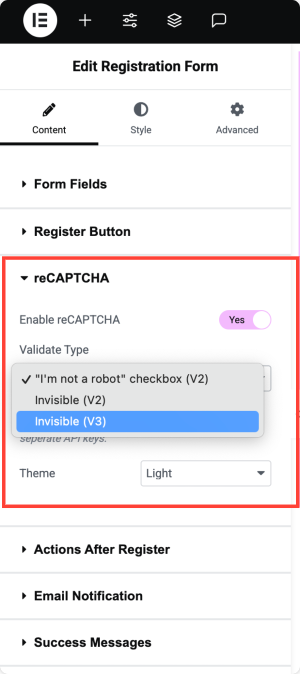
Registration Form provides the option to add Google reCAPTCHA, which provides extra security and ensures that hackers and bots can't exploit the website. It currently supports both V2 and V3 of reCAPTCHA. Let us see how to set up these for the Registration Form.
Setting up reCAPTCHA#
1. Go to https://google.com/recaptcha/ and click "Admin Console" to log in.
2. In the Admin Console, click the + sign to set up a new reCAPTCHA.

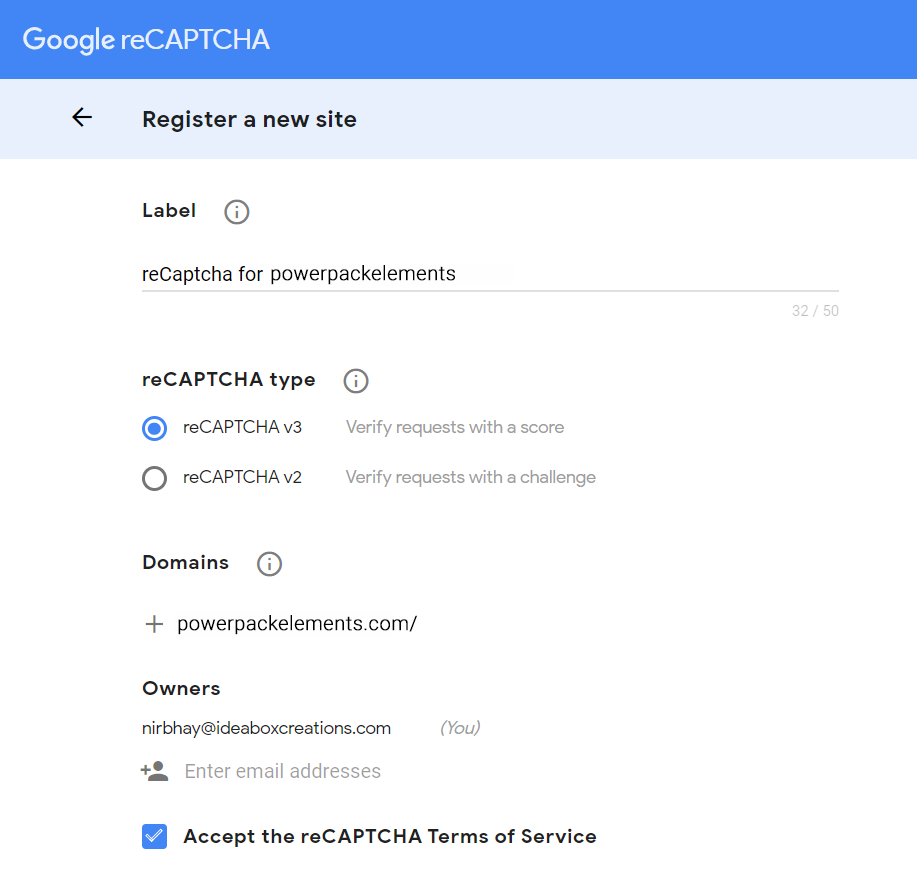
3. Fill in the details to complete the setup of reCAPTCHA on the Register a New Site page.
a. Label: Add a self-descriptive label for the reCAPTCHA. For example, reCAPTCHA for wpbeaveraddons.com.
b. reCAPTCHA Type: Select the reCAPTCHA you want to use on the site. Please refer to the following guide on reCAPTCHA types to learn more about them https://developers.google.com/recaptcha/docs/versions.
c. Domains: Add the site domain on which the reCAPTCHA will be used.
4. Accept the terms and conditions and click Submit.
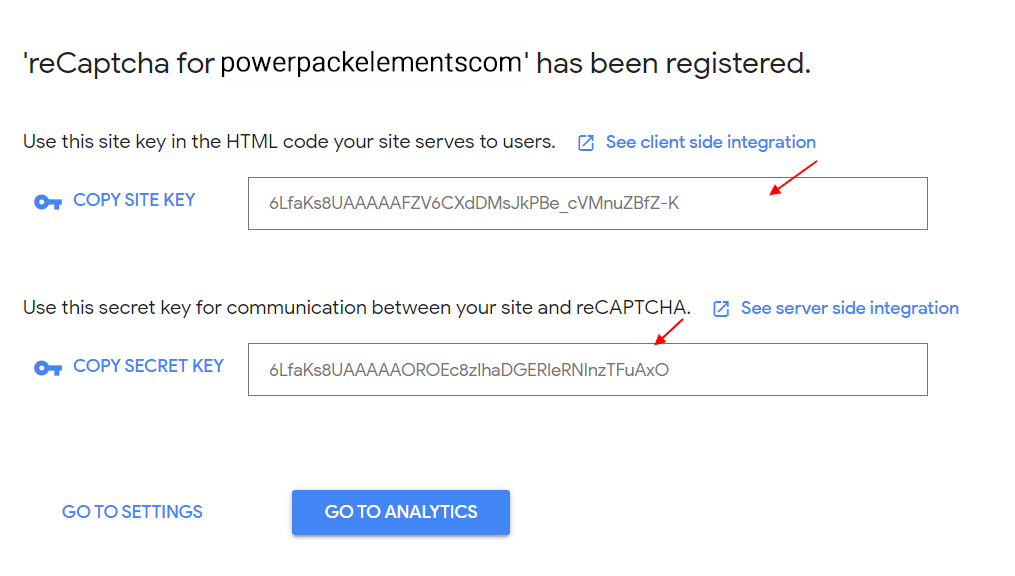
5. After successfully submitting the request, a new page will open showing the reCAPTCHA keys. Keep this page open as we'll use these keys to enable reCAPTCHA in PowerPack.
Enabling reCAPTCHA in PowerPack#
After obtaining the reCAPTCHA keys, follow the steps below to enable them in PowerPack, allowing the module to be used in the Registration Form.
1. Go to WP Admin >> Elementor >> PowerPack >> Integration
2. Based on the version of reCAPTCHA selected previously in Setting up reCAPTCHA, copy/paste the keys to the respective fields.
For example, since we used reCAPTCHA v3 in this tutorial, I have added the keys to the reCAPTCHA V3 fields only.
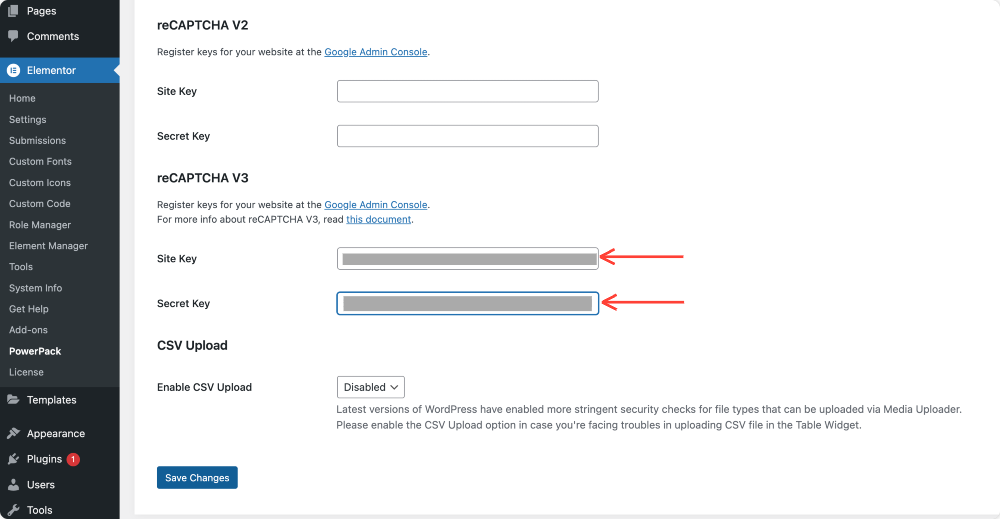
3. Click Save Changes, and that's it. You can now use the reCAPTCHA option available in the Registration Form Widget.