PowerPack Registration Form provides the option to send Post Registration emails to the website administrator for new user registration. Let us learn how to set up the Notification Template.
Merge Tags#
The notification template uses merge tags to insert the variable values in the mail template. These tags can be added to the template anywhere and they will output the relevant values for the registered user in the mail.
Currently, Registration Form supports the following Merge Tags:
- {{all-fields}} – Outputs all the other merge tags together
- {{user_login}} – User’s Username for WordPress
- {{user_email}} – User’s Registered Email
- {{user_pass}} – Adds the password in plain text format
- {{first_name}} – Adds the first name for the user
- {{last_name}} – Adds the last name for the user
- {{user_url}} – Adds the user’s registered website address
Meta Data#
Admin Notification email also provides additional features of adding metadata related to the user registration in the mail. Once selected this data will be added at the bottom of the mail after the content.
Available metadata options are:
- Date – The date of the user registration
- Time – Timing of the user registration
- Page URL – URL of the page on which the user registered. Useful if you have multiple registration forms on the site
- User Agent – User Agent String of the browser used for registration
- Remote IP – IP Address from which the user has registered
Building Notification Template#
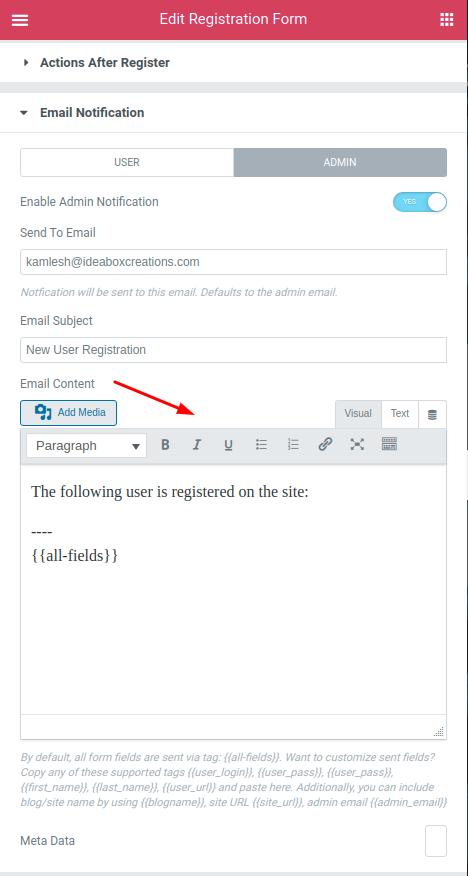
Notification template can be edited at Edit Registration Form >> Content >> Email Notification >> Admin > Email Content for mails sent to the administrator.

As you can see in the screenshot above, editing the template is a very simple process. You have to add the content of the mail in plain text and use merge tags to display the variable info such as username, email, first name, password, etc.
Could not found what you're looking for? Feel free to contact us.