Add customized login forms to any WordPress website using the Login Form Widget for Elementor by PowerPack.
You can add the PowerPack Login Form Widget to any page by dragging and dropping it. The widget has customization and styling options in the Elementor editor’s content and style tab.
Let's take a closer look at the Login Form Widget in detail.
Content Tab of the Login Form Widget#
The Content Tab of the Login Form Widget consists of 5 subsections:
- Form Fields
- Button
- reCAPTCHA
- Social Login
- Additional Options
Let's go over each of these subsections in more detail:
1. Form Fields#
- Labels: Choose a label and placeholder type for the login form. You can display Default, add Custom labels, or choose None.
- Input Size: Choose the label size from Extra Small to Extra Large.
- Remember Me: Toggle on the feature to add a Remember Me check box on your login form.
- Remember Me Text: Add custom Remember text.
- Enable AJAX Login: Enable this option to simplify the login process.

Also check: How to Create a Login Page using PowerPack’s Login Form Widget?
2. Button#
- Text: Change the text of the login button
- Size: Choose the login button size from Extra Small to Extra Large.
- Alignment: Align the button's text to Left, Right, Center, and Justified.

reCAPTCHA#
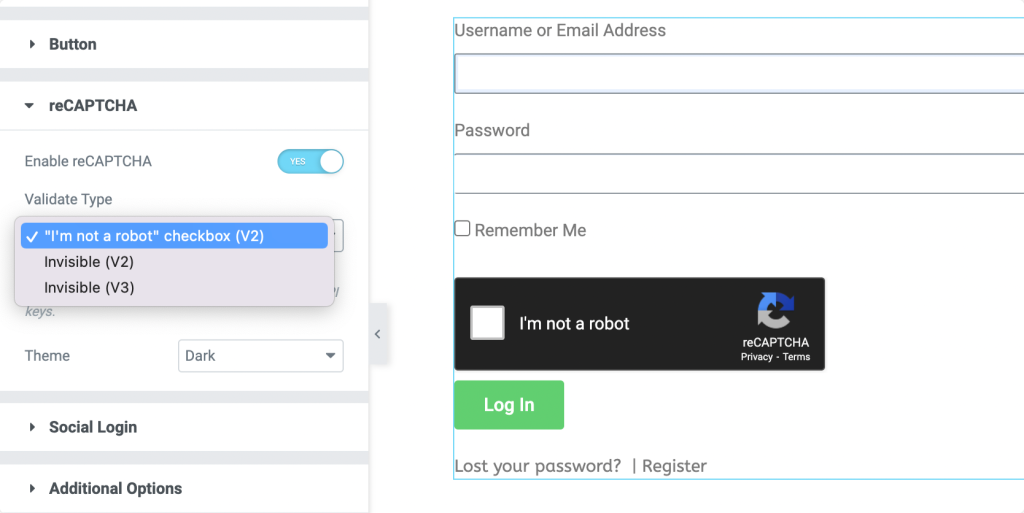
- Enable reCAPTCHA: Toggle on the option to add reCAPTCHA to your login form.
- Validate Type: Choose reCAPTCHA to validate the type.
- Theme: Select theme Dark or Light for your reCAPTCHA checkbox.
Social Login#
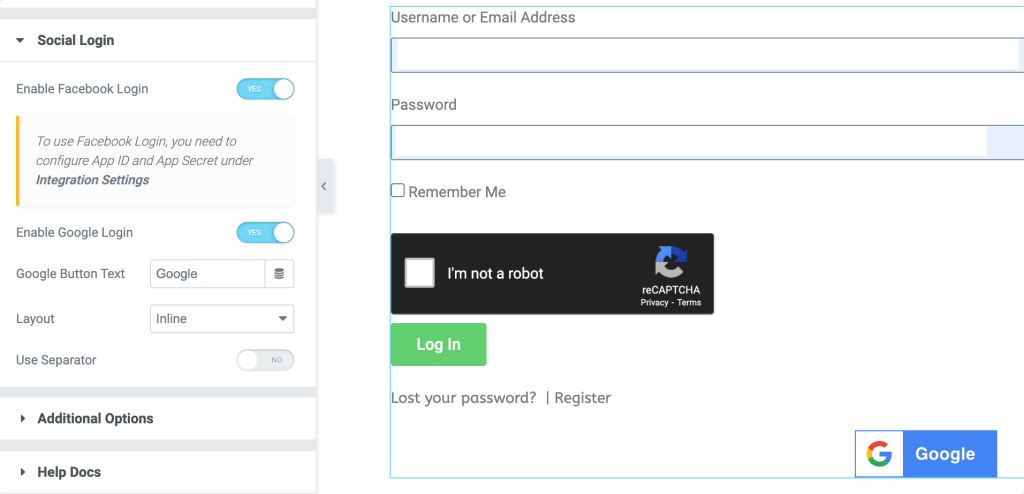
- Enable Facebook Login: Provide an option to directly login from your Facebook account by enabling this option.
Learn More: How to Create Facebook App ID for the Login Form Widget?
- Enable Google Login: Provide an option to directly login from a Google account by enabling this option.
Learn More: How to Create a Google Client ID for Login Form?
Additional Options#
- Password Visibility Toggle: Enable this option to display the password while adding.
- Redirect After Login: Enable this option and add a page link to redirect the user after completing the login process.
- Redirect After Logout: Enable this option and add a page link to redirect the user after logout.
- Password Reset Link: Enable this option and a link for users to reset their password.
- Register Link Text: Add custom Register Link Text.
- Logged in Message: Enable this option to display a successful logged-in message.
- Redirect After Password Reset: Add a link to redirect users once they reset their password.
- Reset Password Button Text: Change the text of the Reset Password button.

Also Learn: How to Change Error Messages in Login Form Widget?
Style Tab of the Login Form Widget#
There are 5 subsections in the style tab of the Login Form Widget:
- Form
- Label
- Fields
- Button
- Logged In Message
- Lost Password Form
Form#
In the Form subsection you can:
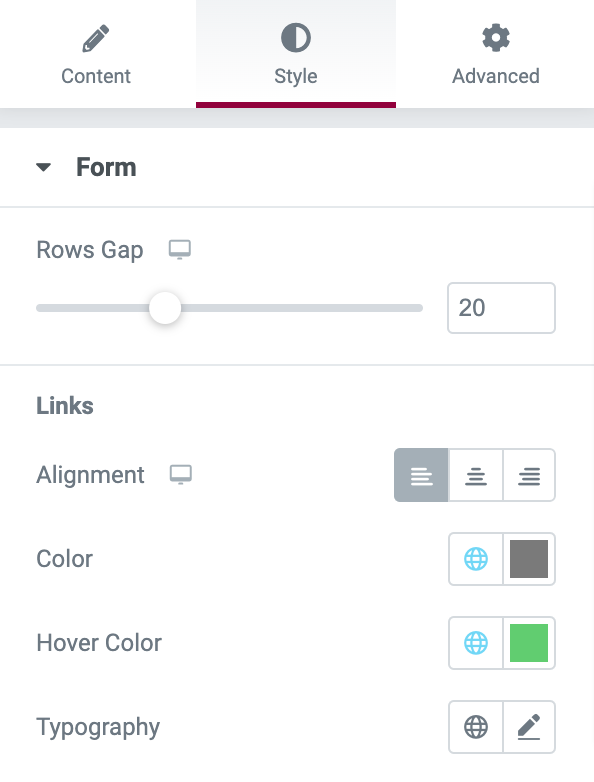
- Adjust space between the rows of the login form
- Align the link to Left, Right, and Center
- Change the color of the links in Normal and Hover
- Customize the link by changing the Font, Letter spacing, and Word spacing between the text.
Label#
In the Label subsection, you get options to:
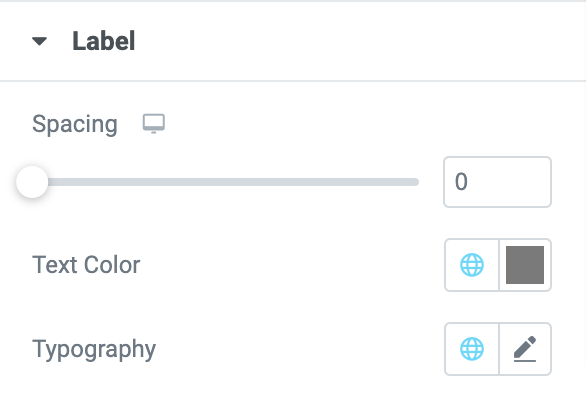
- Adjust the spacing between the labels
- Change the label color, and
- Customize typography of the label text.
Fields#
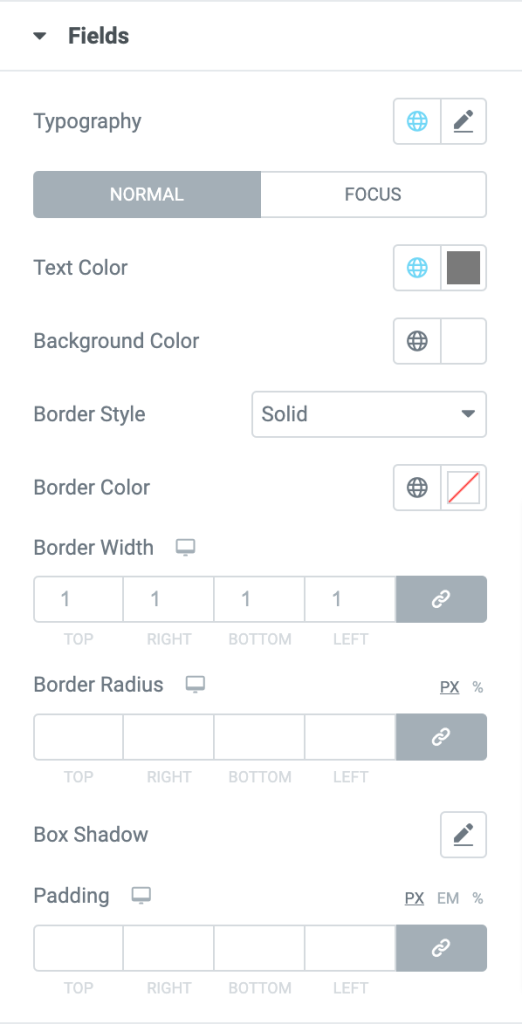
Through the Fields subsection, you can customize the form fields by:
- Changing the text and background color of the fields
- Adding a border to the fields
- Adjusting alignment and color of the box shadow
- Setting border radius and padding for the fields.
Button#
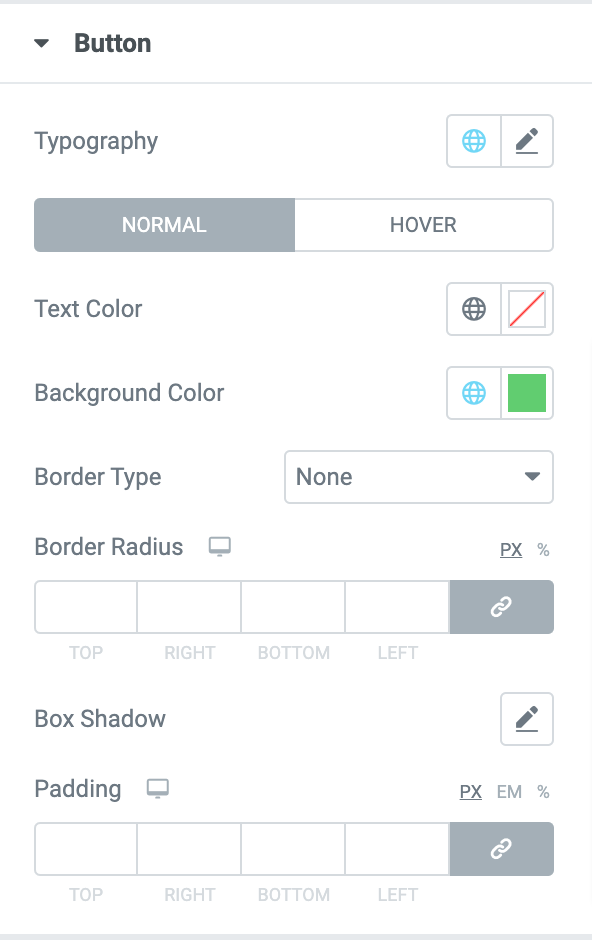
In the Button subsection, you can:
- Change the text and the background color of the button
- Add button border such as Solid, Double, Dotted, Dashed, and Groove
- Change alignment and color of the box-shadow
- Adjust the border radius and padding for the button.
Social Login#
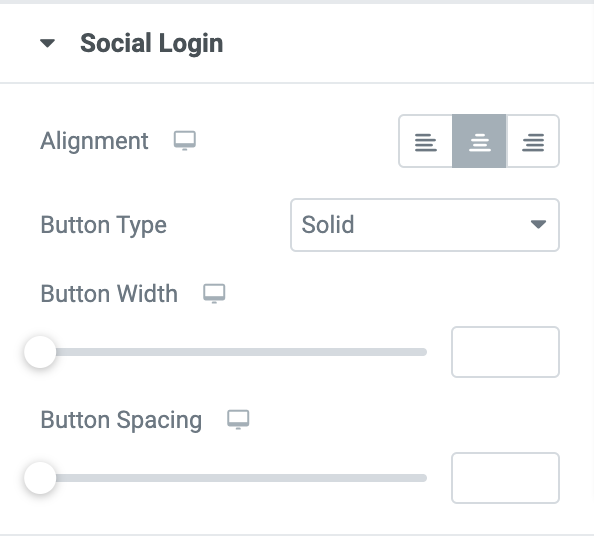
If you have enabled the social login feature, then you get styling options to:
- Change the alignment of the social login button.
- Choose your social login button to be Solid, Transparent, or Custom.
- Adjust button widget.
- Adjust button spacing.
Logged in Message#
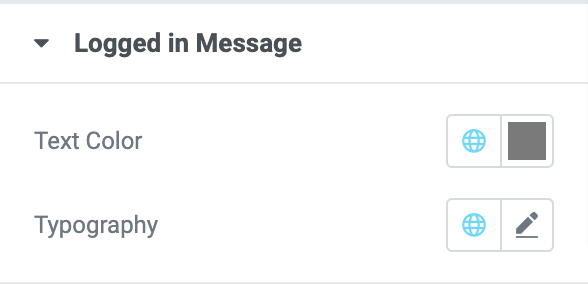
You can change the Color, Size, and Font of the “Logged in Message” text.
Lost Password Form#

You can change the Color, Size, and Font of the lost password form's content.
This was the detailed overview of the Login Form Widget for Elementor available in PowerPack Addons.
Hope this helps!