PowerPack Addons for Elementor seamlessly integrates with WPML, a leading WordPress translation plugin. This integration makes translating PowerPack widgets into multiple languages easy and efficient.
With the ‘Translate Everything’ feature introduced in WPML 4.7, you can now automate the translation process, saving time and ensuring consistent, high-quality translations.
Translate PowerPack Content Using WPML’s ‘Translate Everything’ Feature#
Step 1: Install and Activate WPML#
- Download WPML: After purchasing the WPML Multilingual CMS plugin, log in to your WPML account and download the zip file.
- Install WPML: Next, go to your WordPress dashboard, upload the WPML zip file, and activate the plugin.
Step 2: Complete the WPML Setup Wizard#
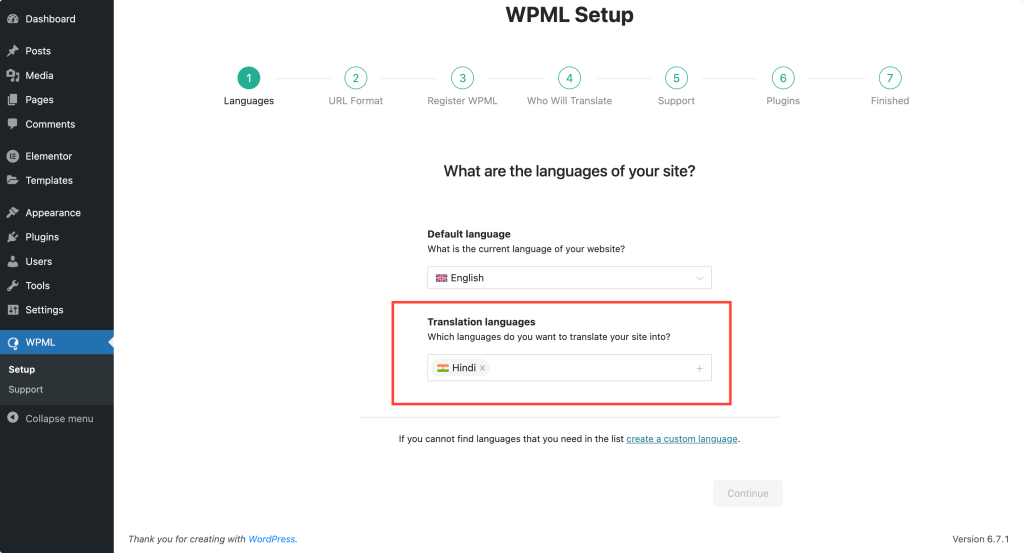
- Select Languages: In the setup wizard, choose the languages you want your site to support by clicking the + icon for each language. Then, click Continue.
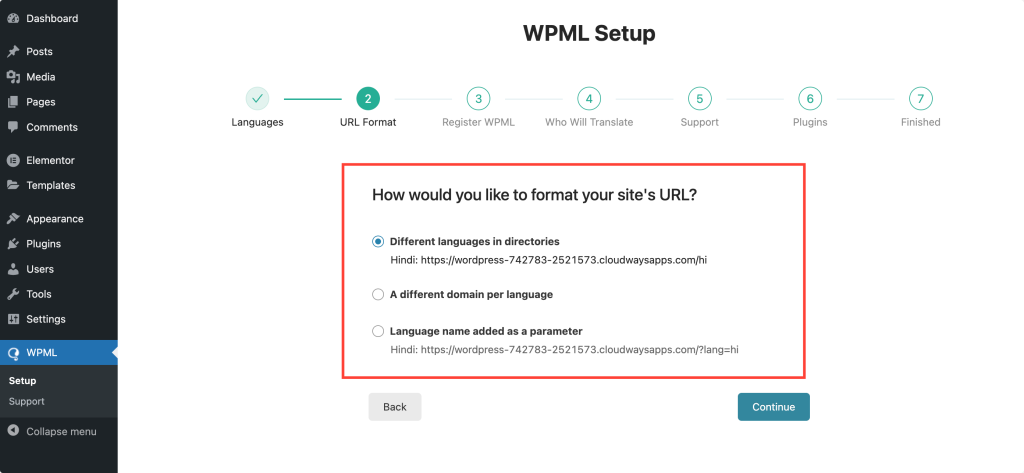
- Configure URL Format: Choose the structure for your multilingual site’s URLs, such as subdirectories or subdomains, and click Continue.
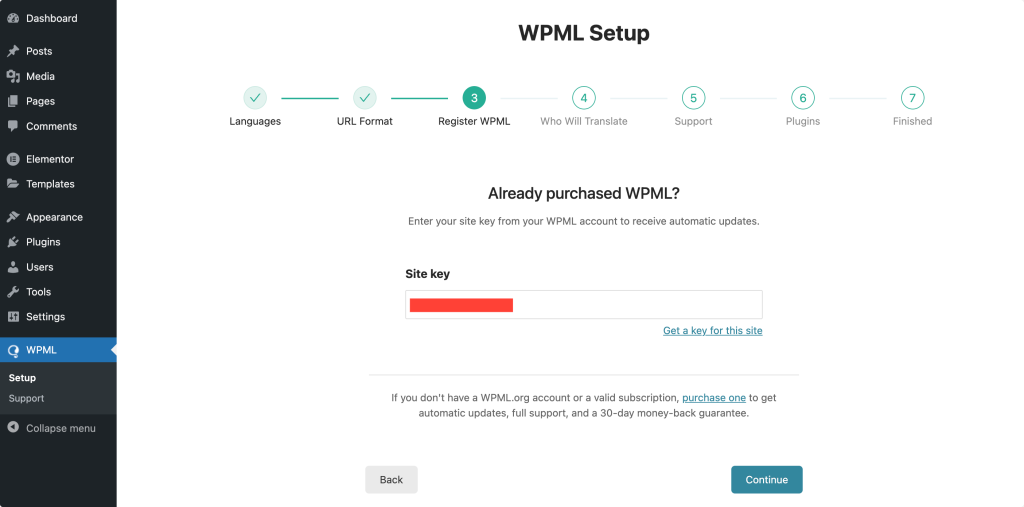
- Register WPML: Enter your site key from your WPML account to enable automatic updates, and click Continue to complete the setup.
Step 3: Go to the Translation Management#
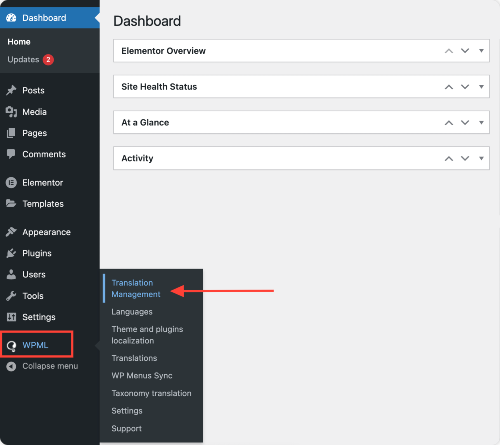
Once you complete the wizard setup process, click WPML >> Translation Management in your WP dashboard.
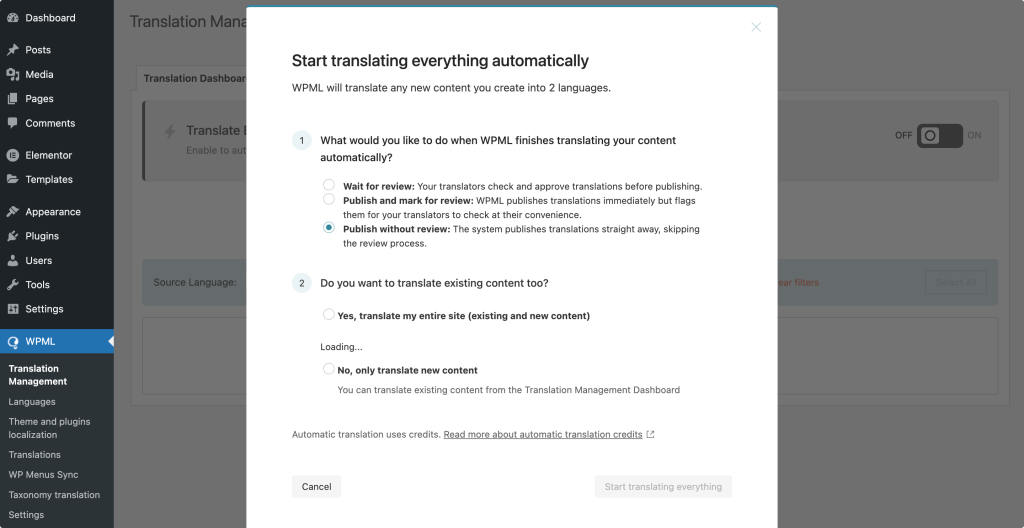
Toggle on the Translate Everything Automatically button at the top. Enabling this will automatically translate all PowerPack content, including sections and widgets.
If you choose Translate Everything, you can further refine the translation workflow:
- Review Before Publishing: Ensures translation quality before making changes live.
- Publish Translations and Review Later: Ideal for large-scale projects requiring immediate updates.
- Publish Translations Without Review: Fastest option, though some translations might need quality checks later.
Step 4: Review Translations#
Once the automatic translation process is complete, click Finish in the WPML setup wizard.
Step 5: Translate PowerPack Widgets With WPML#
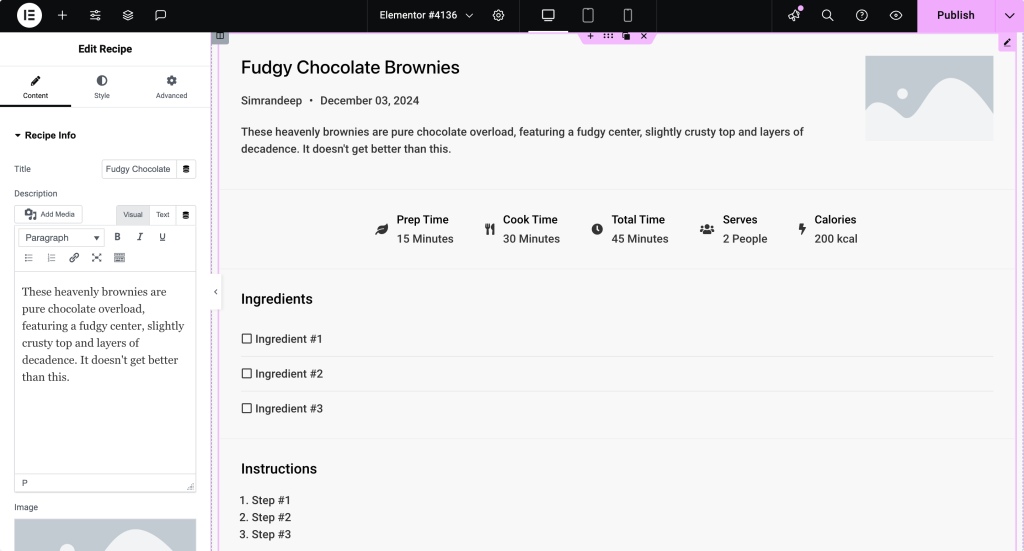
- Create a New Page: Create a new page and add any PowerPack widget. For example, let's use the Recipe widget.
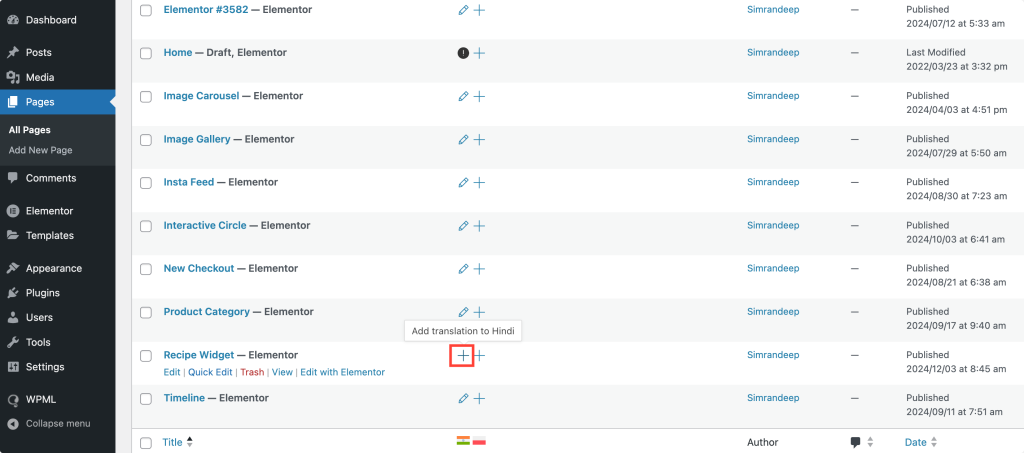
- Select the Language: Go to your dashboard and find the page you created. Click on the '+' icon for the language you want to translate your page into.
Here, we have chosen Hindi.
- Add Translations: The Translation Editor will open. Select a string, input the translated text, and mark it as complete by clicking the check mark next to “Complete Translation.”
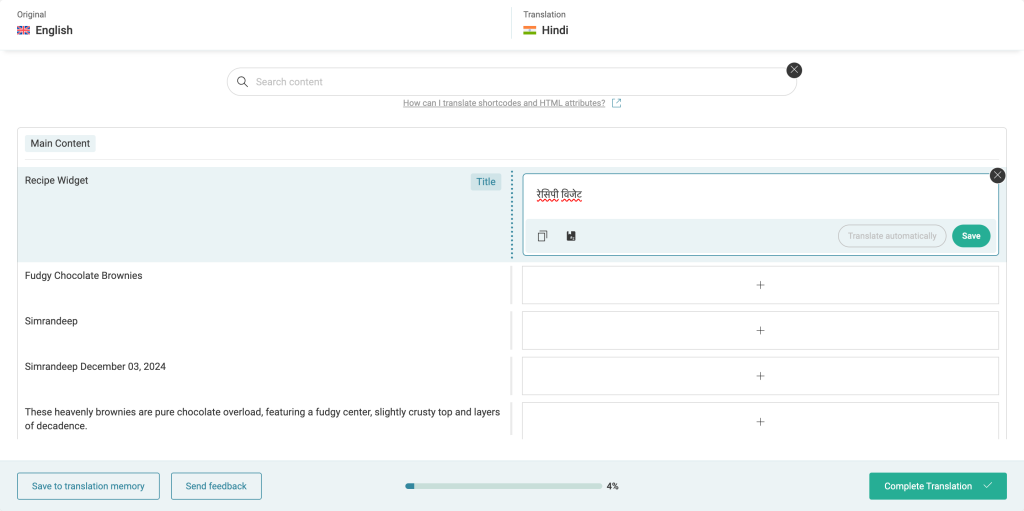
- Save Your Translations: After translating all strings, click Save or Save & Close to finalize the translations.
- View the Translated Page: Preview the translated page on the front end to confirm the changes.
And that’s it! You’ve successfully translated a PowerPack widget using WPML. With these steps, you can ensure that your site delivers a consistent and user-friendly experience in multiple languages.