Want to give your discounted products more visibility? Adding an On-Sale Products section to your WooCommerce store is a simple way to help shoppers discover current deals and encourage them to explore more products.
With the Woo - Products widget from PowerPack Addons for Elementor, you can easily display products that are currently on sale. You can add the widget to any page and use its query settings to automatically fetch your on-sale products.
In this guide, we'll show you how to display on-sale WooCommerce products using the Woo - Products widget.
What You’ll Need#
Before getting started, make sure you have these plugins installed and activated:
Step 1: Create a Single Product Template#
First, you need a Single Product template where you can add the recently viewed products section. From your WordPress dashboard, go to Elementor >> Editor >> Templates. Click Add New Template.
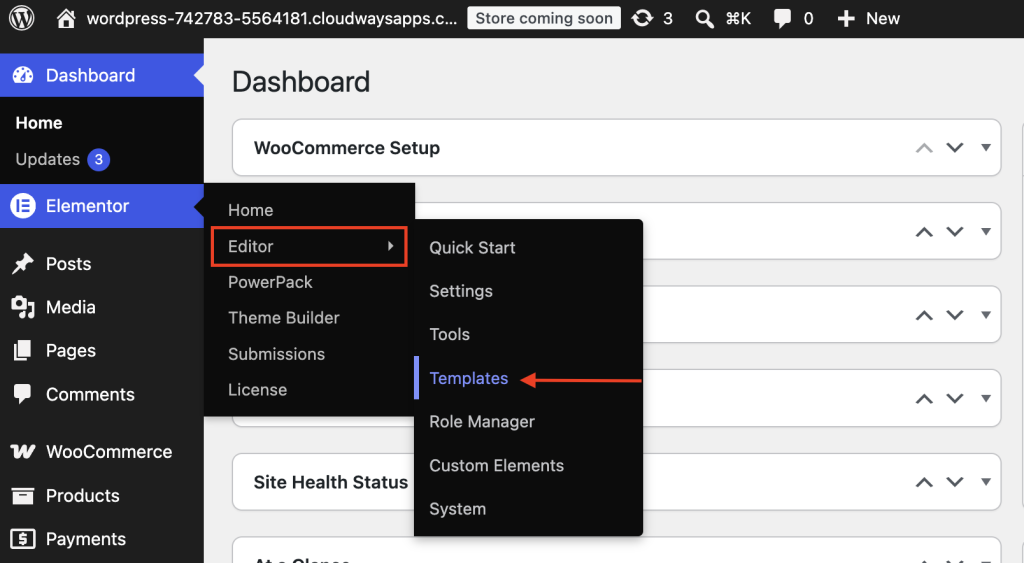
If you already have a Single Product template, you can open that template instead and skip the template creation step.
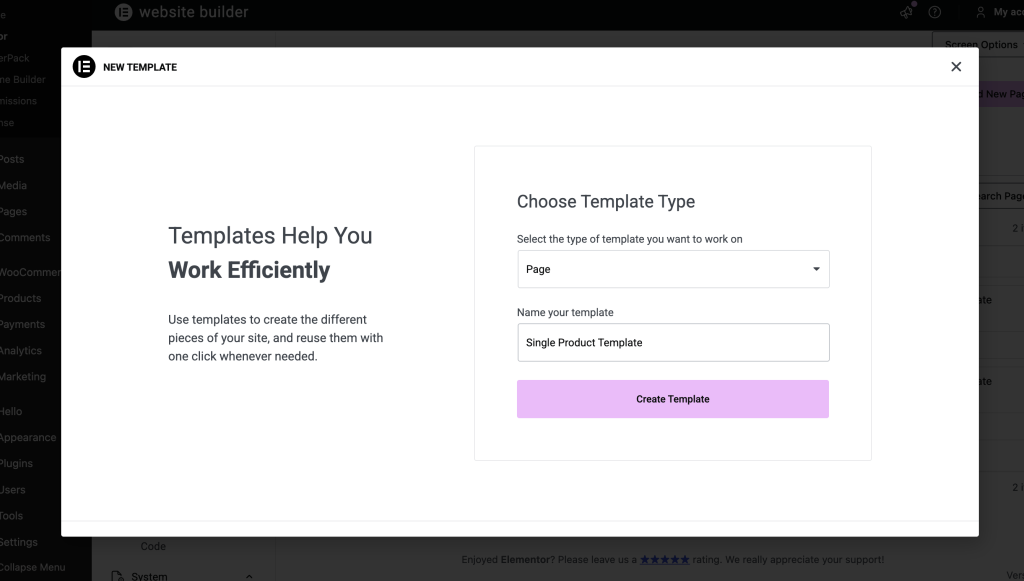
When creating a new template, choose the appropriate template type (Page) for your WooCommerce product page and give the template a descriptive name. For example, you can name it Single Product Page.
Click Create Template to open the template in the Elementor editor.
Set Up the Page Layout#
Once the Elementor editor opens, you can set up the layout for your Single Product page.
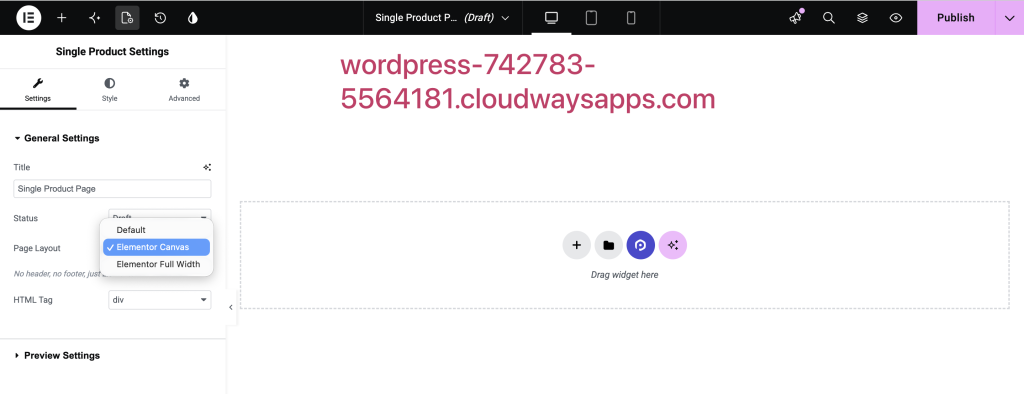
If you want to change the default page layout, click the Settings icon at the bottom-left corner of the Elementor panel. From there, choose the layout that works best for your design.
You can use a canvas-style layout or another layout depending on your theme and website structure.
Publish this template & head back to your website dashboard.
Step 2: Enable the PowerPack WooCommerce Builder#
PowerPack provides WooCommerce-specific widgets that you can use to build and customize your product pages in Elementor.
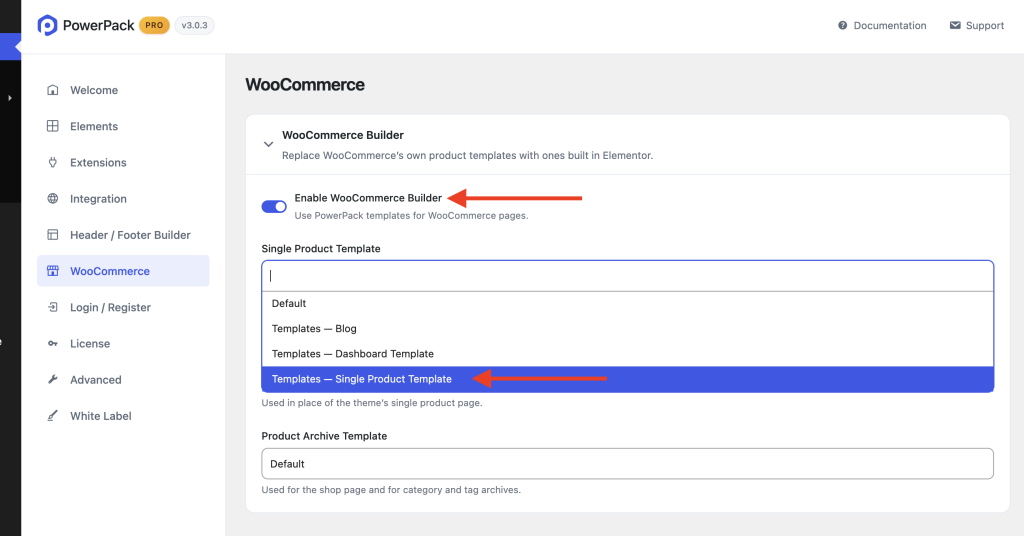
Before adding these widgets, make sure the WooCommerce Builder is enabled in PowerPack. In the Elementor editor, open the PowerPack settings and locate the WooCommerce Builder option. Toggle it on to enable the WooCommerce builder features.
Once enabled, additional WooCommerce-related options will become available for your template.
Since we're creating a Single Product page, select the template you created from the Single Page Template option. You can then click Edit under the Single Page Template option to open the template in Elementor and continue customizing it.
Step 3: Design Your Single Product Page#
Now you can create the layout of your Single Product page. You have two options here.
You can either build the page layout from scratch or import a pre-designed template and customize it according to your needs.
Add the product-related sections and widgets you want to include on your page, such as:
- Product image
- Product title
- Product price
- Product description
- Add to Cart button
- Product ratings
- Product meta
- Additional product information
Once the main product content is ready, decide where you want to display the Recently Viewed Products section.
For example, you can place it below the product details or near the bottom of the Single Product page.
Step 4: Add the Woo - Products Widget#
Now it's time to add the PowerPack Woo - Products widget to your Single Product template.
In the Elementor widget panel, search for Woo - Products. Drag and drop the widget into the section where you want your recently viewed products to appear.
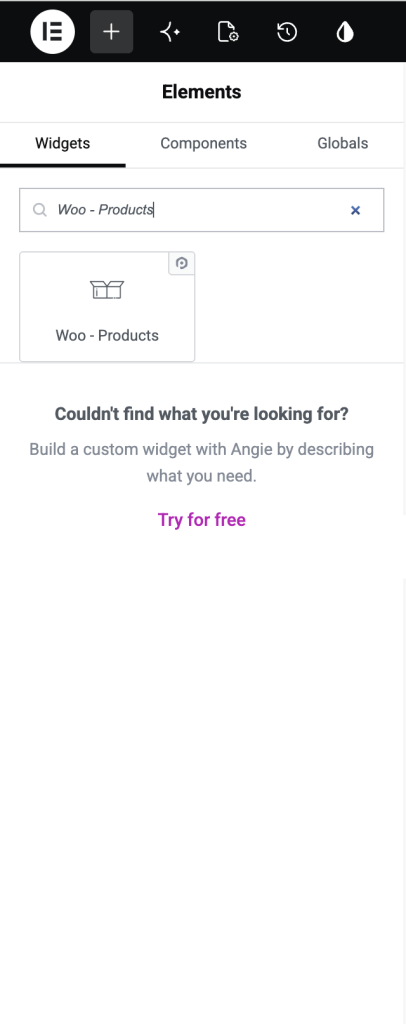
Once added, click the widget to open its settings.
The Woo - Products widget gives you control over the products displayed in the listing, along with options to customize the layout and appearance.
At this point, the widget may display products based on its default query settings. We'll change those settings next so it only displays products that the visitor has recently viewed.
Add the Woo - Products Widget#
In the Elementor editor, search for the Woo - Products widget in the PowerPack widget panel.
Drag and drop the widget onto the page where you want your sale products to appear. The widget will initially display products based on its default query settings. Next, we'll configure the query to show only products that are currently on sale.
Display Only On-Sale Products#
With the Woo - Products widget selected, open its Query settings.
Look for the Filter By option under the available query settings and select Sale. This tells the widget to fetch and display only WooCommerce products that have a sale price.
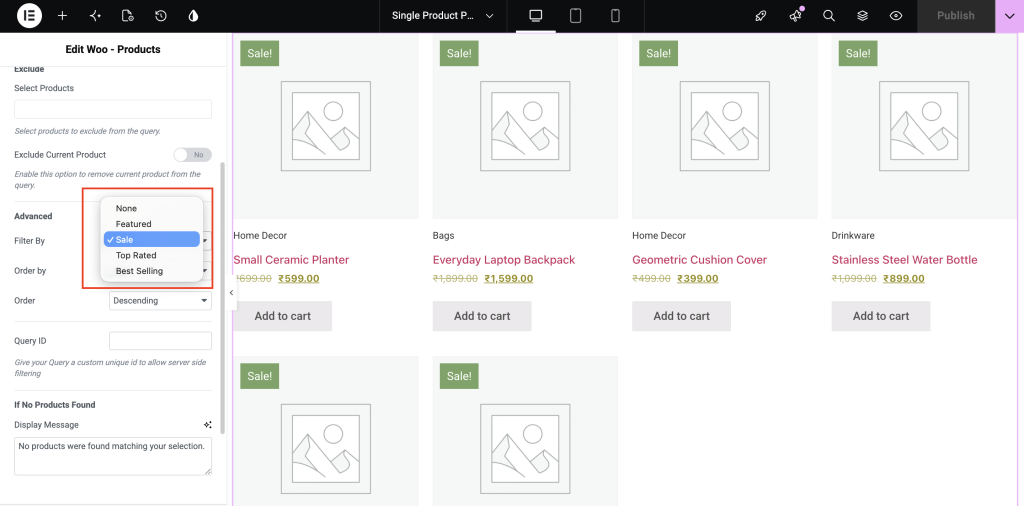
You can then configure other widget options, such as the number of products to display, product ordering, columns, pagination, and other display settings, depending on how you want your sale section to look.
Customize the Product Display#
Once your query is configured, use the widget's styling and content options to customize how your products appear. This lets you match the sale product section with the overall design of your WooCommerce store.
Publish the Page#
Once everything looks the way you want, click Update or Publish to make the page live. Your page will now automatically display your WooCommerce on-sale products.
Wrapping Up!#
Displaying discounted products in a dedicated section makes it easier for shoppers to find your current offers. With the Woo - Products widget, you can simply set the query to "Sale" and let the widget automatically pull in products currently on sale.
You can use this setup to create a dedicated Sale page or add an on-sale product section to your homepage, landing pages, or other parts of your WooCommerce store.