PowerPack Display Conditions for Elementor allows you to control the display properties of the content on your web pages and show specific content only when certain conditions are met.
The process of adding display conditions to your website is simple & straightforward. Display Conditions can easily be added to widgets/rows by selecting the options from the dropdown menu.
In this guide we'll give me complete Display Conditions overview to help you better understand its options.
First, ensure that you have the latest version of PowerPack installed and activated on your website. Once you activate the plugin, we will be able to proceed.
Display Conditions for Elementor: Overview#
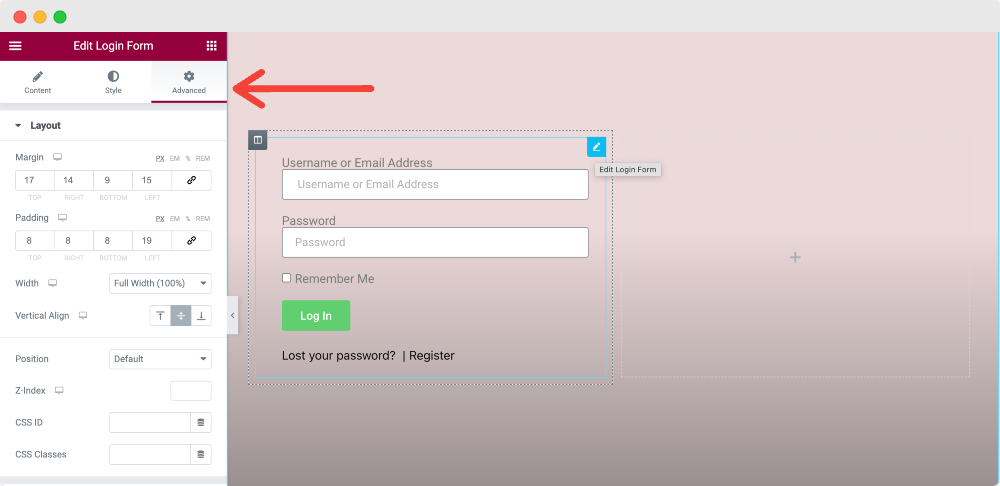
Step 1: Open any page and edit the Section/Column/Widget using Elementor editor.
Here we’ll see how you can set display conditions on any Elementor widget. We have added the PowerPack Login Form widget to our page.
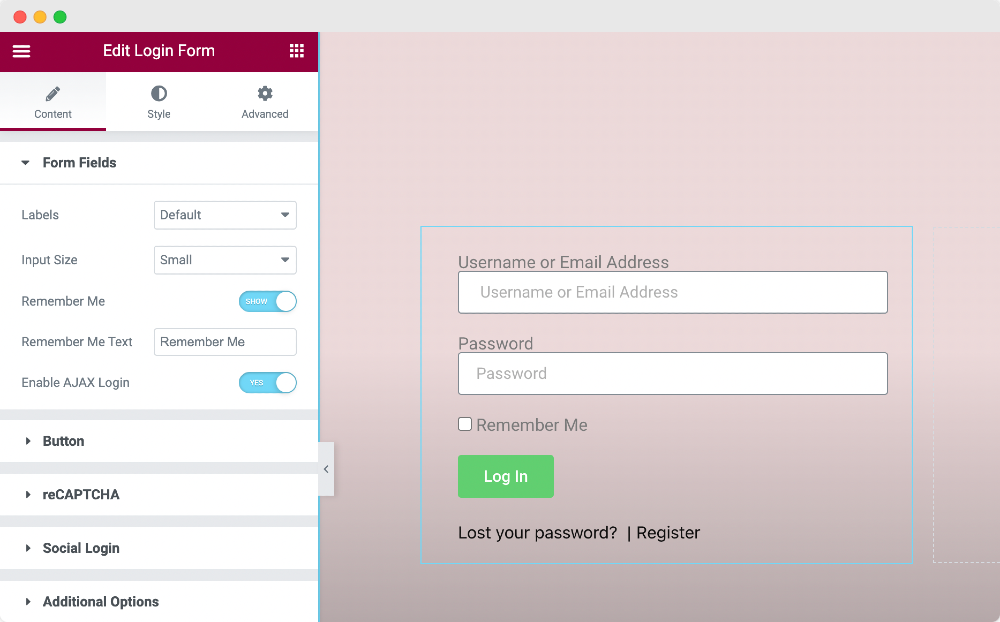
Step 2: To apply display conditions, edit the widget and head over to the Advanced Tab.
Step 3: Next, click the PowerPack Subsection and Toggle On the Display Conditions feature.
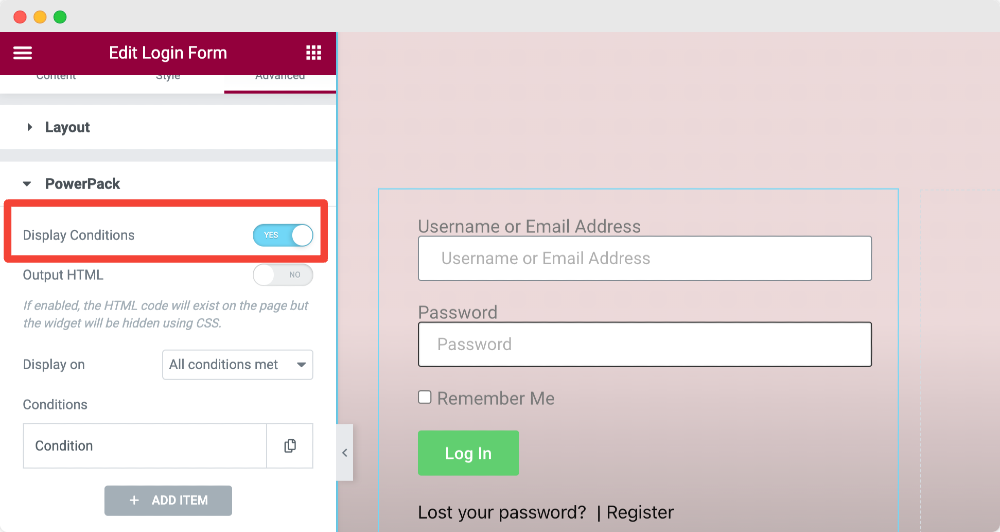
Step 4: As soon as you enable the Display Conditions feature, more options will appear.
Let’s take a look at each option:
Output HTML#
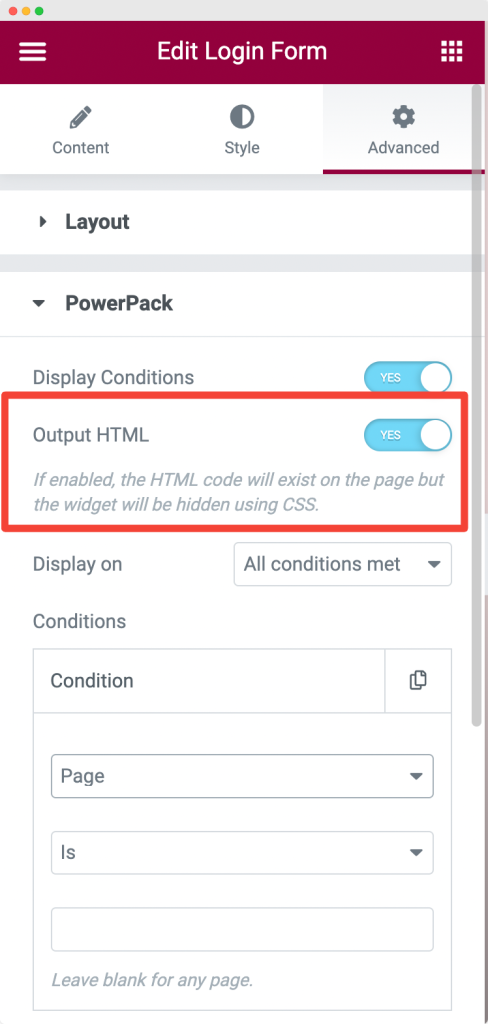
First, you get the Output HTML option.
With Output HTML enabled, the HTML code will appear on the page, but the widget will be hidden with CSS.
Display On#
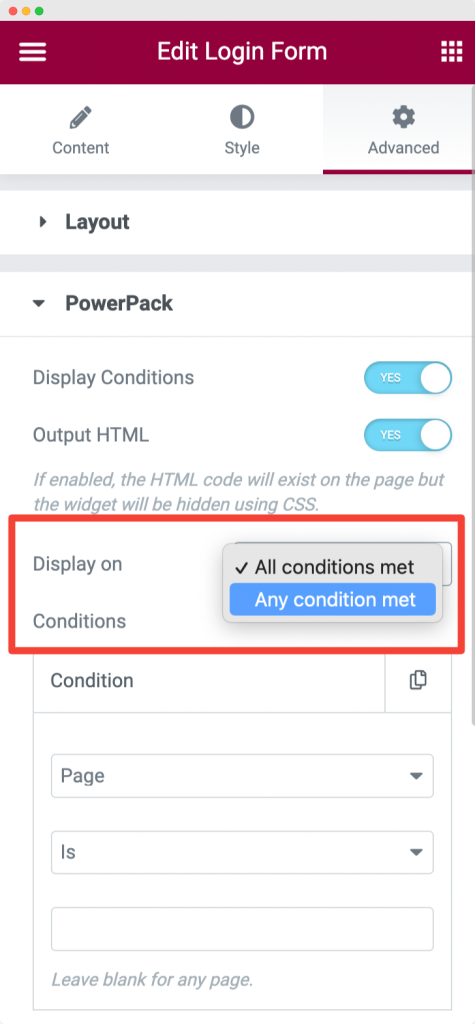
Using this feature, you can define if a condition works if:
- All conditions met
- Any condition met.
Conditions#
Here you get multiple Conditions options to choose from. Let’s see each option one by one.
1. Display Elementor Content Based on Login Status of a User#
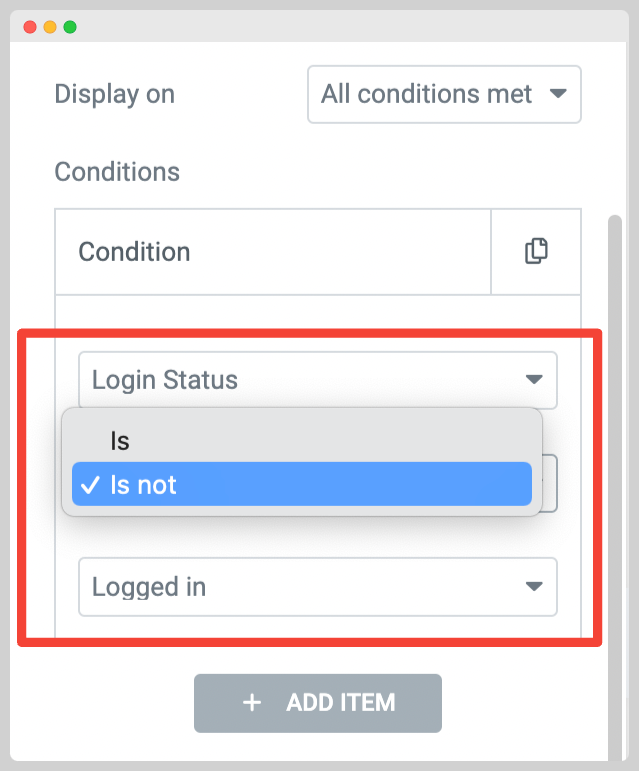
Using this feature, you can set conditions for page elements to appear when a user Logs In. Otherwise, the restricted elements won't be displayed.
2. Display Elementor Content to Current User#
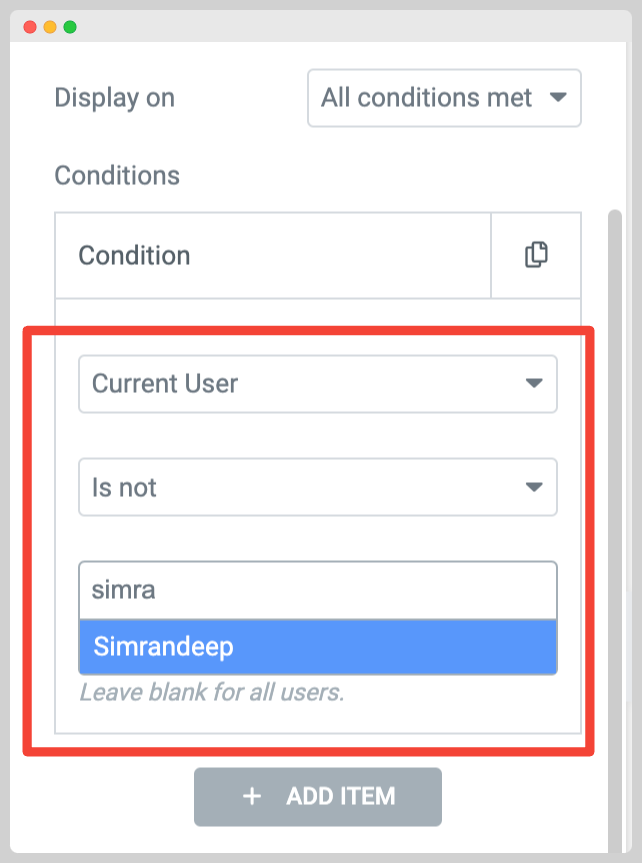
You can set the Current User condition if you choose to display your page content to only a specific user.
3. Display Elementor Content based on User Role#
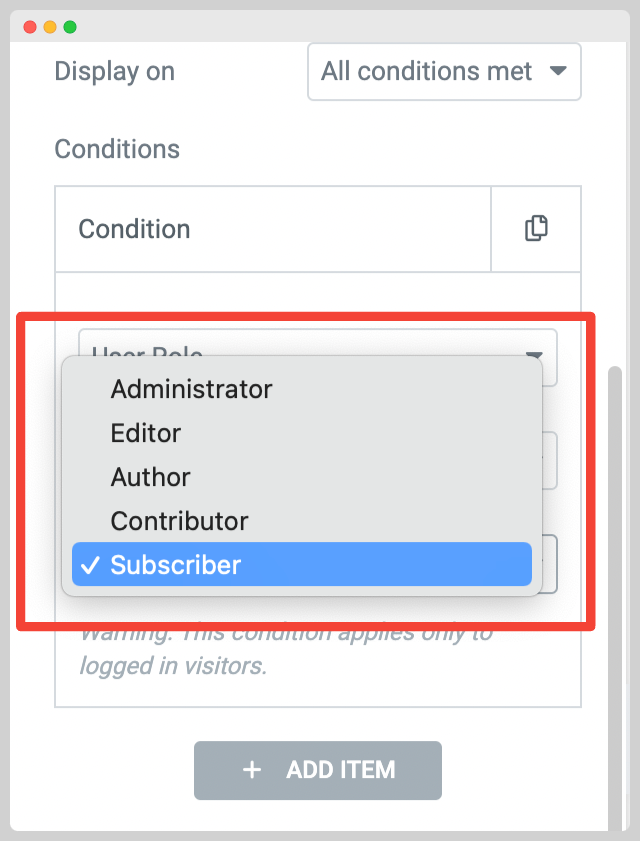
You can apply this condition to display web page elements based on the website's User Role, like Administrator, Editor, Author, Contributor, and Subscriber.
4. Display Elementor Content Based on Visitor Type#

Using this condition option, you can set to display your page content based on your site visitors type. For instance, you can only display content to First Time Visitors or Returning Visitors as per your preferences.
Singular#

This option allows you to set the condition to any singular subcategory. You can select Post, Page, Post Type, or Static Post.
Archive#
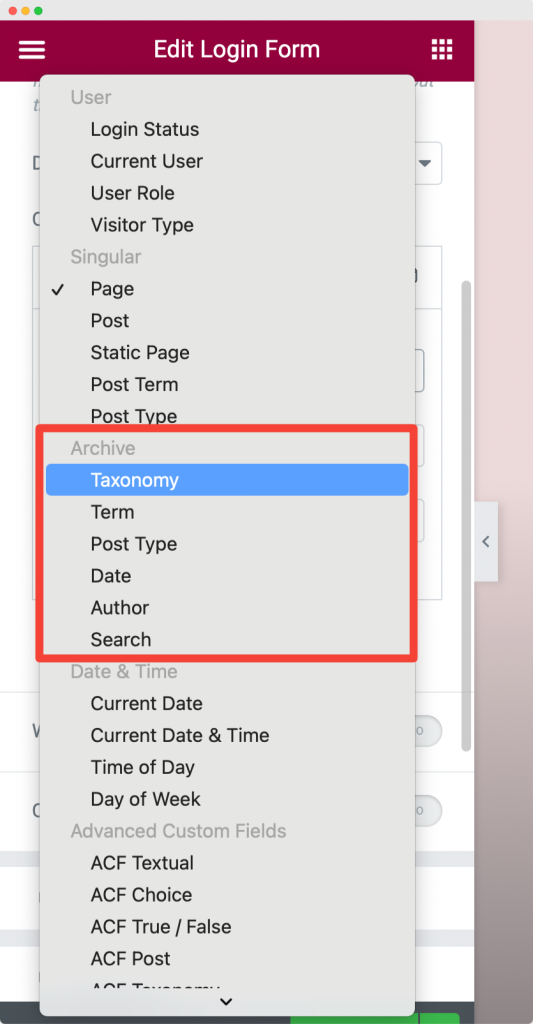
The archive option allows you to set various restrictions for content based on Taxonomy, Post Type, Author, and more.
Date & Time#
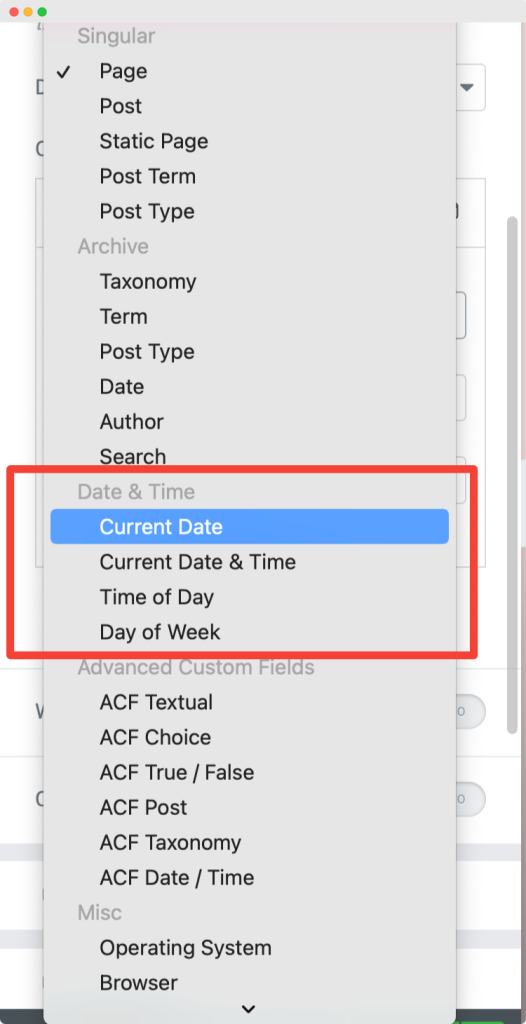
As the name says, from this option, you can select to display your page content on a specific date and time.
Advanced Custom Field (ACF)#
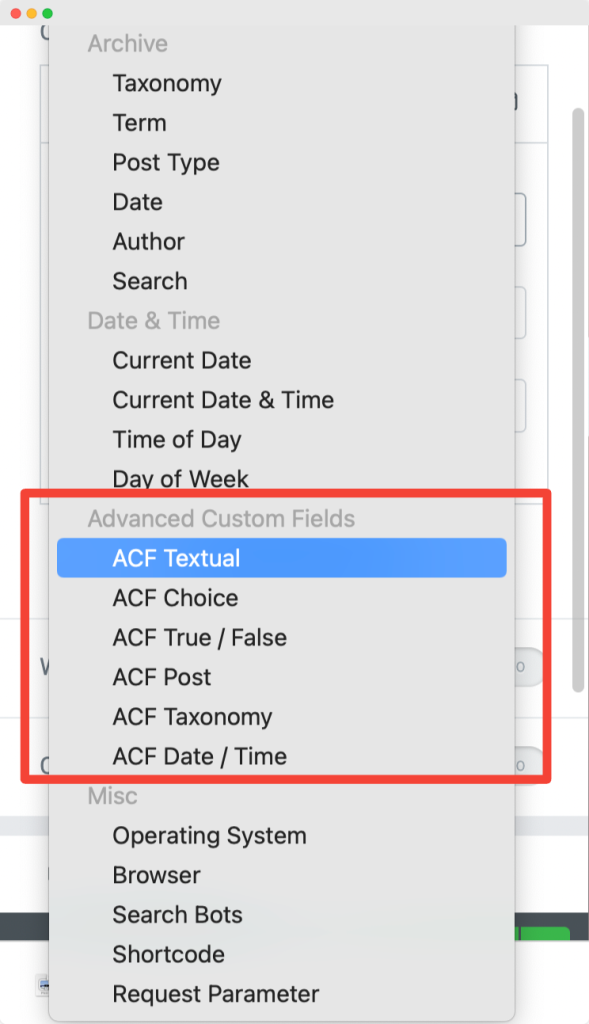
You can also add custom meta options using ACF to hide or show content on a particular page.
Misc#
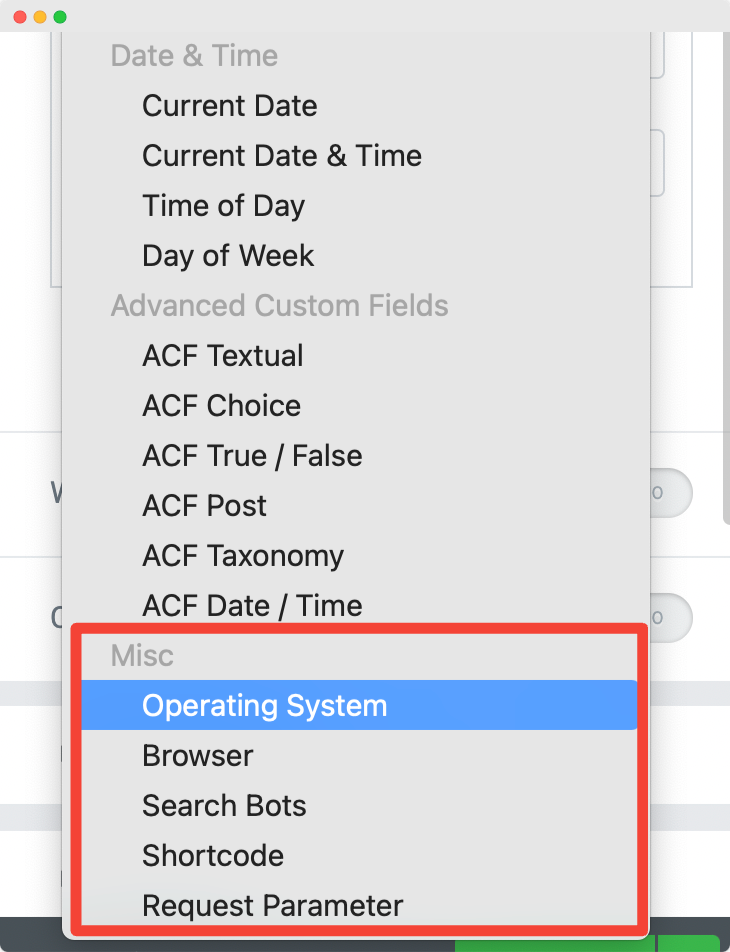
The misc (miscellaneous) ability restricts the content based on users' Operating Systems, Browsers, Search Bots, Shortcodes, and Request Parameters.
And that's it! This is the detailed PowerPack Display Conditions overview.
We hope with this feature, you can restrict the page content of your WordPress websites using the PowerPack Display Conditions and Elementor page builder.