PowerPack Display Conditions gives you complete control over your Elementor content and display and gives you the flexibility to show or hide content on your web pages based on different WooCommerce parameters such as Product Category, Cart Product Count, Purchased Items Categories, and many more.
In this doc, we will guide you on how you can enable & use Elementor WooCommerce Display conditions on your WordPress websites.
Tools You Need:
- First and foremost, you must ensure you've installed and activated Elementor.
- WooCommerce Display Conditions come in the Pro pack of PowerPack Addons. So, make sure to install and activate PowerPack Pro on your website.
- Lastly, ensure the WooCommerce plugin is installed and activated on your website.
Once you install all your plugins, you can proceed to the next step. i.e., enabling Display Conditions extension.
- Add any widget on your page and go to the Advanced Tab of the widget.
- In the Advanced Tab, open the PowerPack sub-tab and toggle on the Display Conditions option.
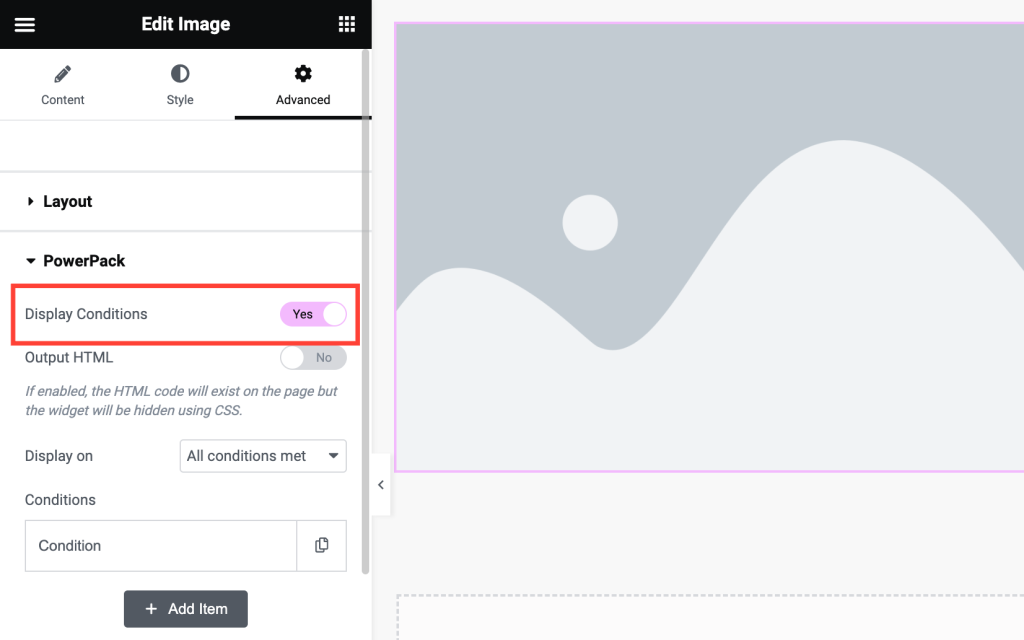
- Output HTML: If you enable this option, the HTML code will exist on the page, but the widget will be hidden using CSS.
- Display On: You can choose whether your chosen conditions should apply when All conditions met or Any condition met.
- Click on the Conditions box, and here, you'll find different options under the Woocommerce Label.
Let's see how you can use these WooCommerce Display Conditions:
1. How to Set Display Conditions to Show/Hide Elementor Content Based on WooCommerce Product Category?#
Using this condition, you can display content on a WooCommerce Single Product template based on the current Product Category.
To Display Elementor Content Based on WooCommerce Product Category:
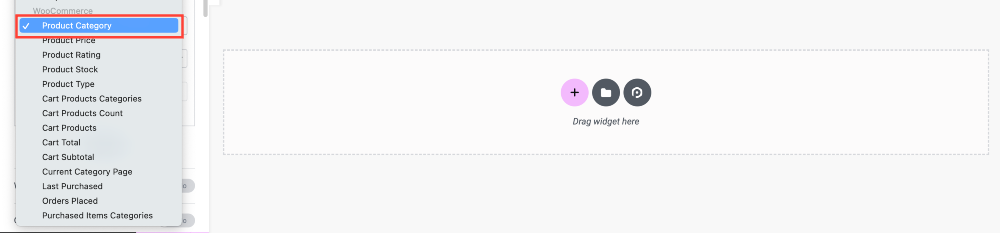
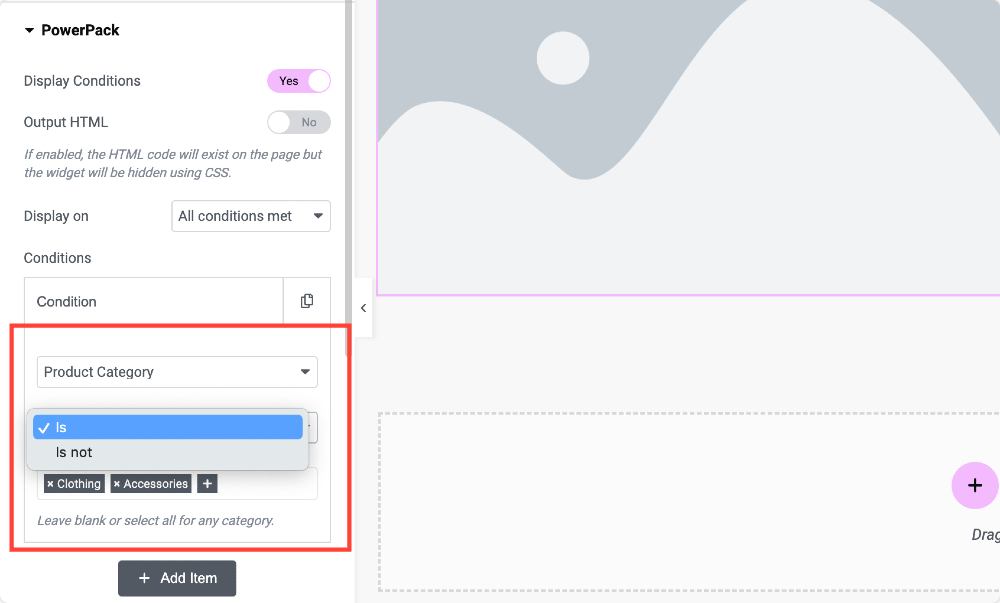
- Choose from the dropdown menu: WooCommerce >>Product Category.
- This will give you another dropdown menu with Is and Is Not options.
- "Is" option will make your statement True.
- "Is Not" option will make your statement False.
- Next, choose your Product Category.
Example: Imagine you operate an online electronics store that sells a wide range of electronic products, such as laptops, smartphones, and accessories. To provide customers with helpful information, you've created product guides that explain how to choose the right products within specific categories (e.g., "Laptop Buying Guide," "Smartphone Accessories Guide"). You can set this condition to display these guides dynamically on product pages based on the product category.
2. How to Set Display Conditions to Show/Hide Elementor Content Based on WooCommerce Product Price?#
You can display price-sensitive messages such as "free shipping" or "a limited-time offer" on the WooCommerce Single Product page using this condition.
You can display content when the product price is above/lower/equal to a certain amount.
- Choose from the dropdown menu: WooCommerce >>Product Price.
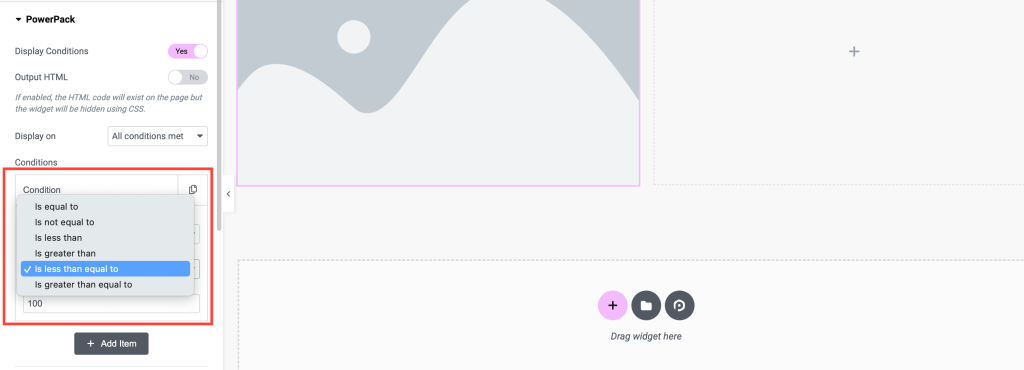
- This will give you another dropdown menu with options such as:
- Is equal to
- Is not equal to
- Is less than
- Is greater than
- Is less than equal to
- Is greater than equal to
- Choose one price rule from the above-given options and add the amount.
Example: Imagine you have an online store selling various electronic gadgets and want to display a special limited-time discount offer when the product price is greater than $500. To do that, you need to set a display condition: Product Price - is greater than - $500.
3. How to Set Display Conditions to Show/Hide Elementor Content Based on WooCommerce Product Rating?#
You can use this condition to display content on the WooCommerce Single product page based on product ratings. To set this condition:
- Choose from the dropdown menu: WooCommerce >>Product Rating.
- Next, select the rating rule for which you want to display your content. You can choose from: Is equal to, Is not equal to, Is less than, Is greater than, and many more.
- Once you choose your rule, add your rating number.
Example: Let's say you run an online bookstore and want to display customer reviews prominently on product pages for books that have received high ratings (e.g., five stars). You need to set this condition: Product Rating - is equal to - 5.
4. How to Set Display Conditions to Show/Hide Elementor Content Based on WooCommerce Product Stock?#
Using this condition, you can display content on your WooCommerce sites based on product stock levels.
- Choose from the dropdown menu: WooCommerce >>Product Stock.
- Next, select the rating rule for which you want to display your content. You can choose from: Is equal to, Is not equal to, Is less than, Is greater than, and many more.
- Once you choose your rule, add your product stock number.
Example: This condition works wonders if you sell limited edition items; you can use it to display a special message when the product stock is low, creating a sense of urgency and encouraging customers to purchase before the item is sold out.
5. How to Set Display Conditions to Show/Hide Elementor Content Based on WooCommerce Product Type?#
Use this condition to display content based on the product type - simple, grouped, variable, or external.
- To set this condition, choose from the dropdown menu: WooCommerce >>Product Type.
- This will give you another dropdown menu with Is and Is Not options.
- "Is" option will make your statement True.
- "Is Not" will make your statement False.
- Next, choose your Product Type.
Example: If you sell affiliate products, you can display a notice to your customers that the website earns a commission if they purchase through the provided affiliate link. This is important information for transparency with customers.
6. How to Set Display Conditions to Show/hide Elementor Content Based on WooCommerce Cart Product Categories?#
This condition allows you to display content according to the product categories in a customer's cart.
- To set this condition, choose from the dropdown menu: WooCommerce >>Cart Product Categories
- This will give you another dropdown menu with Is and Is Not options.
- "Is" option will make your statement True.
- "Is Not" option will make your statement False.
- Next, choose your Cart Product Categories
Example: Let's say you run an online apparel store that sells clothing for different seasons, such as summer, winter, spring, and autumn. You can use this condition to display a special discount to customers with products from the current season in their shopping cart.
7. How to Set Display Conditions to Show/Hide Elementor Content Based on WooCommerce Cart Product Count?#
Using this condition, you can show content based on the number of products in the cart.
- To set this condition, choose from the dropdown menu: WooCommerce >>Cart Product Count.
- This will give you another dropdown menu with Is and Is Not options.
- "Is" option will make your statement True.
- "Is Not" option will make your statement False.
- Next, choose your Cart Product Count.
Example: Imagine you operate an online store selling electronics, and you want to offer discounts to encourage customers to buy more products. You can use this condition to display a discount message when the customer's cart contains a certain number of items.
8. How to Set Display Conditions to Show/Hide Elementor Content Based on WooCommerce Cart Products?#
You can use this condition to display a customized message or a discount offer banner based on the WooCommerce products in your cart.
- To set this condition, choose from the dropdown menu: WooCommerce >>Cart Products.
- This will give you another dropdown menu with Is and Is Not options.
- "Is" option will make your statement True.
- "Is Not" option will make your statement False.
- Next, choose your Cart Products.
Example: You can use this condition to offer a special discount to customers when specific products are added to their cart, such as "Get 20% off when you buy any two pairs of shoes.
9. How to Set Display Conditions to Show/hide Elementor Content Based on WooCommerce Cart Total?#
You can apply this condition to content based on the cart's total amount, including taxes, shipping, and discounts.
- Choose from the dropdown menu WooCommerce >>Cart Total.
- This will give you another dropdown menu with options such as:
- Is equal to
- Is not equal to
- Is less than
- Is greater than
- Is less than equal to
- Is greater than equal to
- Choose one rule from the above options and add the amount.
Example: You can use this condition to offer a discount when the customer's cart total reaches a certain amount, say, $100 or more.
10. How to Set Display Conditions to Show/Hide Elementor Content Based on WooCommerce Cart Subtotal?#
Using this condition, you can display content based on the cart's subtotal before tax, shipping, and discounts.
- Choose from the dropdown menu: WooCommerce >>Cart SubTotal.
- This will give you another dropdown menu with options such as:
- Is equal to
- Is not equal to
- Is less than
- Is greater than
- Is less than equal to
- Is greater than equal to
- Choose one rule from the above options and add the amount.
Example: Imagine you run an online store selling home decor items, and you want to offer a discount when the customer's cart subtotal (before tax, shipping, and discounts) reaches a certain amount, say, $200 or more. In that case, you can utilize this condition.
11. How to Set Display Conditions to Show/hide Elementor Content Based on WooCommerce Current Category Page?#
This condition lets you show content based on the current category page.
- Choose from the dropdown menu: WooCommerce >>Current Category Page
- This will give you another dropdown menu with Is and Is Not options.
- "Is" option will make your statement True.
- "Is Not" option will make your statement False.
- Next, add your Current Category Page.
Example: Let's say you run an online electronics store and want to display a category-specific banner on the product pages within the "Smartphones" category. You can use this condition to do the following.
12. How to Set Display Conditions to Show/Hide Elementor Content Based on WooCommerce Last Purchased?#
You can use this condition to engage with customers who made previous purchases on specific dates.
- Choose from the dropdown menu: WooCommerce >>Last Purchased.
- This will give you another dropdown menu with multiple date rules, such as:
- On
- Before
- After
- On or Before
- On or After
- Next, choose your date from the calendar.
Example: You can leverage this condition to display a special discount to customers who made their last purchase more than 60 days ago
13. How to Set Display Conditions to Show/Hide Elementor Content Based on WooCommerce Orders Placed?#
This condition allows you to display content based on the number of orders a customer has placed.
- To set this condition, choose from the dropdown menu: WooCommerce >>Orders Placed.
- This will give you another dropdown menu with options such as:
- Is equal to
- Is not equal to
- Is less than
- Is greater than
- Is less than equal to
- Is greater than equal to
- Choose one rule from the above options and add the amount.
Example: If you want to treat your loyal customers, this condition works wonders. Let's say you run an online gourmet food store, and you want to offer a loyalty reward to customers who have placed a substantial number of orders, say, more than ten orders. In that case, this condition works best for you.
14. How to Set Display Conditions to Show/Hide Elementor Content Based on WooCommerce Purchased Items Categories?#
Use this condition to display content recommendations based on the categories of products previously bought by a customer.
- Choose from the dropdown menu: WooCommerce >>Purchased Item Category.
- This will give you another dropdown menu with Is and Is Not options.
- "Is" option will make your statement True.
- "Is Not" option will make your statement False.
- Next, add your Purchased Item Category.
Example: Imagine you run an online bookstore, and you want to display personalized book recommendations based on the categories of books a customer has previously purchased. For instance, if a customer has bought several science fiction books, you want to show them a recommendation for a new science fiction release. This is where you can utilize this condition.
This is how you can use WooCommerce Display Condition to display personalized content to your visitors. Hope this helps!