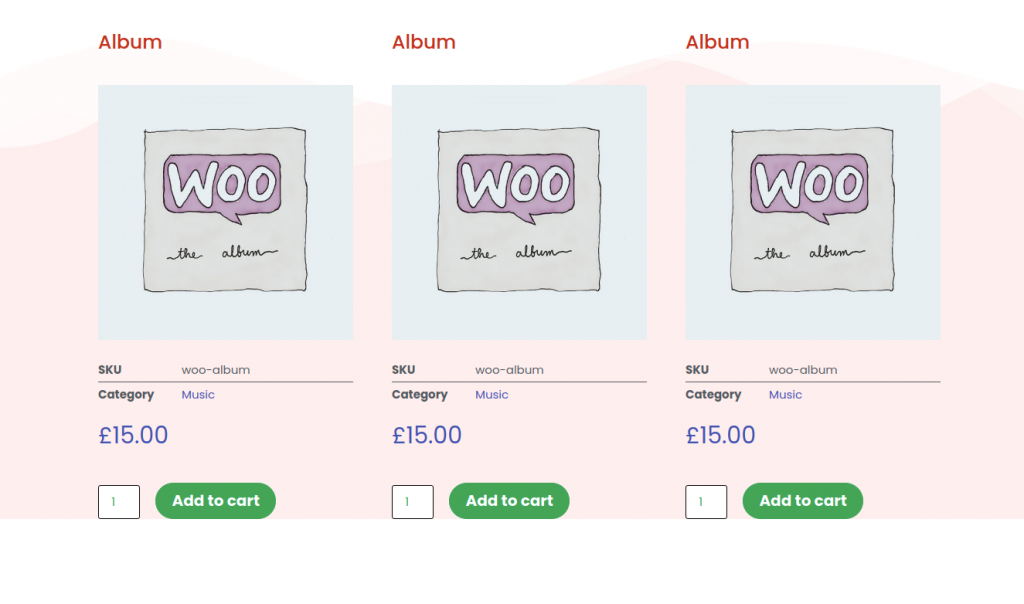
PowerPack has released WooBuilder – A flexible and an easy way to build your online WooCommerce store with PowerPack and Elementor. We have also added a wide range of Woo Widgets in WooBuilder that you can use to create a product archive page.
In this doc, we will focus on designing a Product Archive Page with WooBuilder.
Required Plugins: Elementor, WooCommerce, & PowerPack Add-ons For Elementor.
Go to Templates#
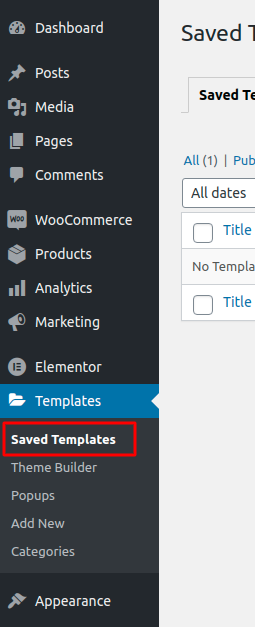
Go to Dashboard >> Templates >> Saved Templates.
Create a New Layout#
- Click on Add New.
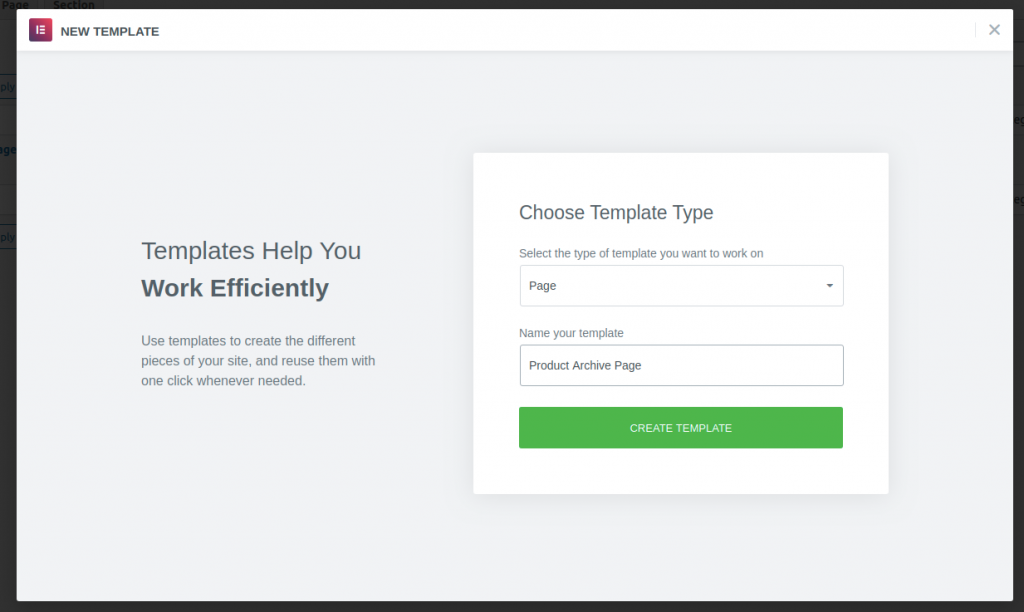
- Now, choose the Template type as “Page” and give a name to the Template.
- Create Template
Edit the Layout#
- After creating the template, either choose the “Canvas” layout or keep the “Default” one as per your wish.
- Publish the Page.
Enable WooBuilder#
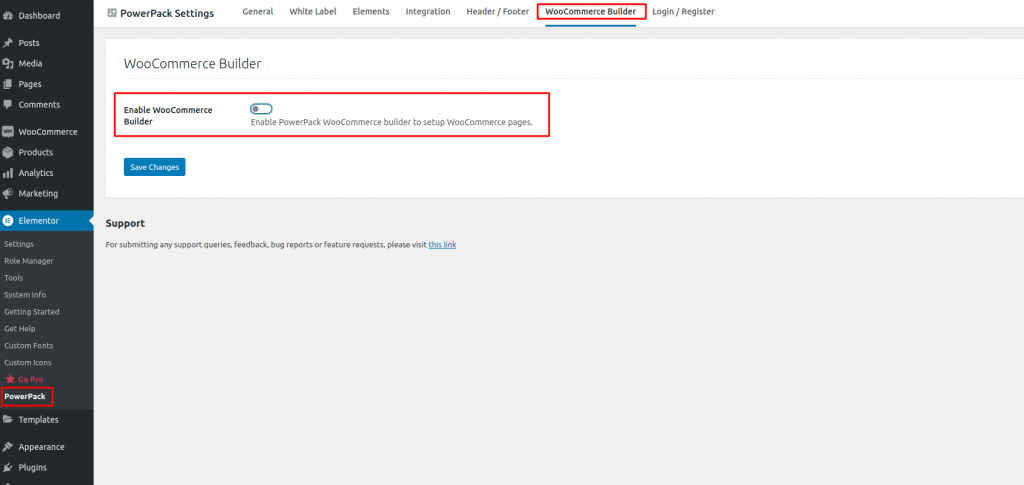
- Head over to WordPress Dashboard and go to Elementor >> PowerPack.
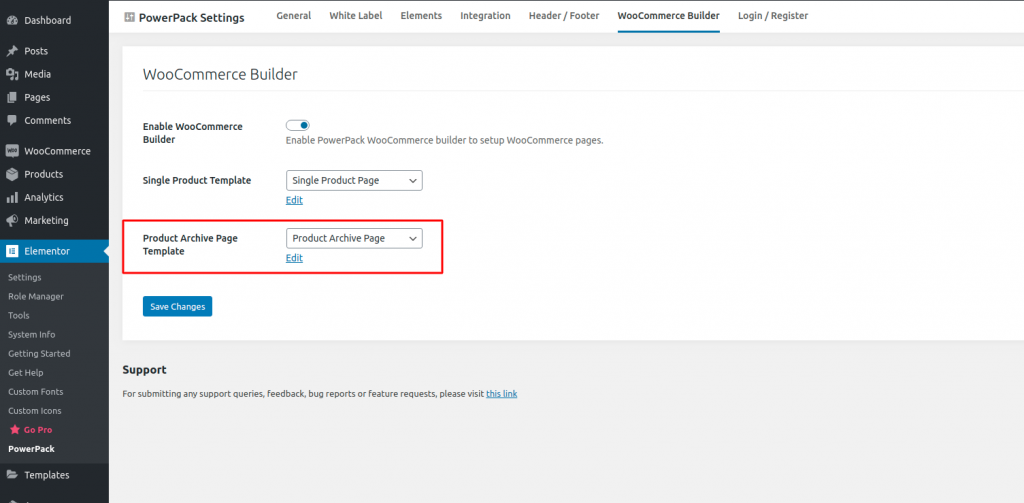
- Click on WooCommerce Builder and toggle on it to enable the WooBuilder.
Choose Product Archive Page Template#
- After activating WooBuilder, you’ll get an option to choose the Product Archive Page Template.
- Choose the template which we recently created.
- Save Changes.
Edit the Product Archive Page Template#
- After choosing a Product Archive Page template, you’ll see an Edit option just below it (as shown in the above screenshot).
- Click on it.
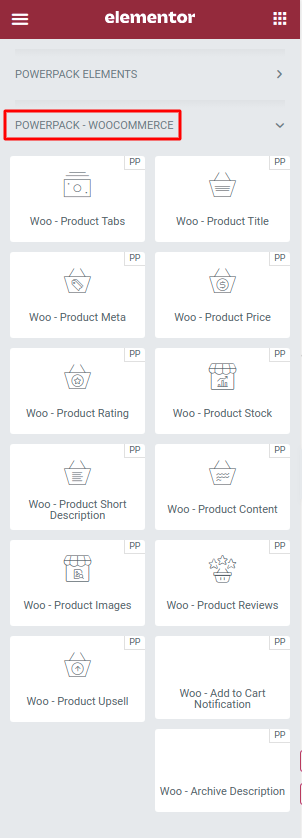
- Now, edit the Product Archive Page Template using Woo Widgets.
- You’ll see a whole new pack of “PowerPack – WooCommerce” widgets in Elementor Editor that you can use to design the Product Archive Page of your site.
Update the Page#
- Use the PowerPack – Woocommerce Widgets to create the design of the Product Archive page.
- Click publish to update the page.
