Wanted to learn how to use Elementor for your next website designing project? Designing and customizing your own website. It seems daunting, doesn’t it?
Well, not anymore! Building and customizing websites is easier than ever with WordPress and page builders. In addition to providing a free platform for making an online presence, WordPress also offers a range of page builders that make it easy to design and set up website structure with minimum effort.
So today, we’ll talk about one of the most popular page builders: Elementor.
In this detailed guide, we’ll try to cover everything about the Elementor Free Version, from the installation process to helpful tricks and tips. If you have just started using Elementor, this guide will help you better understand the structure and working functionality of the Elementor page builder.
So without any further ado, let’s dig in!
What is Elementor: Overview
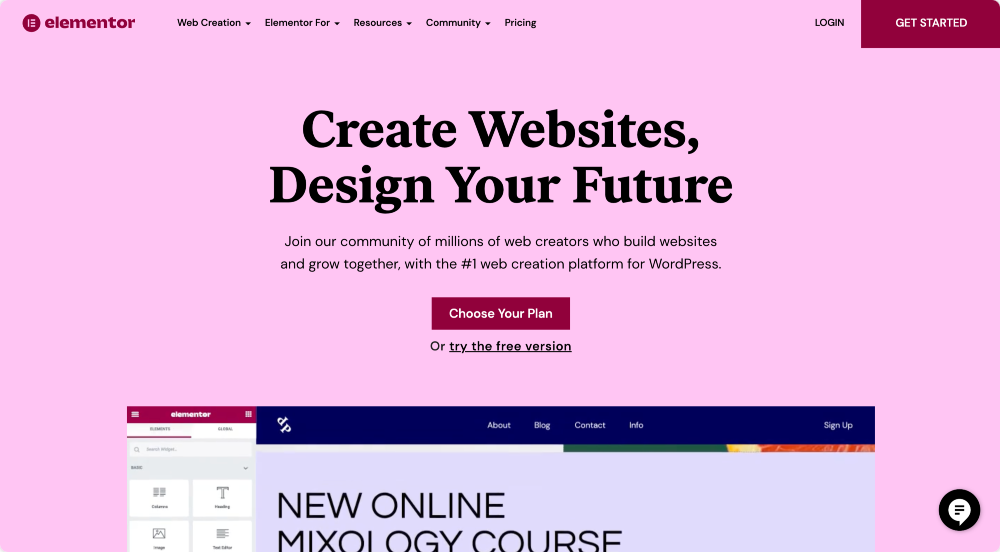
Elementor is one of the most popular visual drag-and-drop WordPress page builders. It offers advanced multiset tools to build beautiful websites the easiest way possible.
It comes with multiple styling options and provides a website-building framework to design creative & stunning websites easily.
Right now, Elementor impressively powers more than 10 million sites.
Why is Elementor so popular?
You might be wondering why Elementor is so popular and what makes it so special.
In simple terms, Elementor lets you create WordPress websites just by arranging blocks’ of content – without adding any code!
One of the most useful & impressive features is frontend editing which allows you to make live edits on your website without tangling between the editor and the preview mode.
Why you should use Elementor?
In order to use and work with Elementor, you don’t have to be a coding expert or a professional web developer. Elementor provides dozens of advanced widgets you can drag, drop, and customize without relying on developers for help.
Elementor comes with both Free and Pro versions, and if you’re a beginner or just started with web designing, I suggest you play with the Elementor Free version first.
The free version comprises plenty of features that make it easy to start the website design process and create flawlessly working websites.
Is Elementor free?
Elementor offers both free and paid subscription plans. The free version provides 40+ free widgets with great design options and innovative features. These widgets can be used to create content, like Buttons, Headings, Testimonials, Progress Bars, and many more.
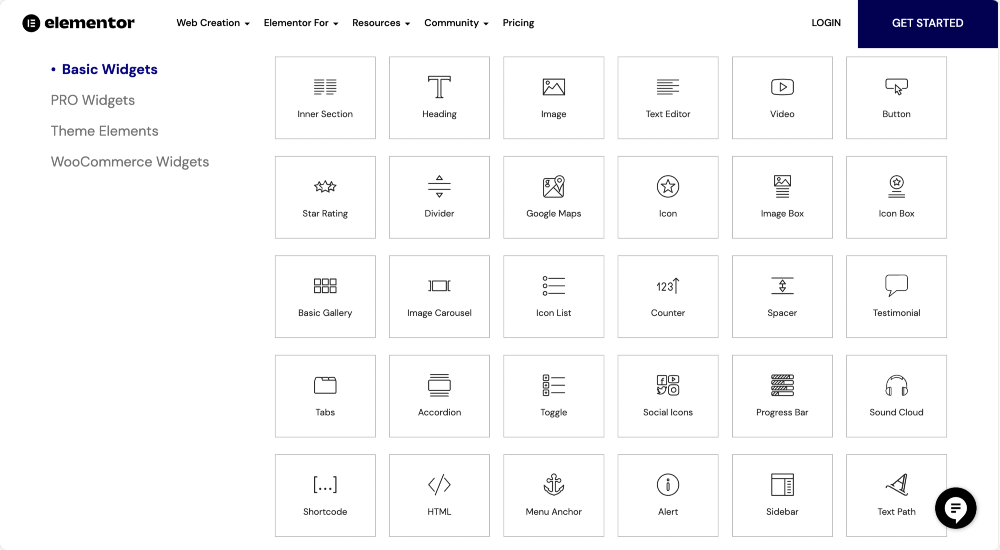
Click here to check the complete Elementor widgets list.
Apart from content widgets, Elementor free version also includes a Template Library that provides impressive Pre-Designed Full Page and Section Templates. You can use templates to create beautiful web pages.
How to Use Elementor?
There is no doubt that Elementor is user-friendly and easy to use, but you will certainly need some guidance when you first start using it.
So let’s get started with installing & activating Elementor’s free version.
How to Install and Activate Elementor Free (Lite) Version
Like other WordPress plugins, installing Elementor is relatively easy & straightforward. You can install Elementor via its official site or directly from the WordPress dashboard.
I assume you already have a WordPress site, so let’s see how you can install Elementor Lite directly from WordPress Dashboard.
Installing Elementor via WordPress Dashboard
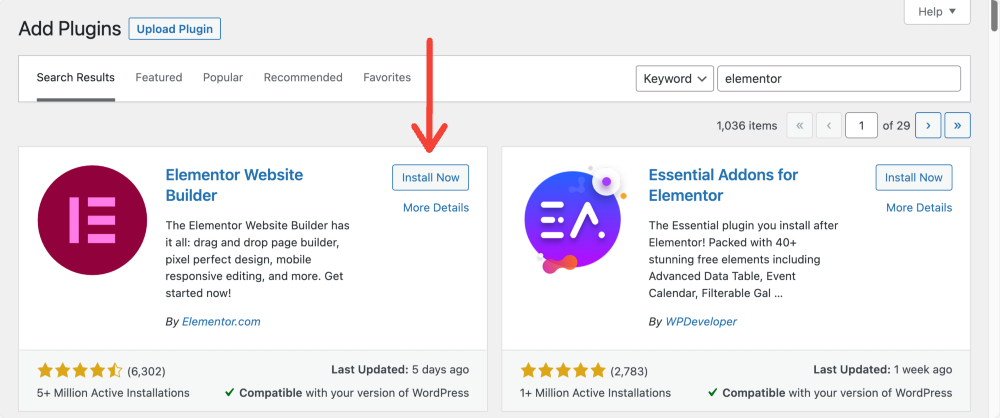
- First, go to your WordPress dashboard, and click Plugins >> Add New.
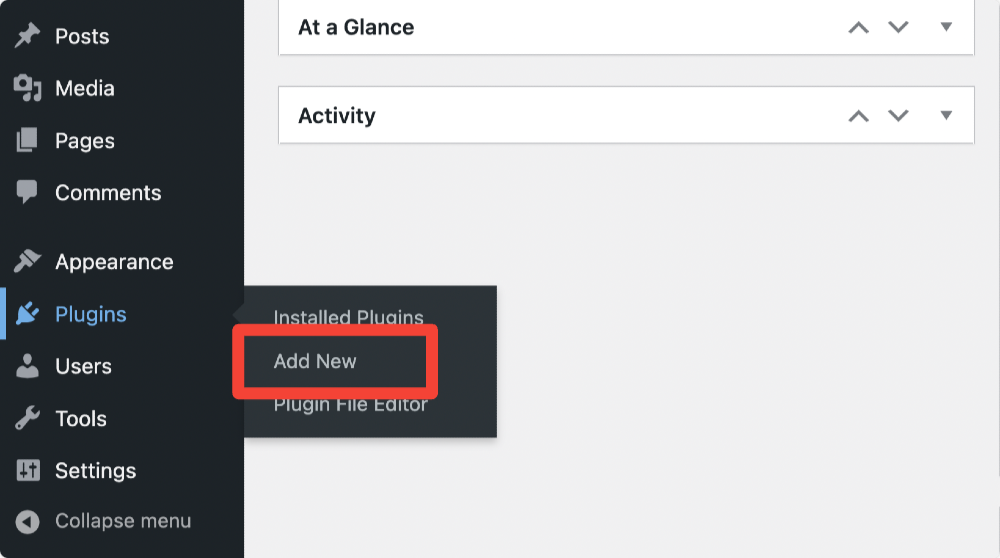
- Now Search for Elementor and click the Install Now button.
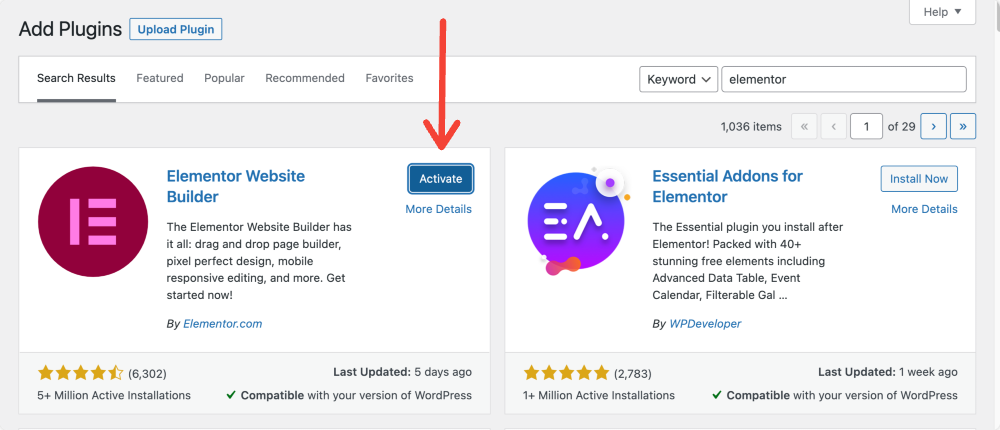
- Once the installation process is complete., click the Activate button.
This is what your WordPress Dashboard looks like after installing and activating the Elementor free version.
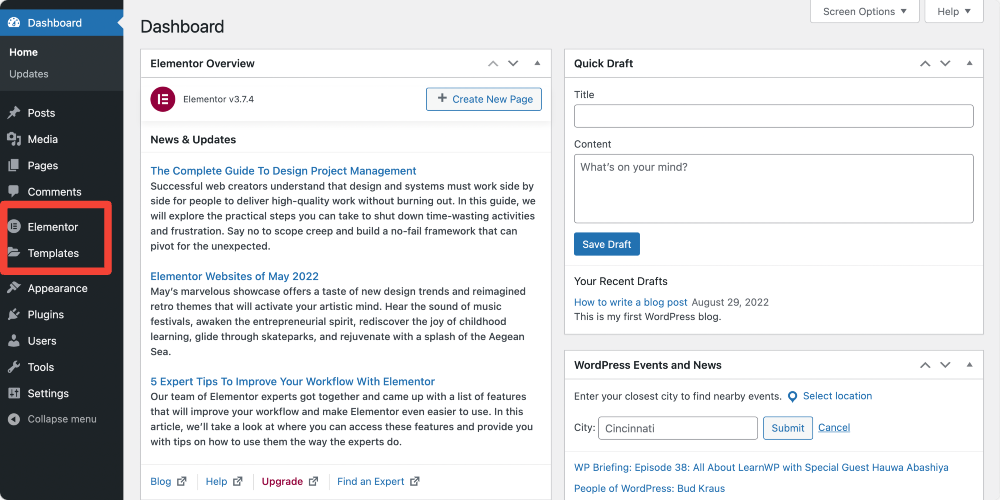
Now that you have successfully installed and activated Elementor on your WordPress website, let’s start understanding some basic settings and features of the Elementor page builder.
Understanding Elementor’s Basic Options
Elementor provides you with options to turn your design visions into reality. With the front-end editing and drag-and-drop feature, you can create any website easily.
But before we proceed to the major part, let’s discuss some basics of Elementor’s front-end and back-end settings.
First, let’s take a look at Elementor’s Backend Settings.
Elementor Backend Settings
To view Elementor backend settings. Click the Elementor icon on the left panel of the WordPress dashboard, and by default, it will open the Settings page of Elementor.
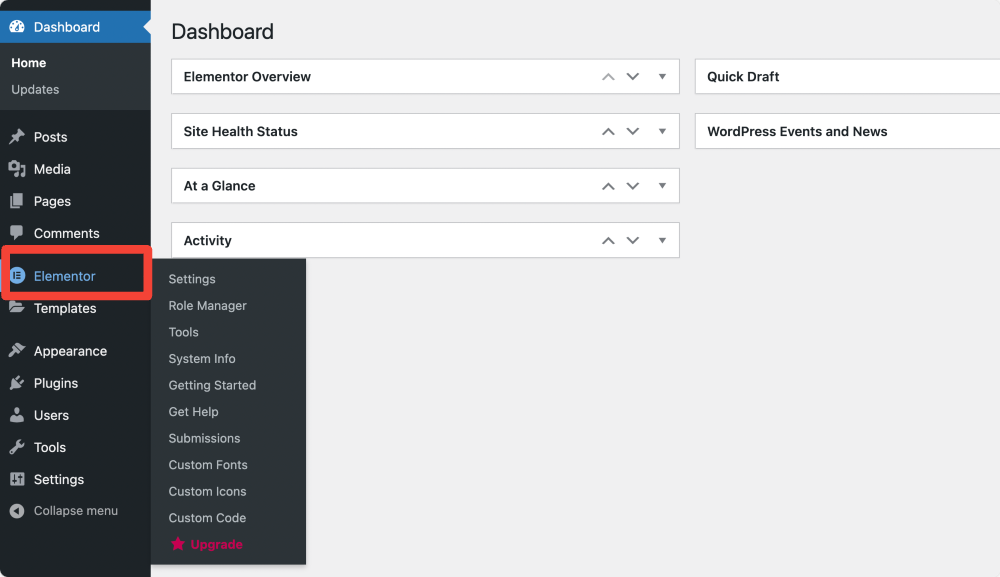
Elementor settings page consists of 4 tabs General, Integrations, Advanced, and Experiment.
General Tab
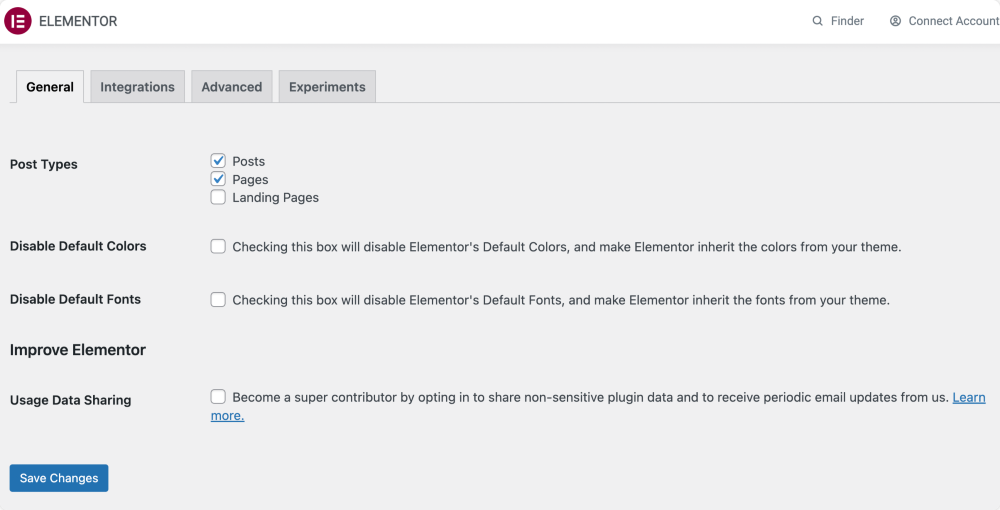
In the General tab, you get options to:
- Set which post types, i.e., Posts or Pages, will be editable in Elementor.
- Disable Elementor’s Default Colors, and allow Elementor to inherit the colors from your theme.
- Disable Elementor’s Default Fonts, and allow Elementor to inherit the fonts from your theme.
Integrations
Under this tab, you’ll find options to integrate different tools’ API keys to integrate them with Elementor.
For instance, you’ll find options to add a Google API key, Instagram Token, and Captcha keys.
As you are beginning with Elementor, I suggest you not alter the Advanced and Experiments tabs’ settings and leave them as they are.
Role Manager
Role Manager is an advanced feature of Elementor that allows you to assign different access privileges for each user role.
With the Elementor free version, you can choose to restrict certain user roles from accessing the Elementor editor.
You can assign permissions to these default roles:
Editor – Can publish and manage their own and others’ posts.
Author – Can publish and manage their own posts
Contributor – Can manage their own posts but cannot publish them.
Subscriber – Can only manage their profile.
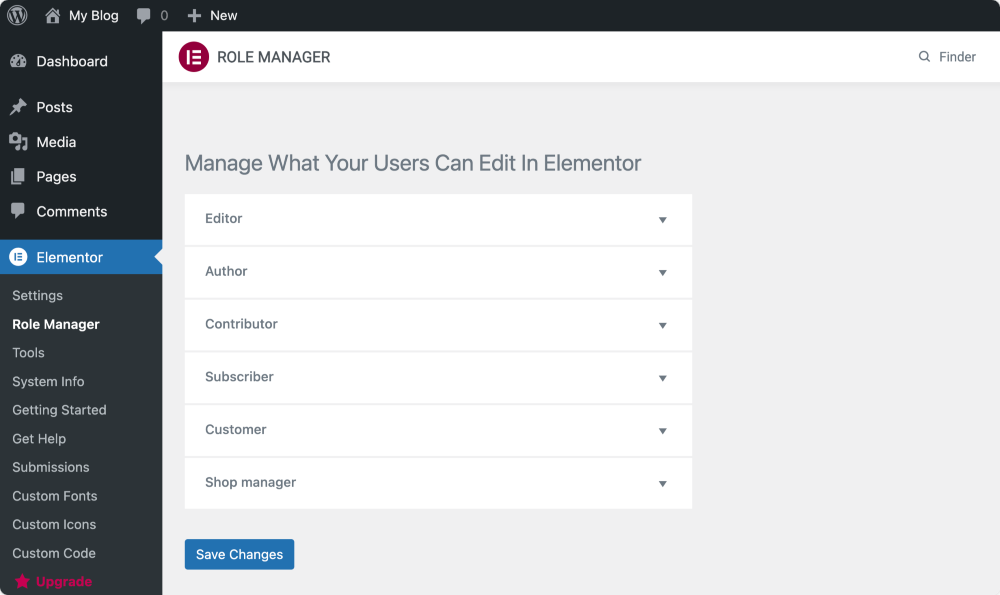
How can you Manage Roles in Elementor?
Go to your WordPress backend and click Elementor > Role Manager.
Here you will see a list of user roles. Click on the drop-down menu, and you’ll see permission options for each role.
- No access to the editor – This restricts the user altogether from entering the Elementor editor.
Because we are talking about the Elementor free version, this information on Elementor’s backend settings might work right for you. Let’s now explore Elementor’s front-end settings.
Elementor Front-End Interface
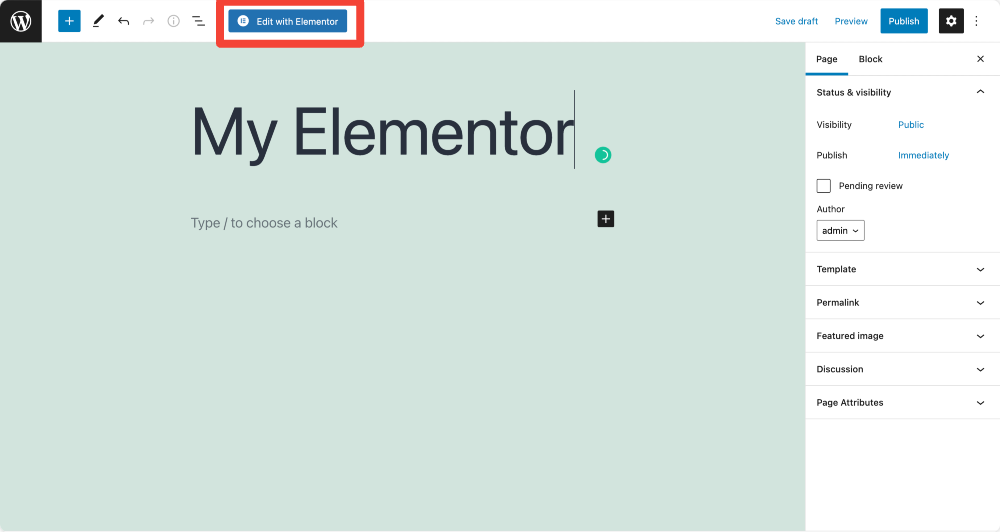
To learn about Elementor’s interface, first, we need to create a new page on WordPress and edit it with Elementor.
- Go to your WordPress dashboard, and on the left, click Pages > Add New.

- On the next page, add your Page Title and Click Edit with Elementor to enter the Elementor website builder.
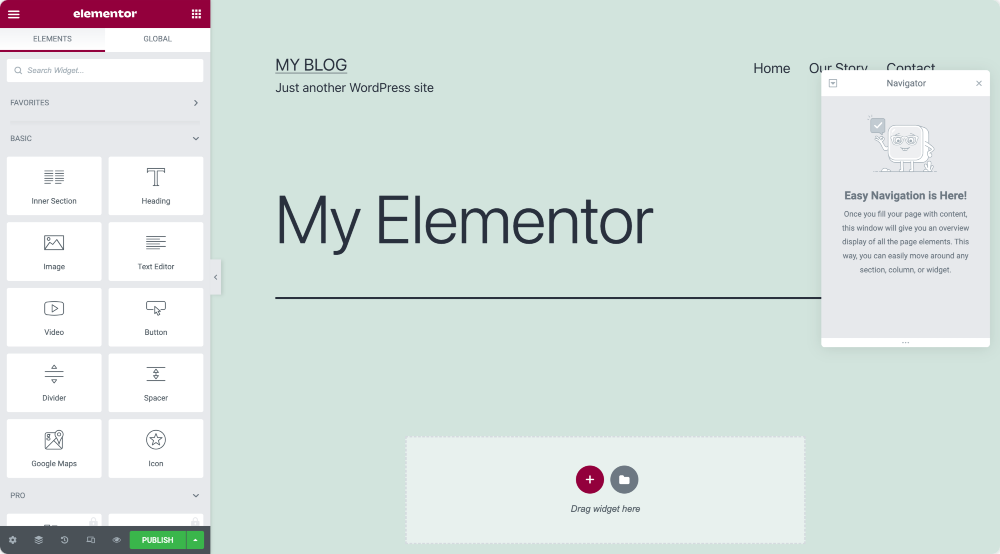
- This is what the Elementor panel looks like.
Sections, Columns, and Widgets
Elementor editor mainly consists of three main building blocks: Sections, Columns, and Widgets.
- Sections are the largest building blocks, where you can add groups of Columns and Widgets.
- Columns are individual segments that contain Widgets.
- Widgets are individual elements.
To design a page with Elementor, you need to combine these three blocks. Additionally, you get complete control over the appearance of each of them.
Elementor Panel Overview
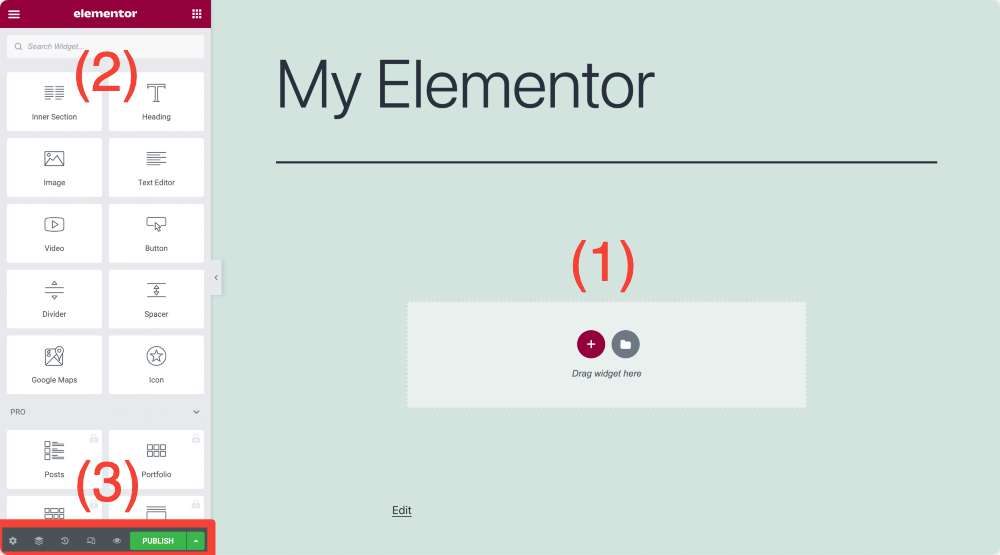
The Content Area – (1)
Here you can add sections, select your structure, drag and drop widgets and start designing your page layout. If you don’t want to hustle with the page designing process from scratch, you can simply add a pre-designed section & full-page templates.
I’ll explain more about Templates in the Working with Elementor Templates section.
Elements/Widgets – (2)
These are the building blocks, or we can say small elements that we can combine and customize to design our pages.
Settings – (3)
You can update, undo changes, and Preview your page design on different devices.
Let us understand Sections, Columns, and Widgets settings in detail.
Creating your first Section in Elementor
- Click the “+” icon in the Elementor content area to create a Section.
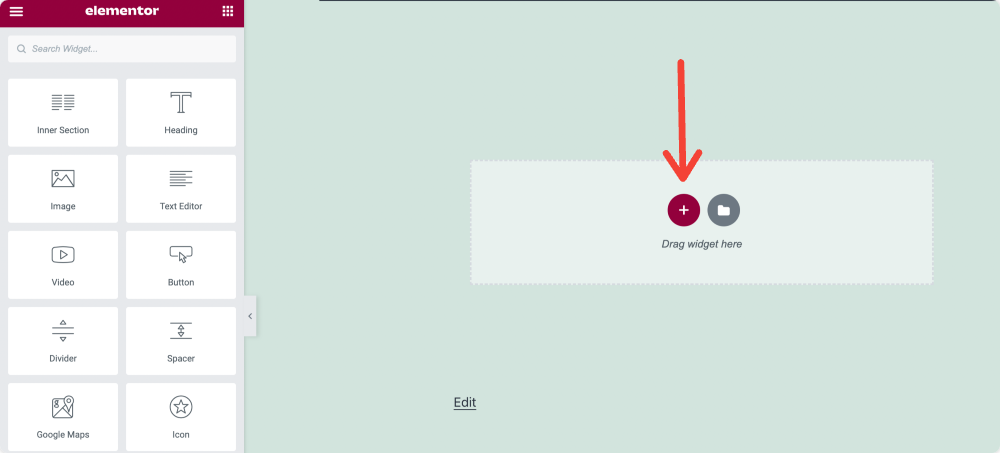
- Select the page structure.

Section Overview
After creating your first-page section, you’ll be able to see three tabs: Layout, Style, and Advanced Tab on the left side of your Elementor panel.
These tabs give you complete control over the editing property of your section. You can adjust section height, width, set background color, and many more.
Let’s learn more about Section Tabs:
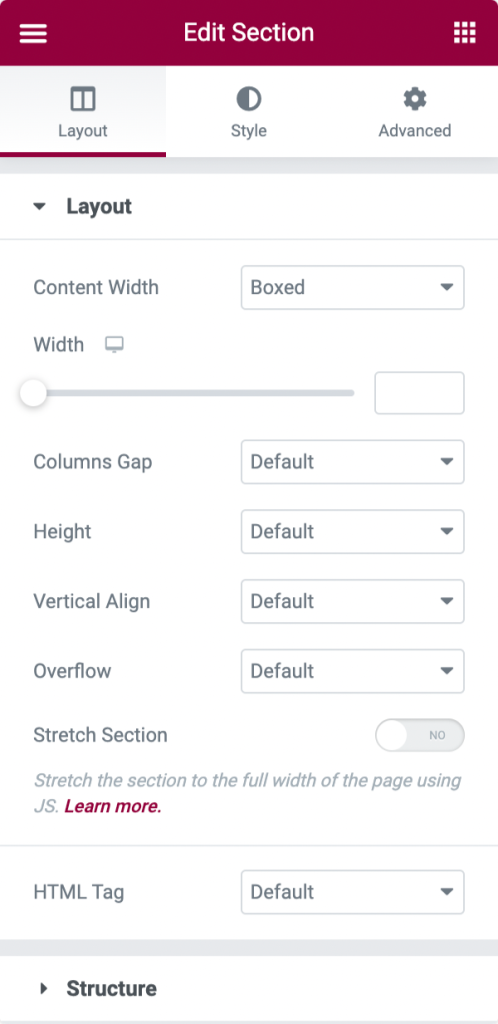
Layout Tab of Elementor Section
You can set the layout of your page section from the Layout tab by altering multiple given options.
- Layout Options
- Content Width: You can set Content Width to Boxed or Full Width. If you choose the content width type as a Boxed, you can use the slider to set your section width.
- Columns Gap: As the name says, from here, you can set the gap between your columns.
- Height: Define column height from this option. You can choose from the height options available: Default, Fit to Screen, and Min Height. If you select a Min Height, use a slider to set your section height.
- Vertical Align: Set your Section content’s vertical alignment
- Overflow: Select how to handle content that overflows its container. The default option allows the overflow. Select Hidden to hide the overflowing content.
- Stretch Section: If you want to display the Section on the full width of the page, enable this option.
- HTML Tag: From here, you can set an HTML Tag for your section. Elementor provides different types of HTML tags that you can choose from.
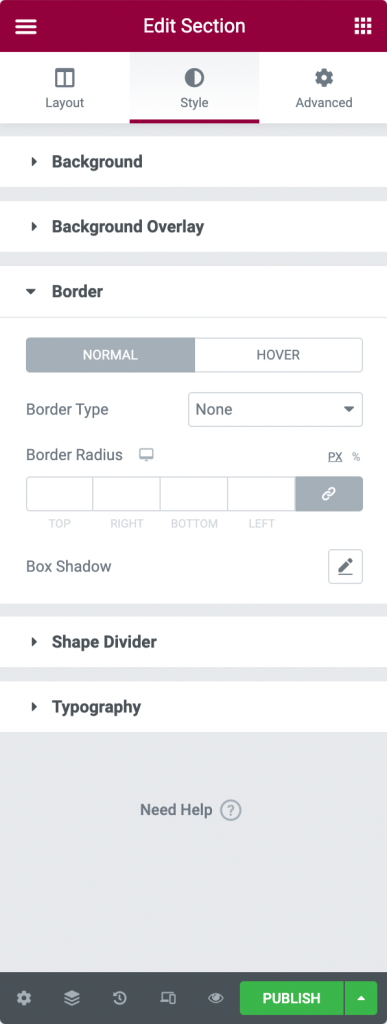
Style Tab of Elementor Section
Style Tab is the second tab of your section. From here, you can customize multiple styling options as per your preferences.
- Style Options
- Background: Select between Classic, Gradient, Video, or Slideshow backgrounds.
- Background Overlay: Choose between Classic or Gradient.
- Border: From here, you can set your Border Type, define Border Radius, and add Box Shadow.
- Shape Divider: Choose shape divider style, color, width, height, etc.
- Typography: Set Typography Colors for the section.
Advanced Tab of Elementor Section
In the Advanced tab, you find options to define advanced settings such as margin., padding, motion effects, etc.
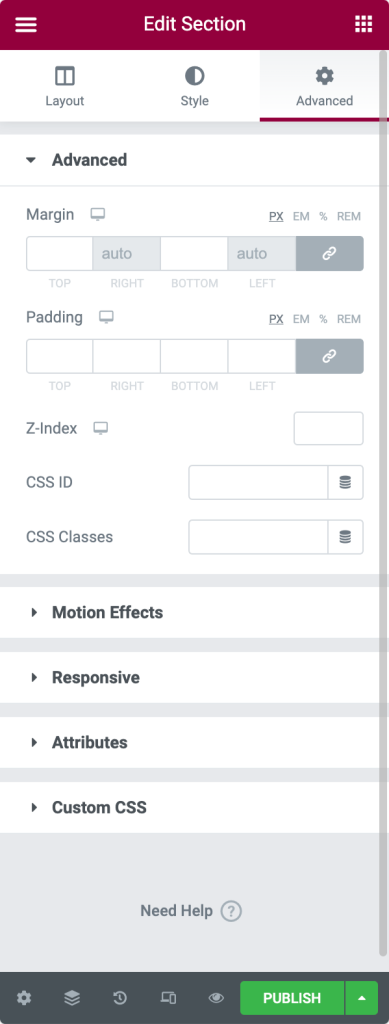
- Advanced Options
- Margin: From here, you can set the margin for your section.
- Padding: Set the padding for the section.
- Z-Index: Z-Index helps you to specify the stack order of elements on your page.
- CSS ID: Define CSS ID for your section.
- CSS Classes: Add CSS Classes for your section.
- Motion Effects: Add motion effects to your page elements.
- Responsive Options
- Reverse Columns: Enable this option to reverse the order of your columns on both Tablet and Mobile.
- Visibility: Show or Hide section on Desktop, Tablet, or Mobile.
- Attributes: This option lets you add custom attributes to any element. But this feature is not available with the Elementor free version.
- Custom CSS: From here, you can add any custom CSS to any widget, but this is also not available with the free version.
Column Overview
Like sections, columns also consist of three tabs: Layout, Style, and Advanced.
Layout Tab of Elementor Column
- Layout Options
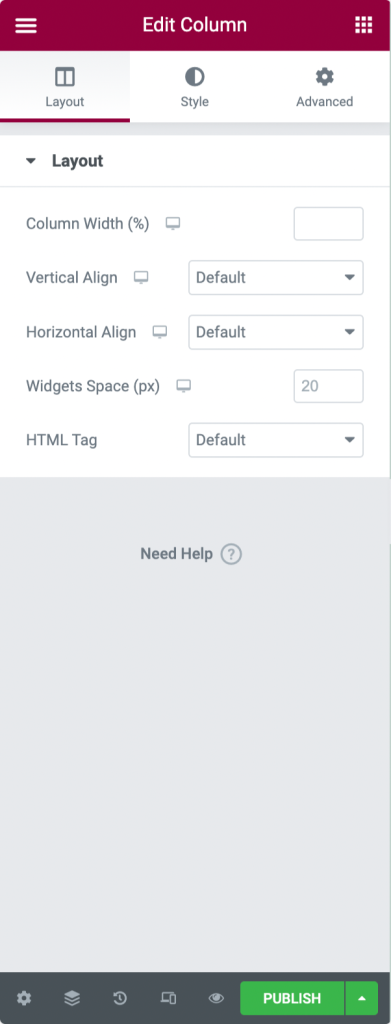
- Column Width: Use this option to define your column width.
- Vertical Align: You can set your column content’s vertical alignment here.
- Horizontal Align: This option allows you to align the inline widgets in the same row horizontally.
- Widgets Space: Adjust the space between inline widgets.
- HTML Tag: Set an HTML Tag for your column.
Style Tab of Elementor Column
- Style Options
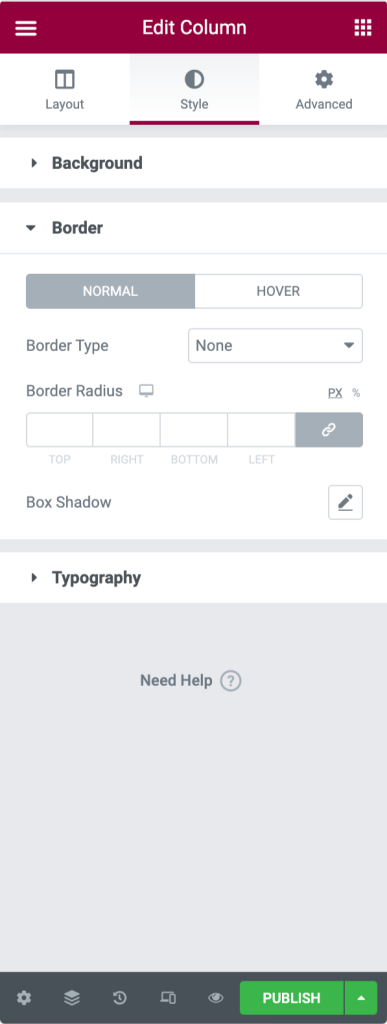
- Background: Choose between Classic, Gradient, or Slideshow backgrounds.
- Border: Set your Border Type, define Border Radius, and add Box Shadow.
- Typography: Set Typography Colors for the column.
Advanced Tab of Elementor Column
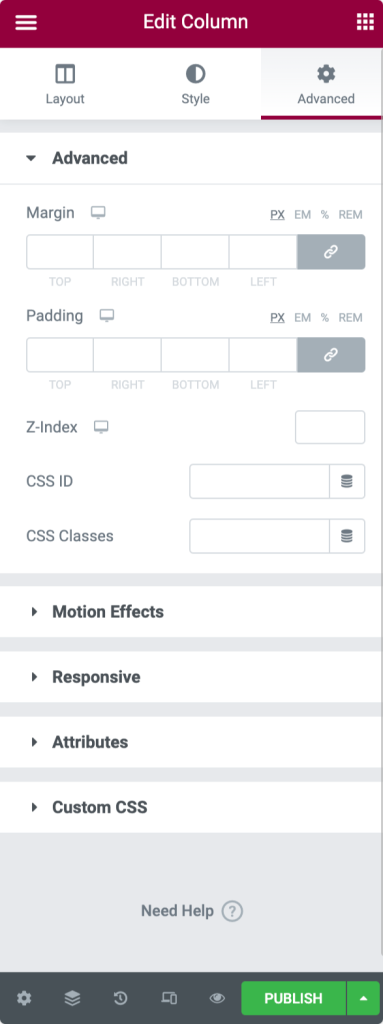
- Advanced Options
- Margin: From here, you can set the margin for your column.
- Padding: Set the padding for the column.
- Z-Index: Z-Index helps you to specify the stack order of elements on your page.
- Motion Effects: Choose an animation from the drop-down menu.
- Responsive Options: Show or Hide column on Desktop, Tablet, or Mobile.
- Attributes: Add custom attributes to any element. But this feature is not available with the Elementor Free version.
- Custom CSS: Add any custom CSS to any widget, but this is not available with the free version.
Elementor Widget Overview
In order to learn and get an idea about Elementor widget settings, first, we’ll add a widget to our page.
- Drag a widget from the left panel and drop it into a column.
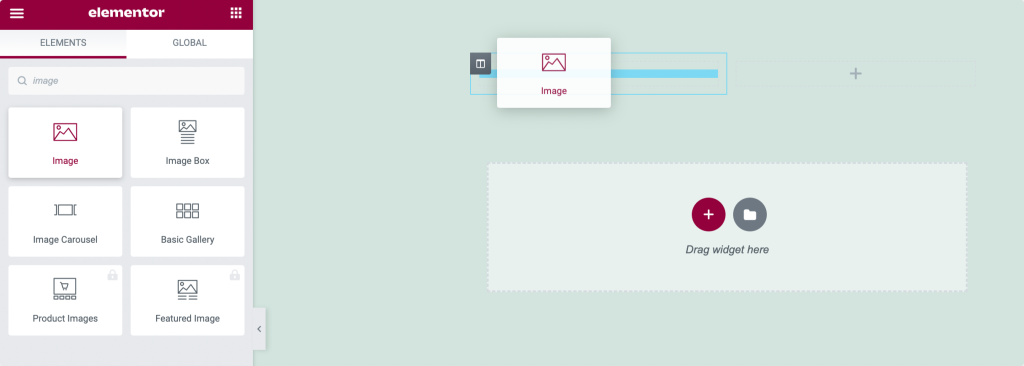
- Now to edit the widget, click the ✏️ icon.
Here we’ll start with the simple widget: Elementor Image Widget.
You can add your preferred image to the widget and customize it per your preferences. Remember, every widget has different settings based on its working process.
Like sections and columns, every Elementor widget has three main tabs: Content, Style, and Advanced tab.; I’ll explain each tab’s properties in detail.
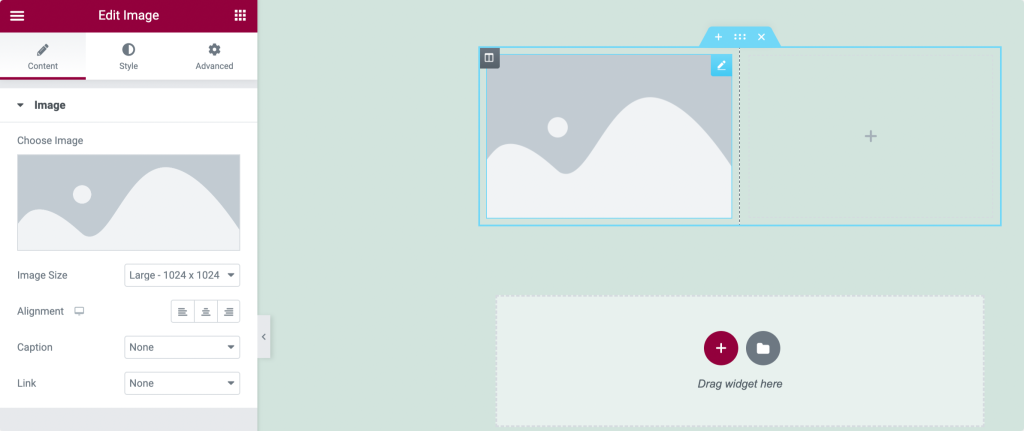
Content Tab of Elementor Widget
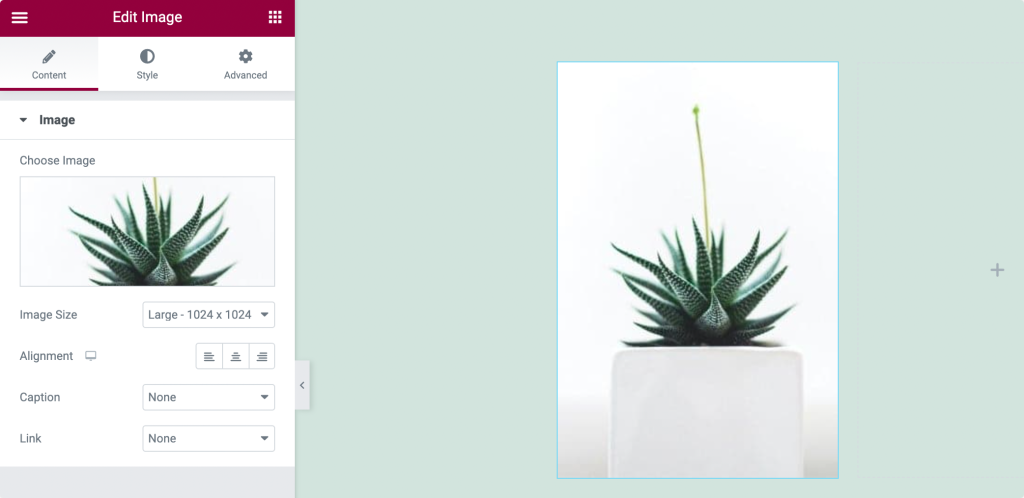
Content tab allows you to set the content of your widget. The content could be in any form, either text, image, or video.
So, for the Image Widget, the Image works as content. You can add any image of your choice, set its size, define its alignment, and add a caption from the content tab.
Style tab of Elementor Widget
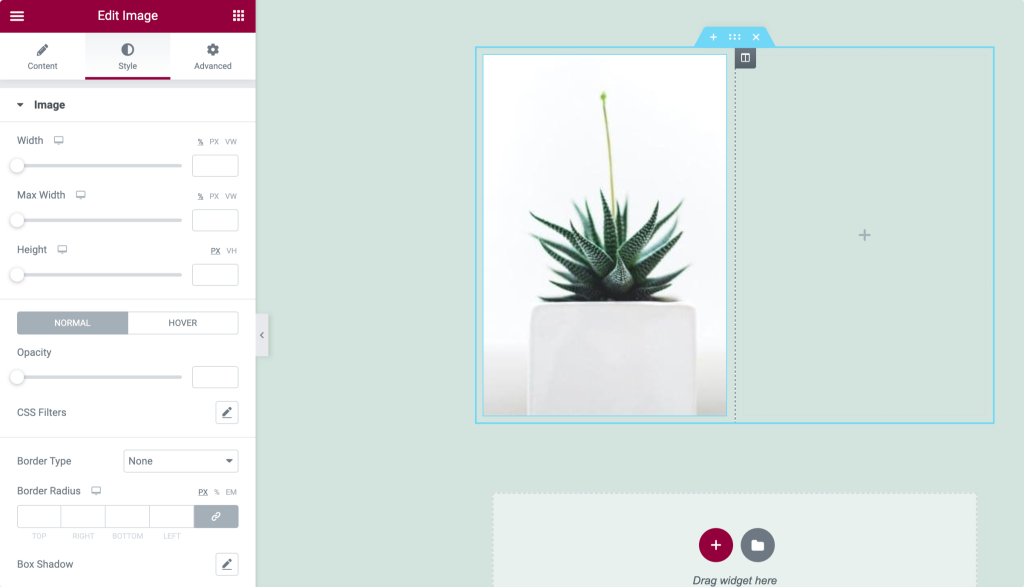
Style tab is the tab where you design, customize, and add styles to your widget. Again styling properties are different for every widget.
For the Image Widget, you can set Image width and height. Add border and border radius. Also, to make it more attractive, you can box-shadow it.
Advanced Tab of Elementor Widget
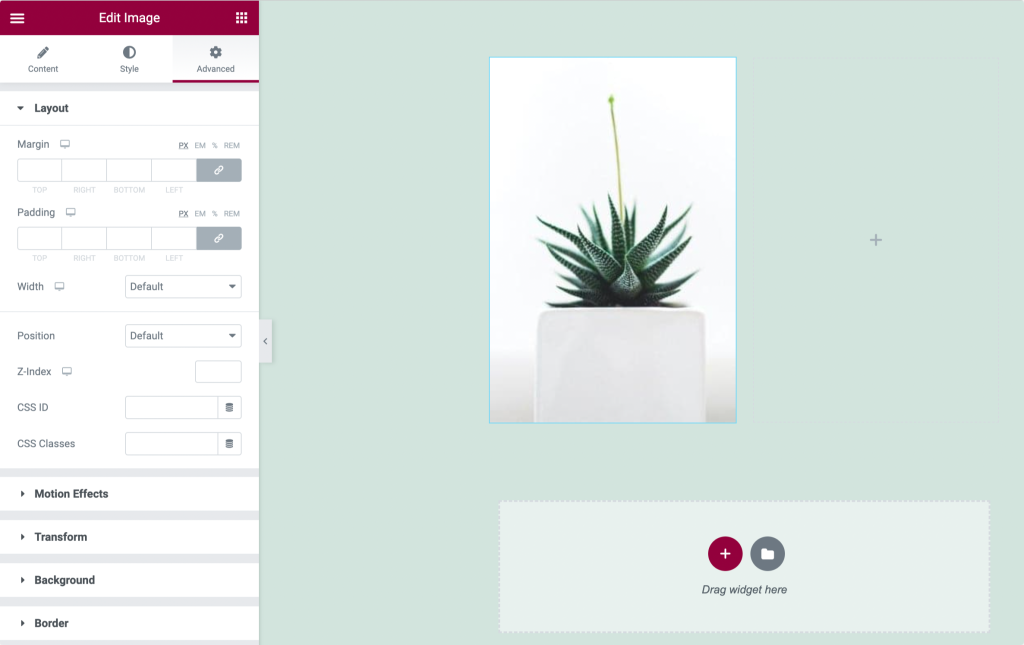
You can add Margin and Padding to your widget from the advanced tab. You can add motion effects and background, define positioning, and make your widget responsive for all device types.
I hope you have completely understood the Sections’, Columns,’ and Widgets’ settings & properties.
We are moving to our next step, i.e., Building a Page with Elementor.
Build your First Page With Elementor
As we already know, Elementor has three main building blocks: Sections, Columns, and Widgets.
Sections are the largest building blocks that hold a group of Columns. Columns sit inside sections, and Widgets are housed within Columns.
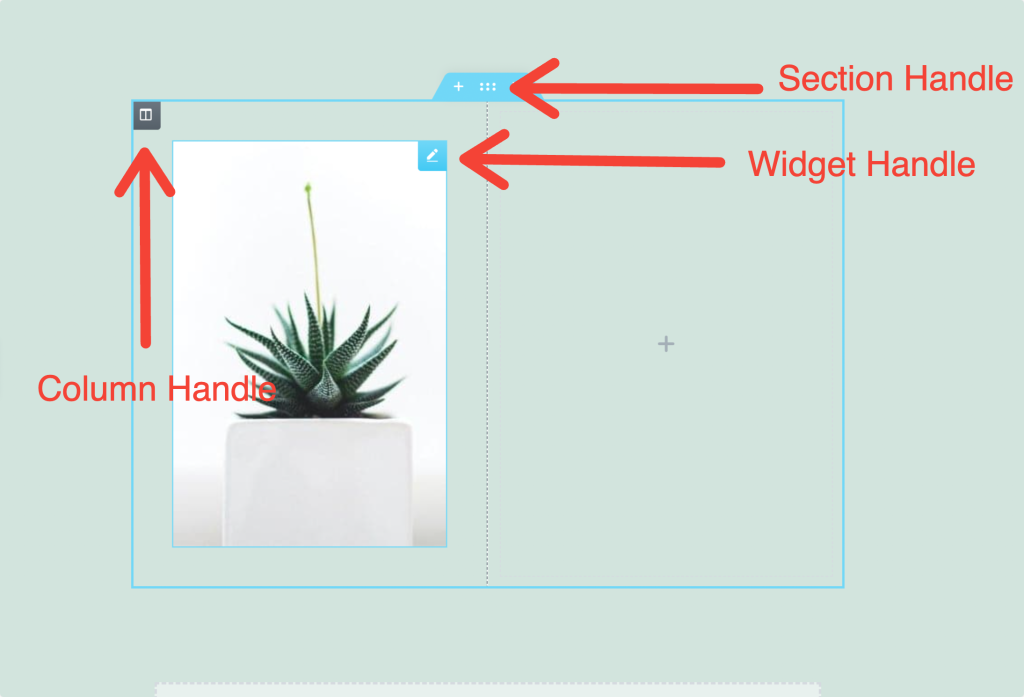
Using the handles, you can easily control Sections, Columns, and Widgets’ settings.
Now to build a page, first, we need a new section for our page.
Create a New Section
- To add a new section, click the “+” icon.
- Now choose your column structure.
- Right-click to Edit, Duplicate, Delete, and for more options.
Column Settings
- Click the column handle to set the Column’s Width.
- To add more Columns, Right Click> Add New Column.
- Drag and Drop Widgets to your Columns
Insert a Widget
- Insert widgets inside columns.
- Click on the ✏️ icon on the right to see the widgets’ settings.
- You can set the Widget width by the Column width.
Editing with Elementor
To edit the Section, Column, or Widget, Just right-click their handle.
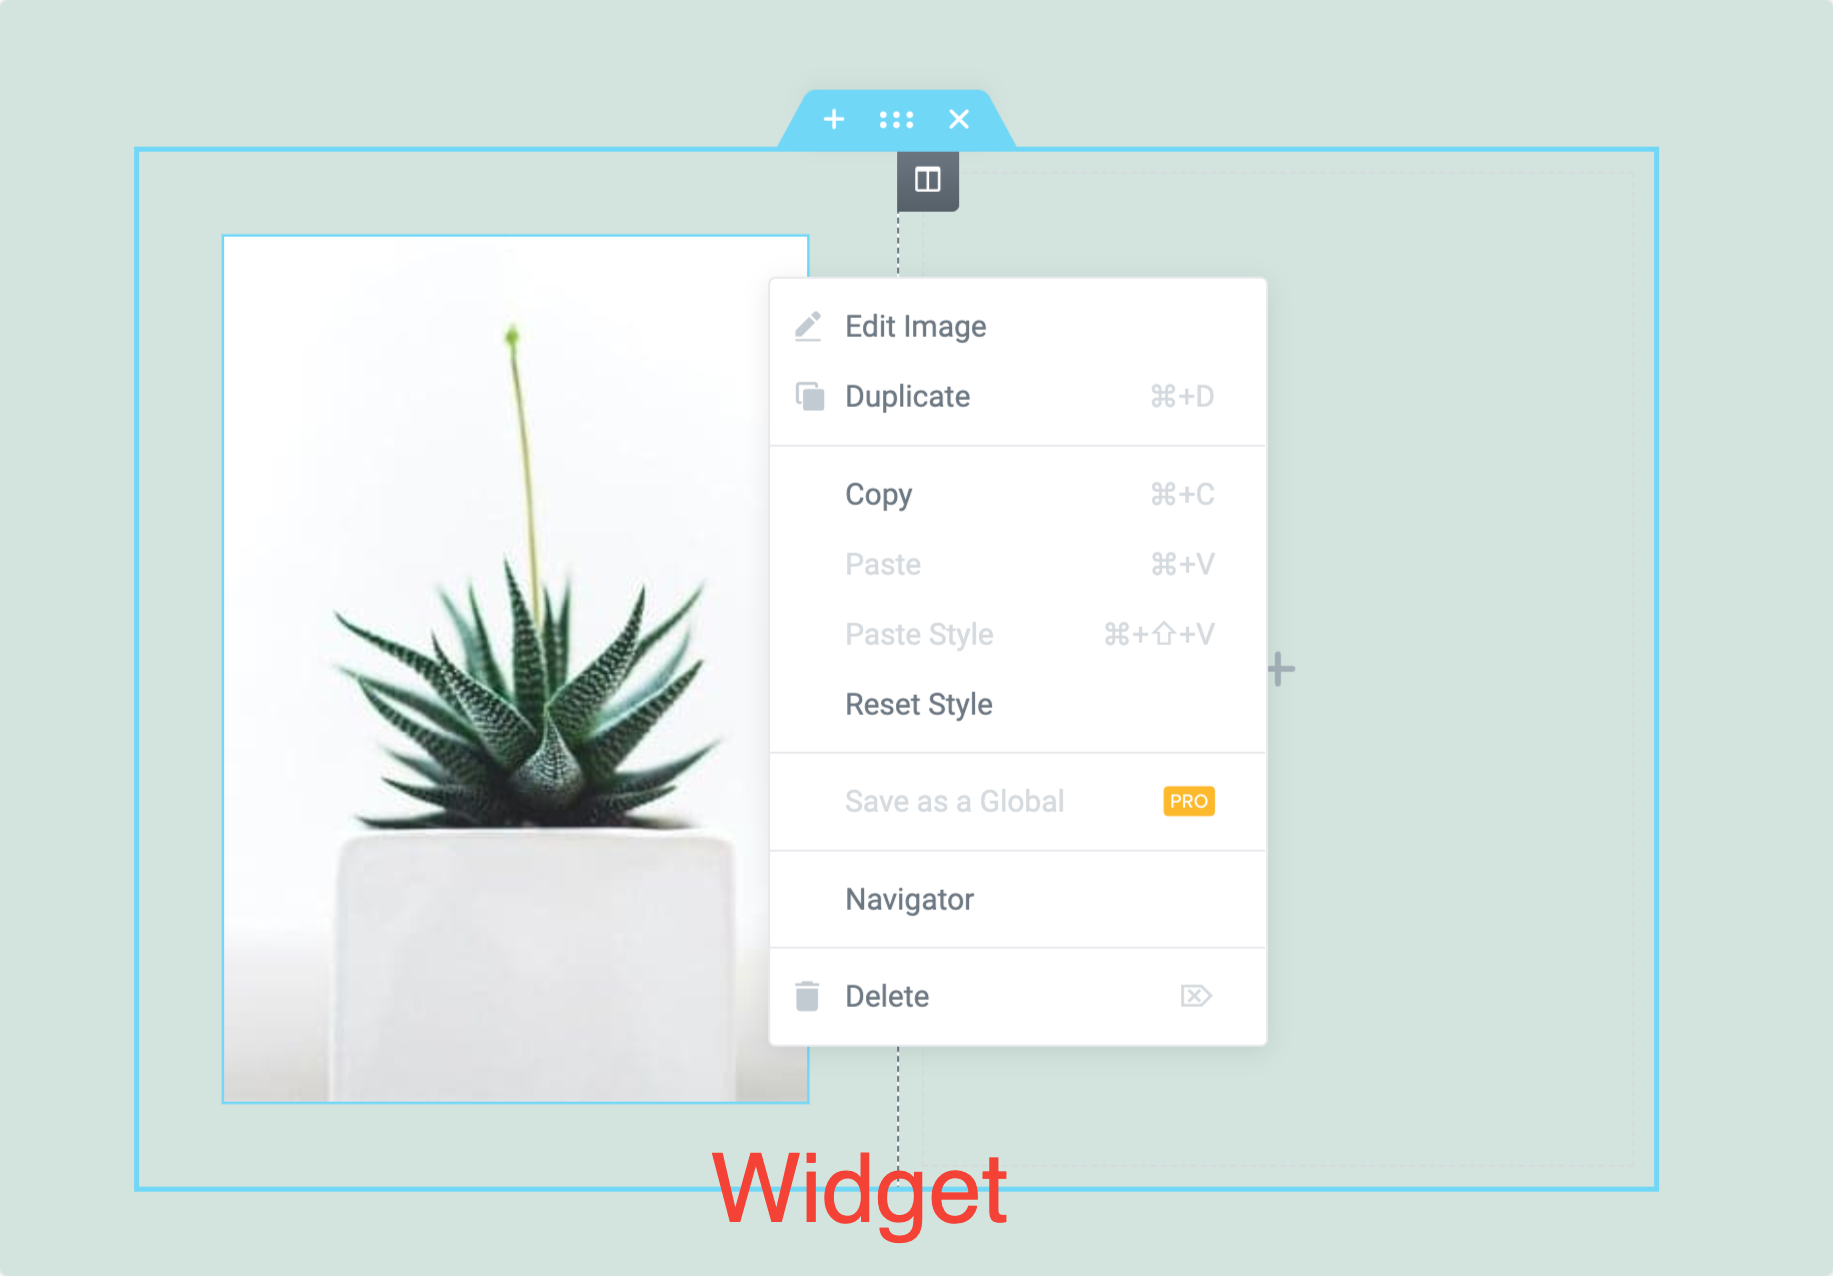
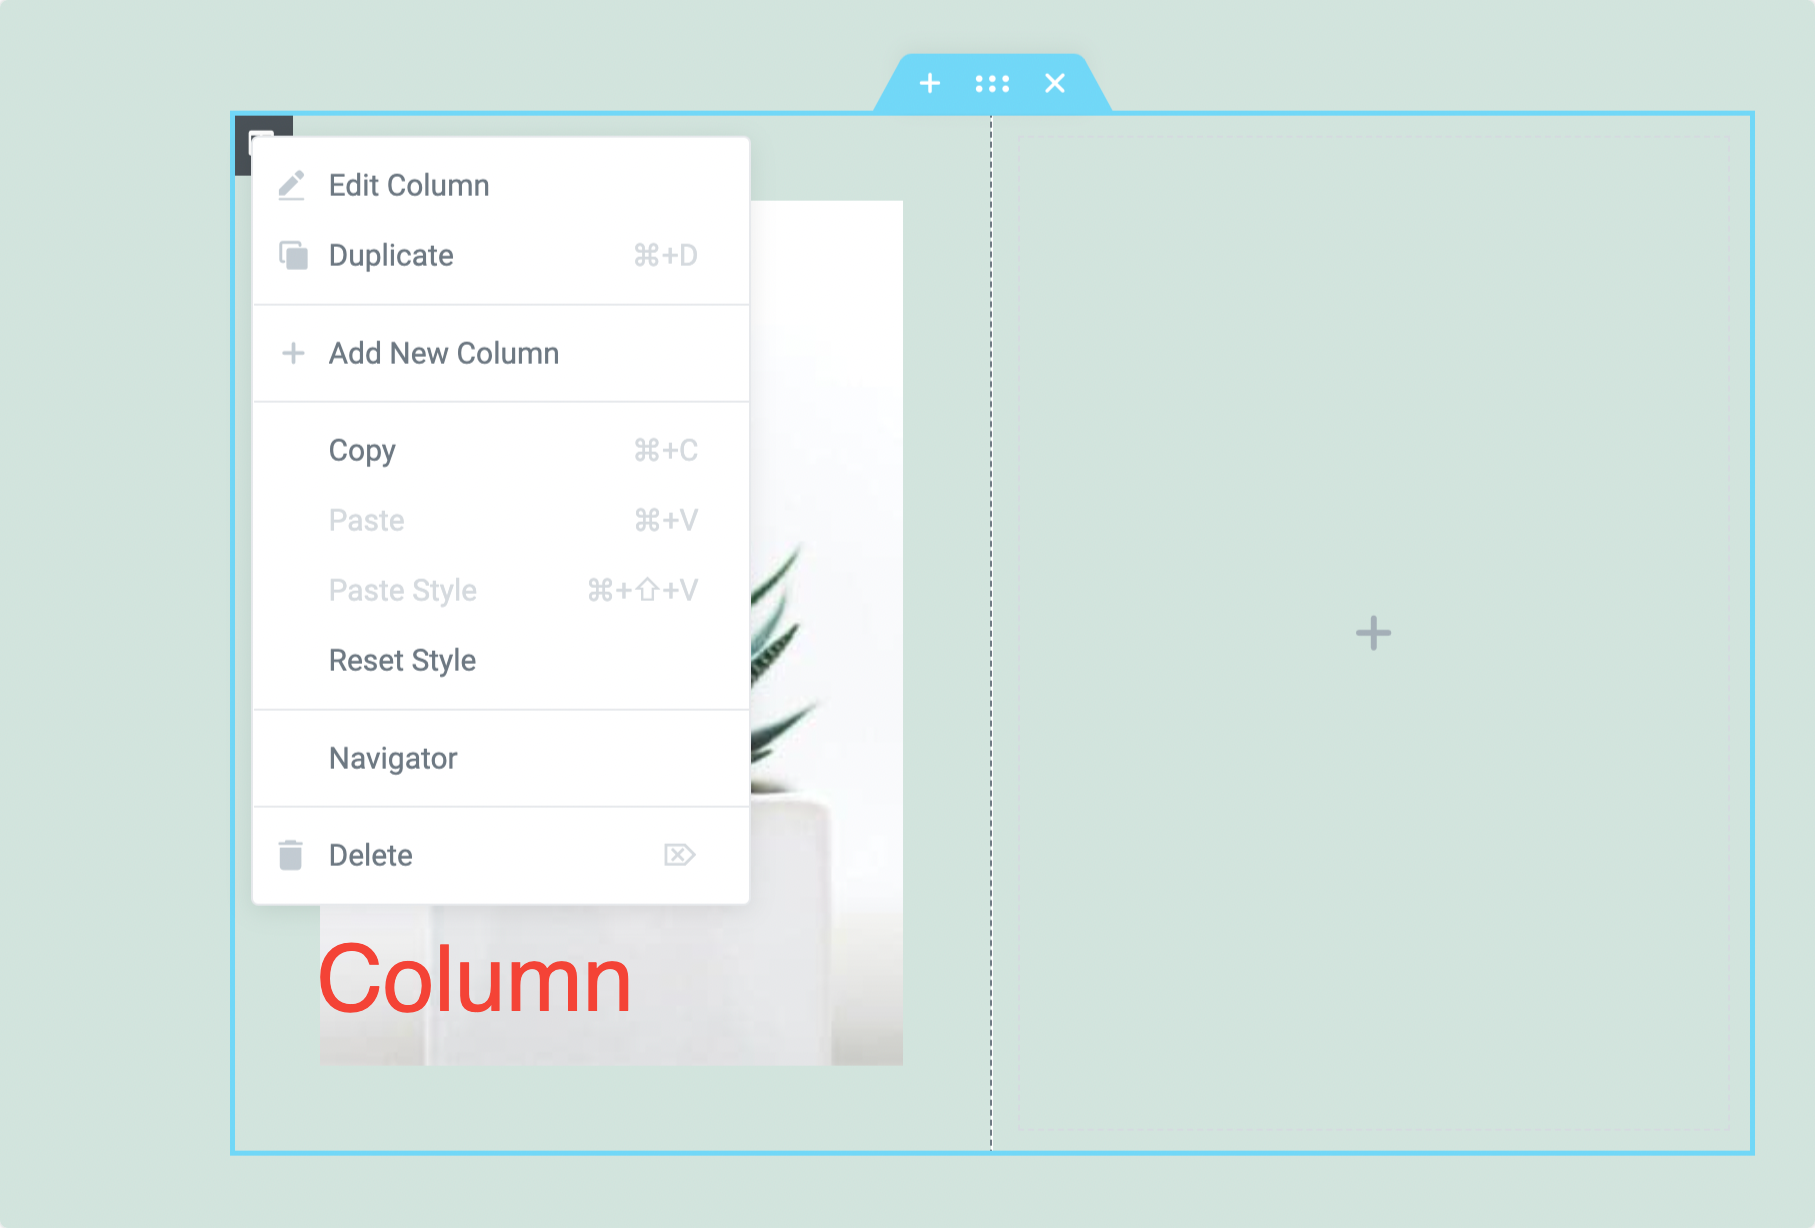
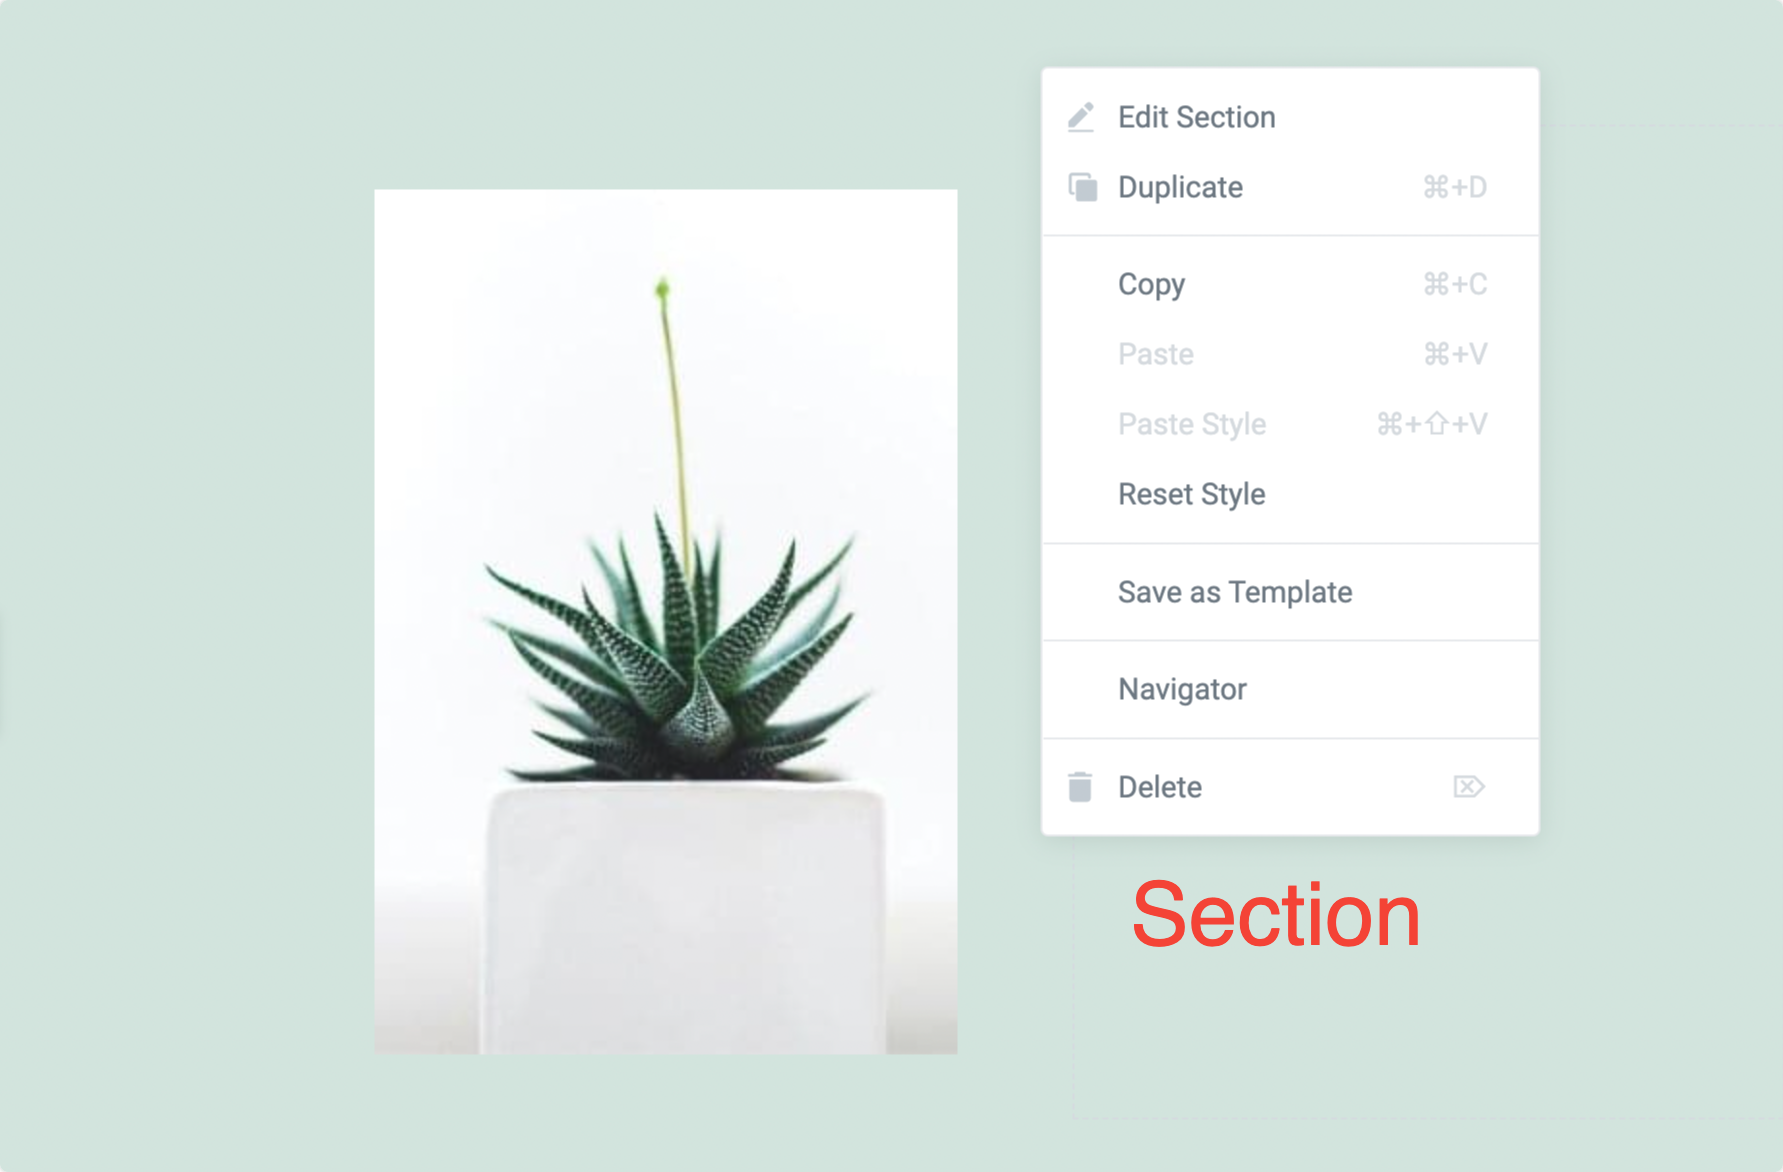
You can see the editing options available in Section, Column, and Widget. All these options are pretty easy to use. Using these options, you can easily copy/paste elements style, reset style, and duplicate and delete content.
Setting up Elementor Page Layout
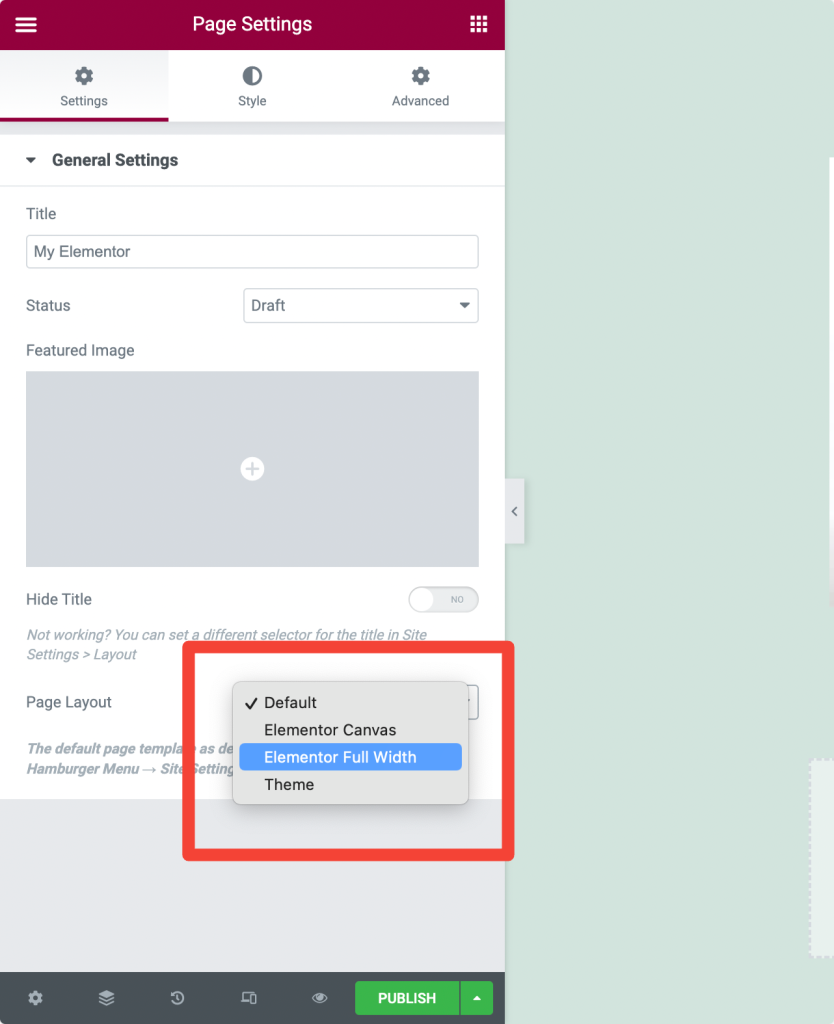
Page Layout is an option that helps you to control how the pages may look in the frontend. Elementor provides multiple page layout options to set the layout of your page. There are three different page layouts available with Elementor:
- Default Layout: Default layout fetches details from a theme and contains your theme’s page layout.
- Elementor Canvas: Elementor Canvas layout allows you to design your page from a blank canvas. It excludes all theme elements, such as Header, Footer, or Sidebars.
- Elementor Full Width: Elementor Full-Width layout makes your content full width. It includes the header and footer.
Using Elementor Full-Width Page Layout
Elementor’s full-width page layout allows you to override the default page width and use a full-width design on any theme.
Let’s check how you can use the Elementor Full-Width Template:
- Create a New Page and Edit with Elementor.
- Click on the ⚙️ icon on the bottom left side.

- Now under the Page Layout option, choose Elementor Full-Width.
You can see a full-width page design with a default Header, Footer, Sidebars, and Full-Width container.
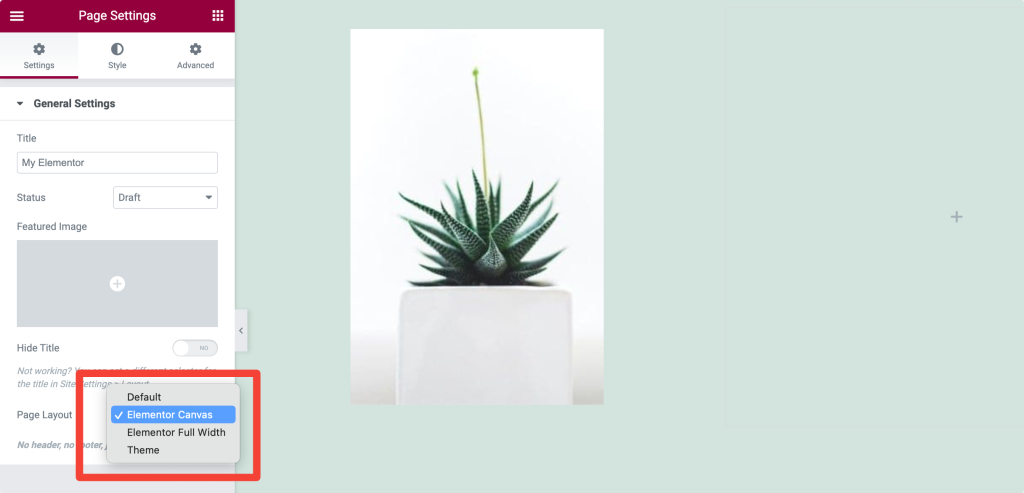
Using Elementor Canvas Page Layout
If you want a blank page without any header, footer, or any other page elements, you can set Elementor Canvas Layout for your page layout.
Canvas templates are great for creating specific pages such as landing pages, coming soon pages, maintenance mode pages, etc.
Setting up Canvas page layout:
- Create a New Page and Edit with Elementor.
- Click on the ⚙️ icon on the bottom left side.
- Under the Page Layout option, choose Elementor Canvas.
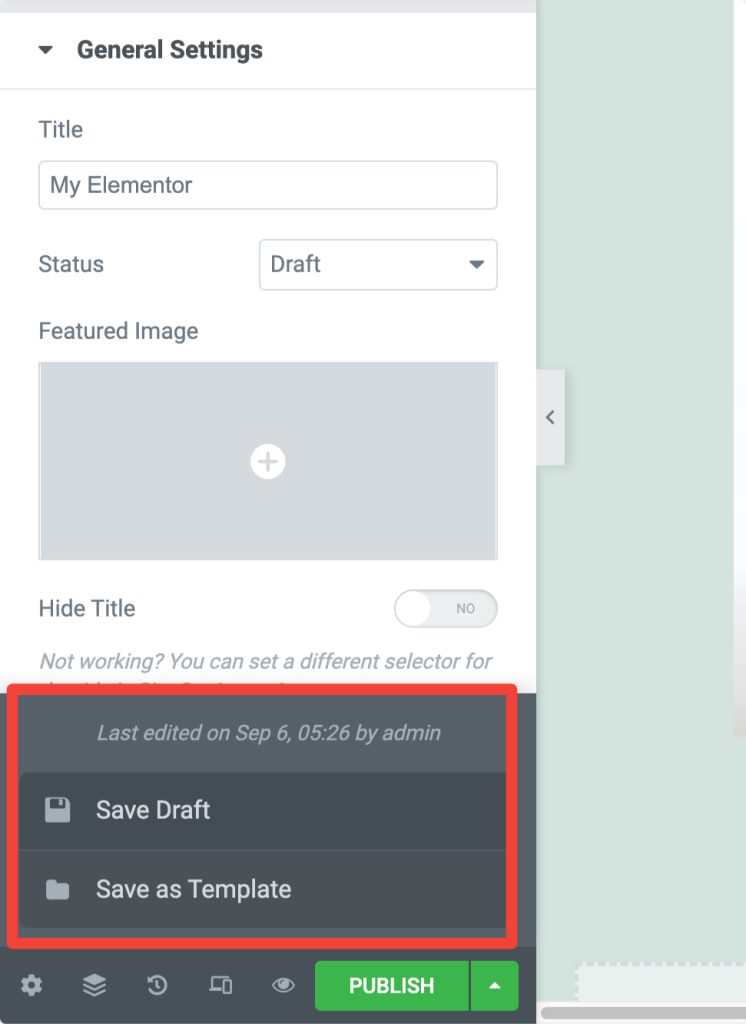
Save Elementor Page as a Draft
If you don’t want to publish your page immediately, you can also save your page as a draft in the Elementor. To save your page as a draft:
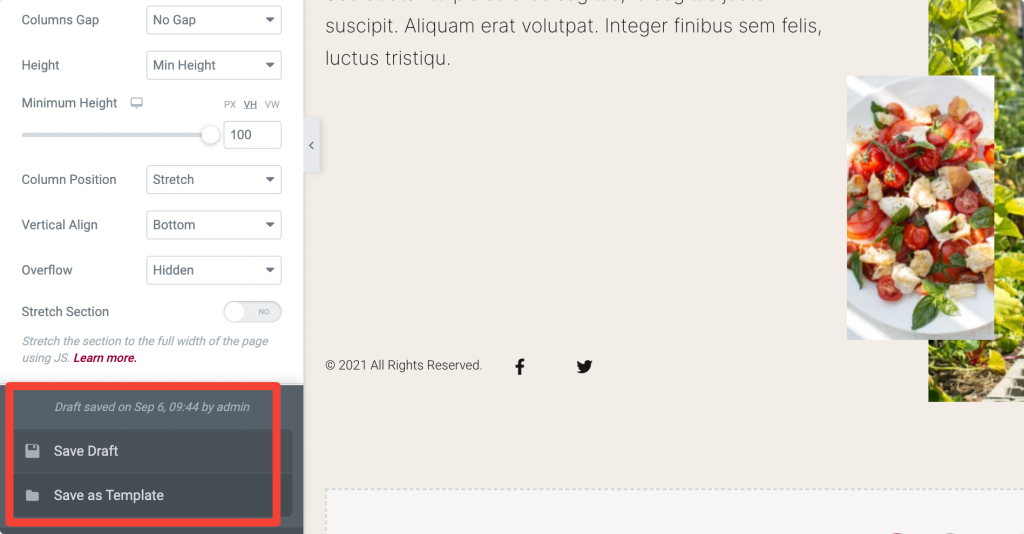
- First, open the page with the Elementor Editor. Click on the up arrow icon in the bottom left of the page and select the Save as a Draft option.
Preview and Publish the Page in Elementor
- To Preview your page, click on the 👁️ icon on the bottom left side.
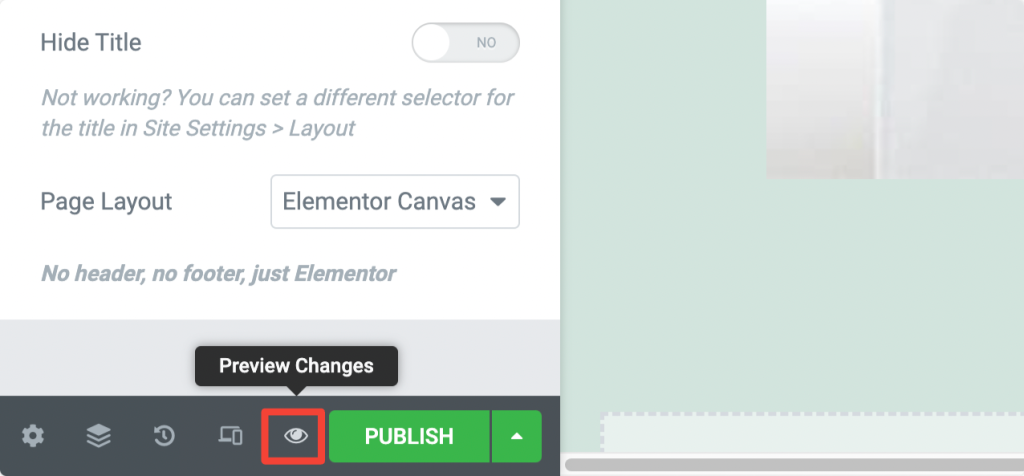
- If your page design is good, click the green Publish button.
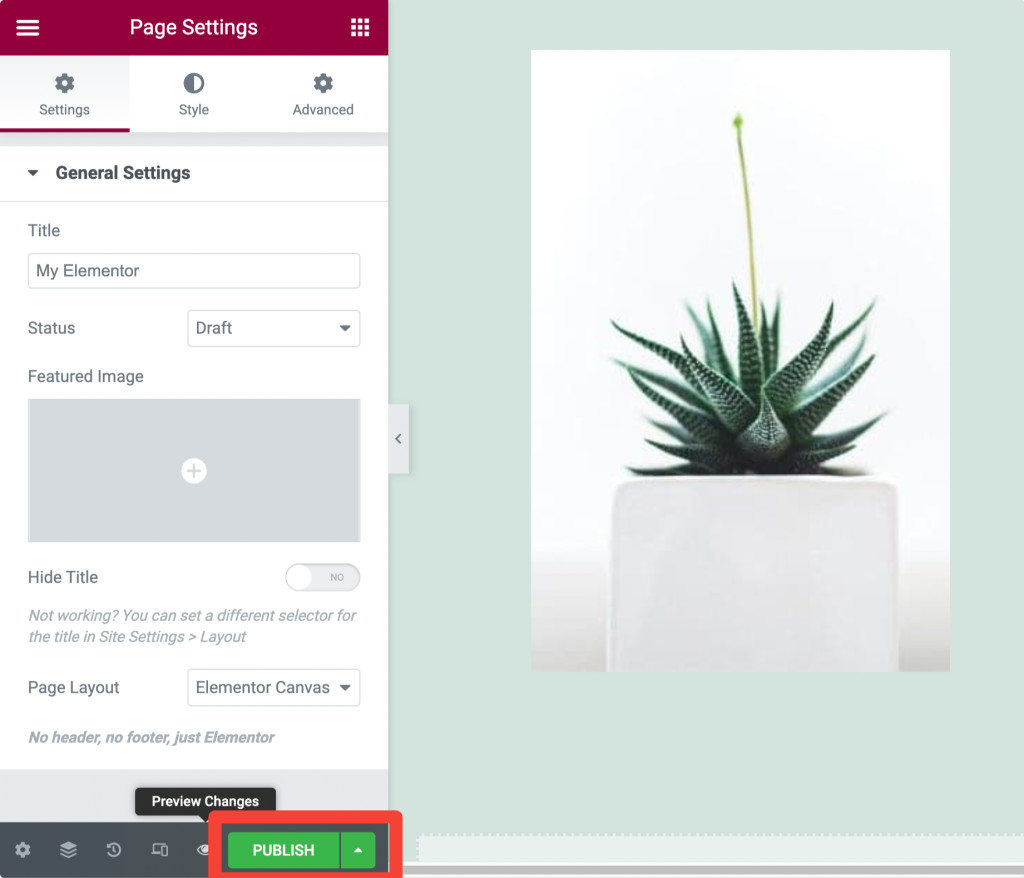
- Click ‘Have a Look ‘to view the published page.
Responsive Design/Editing with Elementor
If you are designing a website, you simply can’t ignore your web pages’ responsive properties. They must look perfect on each device type, whether a small device like a mobile or a big screen like a laptop.
Using the Elementor page builder, you don’t have to worry too much about your pages’ responsive property. Elementor includes advanced responsive controls for each widget, section, and column.
You just need to alter settings according to the device type, and you are done with a beautiful-looking web page.
Let’s see how we can make our web pages look perfect on any device type:
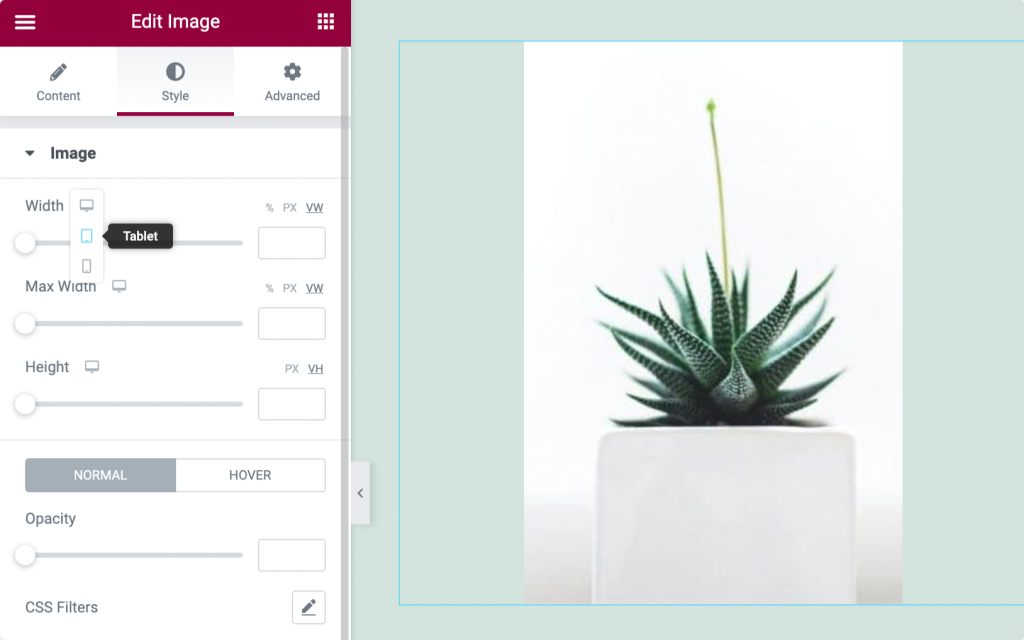
Responsive Controls in Widget Settings
- Go to the Style tab of your widget, and look for the Viewport Icon 🖥️.
- Now click the specific device icon and adjust settings according to the device type.
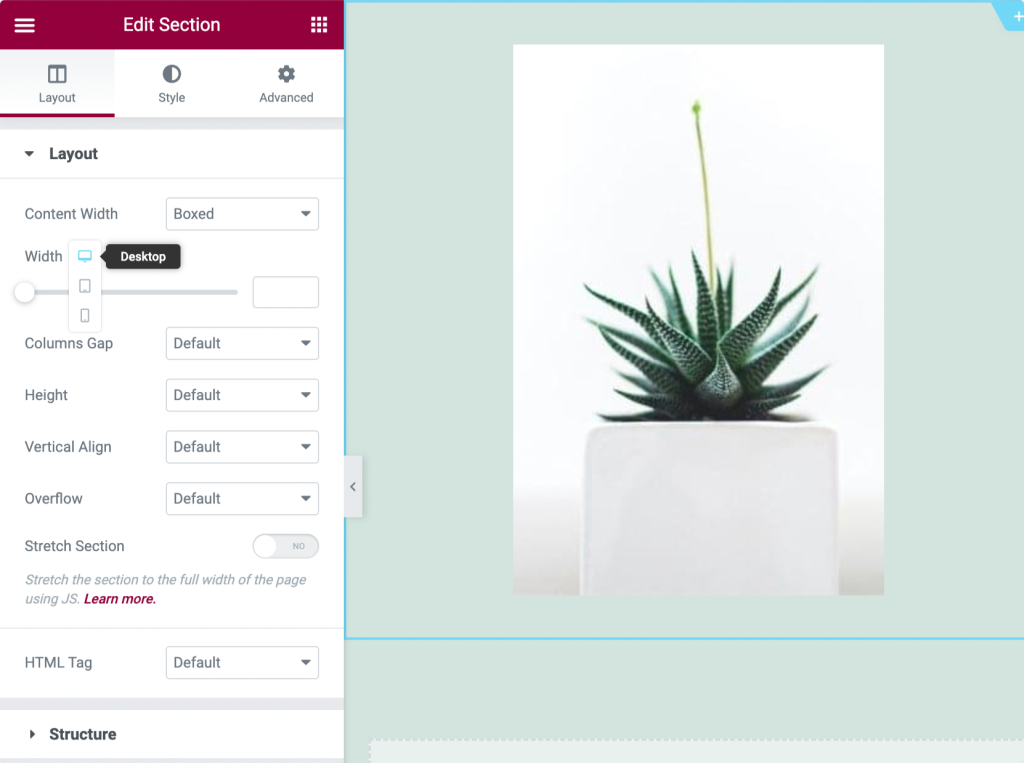
Responsive Controls for Sections
- Go to the Layout Tab of your Section.
- Now adjust the Widht for your device type.
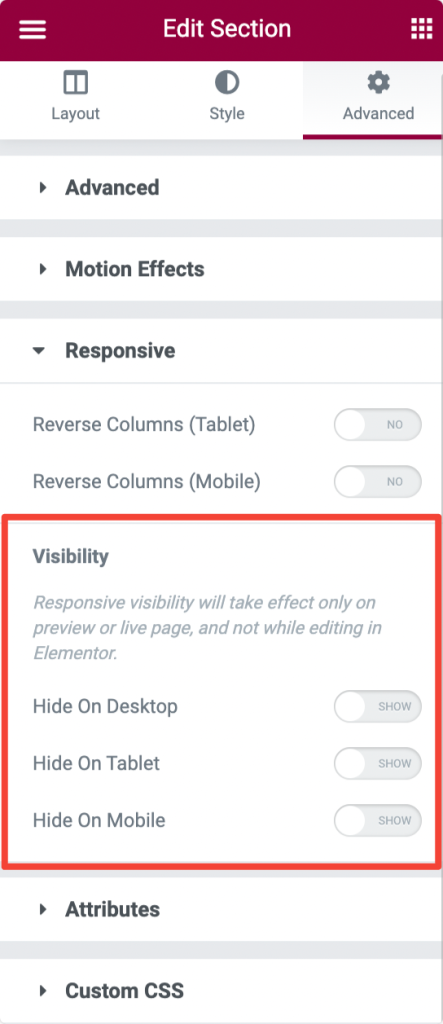
Show/Hide Sections/Columns Based on Devices (Desktop, Tablet, Mobile)
If you want to hide a particular section, column, or widget on a specific device, you can easily do it with Elementor.
- Head over to the Advanced Tab of your section, column, or widget.
- Now look for the option Responsive.
- Here you can see three options, Hide On Desktop, Hide On Mobile and Hide On Tablet, enabling these options per your preference.
How to Use Elementor Template Library
One of the great and most useful features of Elementor is the Elementor Template Library.
This library includes many pre-designed full-page and section templates that help you to get started with your first project.
Elementor not only gives us the flexibility of importing and exporting templates, but they also make it easy to reuse and save the same template for many projects.
This section will explain everything about Elementor templates, from using Elementor free templates to the Import/Export feature.
Using Elementor Free Templates
- To access Elementor templates, Click the icon 📁 in the Elementor editor.
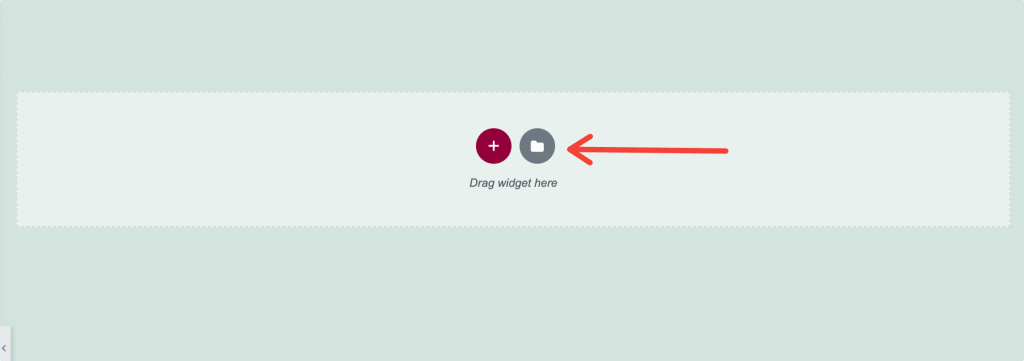
- After clicking the icon, a new window appears with the Blocks, Pages, and My Templates tabs.
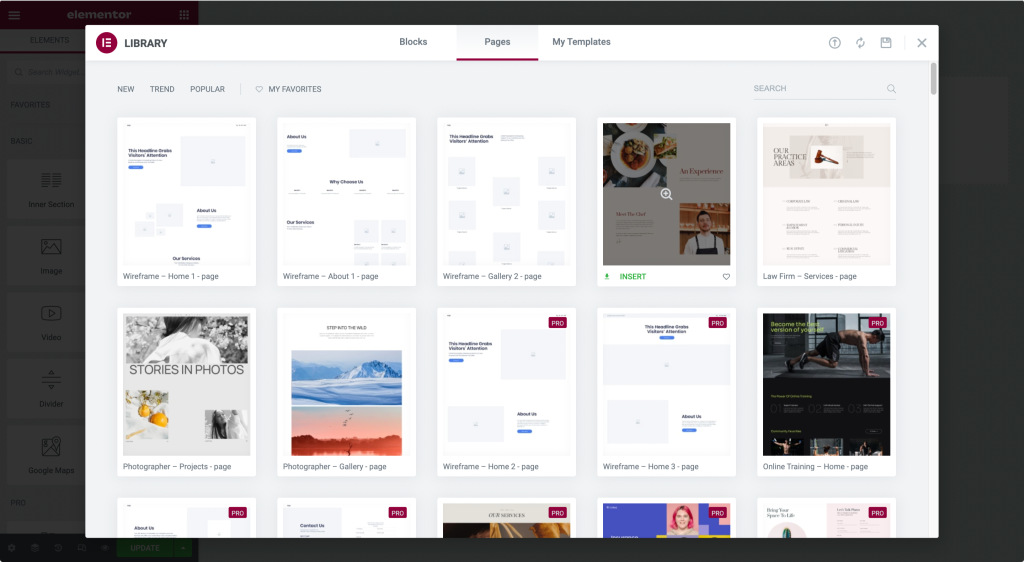
- Blocks are the Section Templates, Pages are the Full-Page Templates, and My Templates are the templates saved by the user.
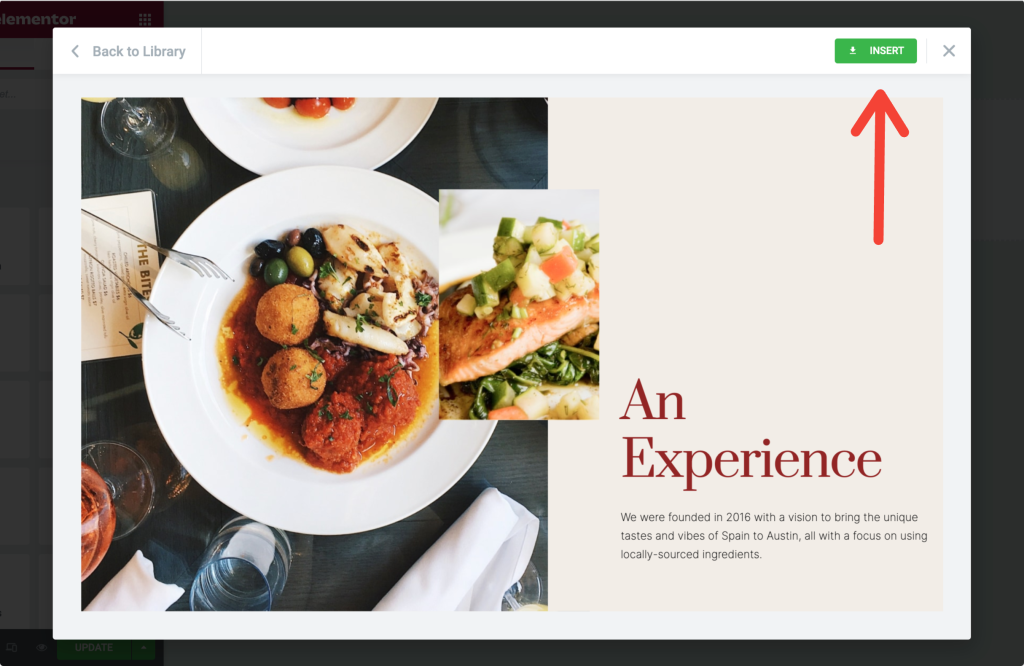
- Click the magnifying glass icon to preview a template.
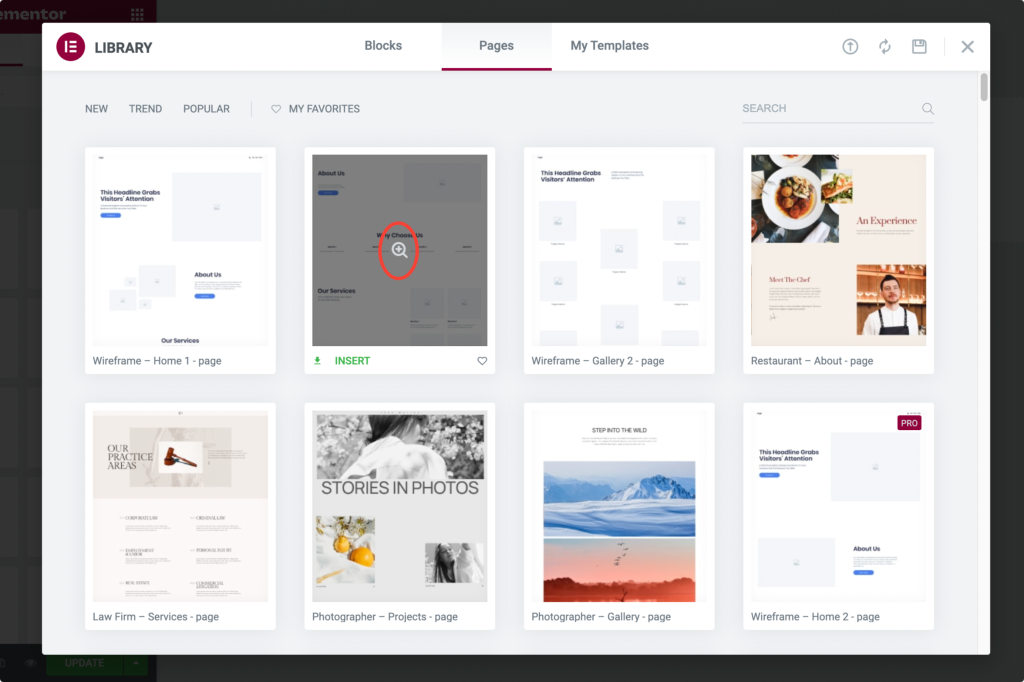
- Click Insert to add the chosen template.
If you are first time using Elementor, using templates from the template library requires you to complete a 2-step signup process.
Once you complete the process, the template is automatically fetched to your web page.
Save a Section as a Template in Elementor
Including the functionality, if saving a whole page as a template, Elementor gives us the flexibility to save a single section as a template.
Let’s say you have built a contact section on your page and want precisely the same section on every page of your website.
Instead of designing that contact section on every page, you can simply save it as a template and use it on every website page.
Let’s see how you can save a section as a template:
- To save a section as a template, choose the section you want to save and right-click on the Edit Section.
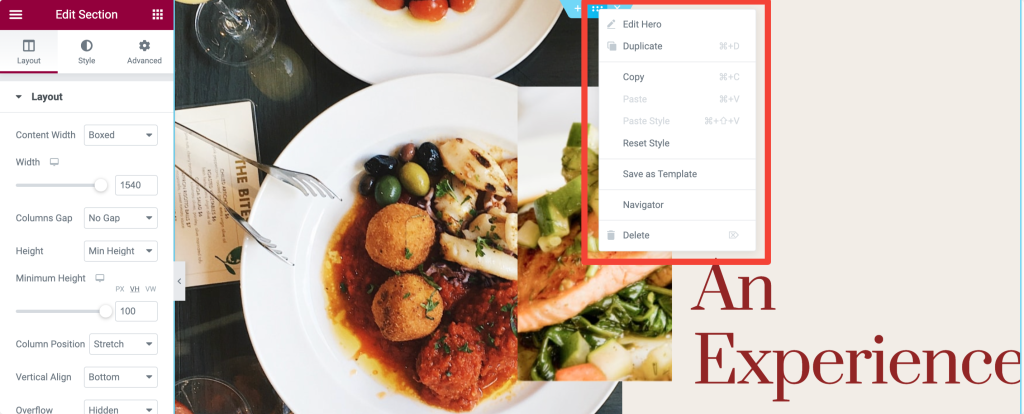
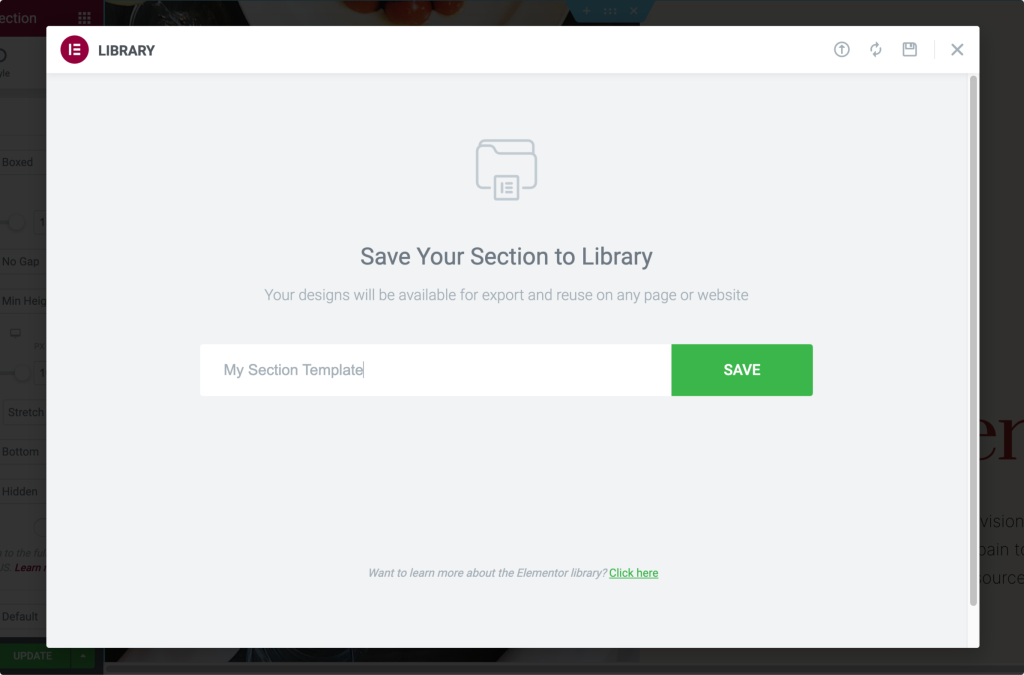
- After clicking the section, a menu appears with a few options; choose the Save as Template option. Give your template a proper name and save it.
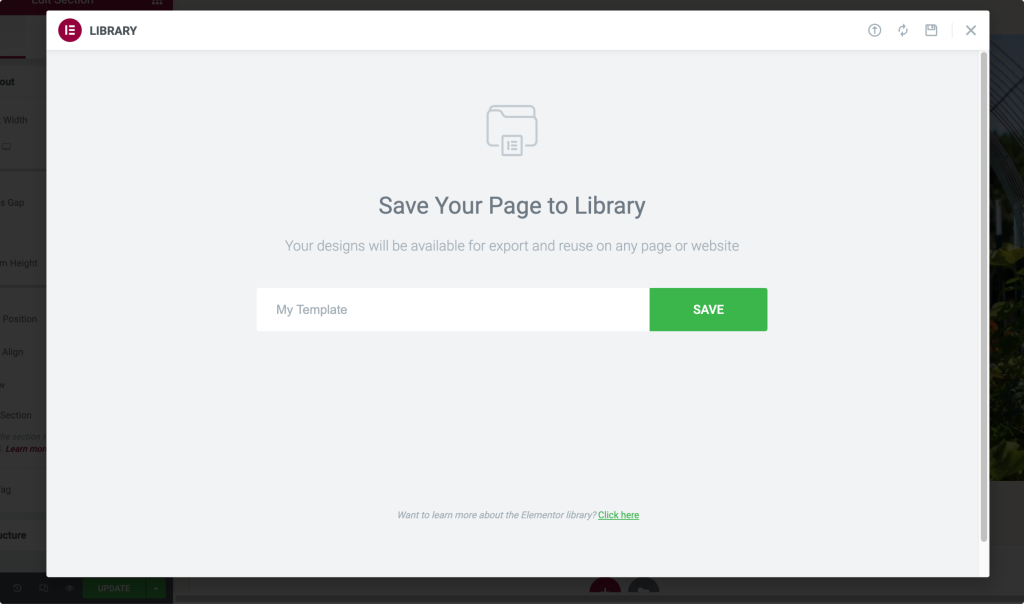
Save a Page as a Template in Elementor
- First, open the page with the Elementor Editor. Click on the Up Arrow icon in the bottom left of the page and select the “Save as Template” option.
- After clicking the option, a new window appears; give a name to your template and save.
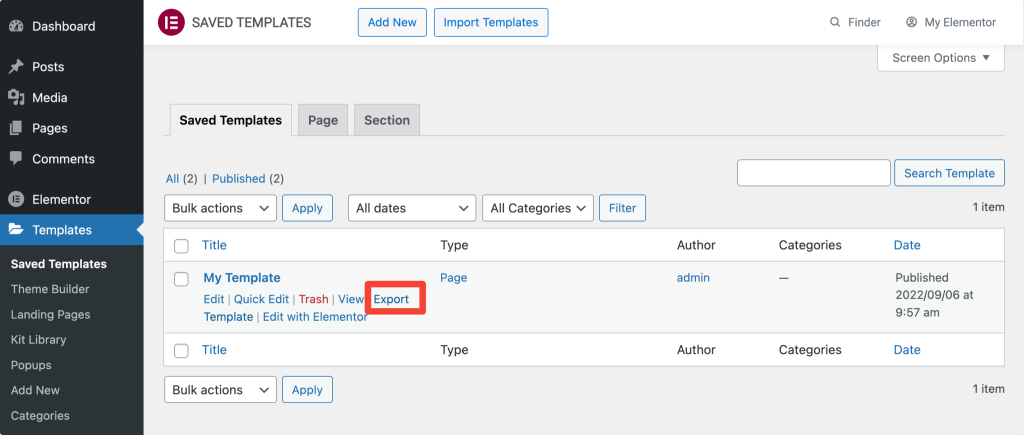
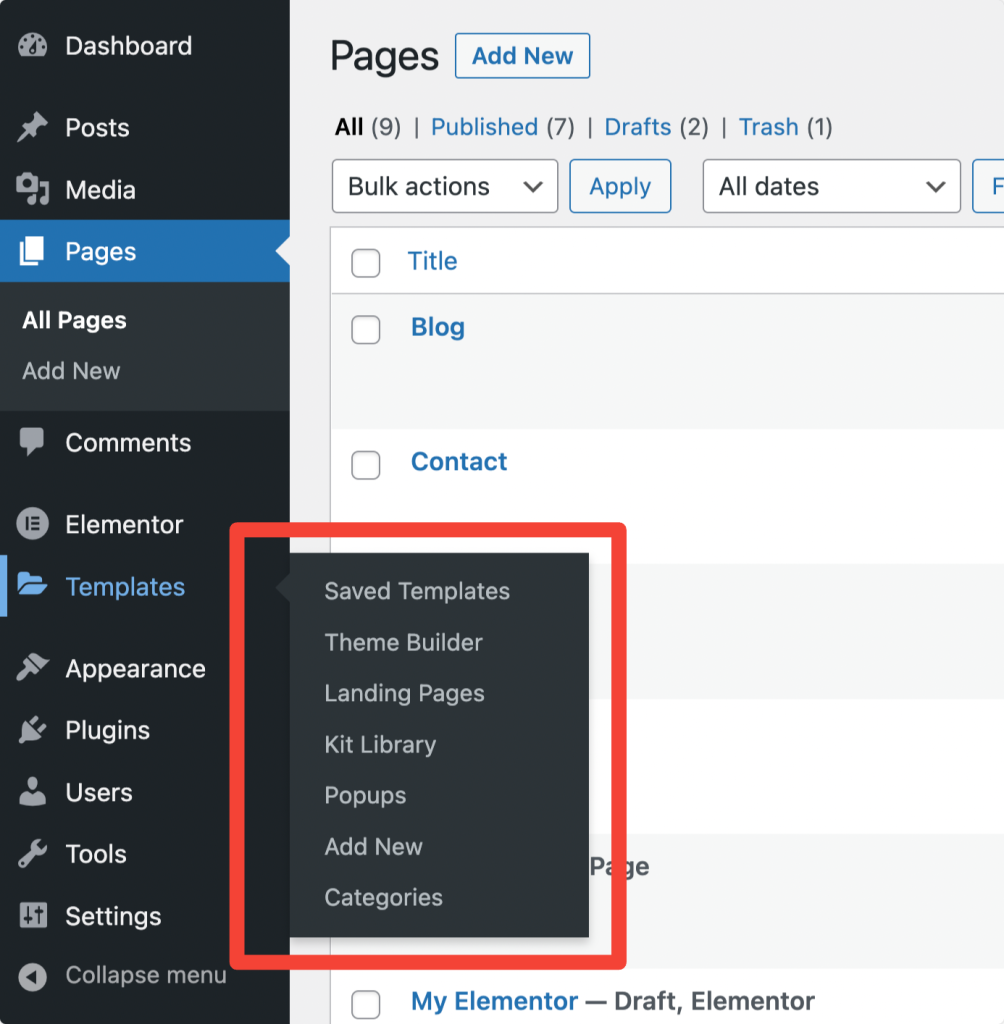
Export Elementor Templates
- You can export templates from the WordPress dashboard. For exporting templates, open WordPress dashboard>>Templates>>Saved Template.

- Choose the template and click the “Export Template” option.
- You can also export a template from the Elementor library. Open the Elementor library & click on the My template tab. Under My Templates, click the 3-dots at the right and click Export.
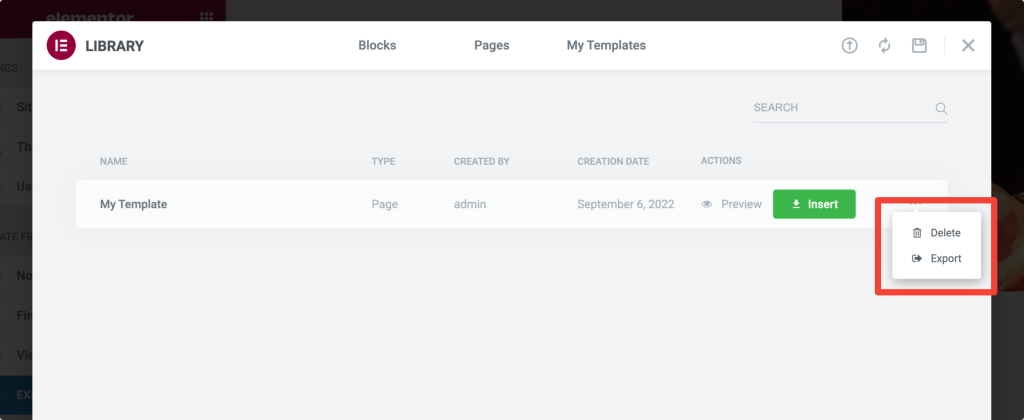
In both methods, your template file will be saved in JSON format.
Import Elementor Templates
- To import an Elementor template, first, open your WordPress Dashboard>>Templates>>Saved Templates.
- At the top of the page, select the option Import Templates.
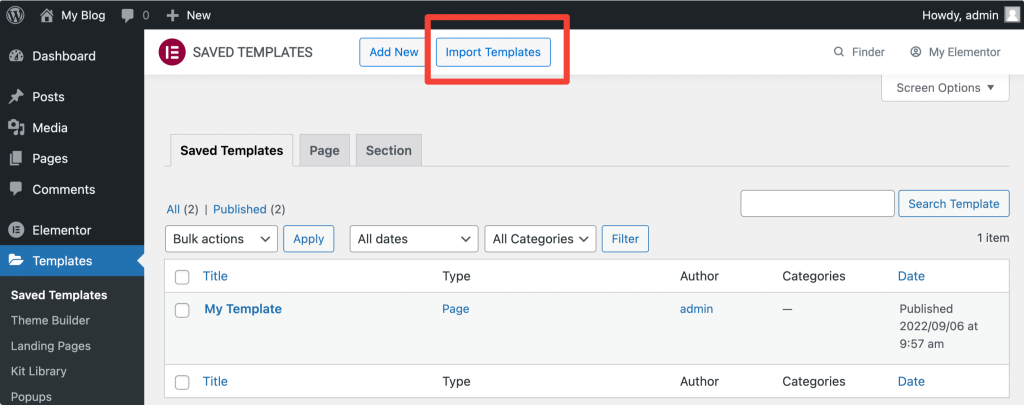
- Upload the JSON format file & click on the Import Now button.

Once you import the file, you can see it in your template list & can be used in any layout.
Elementor Tips & Tricks
In this section, I’ll share tips and tricks to help you improve your workflow with Elementor.
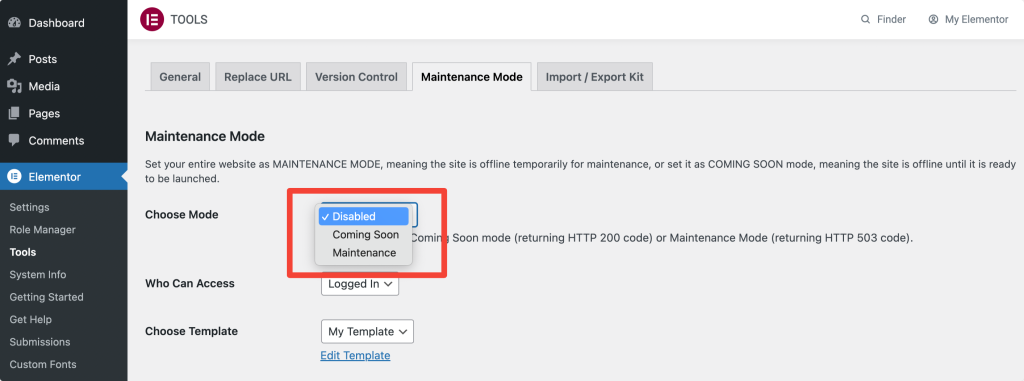
How to enable Maintenance Mode/Coming Soon in Elementor
If your website is under construction, with Elementor, you can display a custom maintenance mode page to visitors and send the right HTTP response to search engines.
To enable maintenance mode:
- Go to WordPress Dashboard, and click Elementor > Tools.
- Choose between Coming Soon and Maintenance Mode.
- Select the Template.
- Save Changes.
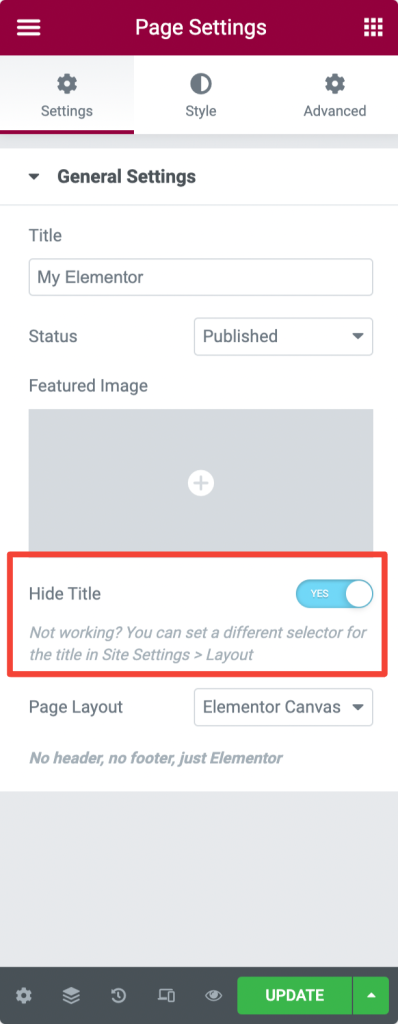
How to Hide the Page Title in Elementor
Right-click the settings icon ⚙️ on the bottom left corner of your page and enable the “Hide Title” option to hide your page title.
How to Duplicate a Column or Section in Elementor
Right-click on the Column or section and click “Duplicate.”
How to Create a Full-Width Section with Multiple Columns in Elementor
Click on Section Settings and enable the “Stretch Section” option in the layout tab.
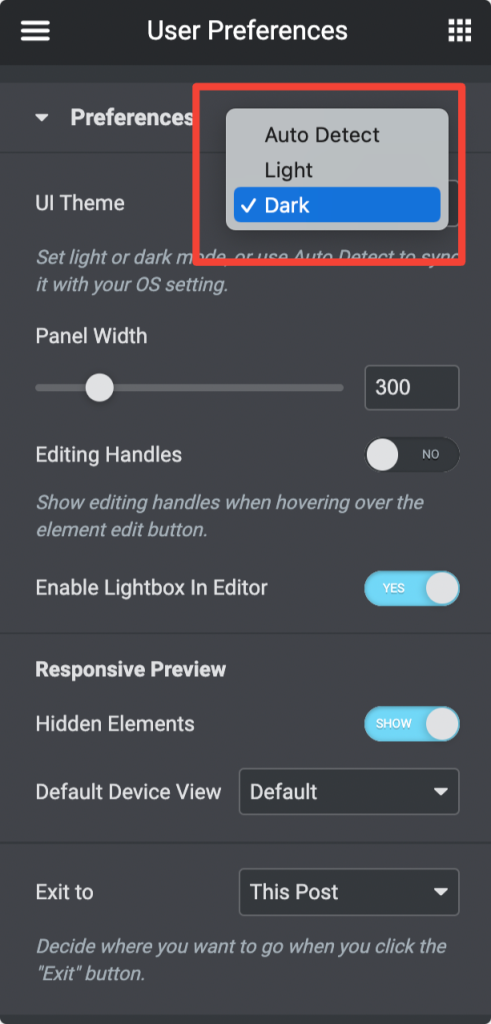
How to Enable the Dark Mode in Elementor
Elementor allows you to set UI Theme’s Light or Dark mode or use the Auto Detect option to sync it with your OS setting.
To change mode:
- Go to Elementor Widget Panel > Hamburger Menu > User Preferences > UI Theme.
- Choose Auto Detect, Light, or Dark as per your preference.
How to add Custom CSS using Elementor Free
Because we are using the Elementor free version, its Custom CSS feature isn’t supported. Worry not. I have a trick for you. You can easily add any custom CSS to your page using this trick.
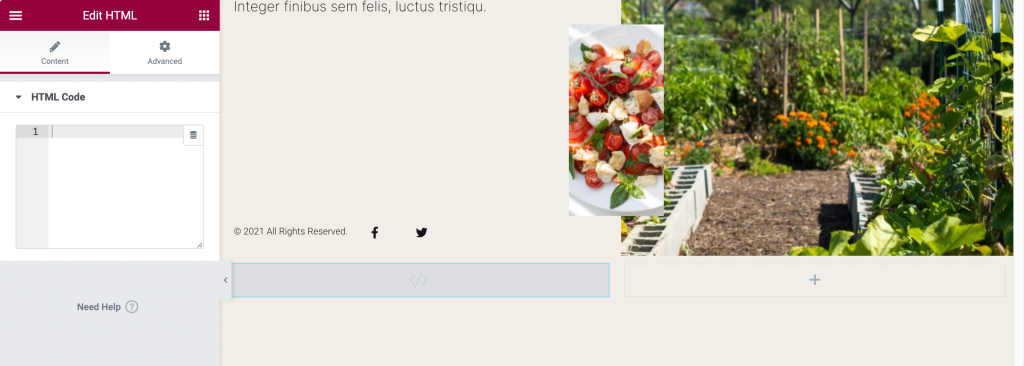
- Search for HTML elements in the Elementor widget area.
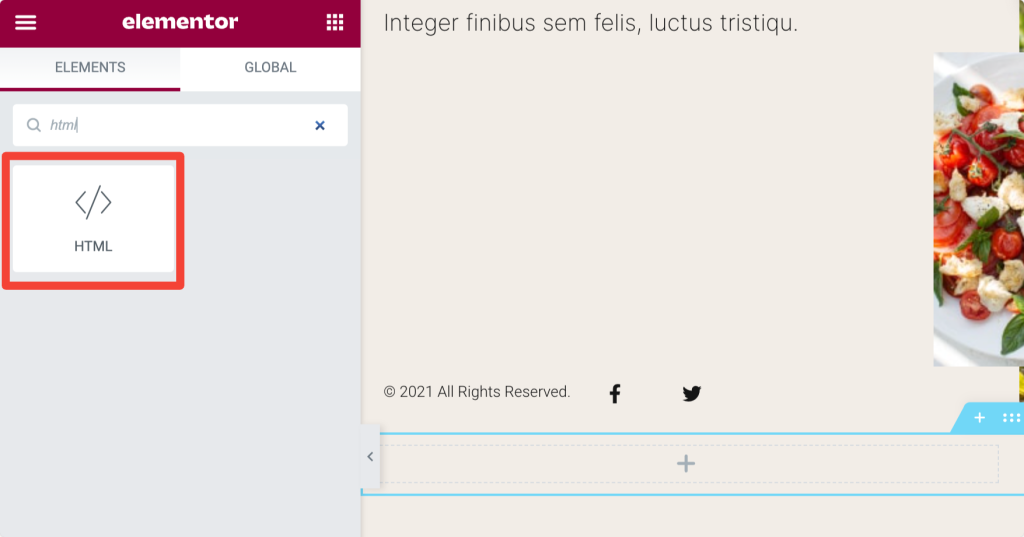
- Drag and drop the HTML element and click edit. Add your CSS Code and update the page.
How to Add Image Hover Effects in Elementor
Elementor offers the flexibility to add hover effects to any Widget, Column, and Section.
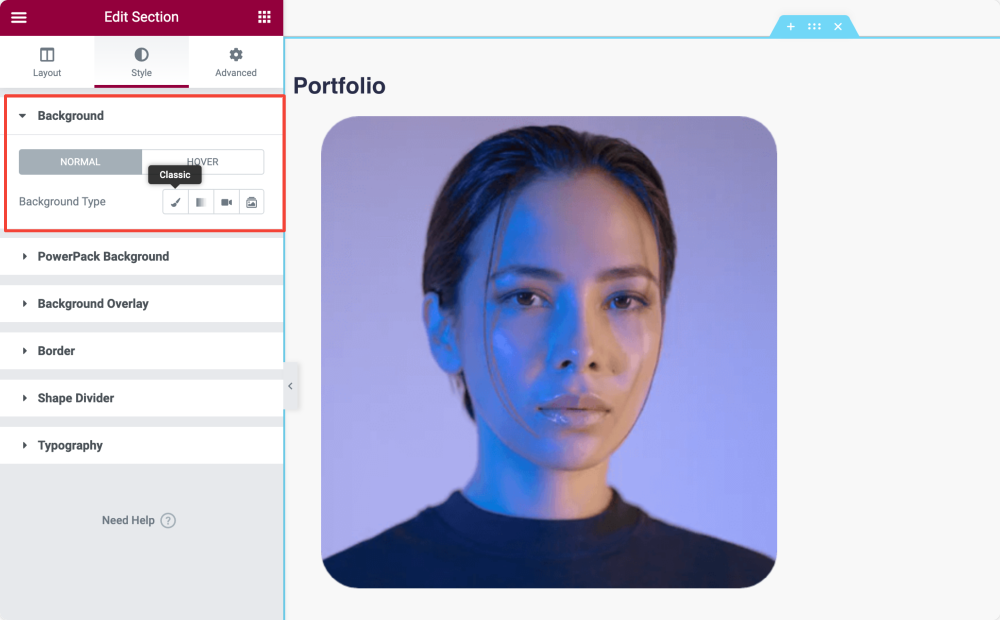
To add the hover effect to any image on your page, drag and drop the Image widget and go to the Style Tab.
In the Style Tab, under the Image subsection, you’ll see the Normal and Hover buttons.
Click the Hover button, and you’ll find multiple options to add hover effects.
You can:
- adjust hover effect opacity.
- set transition duration.
- and choose from the multiple effect types.
How to Change Background Image in Elementor
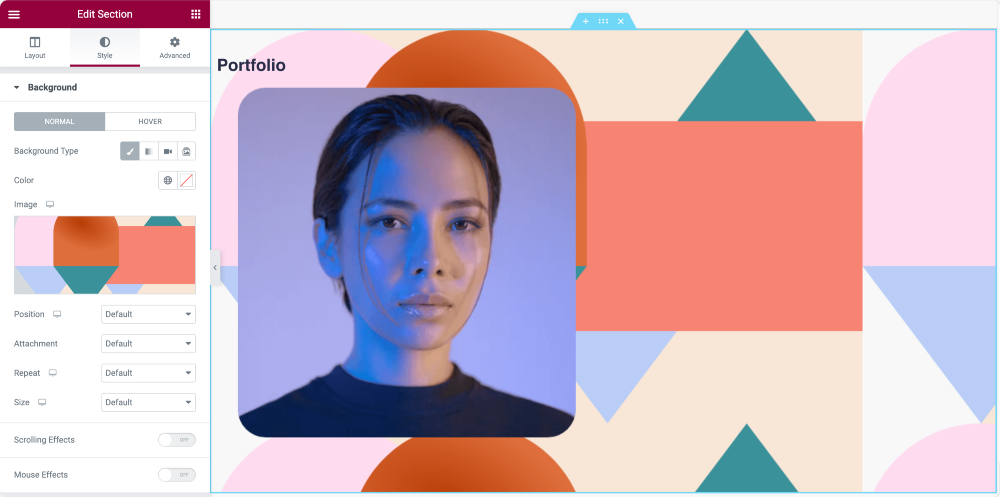
- Open the Elementor Section Settings.
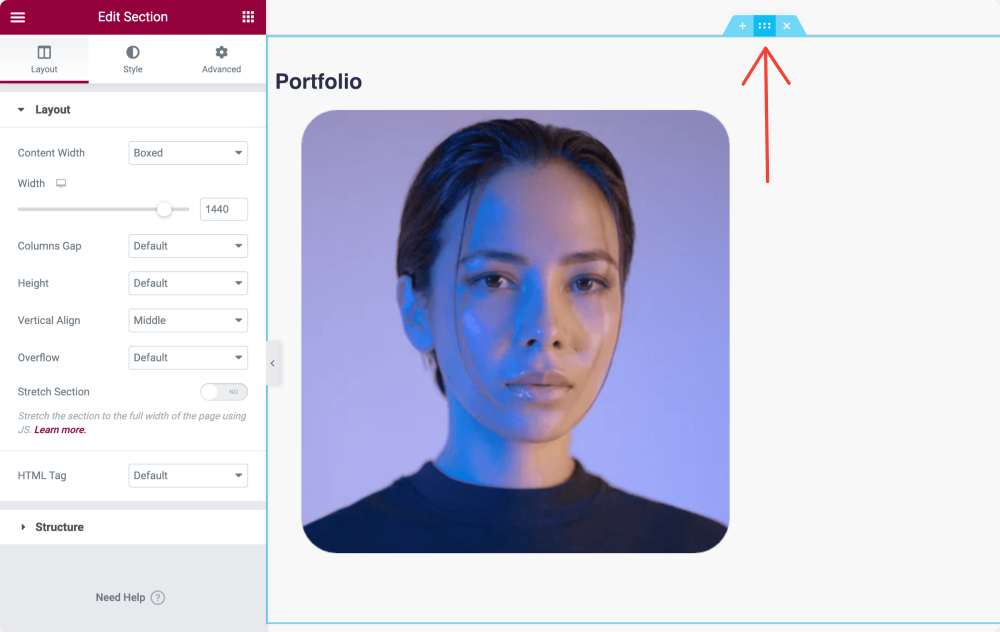
- Go to Style and choose Background > Background Type > Classic.
- Under the Image subsection, click the + sign and add your image.
How to Install the Elementor Hello theme
WordPress websites have three main components: Plugins, Templates, and Themes.
Now that you know the complete working process of the Elementor free version and Template functionality.
Let’s see how you can install and customize Elementor’s Hello theme.
Installing Elementor Hello Theme
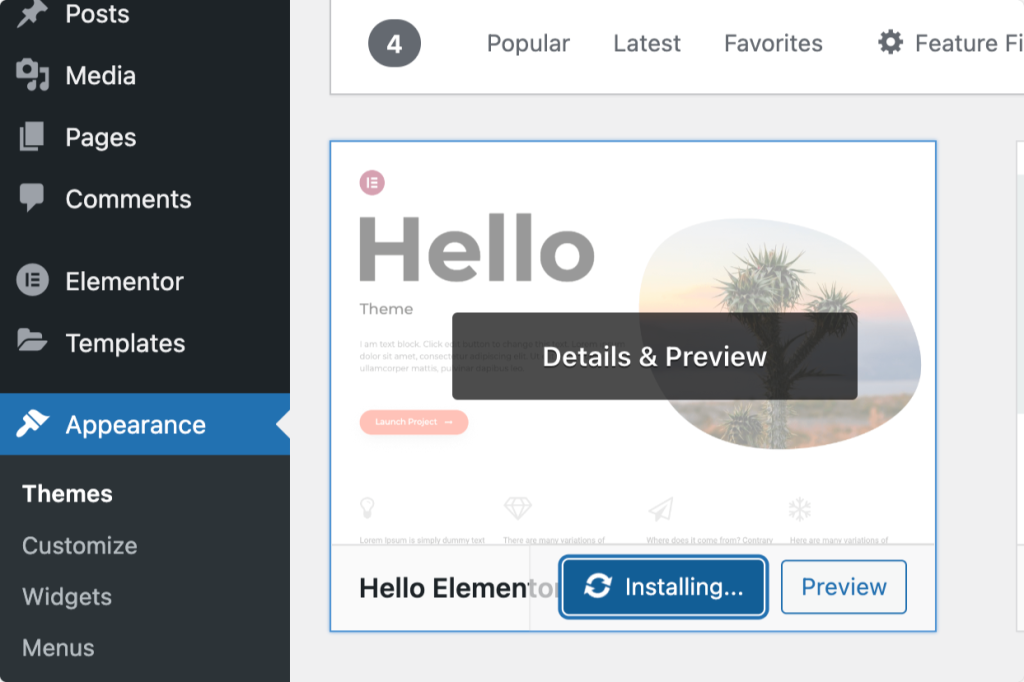
- Go to your WordPress Dashboard > Appearance > Themes.

- On the next screen, click Add New, and search ‘Hello Elementor.’
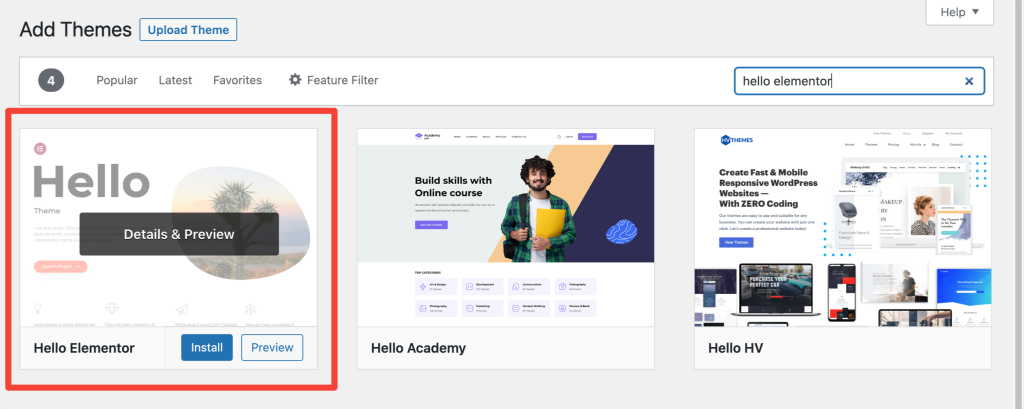
- Install and activate the Elementor Hello theme.
Next Read: Elementor Errors and How to Fix These
We hope this guide will help you to help get started and understand Elementor better.
To learn more about the Elementor page builder, you can check our popular guides on:
- Elementor Errors and How to Fix These
- Best WordPress Hosting for Elementor
- The Ultimate List of Best Free Elementor Learning Resources
If you find this list helpful, share it and drop a comment below if you have more queries!
Also, if you’re looking for fast-loading and creative Addons for Elementor, check out PowerPack Addons for Elementor. PowerPack comes with 80+ powerful and creatively designed widgets that help you build beautiful WordPress sites using the Elementor page builder.
Click here to get PowerPack Now!
