Do you want to create an author listing page on WordPress using the Elementor page builder?
A dedicated page listing all your site authors comes in handy if you have a multi-author WordPress website.
In this article, we’ll show you how to create an author listing page on WordPress using Elementor and PowerPack Addons for Elementor.
So let’s get started!
Features of PowerPack Author List Widget
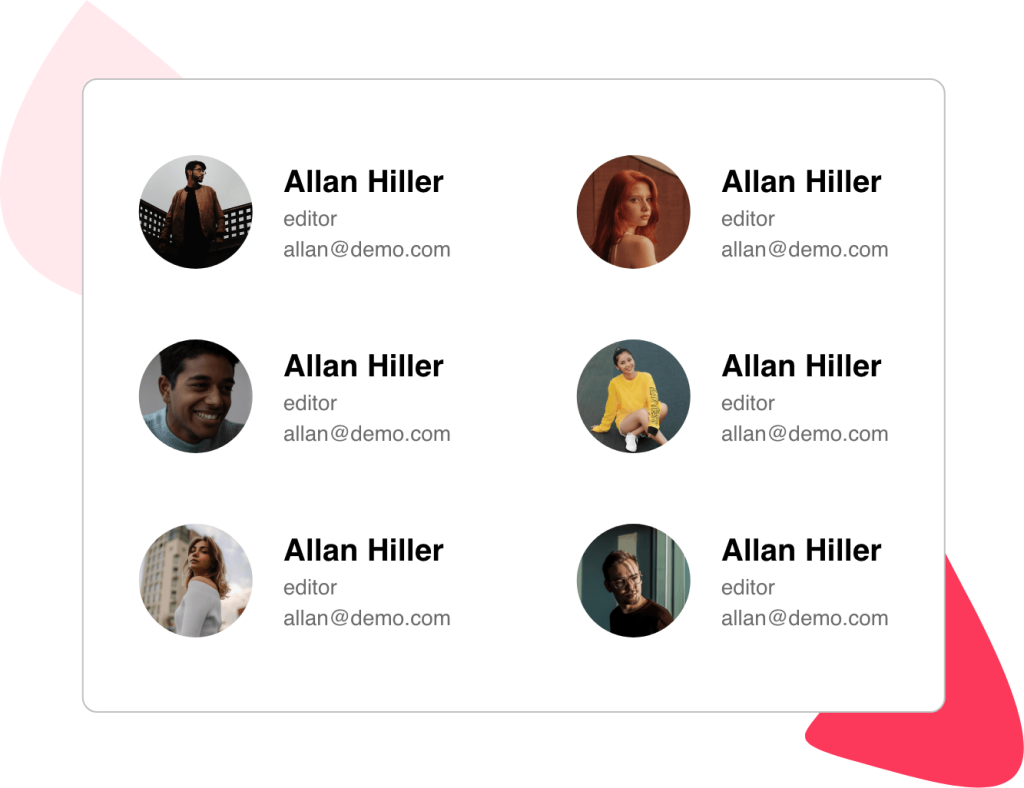
PowerPack is one the best addons for Elementor. It offers more than 80 creative widgets and 300+ customizable page & section templates.
Whether you want to embed an Instagram feed on WordPress, add a video gallery, or display a dedicated team member section, you can create it all and much more with the PowerPack widgets.
Speaking of the author listing page, PowerPack offers a creative Author List widget packed with advanced features & functionalities. This widget lets you create a fully customized WordPress authors page to list writers, team members, contributors, or any other type of participants.
The PowerPack Author List widget for Elementor allows you to:
- Create a WordPress author list based on Custom or Manual queries.
- Beautiful Layouts: Grid and List.
- Flexibility to display authors based on dynamic sorting & filtering.
- Multiple styling options
- And many more!
These are the key features of the Author List widget. Now let’s see how you can create an author listing page using Elementor and PowerPack.
Create an Author Listing Page on WordPress Using Elementor & PowerPack
Before proceeding, ensure you have installed and activated Elementor and PowerPack Elementor Addons on your WordPress site.
Step 1: Drag and Drop the Author List Widget
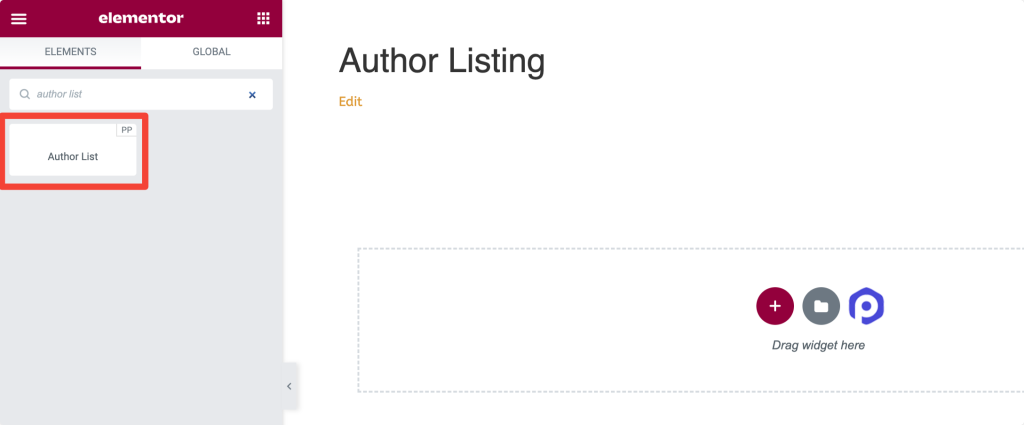
Once you installed both plugins, login to your WP website and open the page using Elementor editor.
Next, search for the Author List widget in the search bar and drag and drop the widget on the page.
Step 2: Customization Options in the Author List Widget Content Tab
As soon as you add the Author List widget on the page, you’ll automatically display a list containing all your site’s authors.
Select the Source
By default, the authors’ fetching source is Custom Query. This will display all your site’s authors on the page.
You can exclude/include authors based on their WordPress user role.

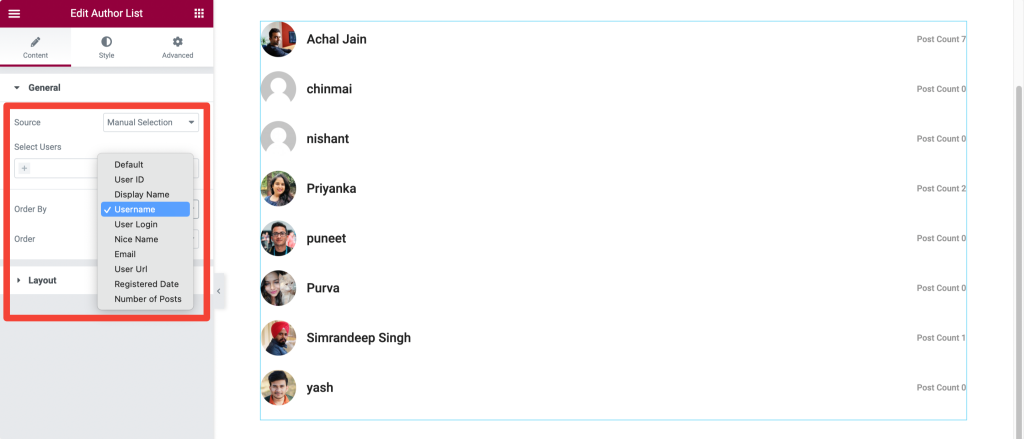
If you want to customize this list with specific authors, you need to select the source as Manual Selection and then select authors per your preference.
Once you have selected the authors, you can order this list with parameters such as User ID, Display Name, User Name, etc.
Choose the Layout
Once you choose your source query, you need to select the layout for your author list. You get two layout options in the Author list widget: Grid and List.
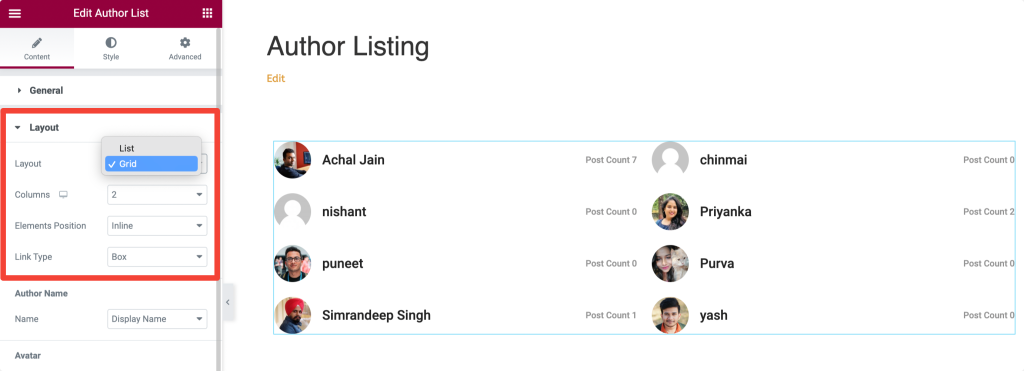
WordPress Author Listing Display: Grid Layout
WordPress Author Listing Display: List Layout
Choose your preferred layout and navigate to the Style Tab.
Step 3: Customization Options in the Style Tab of the Author List Widget
Like every PowerPack widget, in the Author List widget, you get plenty of styling options to customize every single element of your author list.
You get options to style everything, from adjusting the margin border to altering typography, from changing colors to adding box-shadow.
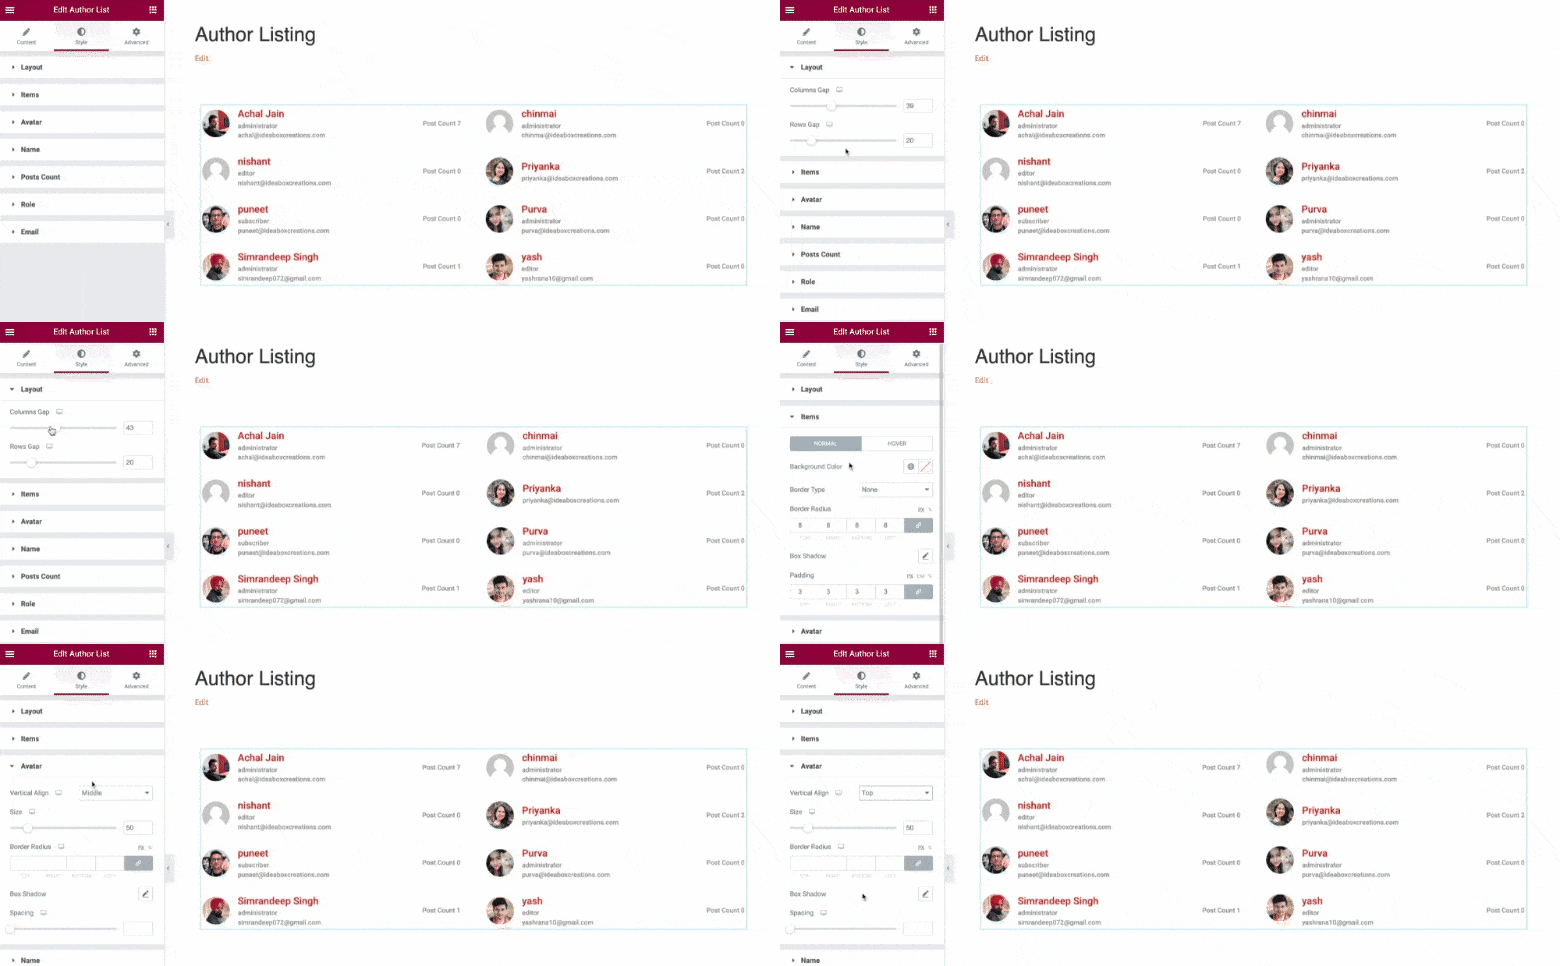
All the styling options in the Author List widget are self-explanatory and easy to use. This means you don’t need to add custom CSS to style the elements.
You can design the page the way you want within a few clicks!
Next: Display Google Reviews on WordPress Using Elementor
We hope this tutorial helps you create a customized and dedicated author page to list your writers, contributors, and team members on WordPress using Elementor.
Next, if you’re looking for a simple way to add Google reviews on WordPress using Elementor, you can check out a step-by-step guide on how to display Google reviews on WordPress using Elementor.
Click here to get the PowerPack Author List Widget for the Elementor page builder.
