Wanted to add a section divider to your WordPress website?
Section dividers help create clean, crisp, and professional-looking web page designs. If you tend to publish long posts/pages, section dividers let you break your long pages and posts into smaller sections, making it easier for your readers to navigate through web page content.
In this article, we’ll show you how to add fancy dividers without any code.
Add Fancy Section Dividers to Your WordPress Websites Using Elementor & PowerPack Addons
Section dividers are often called shape dividers in WordPress. And as the name says, these shape dividers let you add various types of interactive shape dividers between your page sections.
However, in order to create dividers that perfectly match your existing page design requires prior design and coding knowledge.
If you’ve got a WordPress website built with the Elementor page builder, adding section dividers to your website is relatively easy!
Today we’ll see how you can add fancy section dividers to your websites using Elementor and the Divider widget by PowerPack Addons.
PowerPack Addons is one of the best addons for Elementor available in the market. You can enhance the built-in functionality of Elementor and create your dream websites using PowerPack 80+ creative widgets and powerful extensions.
Using the Divider widget of PowerPack, you can add creative and fancy dividers to your web pages – without spending any penny.
So without any further ado, let’s see how you can creatively fill the blank spaces between your page sections.
Before starting, ensure you have installed and activated Elementor and PowerPack Addons on your websites.
Step 1: Open the Page in Elementor Editor
First, create a new page or open an existing page using the Elementor editor.
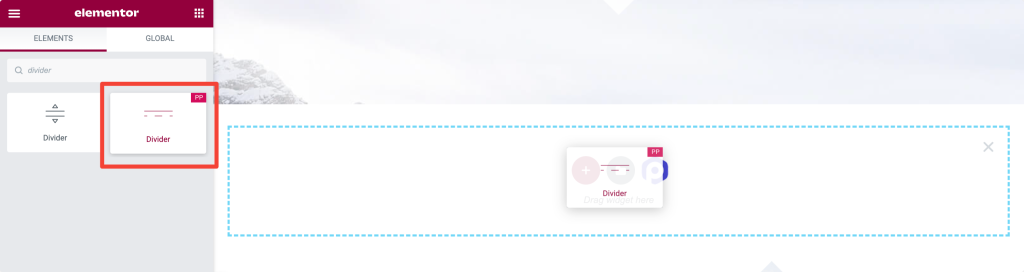
Step 2: Drag and drop the Divider widget
Next, drag and drop the Divider widget on your page section. Make sure to check the “PP” icon on the top left corner of the widget.
Step 3: Choose Your Divider Type
Like every PowerPack widget, the Divider widget also consists of 3 tabs.
Content, Style, and Advanced tab.
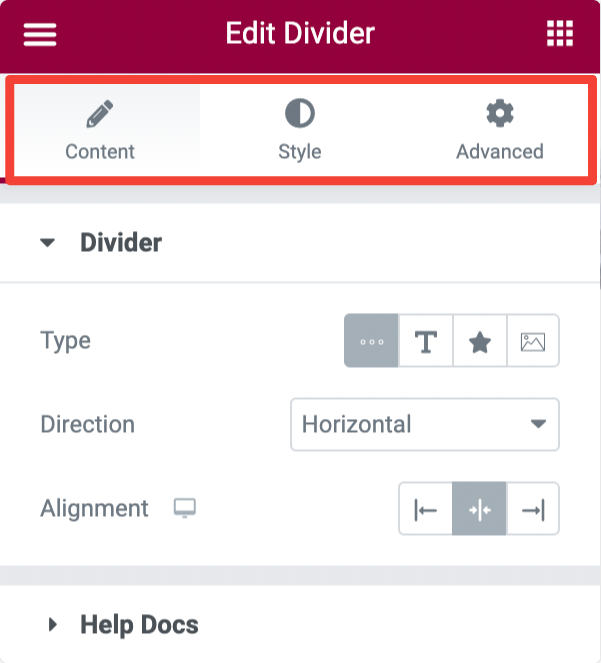
In the Content tab, you’ll find an option to choose the Divider type for your page.
With the PowerPack Divider widget, you can add:
- Plain Divider
- Divider with custom text
- Divider with custom image
- Divider with icon
Plain Divider
If you choose the Plain Divider option, further you get options to:
- Select the Direction of the divider. You can either create Horizontal Divider or Vertical Divider as per your preference.
- Set the alignment of the divider to be Left, Center or Right.
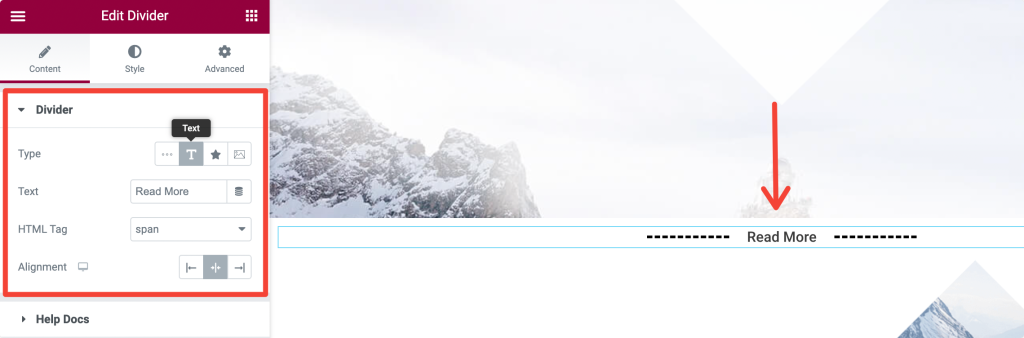
Divider with Custom Text
If you don’t want to add simple-looking plain dividers, you can also add a divider with custom text.
Divider with Icon
Want to go more creative with dividers? Create a stylish icon divider to enhance the look of your web page.
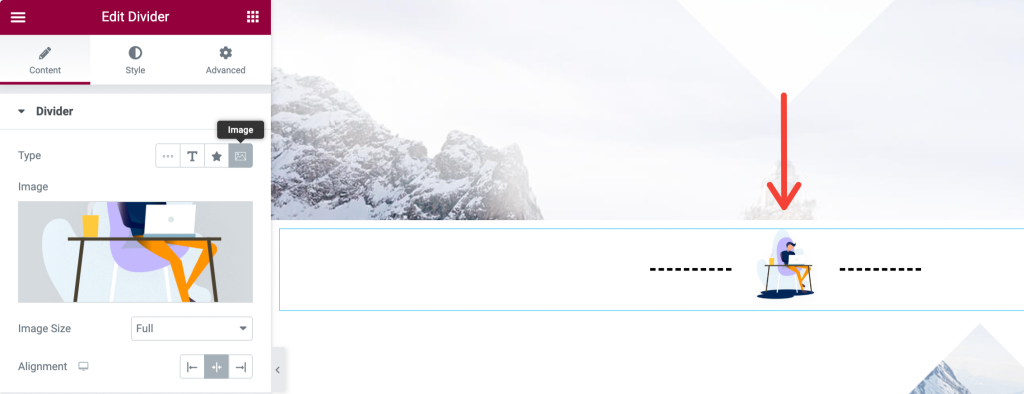
Divider with Custom Image
Last but not least, the PowerPack Divider widget lets you use a custom image with a divider.
As you can see, the PowerPack Divider widget’s Content Tab options are straightforward. Next, move to the Style tab for divider customization options.
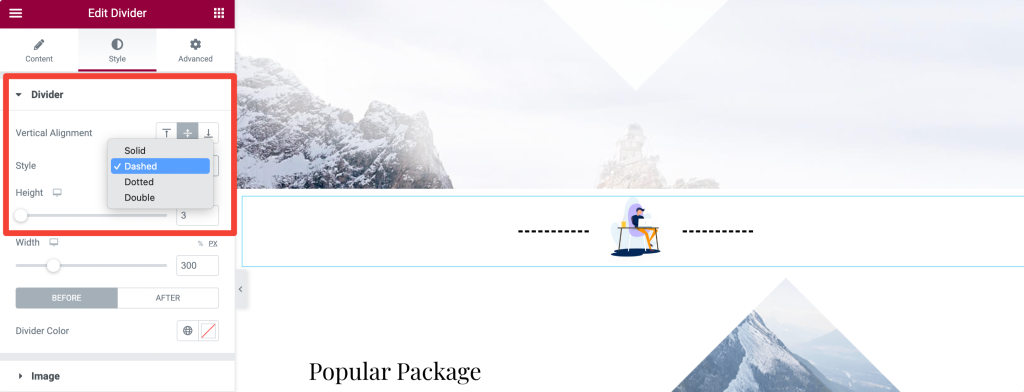
Step 4: Style Your Page Divider
In the Style tab, you get an option to choose the Divider style. You get four different divider style options:
- Solid Divider Style
- Dashed Divider Style
- Dotted Divider Style
- Double Divider Style
You can mix and match Divider Type and Divider Style to create some beautiful divider designs. For instance, you can create a:
Solid Divider with Custom Text

Dashed Divider with Custom Image
Double Divider with Icon
Other divider styling options depend on the divider type you chose in the Content tab.
For example, if you choose the Plain Divider type, you can style it by adjusting the divider’s Height, Width, and Color.
If you create a divider with a custom text, you can customize the text by changing its font, size, color, and more.
The icon divider type allows you to adjust the icon’s alignment to be left, center or right.
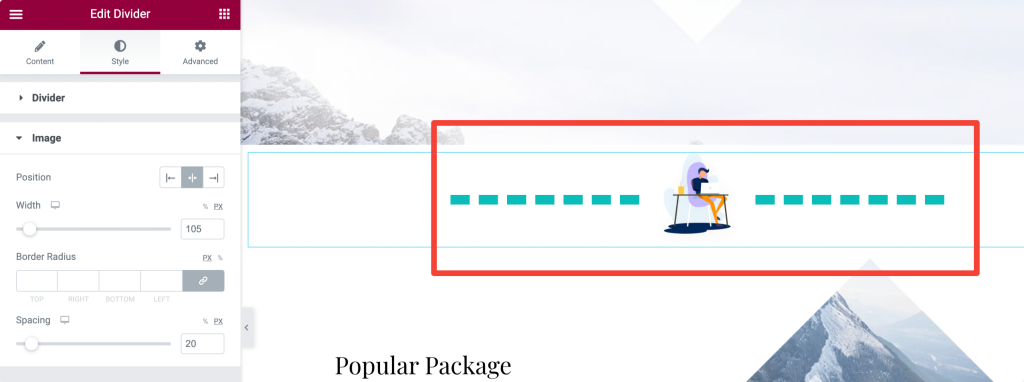
And if you uploaded a custom image, you get options to choose the ideal size of the image wrt to divider style.
And that’s it! This is how you can create fancy section dividers for your WordPress sites using Elementor and PowerPack.
Next, Add a Custom Cursor in WordPress With Elementor
PowerPack Addons is your one-stop solution for creating creative websites using Elementor. With its Lite version, you get features to build basic functioning websites. To add more innovative and advanced features to your WordPress sites, subscribe to PowerPack Pro.
Next, if you get bored with the default mouse cursor, and looking for a simple way to customize the cursor on your web pages, check out our article on how to add a custom cursor in WordPress with Elementor.
We hope this tutorial will help you create interactive and beautiful dividers on your website.
Click here to get the PowerPack Author List Widget for the Elementor page builder.
