Restricting Content with Elementor granularly was not an easy task until now. But now, with the Display Conditions feature of PowerPack, you can define when widgets or sections appear on your website’s pages. In this article, I will show how you can restrict content on your Elementor website using PowerPack’s Display Conditions feature.
There are many instances where you don’t want to show your website’s content to the viewers. Instances like running coupons on Specific Dates, Download Links, or showing My Account to logged-in users.
In that case, Elementor does not provide a lot of options. If you want to restrict some content on your page or website, you will need PowerPack Addon for Elementor. PowerPack has an ingenious tool that allows you to set up rules restricting widgets or sections. We will use this feature in this tutorial and look at different scenarios where you can use this feature.
By the end of this blog, you will be able to easily restrict content on the elementor pages with the Display conditions feature of PowerPack.
If you do not know how to use this feature, you can follow along with this tutorial or check out this quick guide. If you would rather watch a video, you can check it here:
Restrict Content with Elementor
Here, we will look at different scenarios where you can benefit from restricting content from your users. We will also look at the steps on how that content can be restricted using PowerPack’s Display Conditions feature.
Let’s dive in!
Scenario 1: Running Limited Time Deals and Offers
If you want to run offers or discounts on your website, you would want them to run on some specific dates or duration, right?
Also Read: How to Create a Coupons/Deals Page Using Elementor?
For that, you can enable the Display conditions for the coupon code section, set the condition as “Current Date,” and enter the duration of the dates for which you want to run the deals on your website.
How to do it?
Open the section or widget settings of the page on which you want to run deals and go to Advanced > PowerPack Settings. Now enable the Display Conditions option and select the first parameter as “Current Date” from the dropdown list.
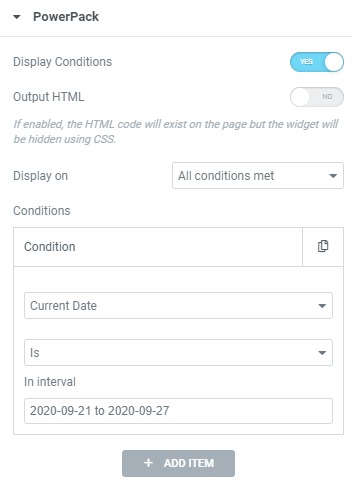
Since we want our offer to run on a specific date range, select the days you want to run your deal on.
Doing this will make the element appear only when the condition is met, and the offer will automatically hide when the current date exceeds the set date.
Scenario 2: Restricting Content from Logged-out Users
If you want to hide some elements on your websites from logged-out users, like the “My Account” button on the header or the Profile page, you can do it too.
For this, we will be using the Logged in status parameter to restrict the buttons or any other elements.
How to do it?
As we did earlier, enable the Display Conditions option from the Advanced Settings of the widget/section you want to restrict.
Now select the parameter “Login status” and set the other two parameters to “is” and “Logged in”

This will make the elements appear only when the user logs in to the website. Otherwise, the restricted elements will not be displayed.
Scenario 3: Restricting Content on Single Pages
Do you wish to not show an element in the footer or a popup on the specific blog pages? You can do that using the Single Pages Condition.
With this parameter, you can make an element/section appear or not appear on specific pages.
How to do it?
For this, enable the display conditions to feature you wish to show or hide. Now, set the condition to any singular subcategory. You can select Post, Page, Post Type, or Static Post.
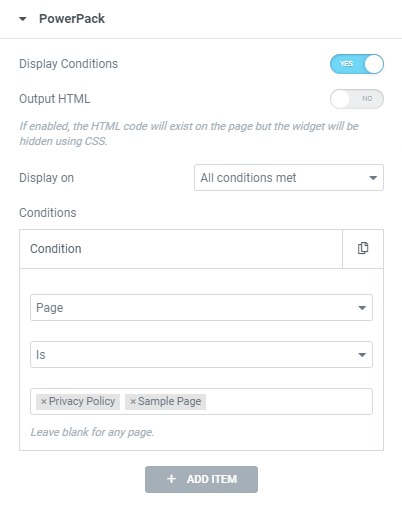
Once that is done, search and select the single page you want to exclude or exclusively include. This will make the element show/hide on specific pages.
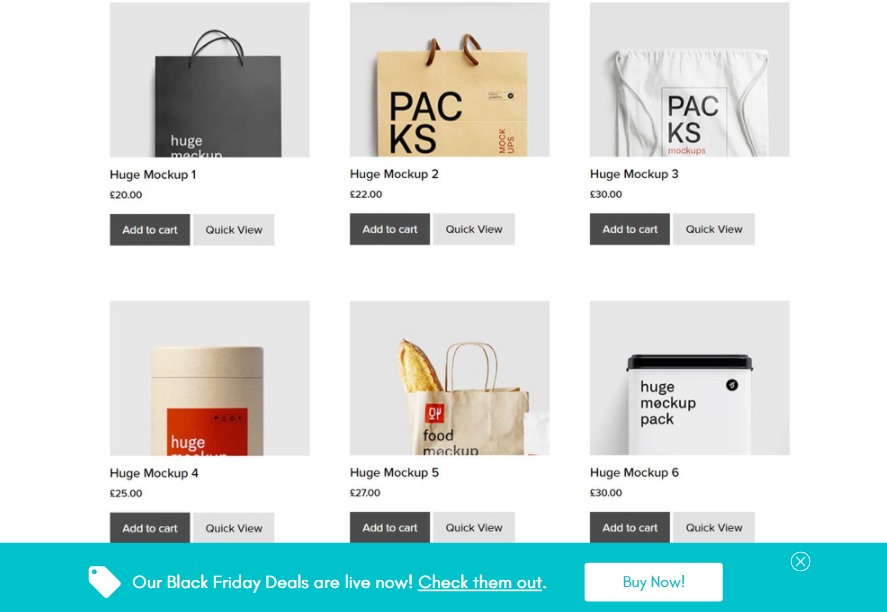
Scenario 4: Upsell or Display Special Offers for Existing WooCommerce Customers
Yes, even this is possible. If you want to upsell to your eCommerce store customers, you can do it using the User Role parameter.
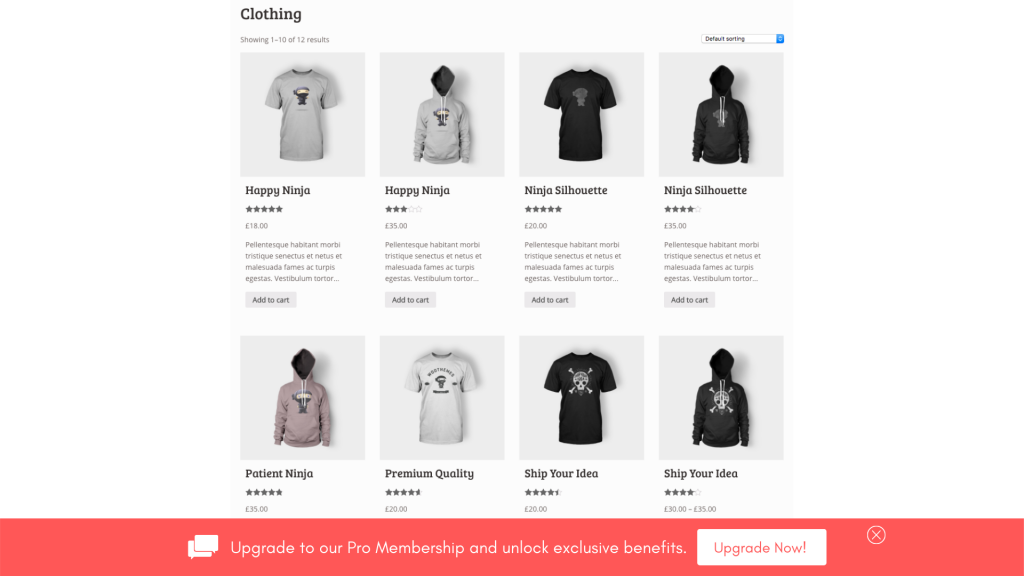
You can place a section at the bottom of the Cart Page or the products page. Then it will appear only to the existing customers.
How to do it?
Enable the Display Conditions for the upsells section. You can create this section using the WooCommerce Products widget. Then, you can limit the number of products to 2-3 depending on the number of products you want to promote.
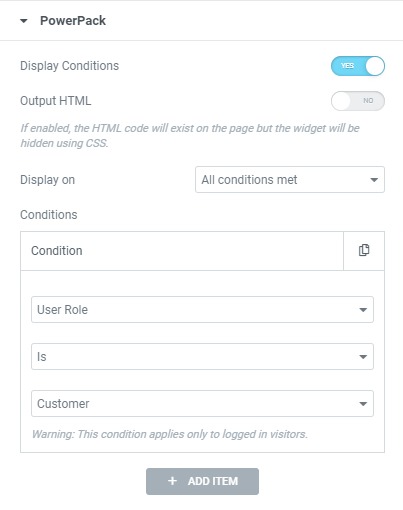
Now select the Condition as “User Role” and set the parameters to “is” and “customer.” This will make the upsells section appear only to existing customers.
Scenario 5: Displaying “Download for iOS/Android” Icons for Respective Operating Systems
If you are customizing a mobile app landing page and want to show your users an icon depending on their device, you can do it using the “Operating Device” Condition.

The Operating System condition restricts the content based on OS like Android, Windows, MAC, OpenBSD, or Linux.
How to do it?
Enable the Display conditions from the Advanced tab for the download link section. Now add the condition as “Operating System” and other parameters as “is” and “android.”
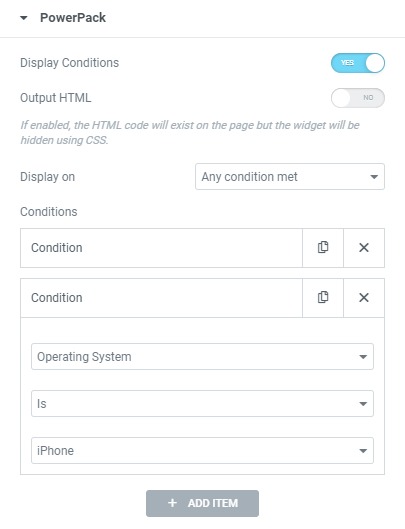
If you want to show the same section on the iPhone OS, you can add another Operating System condition and set the parameter to “iPhone.” Make sure you change the “Display on” parameter to “any condition met” to make the section appear when any conditions are satisfied.
Scenario 6: Restricting Content on the basis of Browser Type
What if you want to restrict some content on the basis of Browser Type? Well, that is possible, too. This can be useful when you want to show content targeted towards that particular browser.
If you have created a landing page for your Chrome or Firefox addon, you can restrict the download button automatically and make it appear for the related browsers.
How to do it?
To restrict content with Elementor on the basis of Browser type, enable the PowerPack’s Display conditions for that specific widget or section.
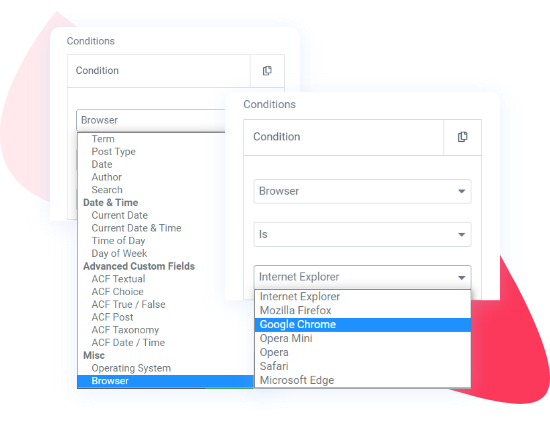
Select the criteria as “Browser” and set the next parameter to “is.” Now select the browser on which you want to show your content. If you have a Chrome extension landing page and want the download link to appear only on the Chrome Browser, you can do it by setting the third field to “Google Chrome.” This way, the widget/section will appear only on the Chrome browser.
Also Check: WooCommerce Display Conditions For Elementor
Scenario 7: Hide/Show Content on Specific Post Types
If your website has custom post types, you can make an elementor section appear/disappear on it with the Post Type condition. This will remove or display a widget/section on all the pages of that specific post type.
How to do it?
For this, enable the Display Condition for the widget/section. Now select the condition as “Post Type,” then set the next parameter to “is,” and then select the post type you want the element to show on.
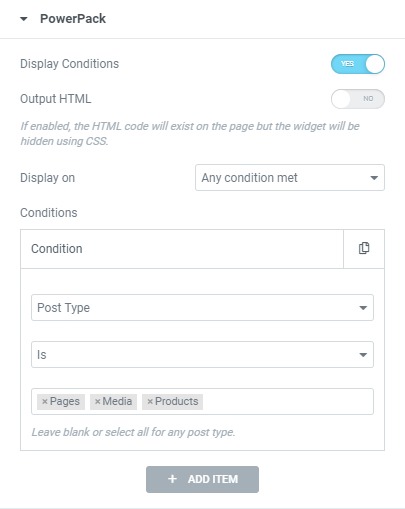
Doing this will show the element only on that post type. This is useful for displaying sales banners or other popups on product pages.
Scenario 8: Showing popups only on Product Archive Pages
Like Post types, you can also restrict content to set archive pages. If you want to show discount notifications or “recently bought” popups to boost the sale of the products, you can do that by showing the popups only on archive pages.
How to do it?
This can be done by first enabling the display conditions feature for the section. Now select any condition from the Archive category. You can go with Taxonomy, Term, Post Type, Date, Author, or Search.
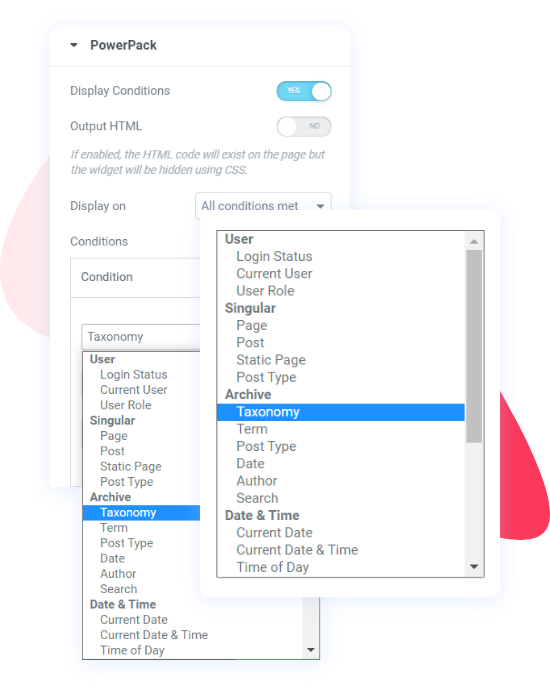
I am selecting “Taxonomy” from the list and setting the third parameter to “Product categories”. This will make the section appear only on the product category pages on the website.
Scenario 9: Running Weekly Offers and Discounts
Who doesn’t like Friday freebies or weekend offers? However doing them manually and updating the website weekly for deals and freebies can add considerable work.
With Display Conditions, you can set a rule that will display the content only on specific week dates.
With this condition, you can make a content block/section appear only on the weekends or any other day of the week.
How to do it?
Enable the Display Conditions option for the freebies banner section and set the condition to “Day of Week.” Then, set the third parameter to the days you want the deal to show on.
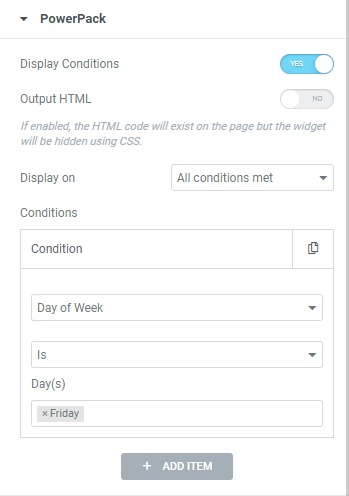
For example, if you wish to show the deals only on Fridays, select Friday from the list and the banner will appear only on Fridays. You can choose multiple days as well.
Scenario 10: Showing Happy Hours Deals
If you are seeing downtime in traffic and conversions on your website during a period on a standard day, you can start running happy hour offers to boost conversion during those hours.
You can use the Time of Day parameter to restrict the content to show daily during those hours.
How to do it?
Enable the Display Condition feature for the happy hours’ information page/banners to do this. Now set the condition to Time of Day, and in the third parameter, set the end time of the deal.
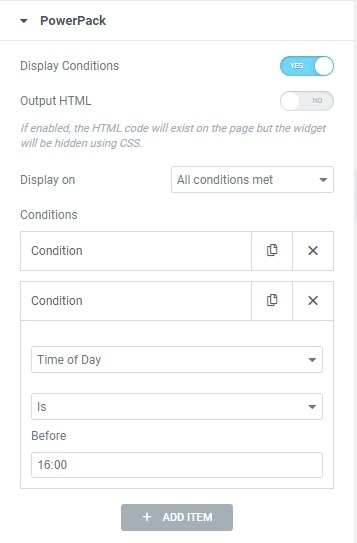
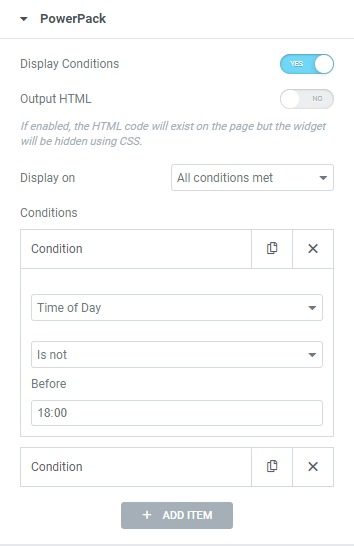
Now add another condition and again set the condition to Time of Day. This time, set the second parameter as “is not” and enter the deal’s start time in the third field.
Make sure you add those two conditions so the Display On is set to “All Conditions Met.” This way, the banner/info page will appear only on those set hours every day.
More Ideas for Restricting Content Using Elementor?
These are just a few examples of how you can restrict the content on your website pages using PowerPack’s Display Conditions feature. You can limit content display on the basis of many more parameters. You can check those parameters in this list of Display Conditions.
Again, if you want to check out the video tutorial for Display Conditions, you can check it out here.
Using Multiple Conditions Together!
You can even mix and match multiple conditions for the same elementor. For example, if you want to run a deal on a specific date and show it to only logged-out users, you can do it by adding 2 different conditions for Login Status and Date parameters. You can mix and match other conditions as well!
Apart from the Display Conditions feature, you get a lot more with the PowerPack Addon for Elementor. You get 70+ widgets and a loaded library of professionally designed templates that you can use to enhance your elementor workflow.
If you wish to learn more about PowerPack, you can check here.
Do let me know if you found this article useful. Also, tell me which condition you use the most in the comment section below!

2 thoughts on “How to Restrict Elementor Content with PowerPack’s Display Conditions”
Hi.
How to restrict content product base on Bought current product?
Hello,
I would like to restrict a part of my blog post, if the reader wants to read the rest he must make a woocommerce payment. Is it possible with module?
Thanks