
Do you know one of the most underrated pages of most websites is the Contact Us page?
Yes!
Many website owners and designers do not understand how crucial is the Contact page. This is the cozy little corner of your website where the user comes to reach you or to have their query resolved.
But since not much importance is given to the contact pages, they become unwelcoming, and sometimes the poor placement makes it difficult for users to find the contact us page. We need to understand how to avoid this problem and improve our contact us page design to make it more eye-catchy.
In this article, we will see what makes a Contact Page better and how you can design it with the Elementor Page builder.
So, what makes a contact page better? Let’s see!
Contact Page Best Practices
Here is a list of features and practices of successful contact us pages. Every element here plays a crucial role in making the contact page what it needs to be.
- Make them readily available – One of the prominent places that the contact page’s link needs to be present is in the footer. Every page must have a contact us link at the bottom of the webpage. If you have space, adding the contact form at the header is also a good option.
- Include important links – For a product website, it is good to add a link to the product documentation, as many people might come up with queries related to the use or billing in their minds. This also avoids the over cluttering of the contact inbox too.
- Add other contact information – It is highly advisable to add a phone number, email, and mailing address for your users. This helps in making your contact page more resourceful to them.
- Avoid unnecessary fields and words – Try to minimize the number of areas on your contact form. Doing this will make it simpler for users to put in their queries. Many good form builder plugins, such as Gravity and WPForms, work great with WordPress.
- Add a Success Message – Many times, the contact forms submit button leads the users to a page with no message. Merely adding a redirect link to a success page or customizing the contact form to display a success message helps greatly. You can add a simple “thank you for contacting” and can add your turnaround time. You can also link your social media accounts so that your users can connect with you on other platforms.
- Make it welcoming – This is one of the most common mistakes that website designers make. You must ensure that the contact form does not look dull and should be welcoming. We will see how you can do that with the help of the Elementor Page builder.
- Make it interactive – Nowhere is it written that your contact page should only have a name, email, and message field. You can add interactive elements such as Google maps with a pin on your location.
When integrated into your contact form, all these points can do a lot more to your business.
Now, we will see how you can incorporate all these points on your website, even if you do not know how to code.
We will use the Elementor page builder and the PowerPack Addon for Elementor to design our contact us page.
Let’s dive in!
How to build a Contact Us Page with the Elementor Page Builder
Before we begin, ensure you have the Elementor Page Builder and the PowerPack Addons for Elementor installed and activated. Once you do that, we can start our design process.
Step 1: Launching the Elementor Page Builder
First, log in to your WordPress dashboard and then click on the page option on the left. Now look for your Contact Us page and click the Edit with Elementor button.
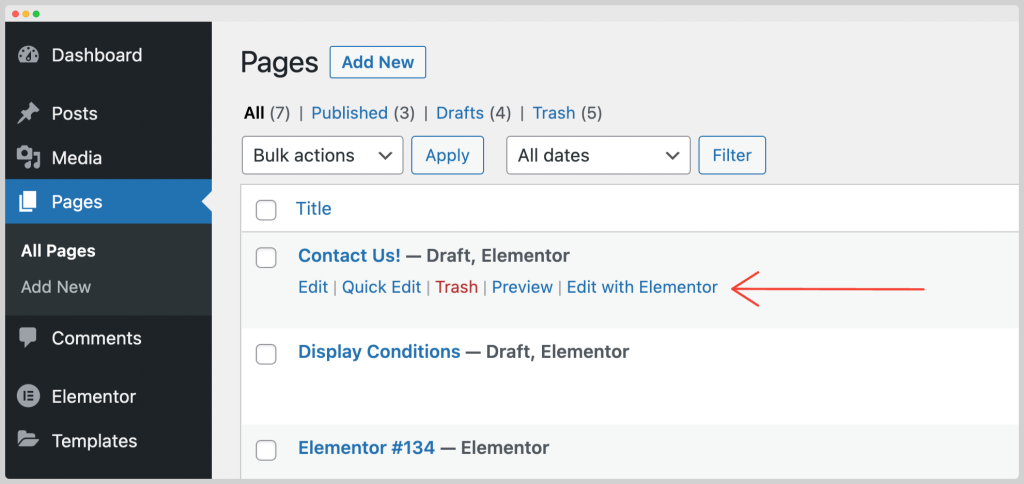
This will launch the Page Builder.
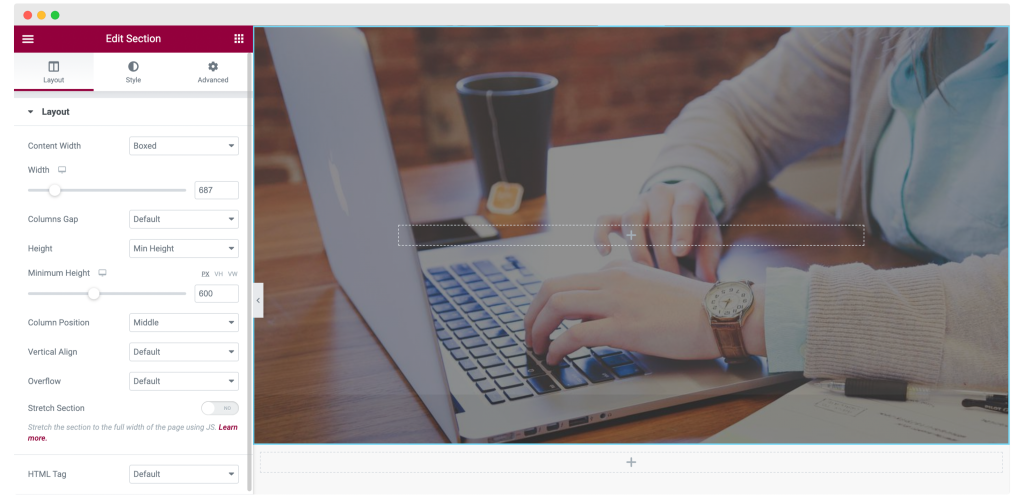
Step 2: Designing the Hero Section of the Contact Page
We will begin by adding a Hero Image at the top and an add Title. For this, click on the “+” or add a new section icon and then add a single-column structure to your page.

Now click on the row settings and add a background image to the row from the style tab.
To make the image and row more visible, you will need to change the row’s height from the Layout Tab. We are setting the minimum size to ‘600’.
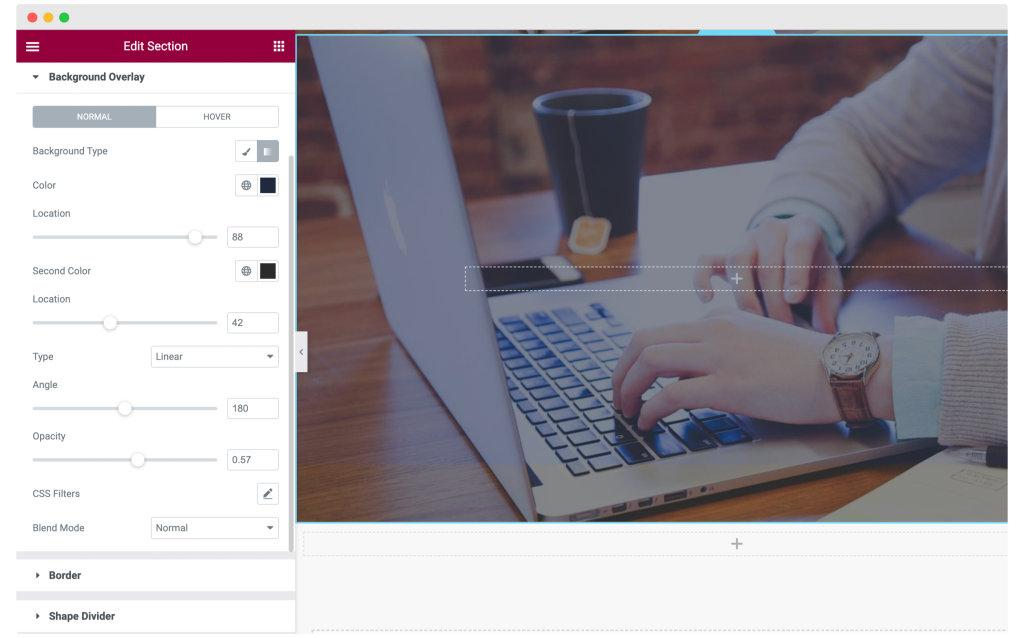
We have also added the Background Overlay with an Opacity of 0.57 using the background overlay section in the Style tab. Here are the changes that we have made:
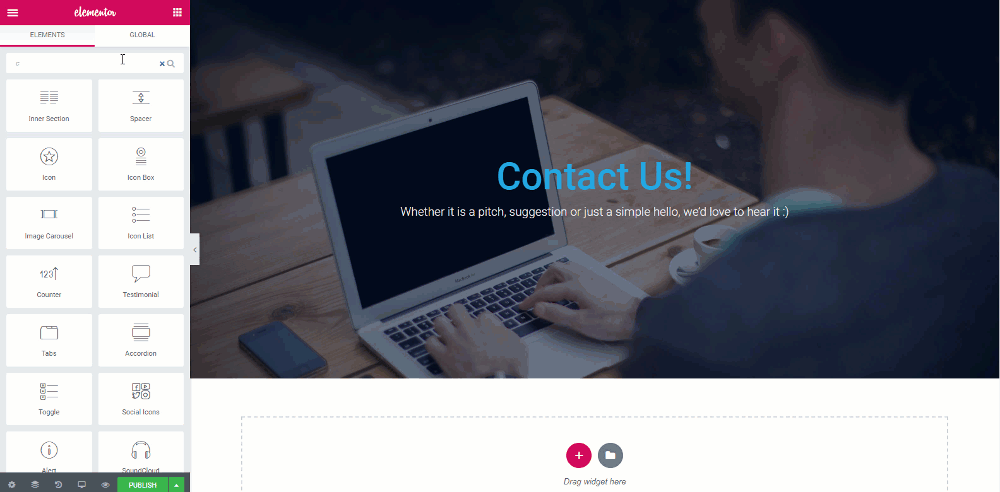
Step 3: Customizing the Title of the Contact Page
Drag and drop a Dual Heading widget of the PowerPack Add-on pack on the row.
Now change the look and design of the Text to look like we have done below. You can use your creativity and design your heading the way you want.

If you don’t want to start title designing from scratch, you can also choose from the Presets of the Dual Heading widget.
Step 4: Add Contact Form to your Page
It is time to add a decent contact form to the page. For this, we are using the Contact Form 7 plugin.
You can go with any popular WordPress form builder plugins such as Gravity forms, Caldera forms, Ninja forms, or the WPForms plugin. Make sure you install and activate the plugin before we go any further.
If you have not installed contact form 7, you can get it here. Install the plugin and refresh the page we designed to get the contact form widget.
Adding the Elementor Contact form widget on the Page
Now drag and drop the Contact Form 7 widget on the page and choose the contact form you want to display.
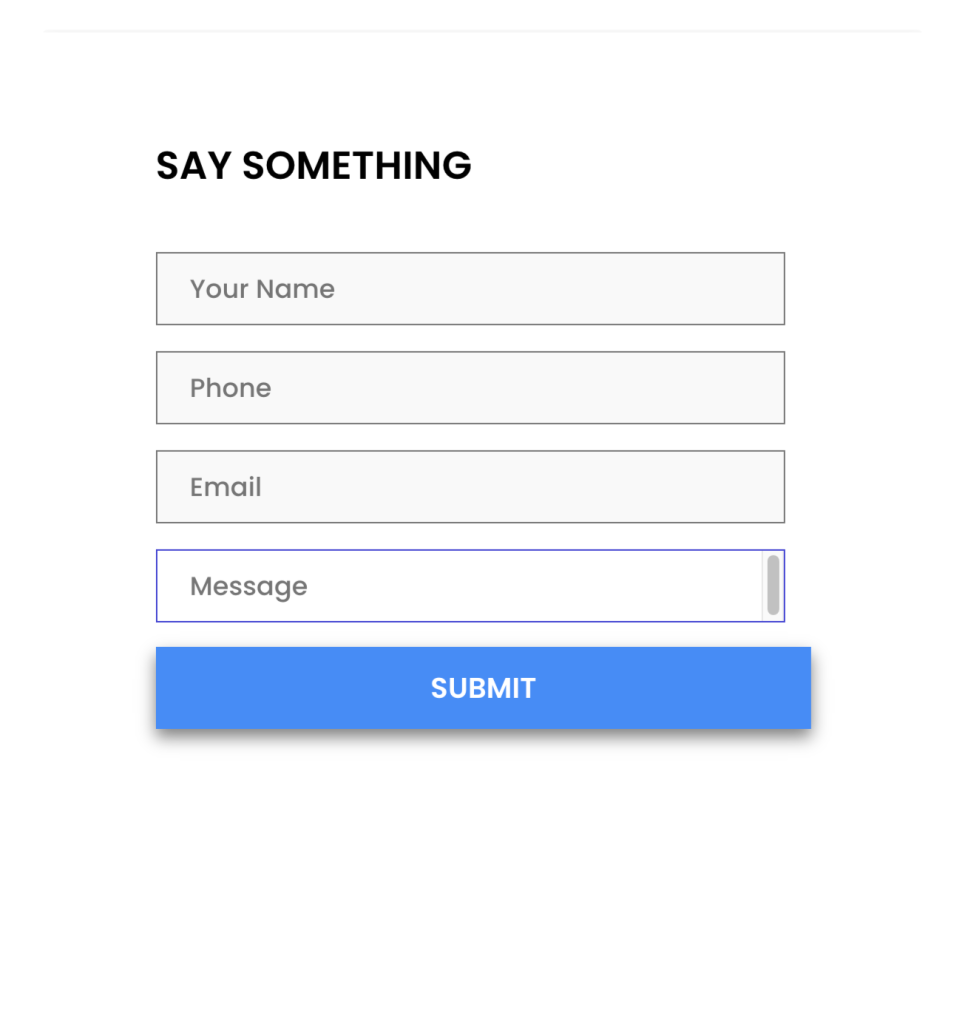
Now it’s time to customize the form. Disable the titles using the toggle button and go to the style tab. Here you can change the color, background, typography, width, and padding of the form.
For this form, we have made the following changes –
- Changed the background and text colors for the fields and increased the spacing to 20.
- Added borders to the fields and changed border-radius.
- Changed the placeholder text color.
- For the submit button, I changed the width to 170 and the color.
- Added border and hover effects to the button.
This is what the contact form looks like once completed.
Step 3: Adding other Contact Information
Now just the contact form is not enough for the contact page, and you need to give more information to your users if they want to contact you apart from your contact form.
For this, we will add another column to the same row and then add the Elementor Info List widget.
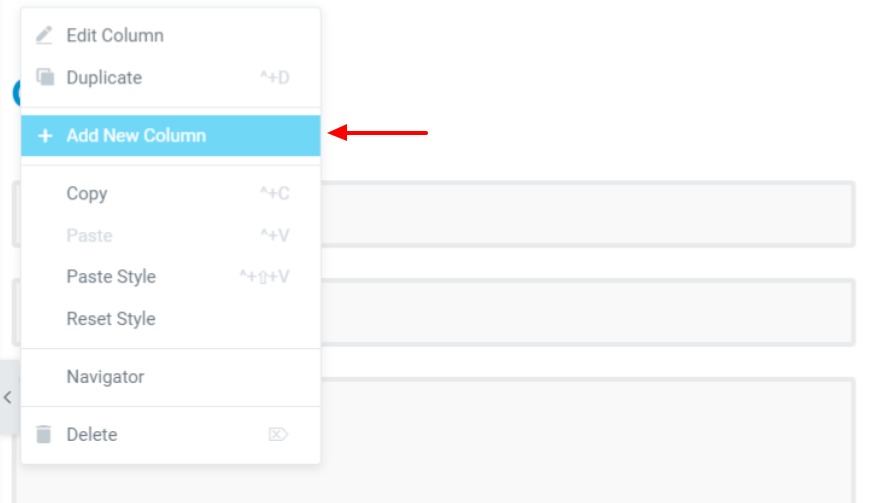
Right-click on the column icon the column and then click on the “Add new Column” button.
Now drag and drop the Info list widget on the page.
Change the icons, color, text, spacing, and padding from the respective settings. For this list, we have changed the following settings-
- Changed icon, description, and title.
- Item Spacing: 30
- Icon size, box size, and spacing 39, 77, and 25, respectively.
- Changed the title, description, and icon color from the style tab.
- Added top and bottom padding: 50
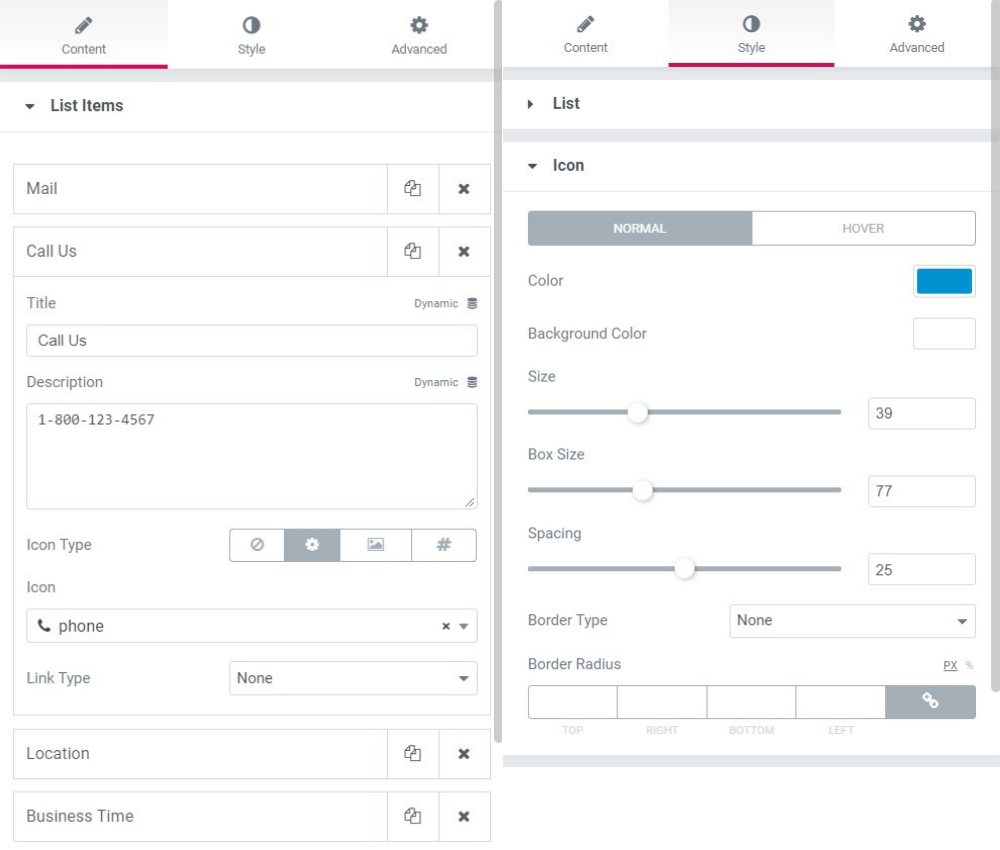
You can keep the same values mentioned above or change and alter them as per your requirements.
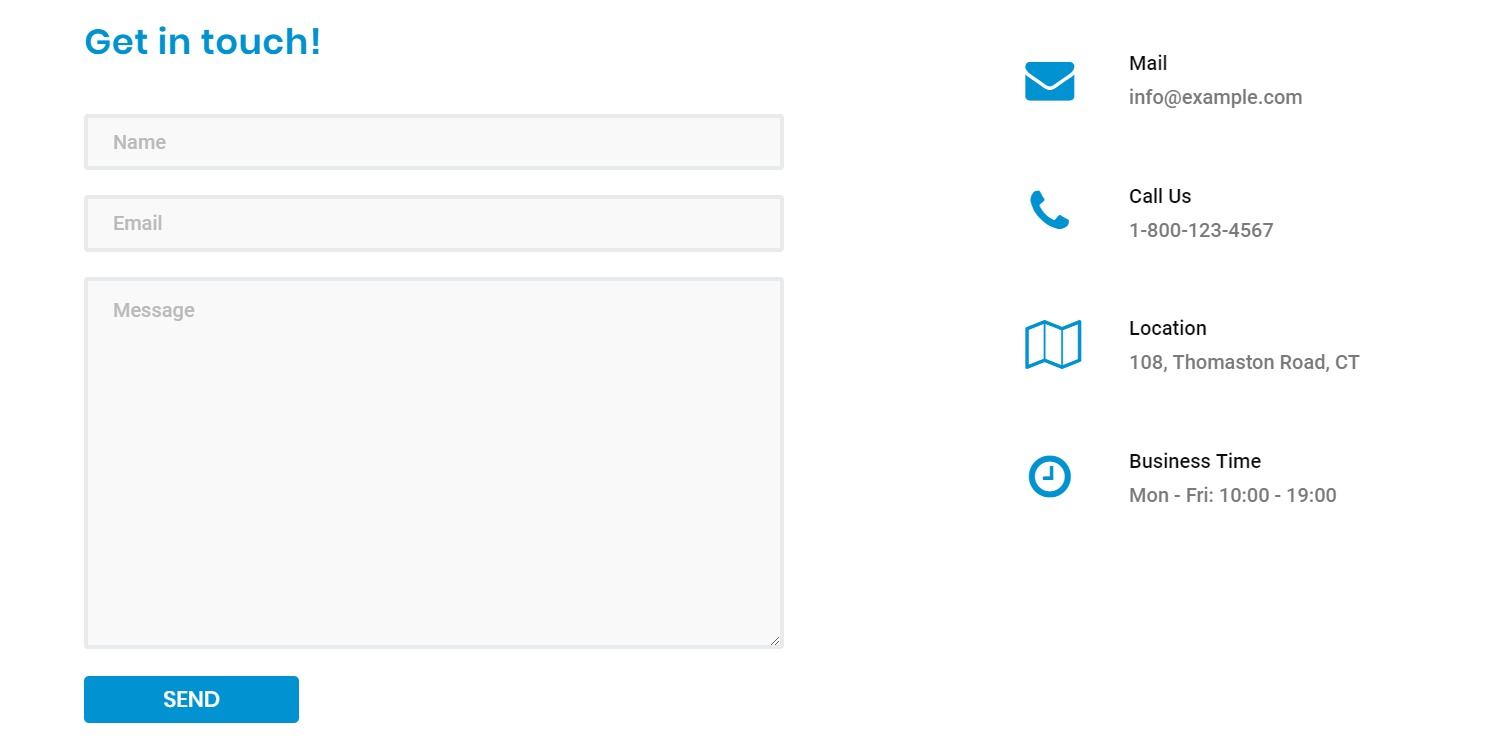
This is what the whole row looks like once all the changes are made.
Step 4: Adding Google Maps to the Contact Page
The contact us page should have more than just simple text and fields. Some creative and interactive elements add up a lot. For this, we will add a custom google map to our page.
Adding Google maps
First, drag and drop the Google Maps widget of the PowerPack Addons on the page. Make sure to check the “PP” icon on the upper right corner of the widget:
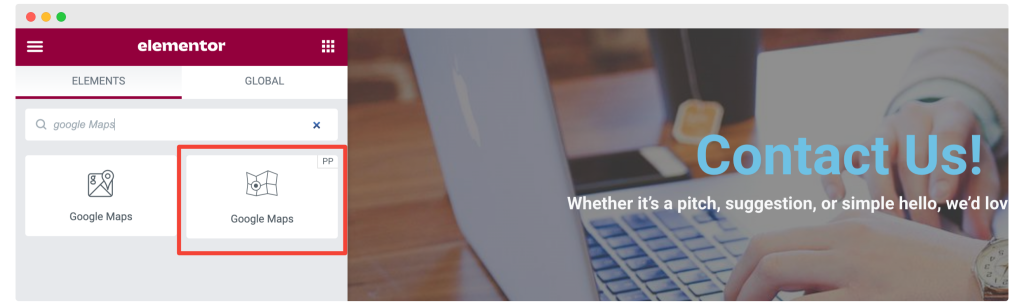
After adding it, enter the location of your office with the help of latitudes and longitudes. You can set multiple locations or pins as well. If you are getting an error, you can refer to this document.
Like other Elementor widgets, in the Google Maps widget, you also get three main tabs to customize the content and style of your maps.
The Content Tab of Google Maps includes four main sections:
- Addresses
- Settings
- Controls
- Map Style
The Address Section allows you to add several locations and customize them separately. In addition, you can add as many locations or any nearby locations/landmarks to this section, making it easy for users to reach the destination easily.
Using the options in the Settings Section, you choose either ‘custom’ or ‘auto’ “Zoom the map, and choose your “Map Type” from a few options such as ‘Road Map,’ ‘Satellite,’ ‘Hybrid,’ and ‘Terrain.’
In addition, there’s an option to set “Marker Animation”; choose among ‘Drop’ or ‘Bounce’ animation options depending on your preference.
The Control Section follows its name by providing various map control options such as “Street View Controls,” “Map Type Control,” “Zoom Control,” “Fullscreen Control,” and “Scroll Wheel Zoom.”
The Map Style Section gives you the flexibility to choose the map theme. You can choose from available options like ‘Silver,’ ‘Retro,’ ‘Dark,’ ‘Night,’ ‘Aubergine,’ and ‘Custom’ depending on your preference and need.
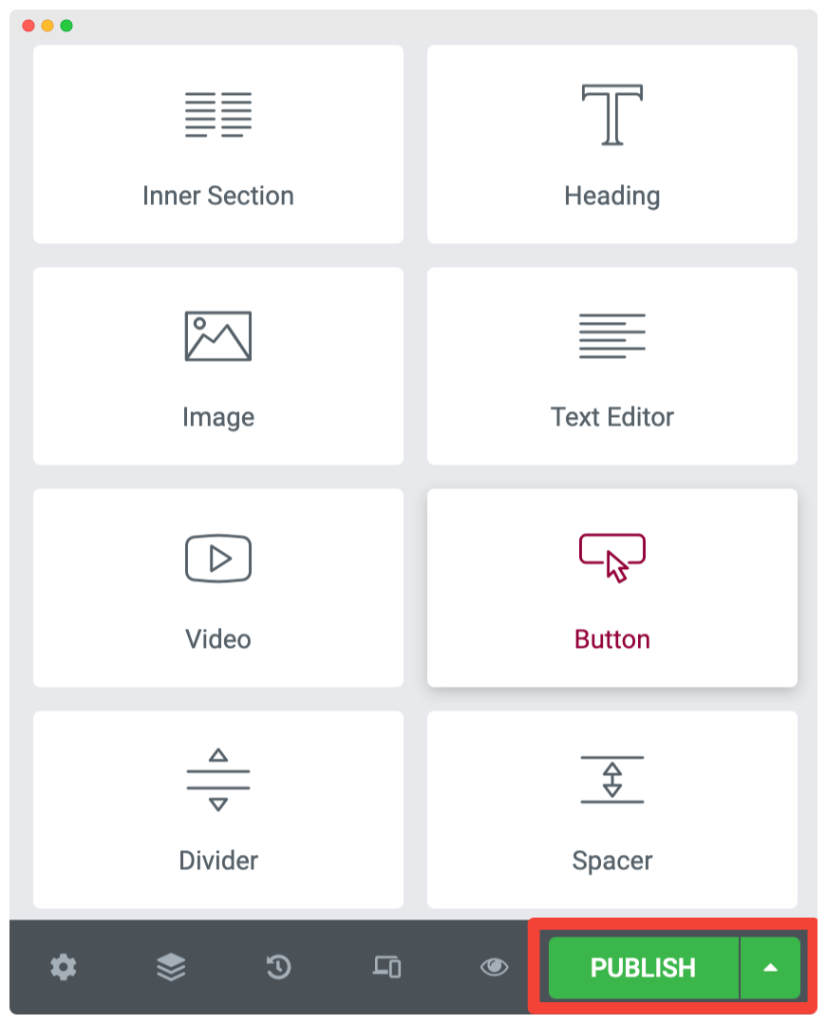
Once you have set up the Google Maps widget, your contact page is ready.
Now the only thing that’s left is making the changes live. For this, click on the Publish button on the lower left corner of the page.
That’s all, folks!
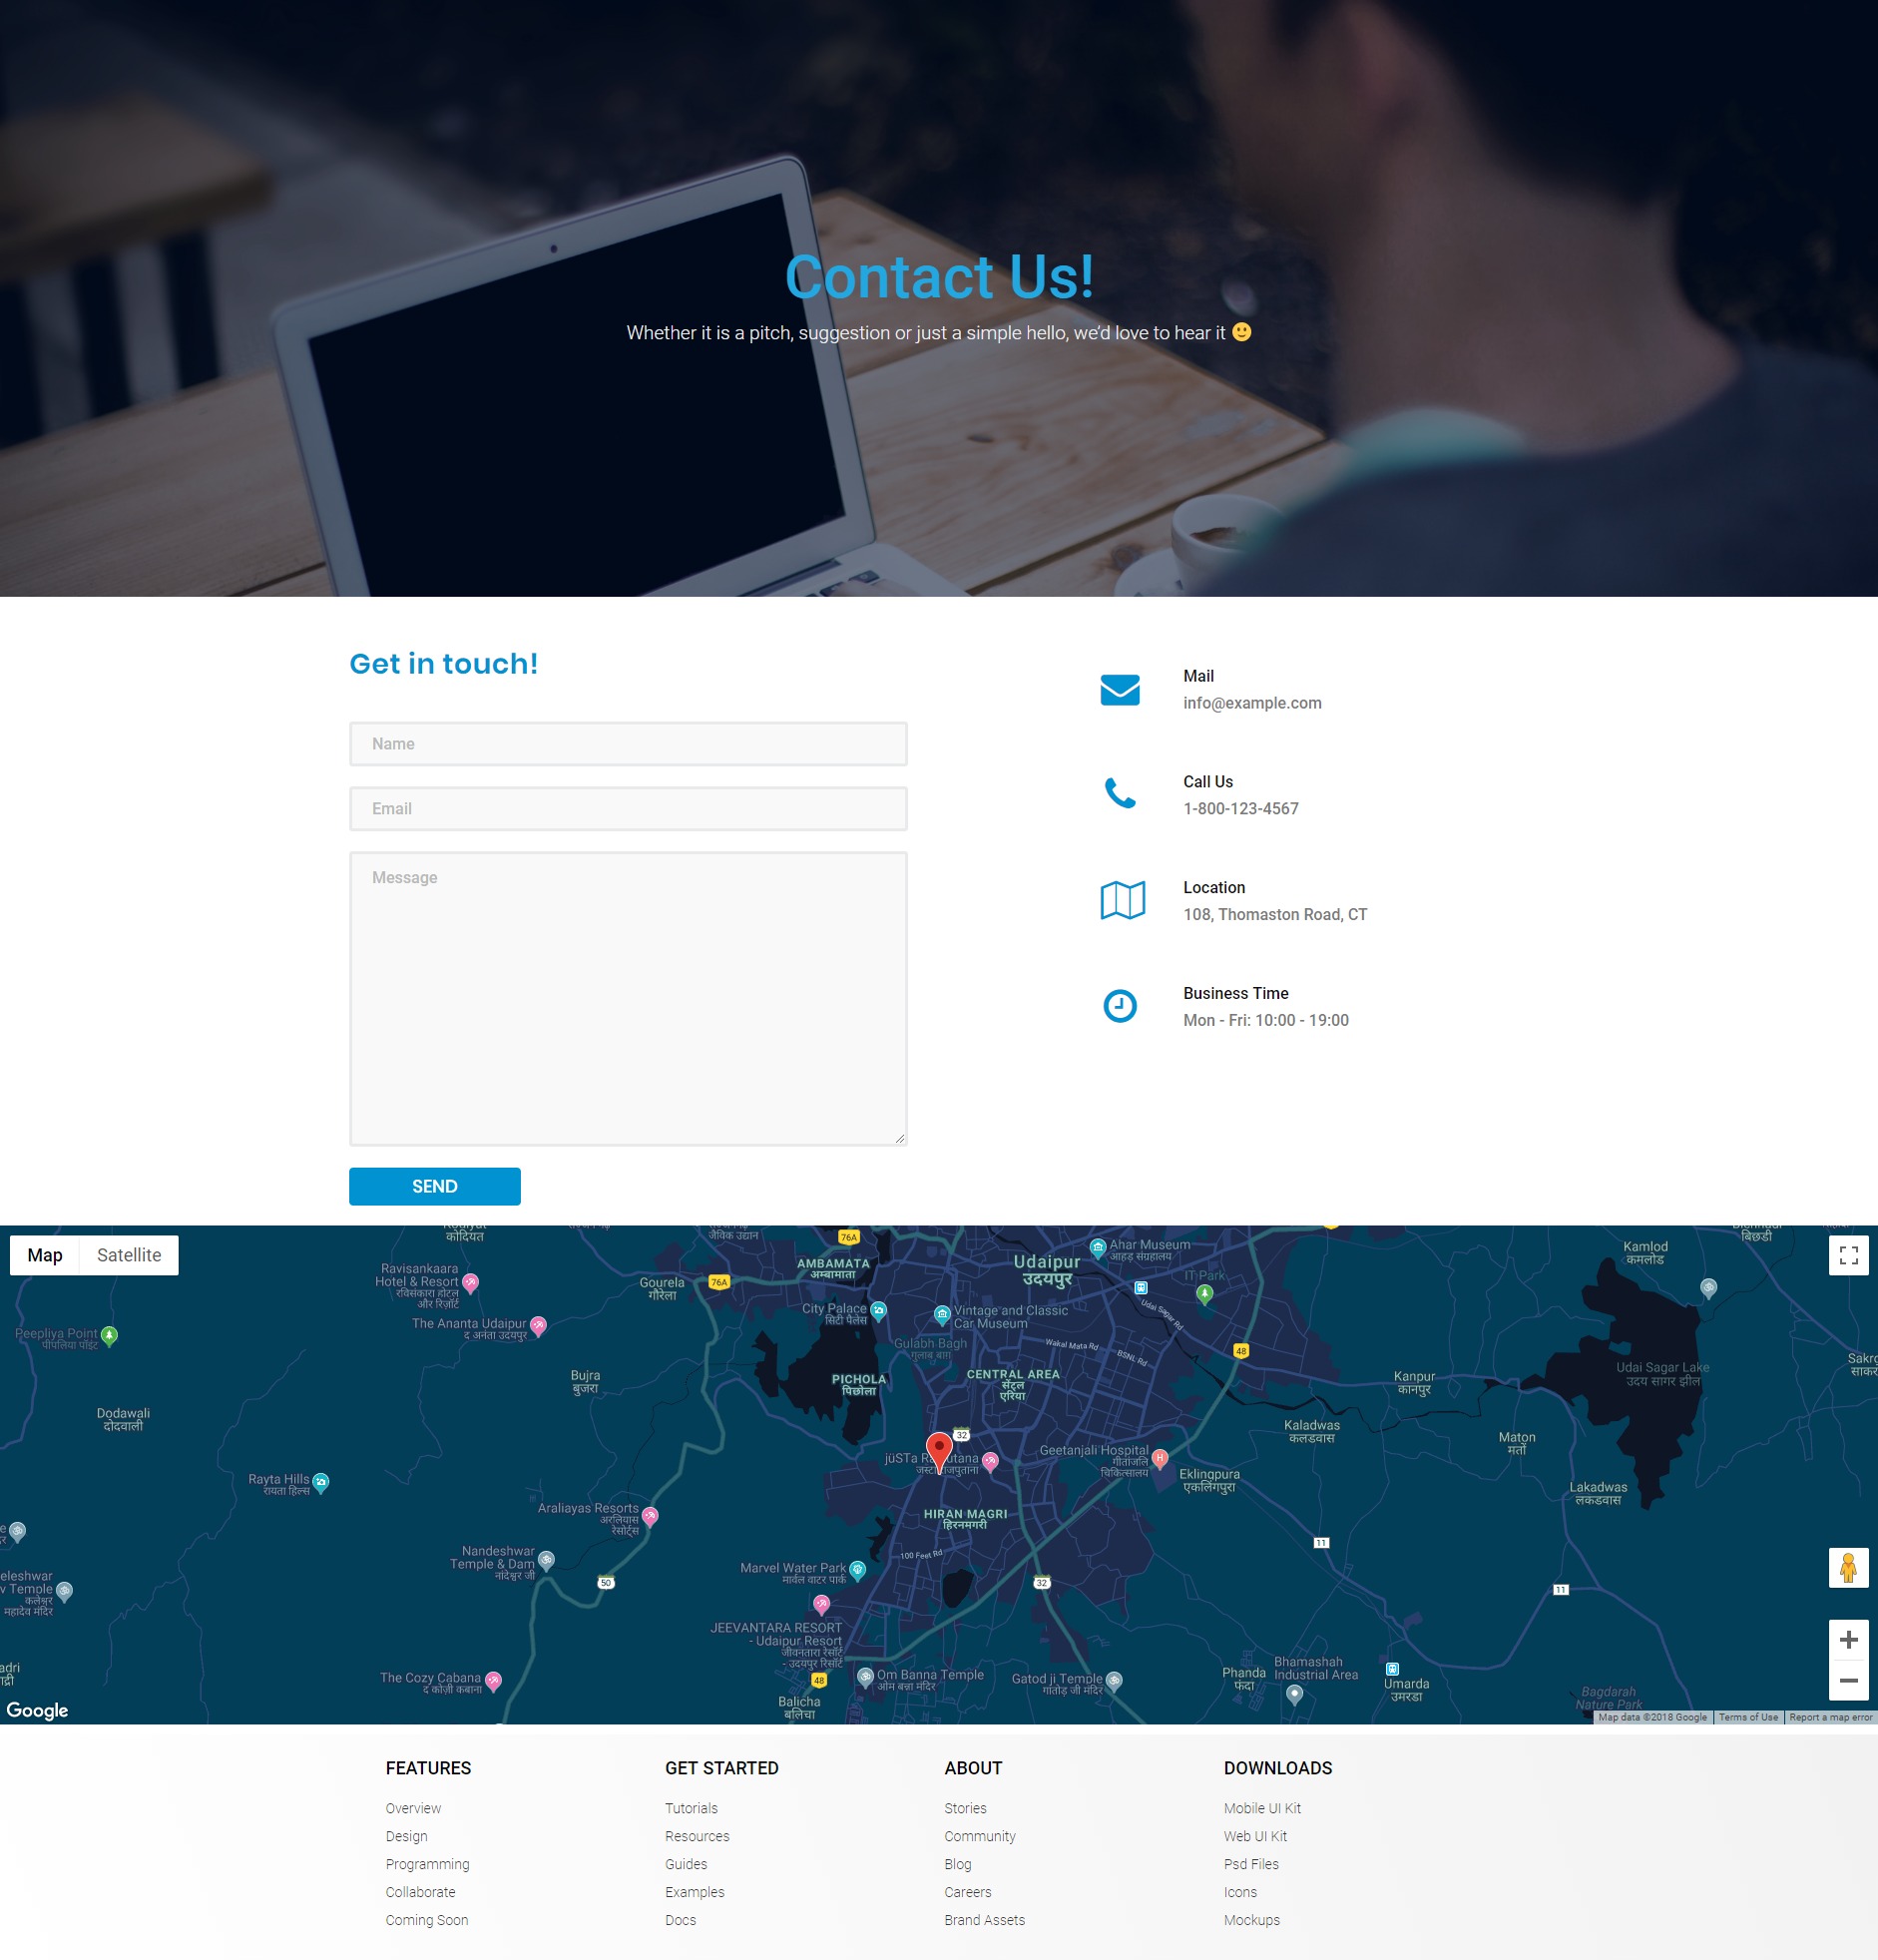
Bingo! You have successfully created a good-looking Contact Page. This is what the whole contact page looks like once completed.
If you want to make more changes, you can easily do that with the Elementor Page Builder. You can add many more interactive elements to your page using Elementor and the PowerPack Addons for Elementor.
To learn more about Elementor, you can check our popular guides on:
- How to Use Elementor: Detailed Guide for Beginners
- Elementor Errors and How to Fix These
- The Ultimate List of Best Free Elementor Learning Resources
- How to Create a Recipe Section Using Elementor (Step by Step)
If you find this tutorial helpful, share it and drop a comment below if you have more queries!

1 thought on “How to Build a High-Converting Contact Page with Elementor [2025]”
This article has helped me to understand more clearly than any youtube videos.