Looking for ways to speed up your Elementor?
Elementor is a great tool and gives you lots of customization power with its amazing drag-and-drop editor. It is not just a page builder now. With time and effort, it has evolved so much that you can design fully functioning WordPress websites with it, and that too without touching a single line of code!
Since Elementor offers so many options and customization capabilities, we often miss out on some of them and end up not using them in our webpage design process.
Although designing web pages with Elementor is really fast and easy, if you want to speed up your designing even more, then you have come to the right place.
In this article, we will see how you can speed up your Elementor Workflow by fully using the editor and its features.
Let’s dive in!
Tips to Speed Up Your Elementor Workflow
- Start with a Template!
- Use Shortcuts to Get Things Done Quickly
- Save Sections for Reuse
- Define your Color Palette
- Use Global Rows to Reuse Common Sections
- Export/Import your Designs for Reuse on Another Site
- Navigate through the sections using Navigator
- Configure the Basics
- Finder
- Use Elementor Add-ons
Start with a Template!
Often, you do not require building a layout from scratch, and here is where templates come in handy. Elementor’s template library is a great resource for professionally predesigned templates. You can use these templates to design your web pages easily.
If you do not wish to use full web page templates, you can also use the Blocks. These blocks are sections of a webpage, such as the services, contact, hero section, etc.
Also Read: Download 10 Free Elementor Business Landing Page Templates
Use Elementor Shortcuts to Get Things Done Quickly
Nobody can debate the fact that shortcuts do make out work easier and much faster.
Elementor has recently incorporated shortcuts to the page builder so that users can speed up their design process. Apart from the simple ones like copy and page, you also get more advanced custom shortcuts.
Tip: Can’t remember all the shortcuts? Open the Shortcuts reference sheet with Cmd/Ctrl + ? to see the list of all shortcuts.
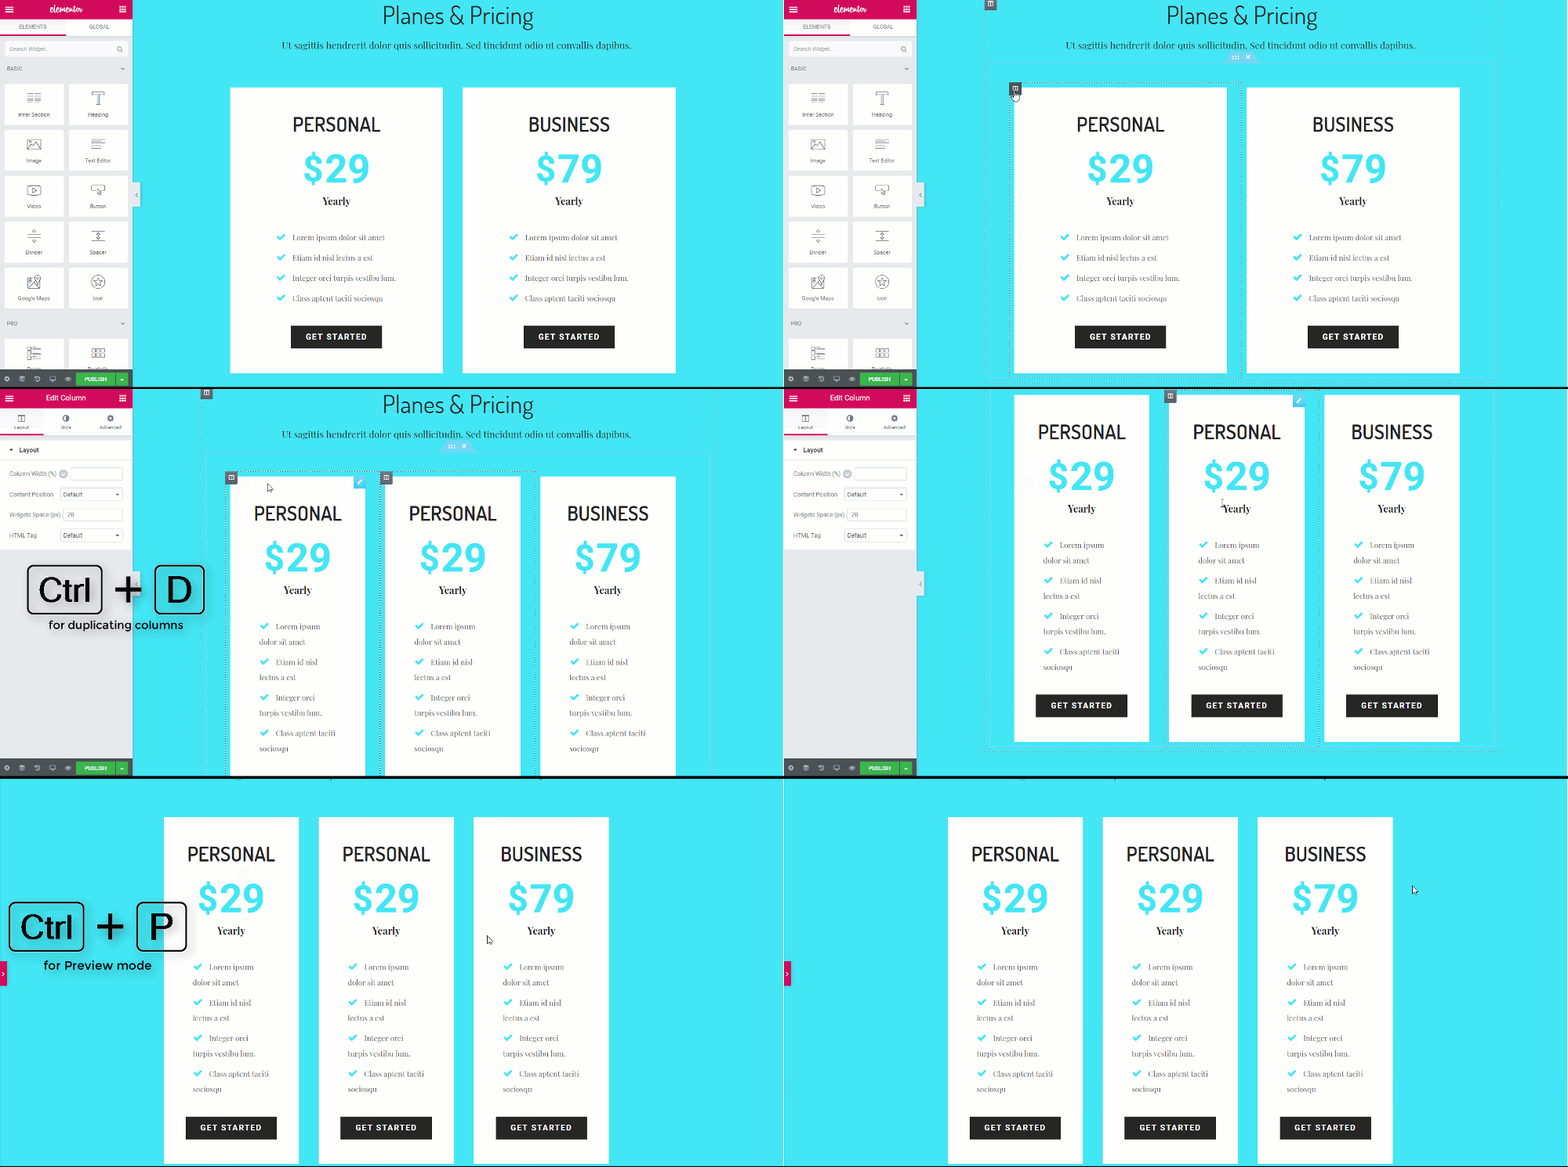
Here is a list of shortcuts that you can use to speed up your design process –
Action Shortcuts
| Undo | Ctrl / Cmd + Z | Undo any change made on the page |
| Redo | Ctrl / Cmd + Shift + Z | Redo any change made on the page |
| Copy | Ctrl / Cmd + C | Copy a Section, Column, or Widget |
| Paste | Ctrl / Cmd + V | Paste a Section, Column, or Widget |
| Paste Style | Ctrl / Cmd + Shift + V | Paste a Section, Column, or Widget’s Style |
| Delete | Delete | Remove section/column/widget that is edited |
| Duplicate | Ctrl / Cmd + D | Duplicate section/column/widget that is edited |
| Save | Ctrl / Cmd + S | Save your page to the revision history |
Go to shortcuts
| Finder | Ctrl / Cmd + E | Go to the Finder |
| Panel / Preview | Ctrl / Cmd + P | Switch between the panel and preview view |
| Mobile Editing | Ctrl / Cmd + Shift + M | Switch between desktop, tablet, and mobile views |
| History | Ctrl / Cmd + Shift + H | Go to the History panel |
| Navigator | Ctrl / Cmd + I | Opens the Navigator |
| Template Library | Ctrl / Cmd + Shift + L | Opens up our Template Library modal |
| Keyboard Shortcuts | Ctrl / Cmd + ? | Opens up Keyboard Shortcuts Help Window |
| Theme Builder | Ctrl / Cmd + Shift + E | Opens Theme Builder |
| Quit | ESC | Opens up Settings and jumps to Exit to Dashboard |
Save Sections for Reuse
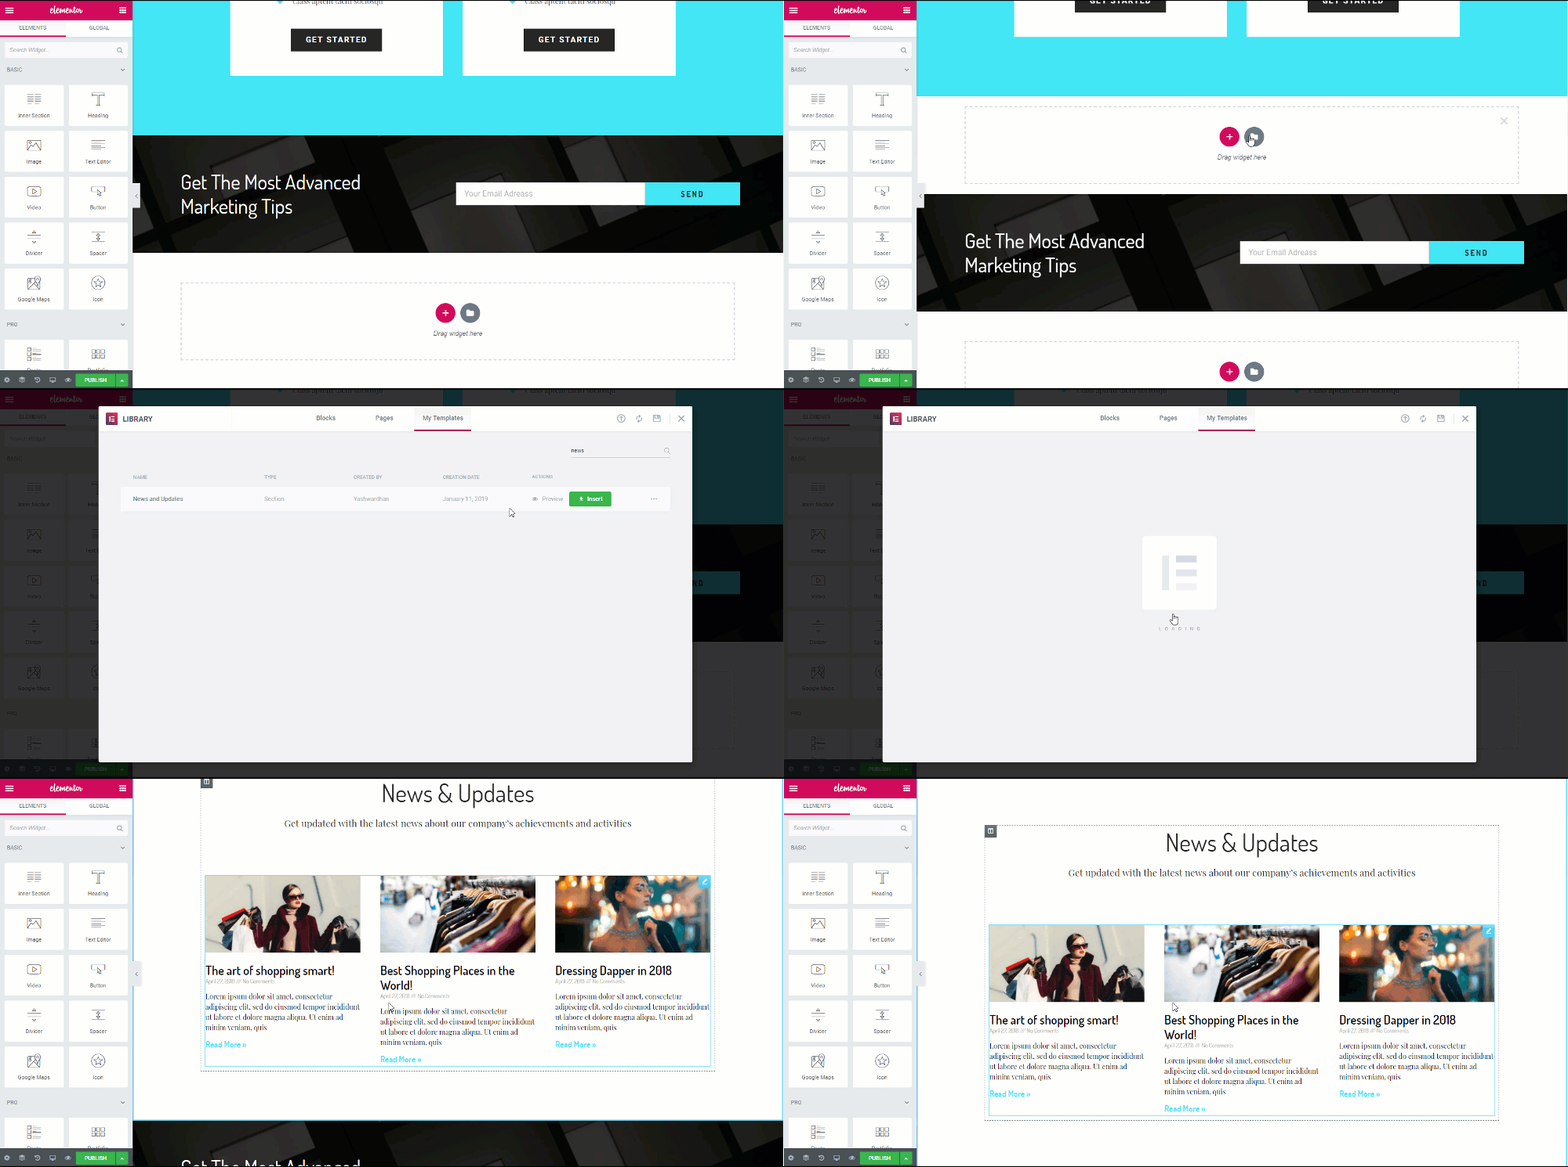
Let’s say you designed a row that looks good, and you would like to use the same row someplace else as well.
What do you do in this case? Of course, you won’t be redesigning it again and again for every instance you want to use it. For this, saving the row and reusing it comes to the rescue. Every row that you design can be saved and can be used in other parts of your website as well.
This gives much more freedom to users regarding speed and quick access as well.
Define your Color Palette
Now, when we are designing a website or a webpage, we usually follow a pattern for the design, which can be some color combinations that will be repeated. We do not randomly select a color out of the blue, right? (no pun intended!).
For this, choosing the color every time from the color palette or entering the color code can take a lot of time. But not to worry, Elementor has a solution for that as well.
You can add your colors to the color picker anytime by going to the settings and adding colors to the pallet there. When you add your custom color to the color palette, it will always show up in custom colors in the color palette.
Also Read: How to Sky Rocket your Web Design Business with Elementor

Use Global Rows to Reuse Common Sections
This feature is great when it comes to speeding things up. Let’s say you want to show the same row on multiple locations on your website.
This can be your Website’s’ CTA row or a promotion row listing the sale details of your product. Now, what if you want to make a minor change to that row? Will you be making the change to every single row? You can, but it will take forever.
To tackle this problem, Elementor offers global rows. These rows are highlighted with yellow color, and when you make any change to one row, all the other rows get changed in the same manner as well.
Doing this saves a lot of time and effort. You can even unlink a global row in case you do not wish to make changes to other rows as well.

Export/Import your Designs for Reuse on Another Site
One another handy feature is exporting and importing templates in Elementor.
You can easily export and import the templates on/from your website. This feature will allow you to copy the same design format that you have designed to other websites as well.
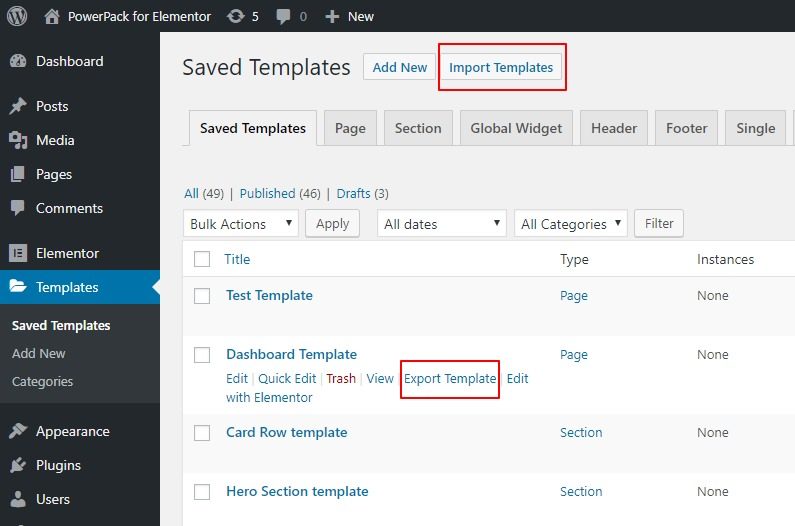
For this, you go to my templates page and then click on the export template button for the respective template. Same way, if you want to import a template, you can do that too by simply clicking on the import template button in the My Templates tab.
Then click on the Import Templates button in the top right corner, select the template, and add it.
This feature comes in super useful when you have to make a layout for your client’s site locally and then later have to export it to the client’s website, as it can be done super easily.
Navigate through the sections using Navigator
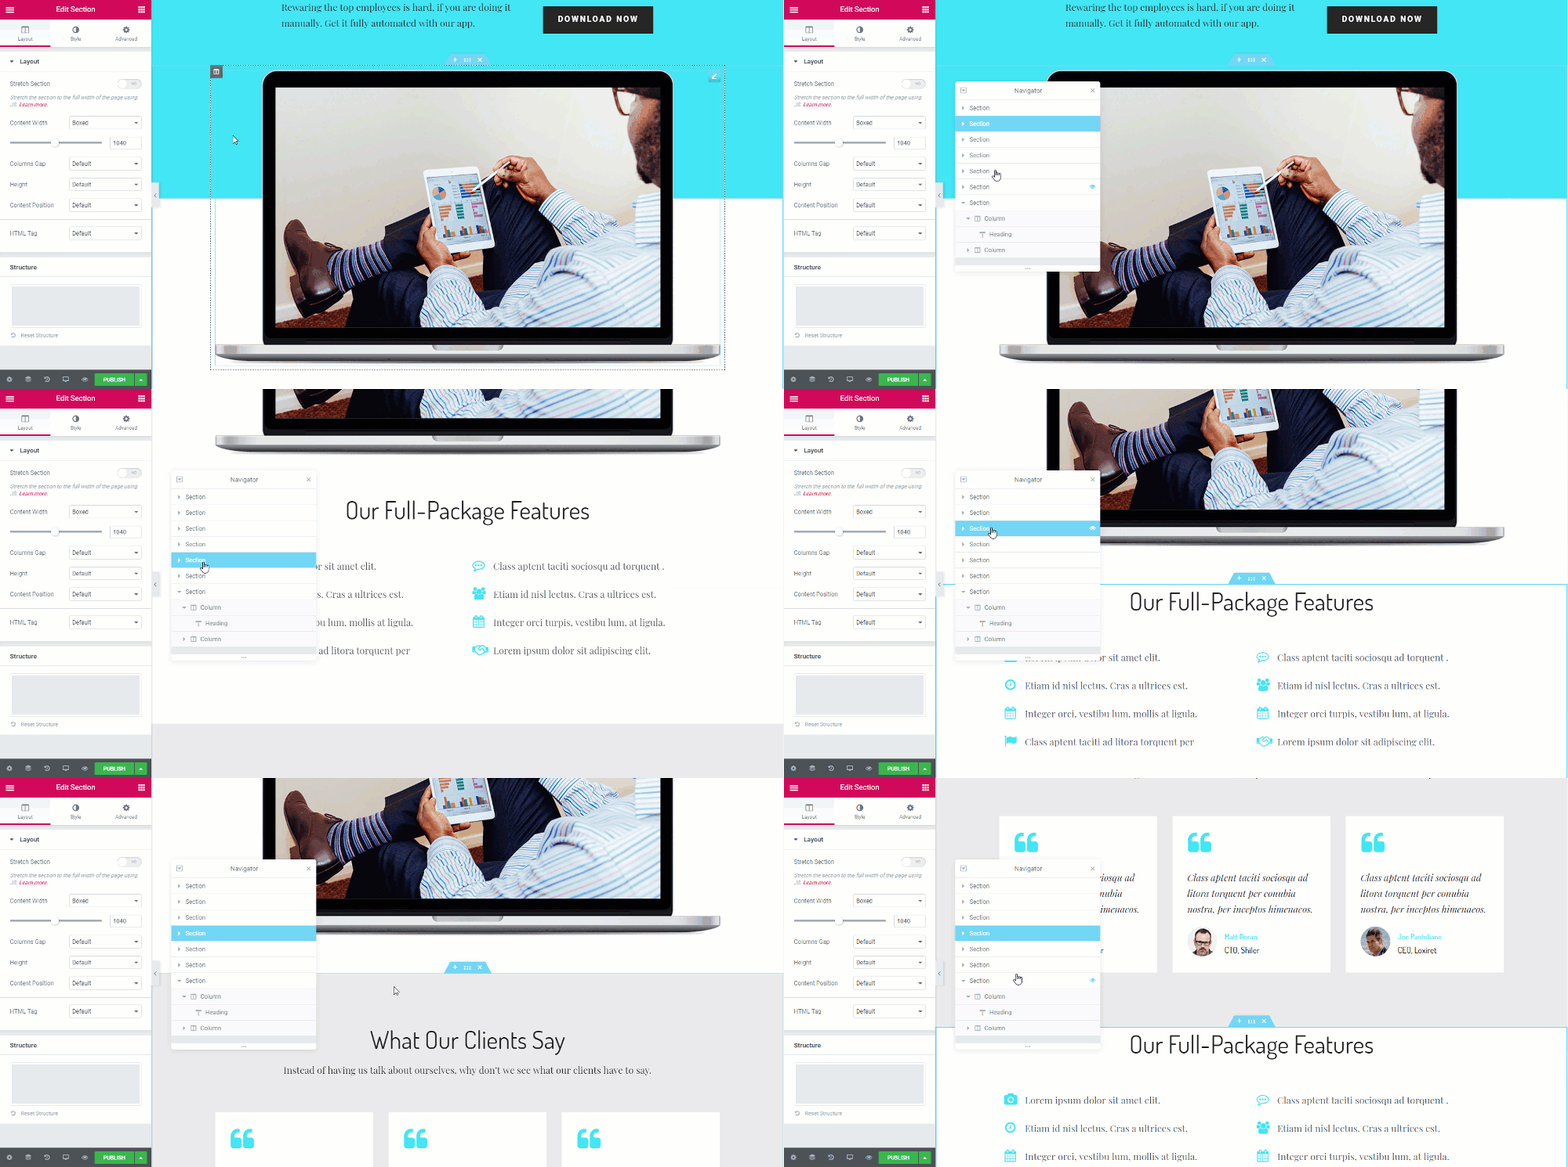
Elementor has recently added the navigator to their page builder.
It is one of the best features of Elementor that can help you in speeding things up. Think of the navigator as a Navigation tree window, which provides easy access to every element in the Page Builder.
This little window allows you to drag and drop the elements and customize them easily.
This tool is most useful with long pages or pages with lots of elements or even pages with complex multi-layered designs.
You can easily access the navigator window by right-clicking on any widget and selecting the navigation option from the list, or since we are talking about speed, you can open it up by using the Cmd/Ctrl + I command.
Configure the Basics
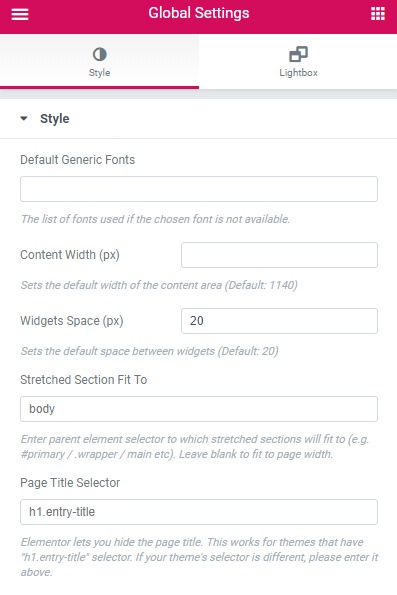
When creating a web page, some settings may be similar to all page rows. For this, instead of changing the same setting for every row and eventually wasting a lot of time, you can eliminate redundancy with the help of Global Settings.
You can set Default Fonts for cases where the chosen font is not available. You can also define your custom content width for the rows, and if you want your widgets to have some space between them, it can be done as well using the Global Settings.
Find your way with Elementor Finder
Sometimes when designing multiple pages or want to toggle from one elementor designed page to another, it can be time-consuming if you save the page > go back to your dashboard > search for the page > and then open the page again in Elementor. This can take a lot of your time if you have to do it again and again.
Instead of going through all that trouble, you can use the Elementor Finder. With this feature, you can directly jump to any Elementor template, page, settings, or theme part by simply searching in the search bar.
You can access the Finder from Elementor Settings or with the Cmd/Ctrl + E keys. Check out this video and see what you can do with Finder.
Use Elementor Add-ons
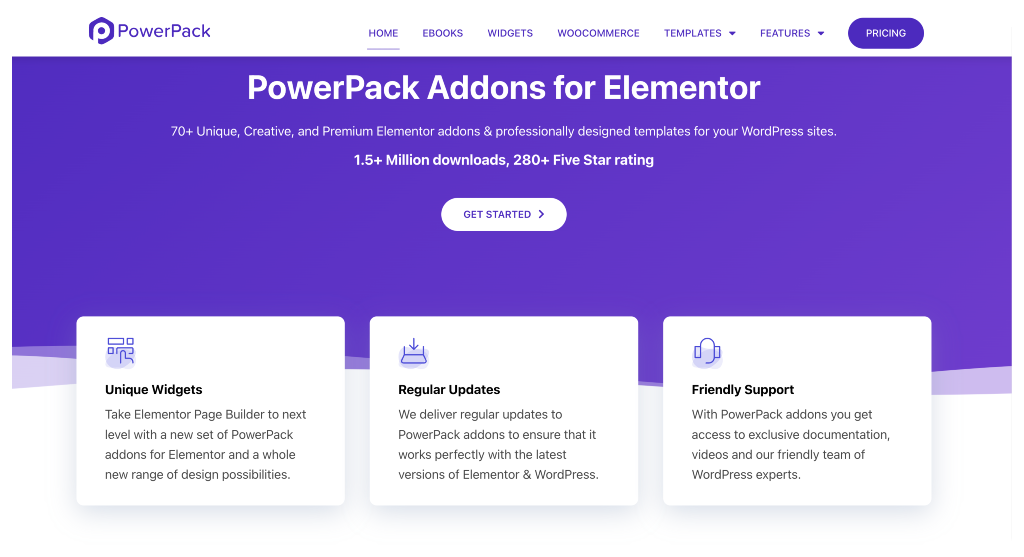
Another great way to increase your Elementor Customization is by using 3rd Party Elementor Addons. One of the most popular addons is PowerPack for Elementor. PowerPack offers more than 80 widgets that you can use with Elementor to supercharge your WordPress website.
You can also check out the Free Lite version of PowerPack, which offers 30+ creative widgets to enhance your customization.
If you want to take your design and speed game to another level, then check out our Pro version of PowerPack Addon.
With plenty of creative Elementor widgets at your disposal, you will be able to do a lot more, and that too in much lesser time.
Elementor has a pretty good set of tools you can use for your website, and with the tips mentioned above, I am sure you will be able to boost your web design speed significantly.
Which tip did you find the most helpful? And if you found this content useful, share it with others! 🙂
Read More From the Blog:
5 thoughts on “10 Tips to Speed Up Your Elementor Workflow”
Rana these are ingenious tips for Elementor everyone should learn before hand. I was just looking for shortcuts to speedup my work but got more.
Pity they come with no documentation
The FINDER tip was the best one for me… I’m just phasing off of using Visual Composer’s Page Builder… Elementor is just a few levels better, and now with FINDER, the one pain point of mine is resolved…. I’d seen it before, but didn’t realize the power of it until you spelled it out. Thanks Yash!
Finder and Navigator are two of the best features I love in Elementor. These are less known to a lot of users but once you get used to it, there’s no going back. 🙂
Great article. It helps a lot for my work. Thanks for sharing these effective and helpful ways.