Looking for a simple way to create a search engine-optimized FAQ Page using Elementor page builder?
A particular section for frequently asked questions (FAQ) can be an excellent way to help your visitors or customers. Leaving those users wondering is nothing less than losing them as potential customers.
So in this article, we’ll show you how you can create an effective FAQ using Elementor & PowerPack Addons.
Why Do You Need a FAQ Page?
When making a purchase online, customers will first research the same on Google, and as soon as they find their match, they tend to learn much more about that product in detail. In this whole research procedure, a dedicated FAQ section helps your prospective customers to learn more about your products and solve their queries that they might have related to your services.
If you run a business website, there will be many reasons for you to include an FAQ page on your website to provide appropriate answers to your customers’ questions. We’ve listed a few essential points that show the importance of including an FAQ page on your website:
- ✅ Adding the FAQ page results helps create high-quality learning resources for users.
- ✅ Linking some of your relevant content to the FAQ page can help increase keyword ranking.
- ✅ With optimal user experience, FAQ pages can be a proven strategy for organic search rankings.
- ✅ A well-structured FAQ section can drive targeted traffic to your website.
- ✅ Including an FAQ page on your website will save time and effort by repeatedly addressing your customers’ similar questions.
- ✅ A FAQ section provides relevant data about your website; it’s good for SEO and better organic rankings.
- ✅ A well-organized FAQ section builds trust and provides a hassle-free experience for customers while scrolling your site.
- ✅ Including an FAQ page on your website will be the best opportunity to increase internal linking on your website.
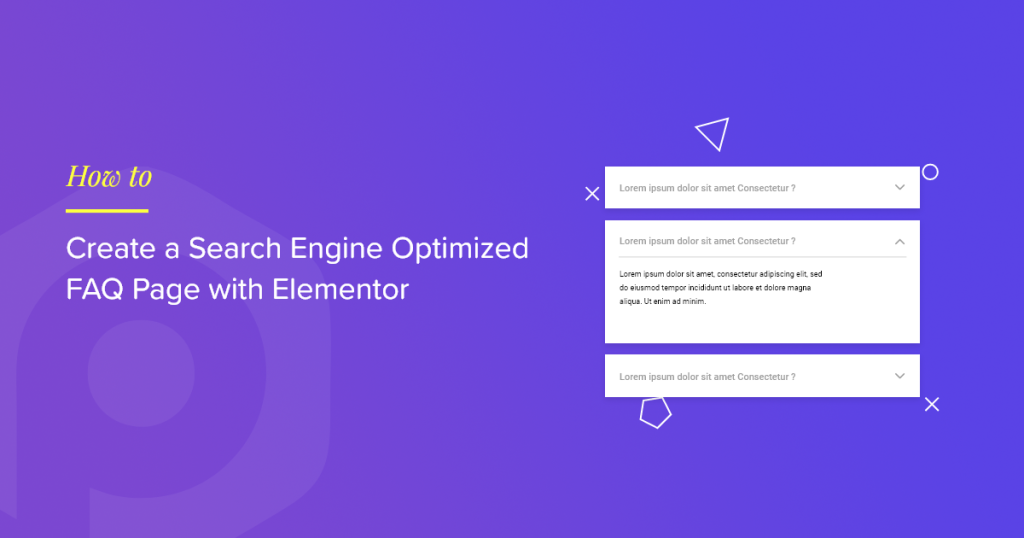
Create a Search Engine Optimized FAQ Page With Elementor
With all the benefits of having an FAQ section on your web pages in mind, let’s now see how to create one with Elementor.
To create an FAQ section on your website, you probably need to know a dozen codes, but PowerPack Elementor Addons has got you covered with an easy option.
PowerPack addon for Elementor includes 80+ powerful widgets and 150 pre-designed beautiful templates, including the powerful FAQ Schema Markup Widget. This FAQ widget offers plenty of customization and advanced features, allowing you to create FAQ pages with structured data on your Elementor website.
Let’s deep dive into the tutorial and create FAQ pages with the Elementor & PowerPack FAQ widget.
If you prefer to watch a video tutorial, you can consider this video on how to create an FAQ Section using Elementor with Google Structured Data Markup.
Before we start the tutorial, ensure you’ve installed & activated Elementor and PowerPack Elementor Addons on your WordPress website.
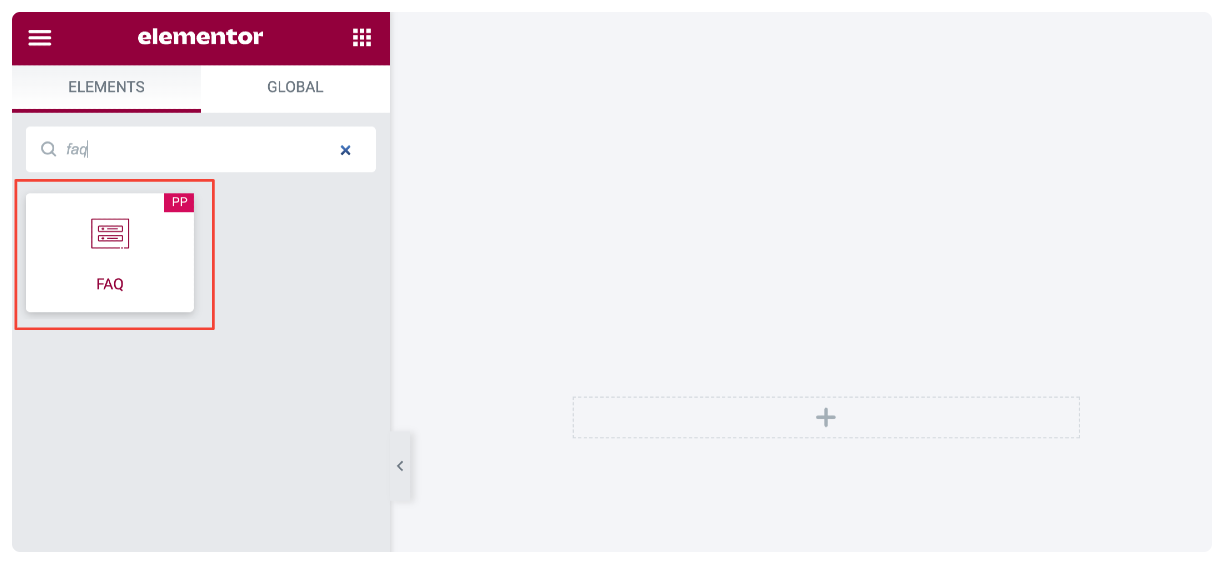
Next, go to your WordPress dashboard, open the page in Elementor editor & then type ‘FAQ’ in the search bar, and drag & drop the widget on the page.
Make sure to check for the PowerPack ‘PP’ sign on the top-right corner of the widget.
Content Tab of the FAQ Widget
The Content tab of the FAQ widget has four sections:
- FAQs
- Query ( If you choose “Posts” as a source type in the FAQs section)
- Settings
- Toggle Icon
FAQs
This section contains options to add content to your FAQ section.
- Source: This is the first sub-section. Select the source type Custom or Posts for the FAQ section.
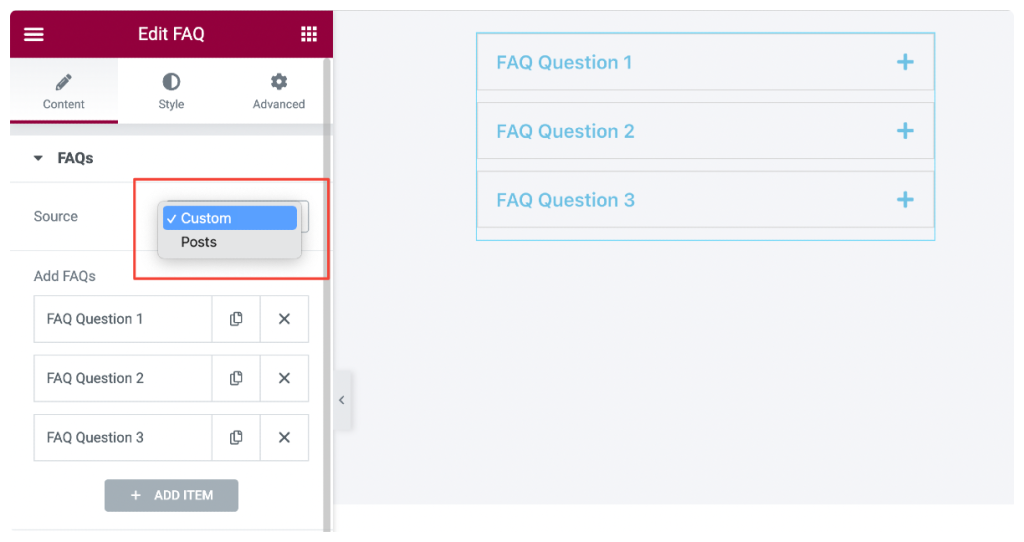
If you choose “Custom” as the source type, you’ll get the following options:
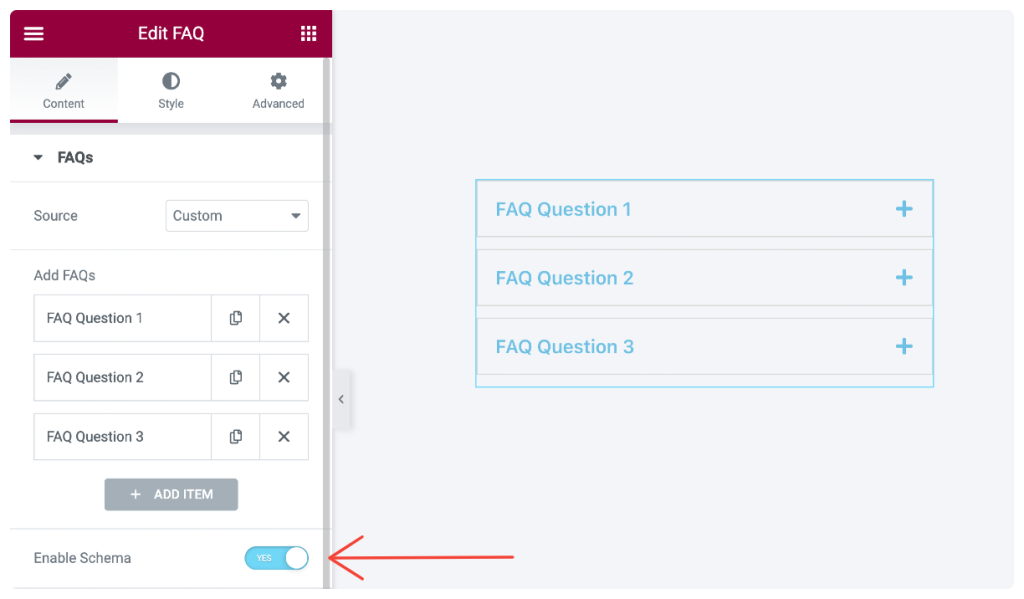
- Add FAQs: You can add custom text content and create as many FAQs by clicking on the Add Items button.
- Enable Schema: This is the most useful option. PowerPack FAQ widget comes with a built-in schema markup feature that automatically adds structured data to your FAQ section. This helps search engines understand the content more effectively and enables them to recognize that the content on the page is structured as questions and answers with markup.
If you select “Posts” as the source, then you’ll get these options to customize the FAQs section:
- Posts Count: This option fetches all your site’s single posts and displays them in an FAQ format.
- Content-Type: Select the content type as “excerpt” or “full content.” If you choose an excerpt, you next need to set the excerpt length.
- Default Active Tabs: Add the tab numbers in a row, followed by a comma to display active (open) tabs by default.
Query
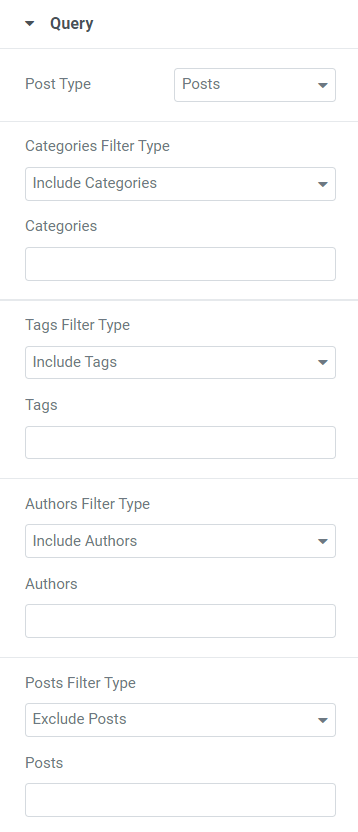
In this section, you can include/exclude filter types for categories, tags, authors, posts, media, landing pages, my templates, products, product tags, and templates.
All these filter types depend on the post type you choose.
This section includes a few more features:
- Date: Choose the date format to display FAQs accordingly.
- Order: Select the order for the FAQs, whether ascending or descending.
- Order by: Choose the format to display the FAQ page from available options such as date, last modified date, random, comment count, title, post ID, and post author.
- Sticky Posts: Toggle on this option to enable the sticky posts.
- Show Only Sticky Posts: Enable this option if you want to display the sticky posts in the FAQ section among all the posts.
- Offset: This option lets you skip the initial number of posts from the FAQ section. Select the number of posts you want not to display on the FAQ page.
Note: This section will appear only when you choose “posts” as the source in the FAQs section.
Settings
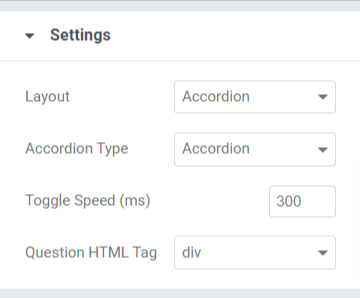
This section contains options that you can customize for a better user experience. Let’s see these options in detail:
- Layout: Choose the FAQ section to be showcased in a Grid or Accordion layout.
- Columns: If you’ve selected the grid layout, you can choose the number of columns.
- Accordion Type: You can choose the accordion type from options like Toggle or Accordion.
- Toggle Speed: Customize the toggle speed using this option.
- Question HTML Tag: Select the question HTML tag from here.
Toggle Icon
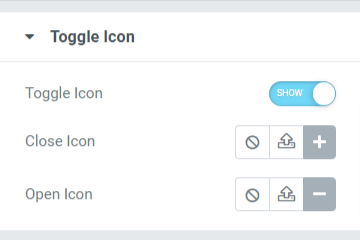
This section includes options related to the toggle icon on the FAQ page.
Let’s have a quick look at the options available in this section:
- Toggle Icon: Enable this option to add a toggle icon to your FAQ section.
- Close Icon: Choose a close icon from the icon library.
- Open Icon: Here, you can choose an open icon from the icon library.
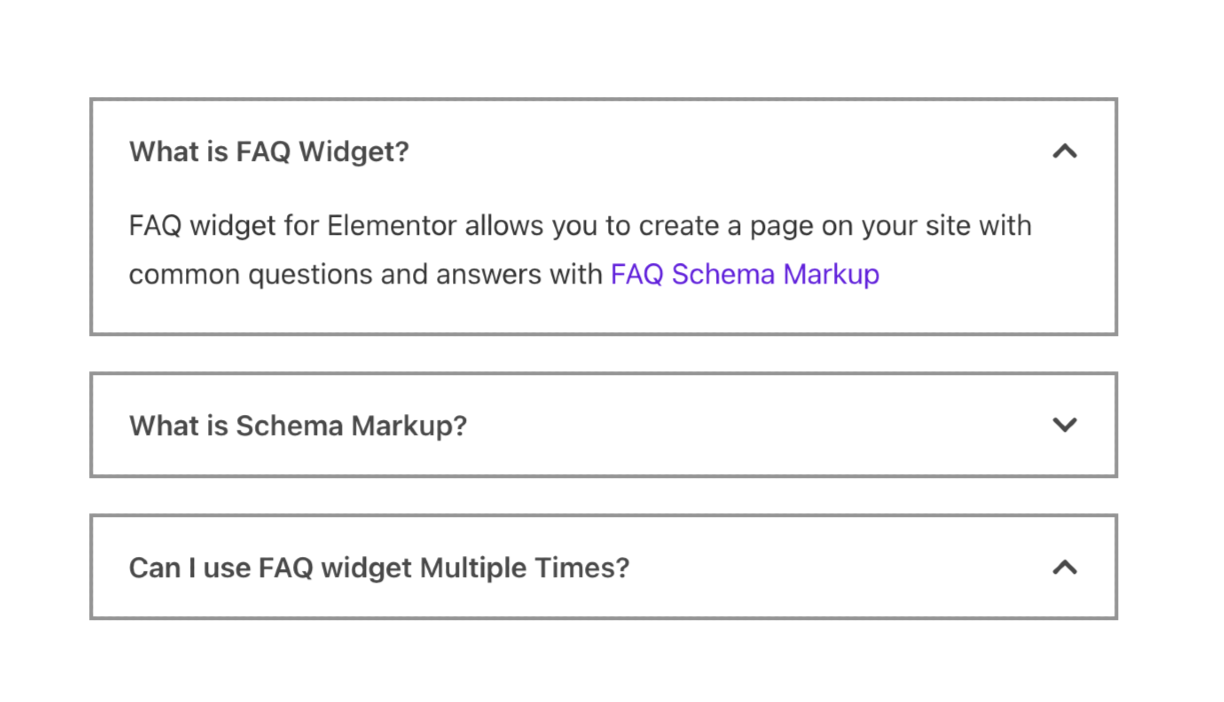
Let’s see what it looks like after applying all these changes in the Content tab of the FAQ widget.
Style Tab of the FAQ Widget
The style tab of the FAQ widget has four sections:
- Items
- Questions
- Answers
- Toggle Icon
Now, let’s have a detailed look at these sections:
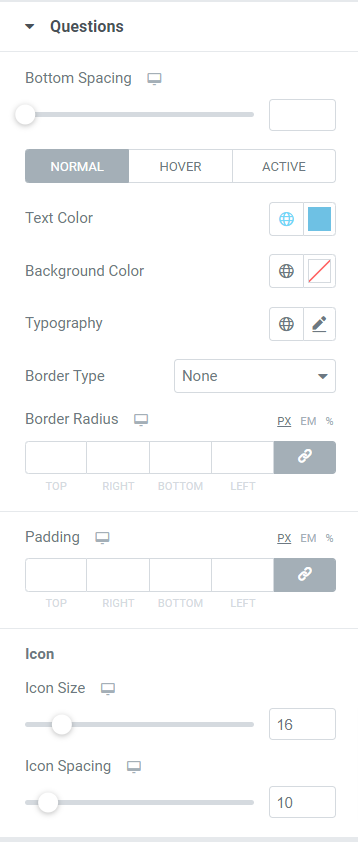
Items
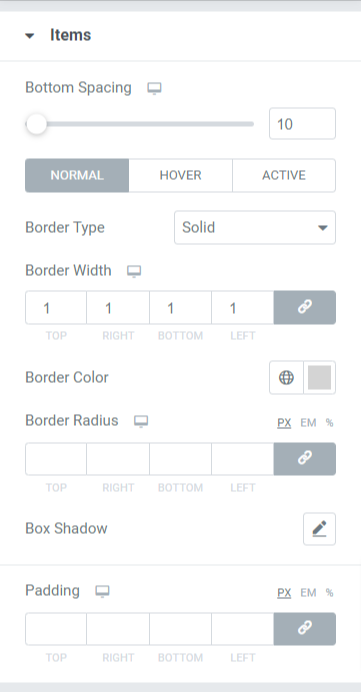
Options available in this section are:
- Bottom Spacing: Adjust the bottom spacing for each question tab on the FAQ page.
- Border Type: Select the border type you want to display in the FAQ section. Choose among the options, such as solid, double, or dotted. You can also choose “none” if you don’t want to display any border.
- Border Width: Using this option, you can set the border width.
- Border Color: With this option, you can choose a border color.
- Border Radius: Set the border radius to give a smooth edge to the borders applied.
- Box Shadow: Use this option to customize the box shadow for the FAQ section.
- Padding: Using this option, you can adjust the padding. It helps to apply enough space between the content and the borders, and gives a neat look.
Questions
This section allows you to customize the question part displayed in the FAQ section.
Let’s have a quick look at all the available options:
- Bottom Spacing: This option allows you to adjust the bottom spacing for each question on the FAQ page.
- Text Color: You can choose the text color using this option.
- Background Color: You can customize the background color for the question in the FAQ section.
- Typography: With this option, you get all the options to customize the typography of the text for the question part.
- Border Type: You can customize the questions by applying the border. Select the border type you want to display in the FAQ section. Choose between solid, double, dotted, and dashed. You can also choose “none” if you don’t want to display any border.
- Border Radius: Set the border radius to give a smooth edge to the borders applied.
- Padding: Using this option, you can adjust the padding. It helps to apply enough space between the content and the borders, giving a neat look.
Icon
- Icon Size: Adjust the icon size using this option.
- Icon Spacing: This option can adjust the spacing between the icons.
Answers
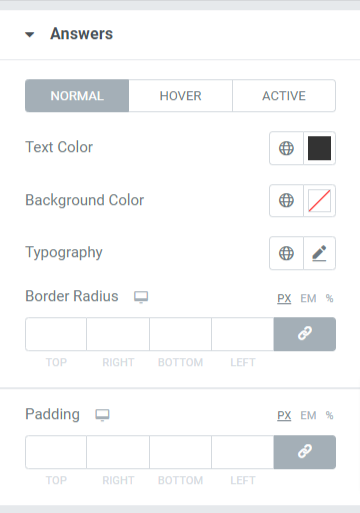
As the name says, in this section, you’ll get customization options to style the Answer part of your FAQ section.
Let’s have a quick look at all the available options:
- Text Color: With this option, you can choose the text color for the answers.
- Background Color: You can choose the background color using this option.
- Typography: This option allows you to customize the text’s typography for the answer section in all possible aspects.
- Border Radius: Set the border radius to give a smooth edge to the borders applied.
- Padding: With this option, you can adjust the padding. It helps to apply enough space between the content and the borders, giving a neat look.
Toggle Icon
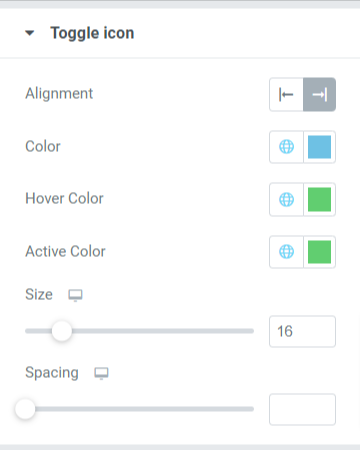
- Alignment: You can set the alignment of the toggle icon using this option.
- Color: With this option, you can choose the color for the toggle icon.
- Hover Color: This option allows you to choose a color for the toggle icon in hover mode.
- Active Color: This option allows you to choose a color for the toggle icon in active mode.
- Size: You can set the size of the toggle icon using this option.
- Spacing: This option allows you to add space between the toggle icon and the question/answer text.
Get the PowerPack FAQ Widget for Elementor Now!
We hope this tutorial helps you to create a Search Engine Optimized FAQ page for your WordPress website using Elementor page builder. If you’ve enjoyed this article, we’re sure you’d love experiencing our other PowerPack tools. Click here to explore all PowerPack Widgets for Elementor.
Please drop your comments here; we’d love your replies. Also, join us on Twitter, Facebook, and YouTube.
Now that you’ve learned how to create an effective FAQ page with Elementor, let’s take a glance at some frequently asked questions that you might have:
Answer: A dedicated FAQ page serves multiple purposes. It helps provide quick and easy answers to common questions, improving your experience and reducing bounce rates. Additionally, search engines often favor well-structured FAQ pages, as they provide valuable information to users and can enhance your website’s search engine optimization (SEO) by targeting specific long-tail keywords.
Answer: To create an SEO-friendly FAQ page with Elementor, you can use PowerPack Addons.
PowerPack comes with a dedicated FAQ widget that allows you to create effective FAQ pages/sections without adding any code.
Answer: There is no set rule for the number of FAQs to include on your page, but a good starting point is to have at least 5 to 10 questions. Focus on addressing common customer queries or providing information that will be helpful to your target audience. Keep the list concise and relevant. You can always add more FAQs as you gather feedback and analyze user behavior.
Answer: Yes, keeping your FAQ page up-to-date is beneficial for both SEO and user experience. Regularly review and update the content to reflect product, service, or business policy changes. Adding new relevant FAQs and removing outdated information can help search engines recognize your website as a valuable resource.
Read More From the Blog:
