
Looking for a way to add custom fonts in Elementor?
Every website owner wants their website to look the best and be so attractive that users should praise & thoroughly explore their website. It is possible to make a website visually appealing in various ways, and one of them is to add creative custom fonts.
This blog will provide a complete guide on adding custom fonts to your WordPress website using Elementor. So what are we waiting for? Let’s get started.
Add Custom Fonts Using Elementor [2 Easy Methods]
If you have used Elementor before, you would know how easy and effective it is. There are many features of Elementor through which you can give a stunning look to your website.
Along with these features, Elementor gives the flexibility to add Custom Fonts & customize their formats for your website.
Before proceeding, there are some default font formats supported by Elementor that you need to know.
Let us first discuss them in brief.
- WOFF File: WOFF is Web Open Font format which is OpenType or TrueType fonts used by modern browsers.
- WOFF2 File: This web font file is created in WOFF file in 2.0 format, which supports OpenType & TrueType fonts providing better compression than WOFF.
- TTF File: A TTF file is a TrueType font format developed by Apple and used in macOS & Windows.
- SVG File: SVG, which stands for Scalable Vector Graphics, is an XML-based vector image format. It is used for defining two-dimensional graphic file formats for the web.
- EOT File: EOT is an Embedded Open Type file format that works on IE and is designed by Microsoft.
There are two ways to add custom fonts to your Elementor website:
- Using the Elementor Custom Fonts Feature
- Using a WordPress plugin
Method 1: Add Custom Fonts to WordPress Using Elementor Custom Fonts Feature
To use the Elementor custom fonts feature, you need to upgrade to Elementor Pro.
Note: The custom font feature was available in the Elementor Lite plan till a few years back, but after the upgrade, it was shifted to Pro users only.
Follow these steps to add custom fonts to your Elementor website:
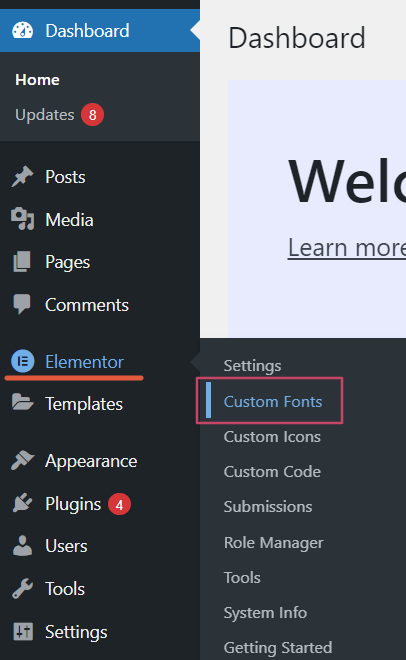
- Step 1: Open your WP Admin Dashboard, explore the sidebar, and navigate to Elementor >> Custom Fonts.
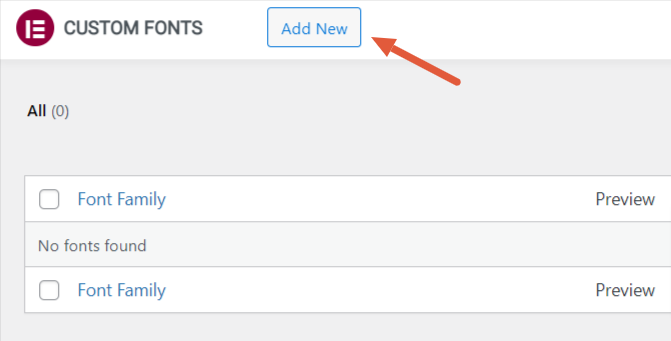
- Step 2: As soon as you click on the Custom Fonts option, you’ll be redirected to the Custom Fonts page, and there, you have to click on the “Add New” button.
To add a new font, enter your font family name. Here we are naming it ‘Elementor font 1.’
Next, click the “Add Font Variation” button below the font title area.

- Step 3: Once you hit the font variation button, you’ll get options to manage & customize your font files.
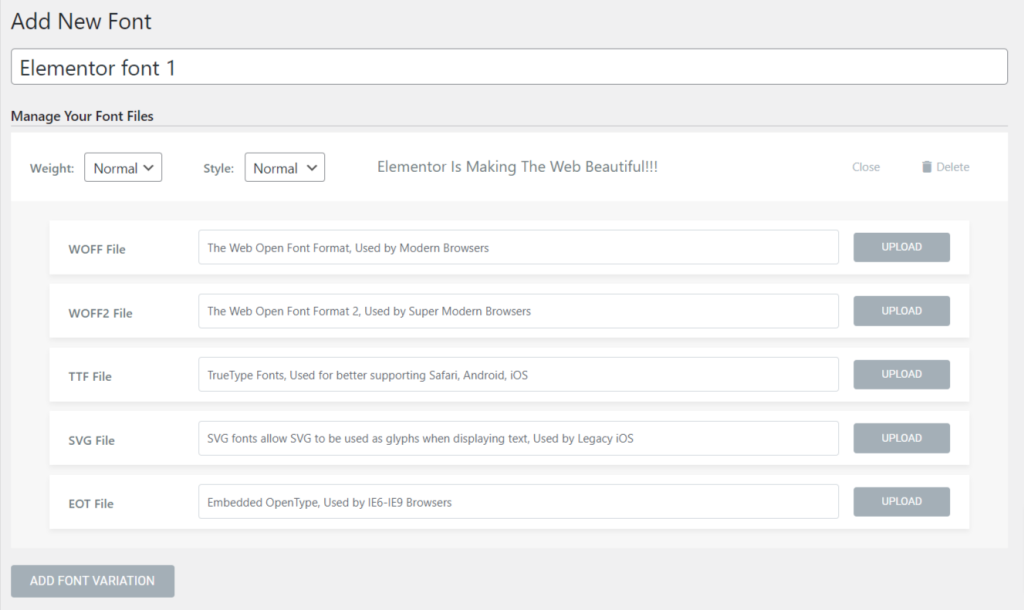
You can manage your font files according to the font Weight, Style (normal, italic, & oblique), and Font Files like WOFF, WOFF2, TTF, SVG, and EOT.
- Step 4: Download a free font or purchase one from the internet.
There are a lot of free & paid resources which offer awesome custom fonts compatible with WordPress and Elementor websites.
Where to Find Free Custom Fonts?
You might be questioning where I can find the free custom fonts.
Many free websites offer free custom fonts, such as fonts.com, Google Fonts, Typekit, and more.
Check the website’s authenticity before downloading or purchasing a font.
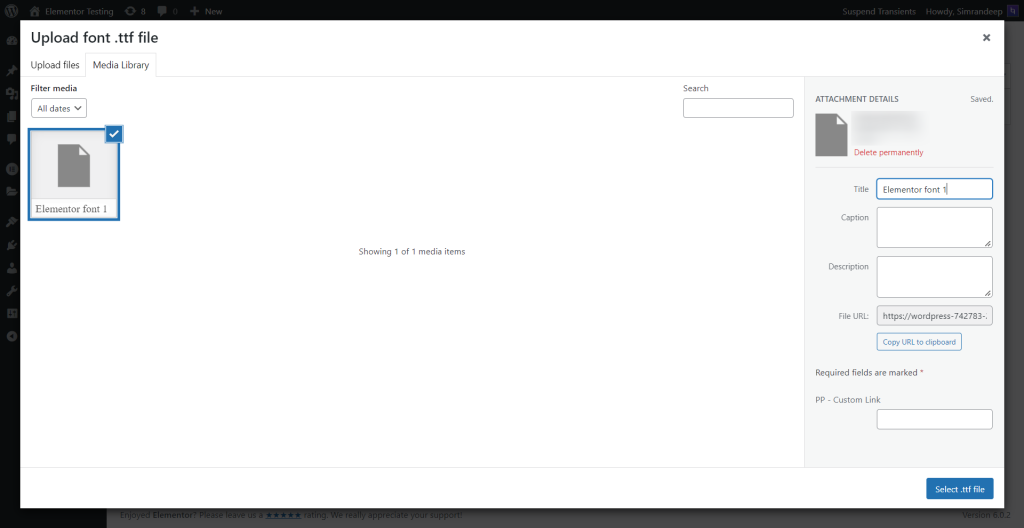
- Step 5: Once you’ve downloaded a font of your choice, upload the file in any of the five font variations available and hit the publish button.
However, we recommend you upload your font file in all five formats for better results to let your content load smoothly in any system or browser.
Remember not to upload more than one font file at a time in all different variations; otherwise, it may slow down your page.

And we’re done! Our font is now added to Elementor and is ready to be used.
- Step 6: Open the Elementor editor page, and in the typography section, search for your newly created font, i.e., ‘Elementor font 1.’
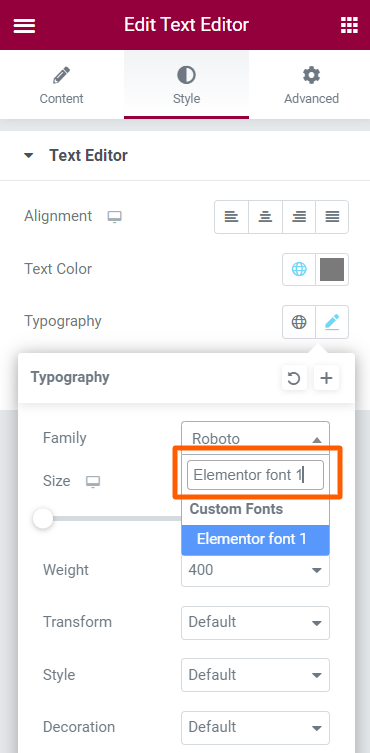
Finally, the ‘Elementor font 1’ we’ve just added is ready to be used.
Method 2: Add Custom Fonts in Elementor Using a WordPress Plugin
This method will be perfect for those using Elementor Lite/Free version.
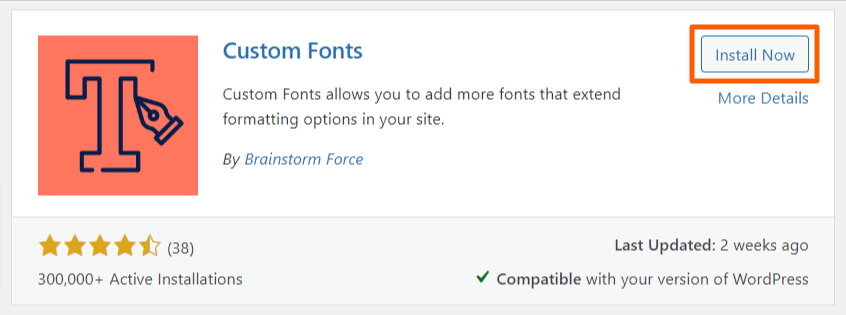
- Step 1: Go to WP Admin Dashboard, and click Plugins >> Add New.
- Step 2: Type ‘Custom Fonts,‘ hit the Install Now button, and activate the plugin.
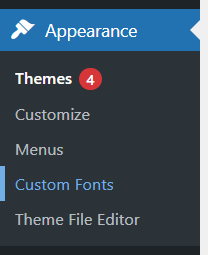
- Step 3: Once you’ve activated the plugin, you’ll find an option, ‘custom fonts,’ underneath the Appearance feature; click on that option, and you’re good to go.

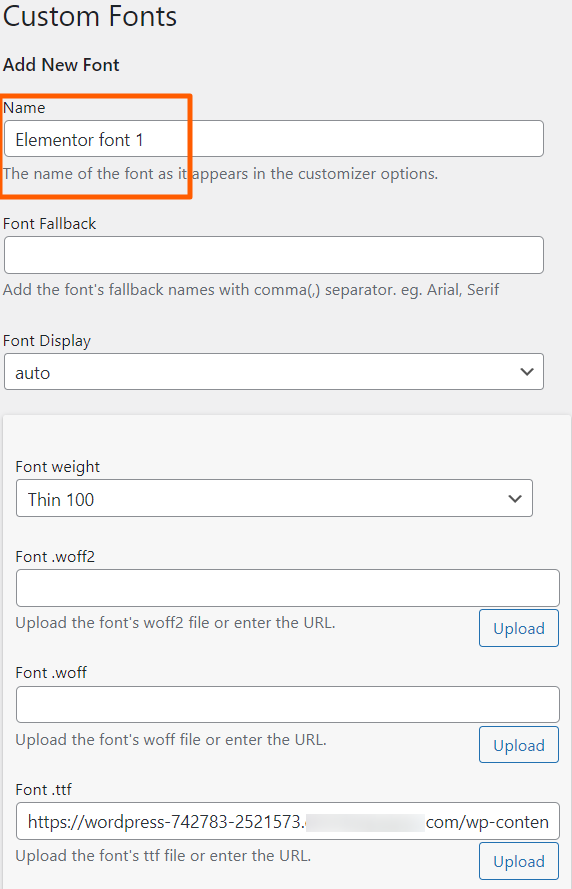
- Step 4: Now that you’ve reached the custom fonts section, enter the font name and a fallback font. Then finally, upload the font formats one by one for all variations, as explained in method 2.
- Step 5: Your new custom font file is successfully added and ready to be used. You can find the font in the typography option within the style tab on your Elementor editor page.
Customize your content using the newly added font on your website with Elementor free & custom fonts plugin. However, if you’re an experienced coder, you can easily create custom fonts for your website using Elementor.
So far, we’ve included all two methods you can follow to create your own custom font for your Elementor website via free and paid resources. Choose the one that suits your needs.
Next Read: How to Use Elementor
We are sure this article will guide you to effortlessly add custom fonts in Elementor. If you face any difficulty following the steps mentioned in this article, please feel free to connect with us or drop your queries in the comment section.
If you’ve just started your journey with Elementor, this article, How to Use Elementor: Detailed Guide for Beginners, will be perfect.
In case you’re searching for an all-in-one solution for your Elementor page builder, PowerPack Elementor Addons will be the best choice.
If you like this article, subscribe to our newsletter to receive amazing articles related to Elementor & WordPress.
Also, you can connect with us on these platforms: YouTube, Facebook, and Twitter.
