Looking for a simple way to paginate WordPress posts using Elementor?
Pagination is a cool trick for showing a ton of stuff neat and organized. Instead of cramming everything onto one super long webpage, you split things into smaller chunks. This lets your visitors flip through different sections easily using pagination buttons.
Sounds interesting? So, let’s learn how to paginate your WordPress posts without adding code.
Let’s get started!
What Is Pagination?
Pagination is like turning a massive book of web content into smaller, more organized chapters. It’s a way to keep your website user-friendly and your visitors happy. When it comes to implementing pagination on your WordPress, it’s all about ensuring your audience can easily navigate your blog posts without feeling lost in a sea of content.
Imagine you run a fantastic blog with tons of posts. Without pagination, all your posts would appear on a single, never-ending page. Visitors would have to scroll and scroll and scroll… You get the idea. That’s not very user-friendly.
That’s where pagination comes to the rescue! It divides your content into neat chunks, usually a certain number of posts per page. So, instead of showing all your blog posts on one page, pagination creates a series of pages. Each page contains a specific number of posts, making browsing easier for your readers.
Why Paginate WordPress Posts?
Implementing pagination for your WordPress posts can bring various advantages that greatly enhance the user experience and improve the functionality of your site. Let’s dive into why you should consider paginating your WordPress posts:
- Improved User Experience: Extensive pages of content can be overwhelming for visitors and make it challenging to locate specific information. Pagination breaks your content into smaller, more manageable sections, making it flexible for users to navigate and find what they’re looking for.
- Faster Loading Times: Having numerous posts on a single page can lead to slower loading times, mainly for users with slow internet connections or mobile devices. Paginating your posts helps distribute the content across multiple pages, improving loading speeds and reducing the risk of users bouncing off due to slow loading.
- Easier Navigation: Pagination provides clear navigation options for users to move between different content pages. This prevents excessive scrolling and makes it more convenient for visitors to browse your posts.
- Search Engine Optimization: Search engines like Google prefer well-organized websites with clear navigation. By implementing pagination, you create a more structured site, which can positively impact your SEO efforts.
- Increased Engagement: With pagination, visitors are more likely to explore multiple pages and read more of your content. This extended engagement can lead to more time spent on your site and a better chance of converting casual visitors into regular readers or customers.
- Enhanced Analytics: Tracking user behavior and engagement becomes more insightful when you can analyze data across different pages. Paginated content gathers more accurate analytics, helping you understand what posts resonate with your audience.
- Better Mobile Experience: Mobile users are a significant portion of web traffic. Pagination ensures a smoother experience for mobile users by reducing the amount of scrolling required and optimizing content for smaller screens.
- Aesthetic Appeal: From a design perspective, paginated content looks cleaner and more organized than lengthy single-page layouts. It presents your content in a visually appealing manner that’s easier for users to digest.
How to Paginate WordPress Posts Using Elementor?
Now that you know the benefits of pagination WordPress posts, let’s learn how to paginate your WordPress using Elementor and PowerPack Addons’ Advanced Posts widget.
Including the feature that allows you to paginate your blog posts, this Posts widget offers many other features, such as:
- You can choose from various skins for your blog post display: Classic, Card, Creative, Event, News, Overlap, Portfolio. Customize these skins to your liking.
- Allow you to adjust the number of columns and posts on your website. Achieve uniformity in titles by using the equal heights option.
- The Posts widget offers extensive options. Select which posts to display on the grid, modify the Custom Post Type, and apply filters based on authors, categories, or specific exclusions—Reorder posts as needed.
- You can also implement user-friendly front-end post filtering based on categories and tags.
- Enable or disable featured images for posts, and set a fallback image for those without.
- You can even customize post elements like title tags, links, Excerpts, Post Meta, Post Comments, Post Date, and the Read More button.
- Last but not least, you can leverage styling options to make precise adjustments to every element of your post grid.
Let’s start paginating your WordPress posts using Eleemntor and PowerPack Addons’ Post Widget.
Step 1: Install and Activate PowerPack Addons
The Advanced Posts widget comes in the pro version of PowerPack Addons. So first, you need to purchase and add the license key to use the premium features.
Check out this installation guide to learn the complete process.
Once you complete the installation process, head to your WordPress dashboard and create a new page.
Step 2: Drag and drop the PowerPack Posts Widget
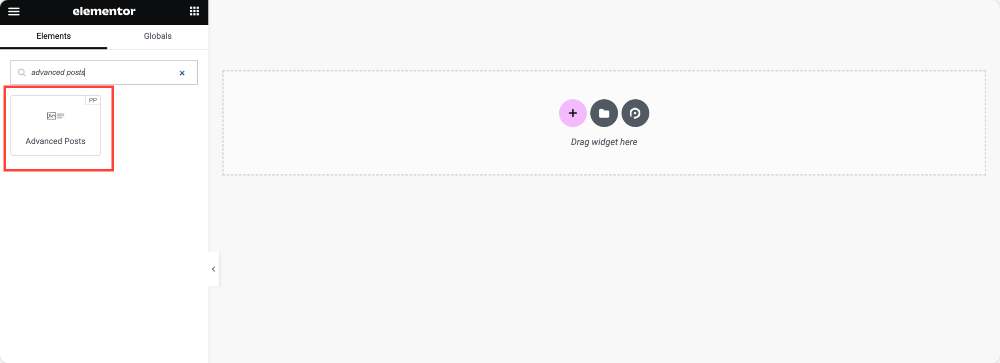
Next, open the page using the Elementor editor and search posts in the widget panel.
Drag and drop the Posts widget on your page. Check the “PP” icon on the widget’s right corner to ensure it’s from PowerPack.
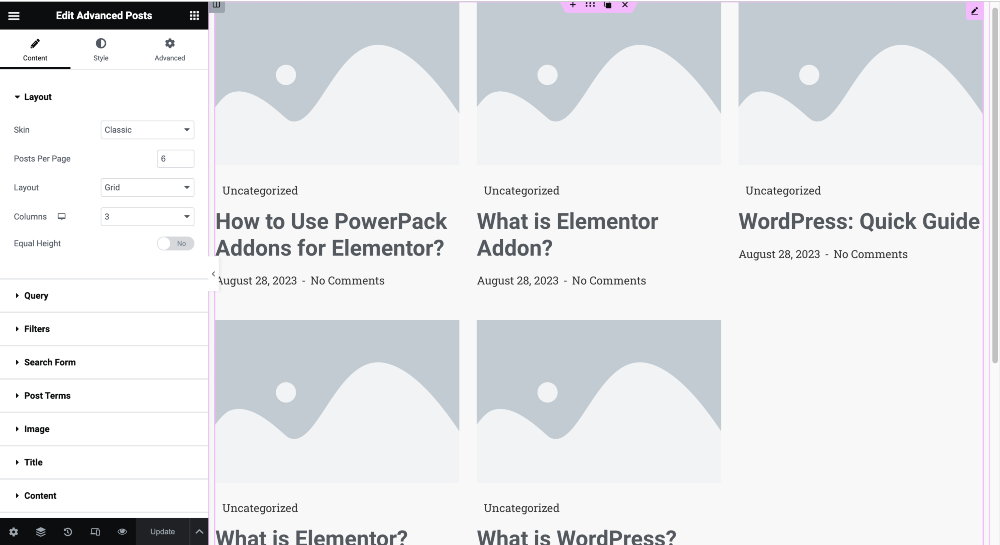
As soon as you add the widget, you”ll see all your site’s blog posts start appearing on the page.
Step 3: Add Pagination To Your Blog Posts
PowerPack Posts offers you tons of features. You can explore each and every feature in the Content tab of the widget.
All the options are pretty easy and self-explanatory. You can play around with the options and create your own blog post display.
To add pagination to your posts, scroll down the Content tab till you see a section named “Pagination.”
Open the section, and pagination options are shown in the screenshot below.
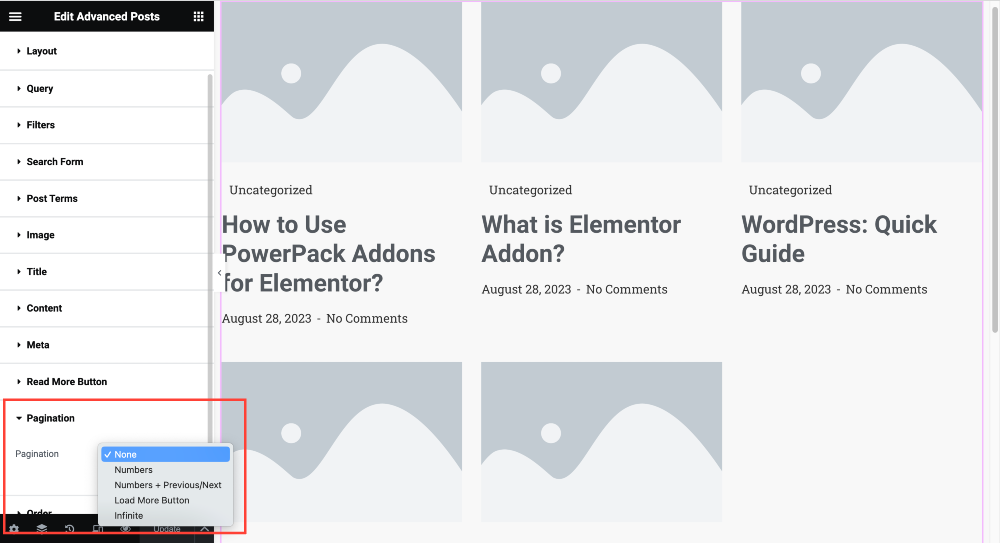
You get different pagination style options like Number, Load More Button, and Infinite. Choose your preferred style and preview to check how the pagination works on the live page.
And that’s it! This is how you can easily paginate WordPress using Elementor. Also, remember to customize other PowerPack Advanced Posts widget settings options.
Wrapping Up!
Paginating WordPress posts isn’t just about splitting content; it’s about creating a more user-friendly, efficient, and engaging experience for your visitors while reaping the benefits of improved SEO and site performance.
We are sure this guide will help you understand the pagination feature and how it can benefit your website.
We regularly published detailed content around Elementor and PowerPack Addons. Some of our popular guides are:
