Wanted to learn how to install and activate themes and plugins in WordPress?
Installing and activating WordPress themes & plugins on a website seems like a technical process, but it’s not. Following a few simple steps, you can install and activate any theme & plugin of your choice and start using them on your WordPress website.
So, In this article, we’ll discuss two methods of installing & activating themes and plugins in a WordPress website.
Installing a Theme & Plugin in WordPress
WordPress is the most user-friendly CMS, currently powering 43% of the web.
The use of plugins and themes greatly facilitates the process of developing a website. Plugins & themes allow users to customize their website’s features, designs, and functionalities by making a few easy tweaks.
You’ll be pleased to know that installing a theme and plugin is as easy as flying a paper plane. There are a couple of ways to apply themes and activate plugins on a WordPress website, and none require complicated steps; everything is quite simple.
Method – 1: Installing a theme or plugin using WordPress Admin Search
Installing a Free Plugin
To install a free theme or plugin from the WordPress directory. First, you need to log in and open your WordPress admin dashboard.
In order to install a plugin, go to Plugins and click on the Add New button.

Next, you can manually choose a plugin from the ‘Featured,’ ‘Popular,’ ‘Recommended,’ and ‘Favorite‘ plugin categories.
Clicking on the ‘Featured’ field will list all the featured WordPress plugins you might like to use on your website.
If you choose the ‘Popular’ field, all the trending WordPress plugins will appear on your screen. Likewise, selecting the ‘Favourite’ field will list all your fav-marked plugins.
If you want to use a particular plugin, type its name in the Search Plugins area, click Install Now, and hit the Activate button once installed.

Once you hit the ‘Activate‘ button, the plugin will be ready to use immediately.
Installing a Free Theme
Although many themes are available for WordPress, not all themes are free. If you want a free theme on your website, install it from the WordPress themes directory.
To install a free theme, you must first log in to WordPress and navigate to the ‘Admin Dashboard Area.’
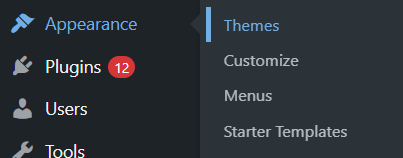
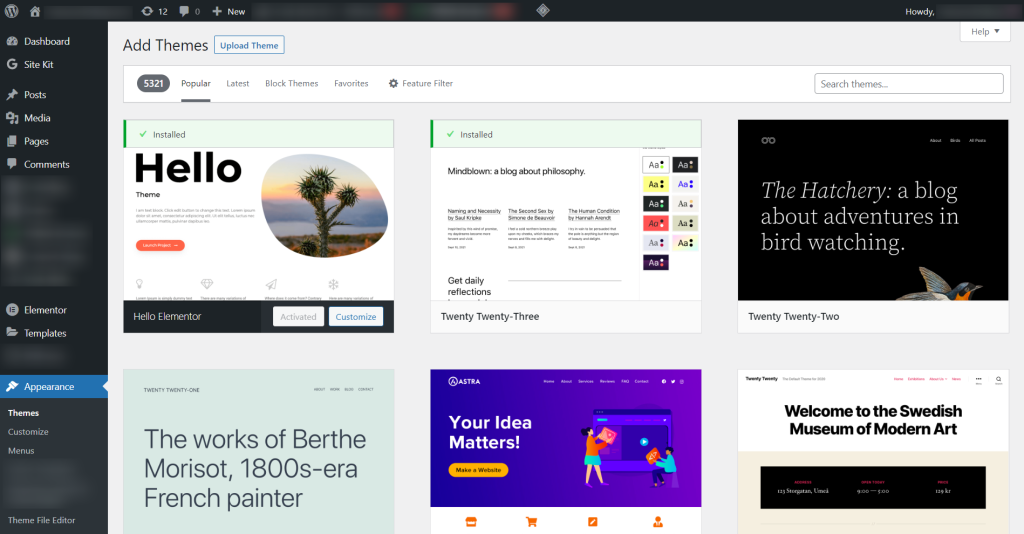
Now, navigate to Appearance>>Themes on your WordPress dashboard and click the Add New button.

On the next screen, you’ll be redirected to the exclusive free themes library of WordPress.

Similar to the plugin installation process, here, too, when searching for a theme, there are different fields available that can help you match your criteria and preferences with the theme design you want. For example, you can find a theme by choosing fields like ‘Popular,’ ‘Latest,’ ‘Block,’ ‘Themes,’ ‘Favorites,’ and ‘Feature filters.’
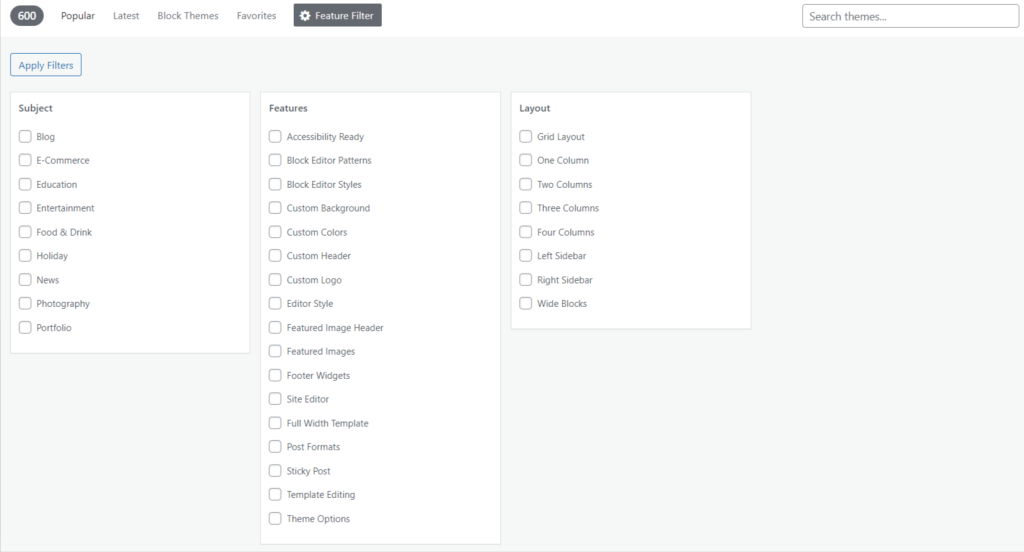
Selecting the ‘Feature Filter’ field will let you sort the themes based on the different characteristics, such as subject, features, and layout.

You can choose the fields and search for the themes you’re looking for. Also, if you are already familiar with any particular theme and want to use it on your website, type that name in the ‘Search Themes’ area and install it, then activate it.
For example, we are choosing the ‘Twenty-Twenty-Two‘ theme for better understanding.

Few themes allow you to view it before applying on your website, simply click the ‘Preview‘ button to see how it will look on your site.

Once you activate the theme, WordPress will pop an “Installed” message on your screen, and you’re now ready to design your website with the theme you’ve just applied.
Note: Some themes use a few additional settings like header-footer and layout options. Configure the theme settings and customize the layout design as per your need.
Method 2: Installing a theme or plugin using the Upload Method
This method includes downloading and uploading a plugin or theme file directly to the WordPress website.
To manually add a plugin or theme to your WordPress website, you first need to download the .zip file of the desired plugin/theme from the WordPress.org directory or from its official marketplace.
Installing a plugin
- Log in to your WordPress admin dashboard, hover over Plugins > Add New.
- Click on the Upload Plugin option at the page’s top.

- Next, click on the Choose File option.
- Now browse the .zip file of the plugin you’ve downloaded and hit the Install Now button.
- Once the installation is completed, click the Activate plugin option.
- Finally, the plugin is available on your WordPress Admin area and ready to use.
The process of uploading a theme follows the same procedure you’ve followed while installing a plugin on your website.
Try out the following procedure in these simple steps:
On your WordPress Admin Dashboard, go to Appearance > Themes > Add New > Upload Theme > Choose File > Install Now > Activate.
You can also see a ‘Live Preview’ of your installed theme before activating it on your website.
Note: Please verify the third-party plugin/theme before installing or uploading it on your official website. A corrupt/broken theme or plugin may harm or disturb your website’s settings or performance.
So far, we’ve learned the two methods for activating a free plugin or a theme on a WordPress website. Follow the method that suits you the best.
Conclusion
Many free themes and plugins for WordPress are easily downloadable from WordPress.org or its admin dashboard.
Both methods are simple to implement, but the first approach is more reliable because it uses products in the WordPress directory.
However, if you want to use a premium or a 3rd party theme/plugin which isn’t available in the WordPress directory, you can follow the Upload Method.
We hope we’ve helped you to get your desired plugins and themes installed on your website in the simplest way possible. If you’ve any queries, you can drop them in the comment sections.
More From the Blog:
- Best WordPress Video Gallery Plugins
- Free WordPress Contact Form Plugins
- Best WordPress Slideshow Plugins
Also, join our newsletter to get updated with new releases and amazing tutorials like this.
