Wanted to create a multistep form in Elementor? Great, you’ve landed on the right page!
Creating a multi-step contact form can greatly enhance the user experience on your website. By breaking down the form into manageable steps, you make it easier for visitors to complete, leading to higher submission rates.
In this guide, we’ll show you how to create a multistep contact form using Elementor, one of the most popular WordPress page builders.
What is a Multistep Form?
Multistep forms divide the input fields into multiple sections or steps, guiding users through a series of steps to complete the form. Instead of presenting all the fields at once, which can be overwhelming, multi-step forms break the process into manageable chunks.
Advantages of Multistep Forms
- Improved User Experience: By breaking the form into smaller, more digestible parts, users feel less overwhelmed and are more likely to complete it.
- Higher Completion Rates: Multi-step forms often lead to higher completion rates because they feel more manageable to users. Each step feels like a small, achievable task.
- Better Data Organization: Segmenting information into different steps helps organize data more efficiently. This can be particularly useful for long forms that require more information.
- Reduced Perceived Effort: Users perceive multi-step forms as requiring less effort, as they are guided through each step gradually rather than facing a long list of fields all at once.
Creating a Multistep Form in Elementor
Step 1: Open the Page
First, navigate to the page where you want to add your contact form. Then, open the page in the Elementor editor by clicking the “Edit with Elementor” button.
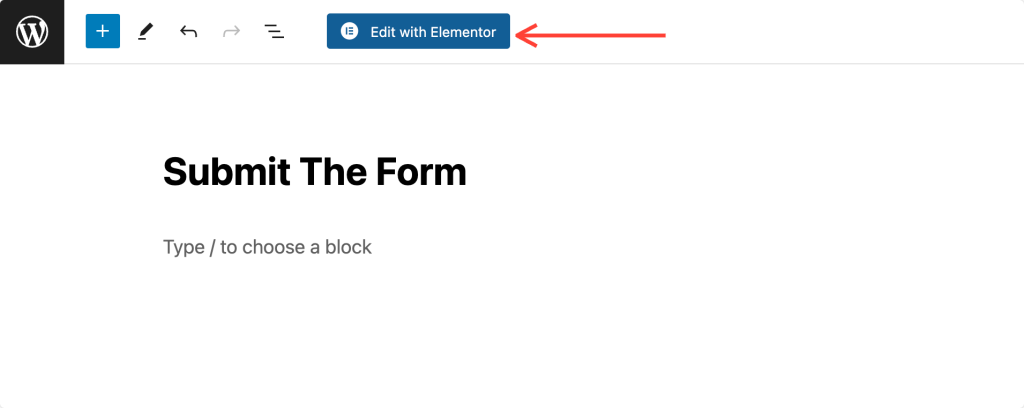
Step 2: Add the Contact Form Widget
Once you’re in the Elementor editor, drag and drop the “Contact Form” widget onto your page. You can find this widget on the left side of the Elementor panel.
Search for “form” then drag it to the desired location on your page.
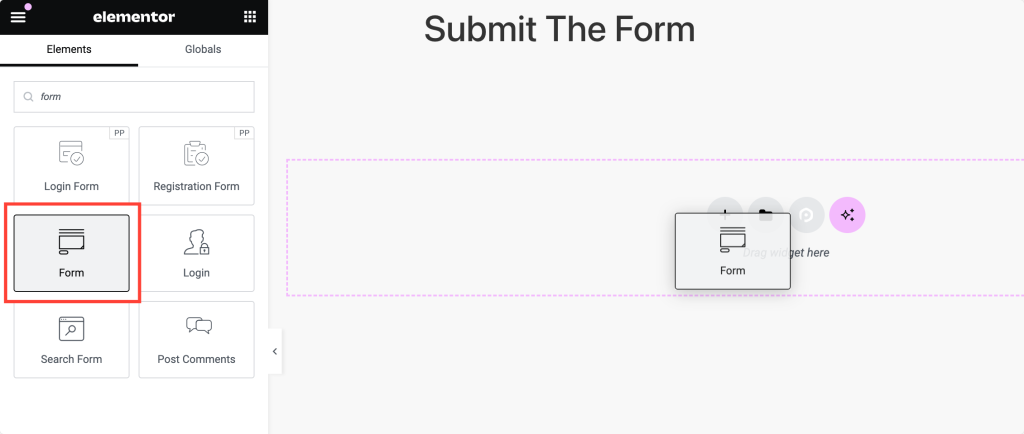
Step 3: Default Form Fields
By default, the Contact Form widget creates a form with three fields: Name, Email, and Message. Under these fields, there is also a Send button. We’re going to modify this form to make it multi-step.

Step 4: Plan Your Multistep Form
We’ll create a multi-step form that collects the visitor’s first name, last name, and email address in the first step, and their message and other details in the second step. This helps streamline the form-filling process for users.
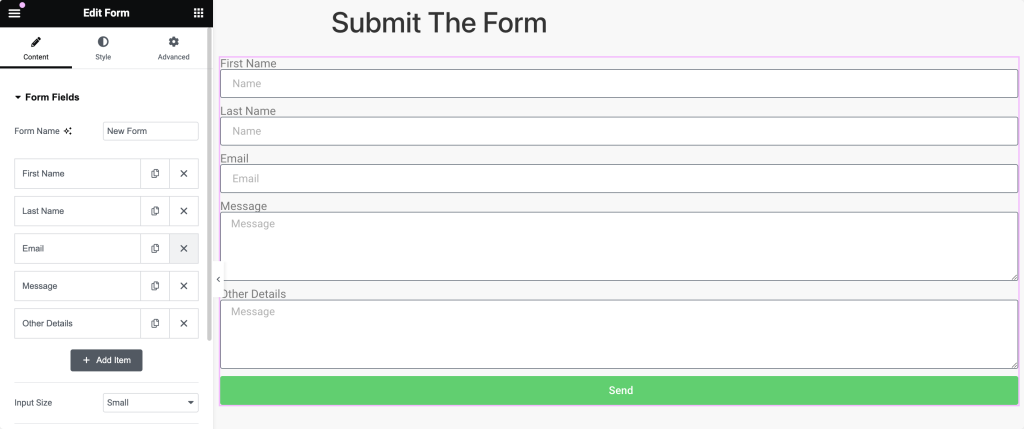
Step 5: Add a New Item
Click on the form widget to bring up its settings in the left panel. In the Form Fields section, click the + Add Item button to add a new field to your form.
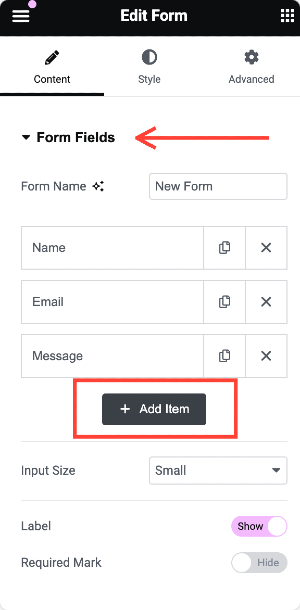
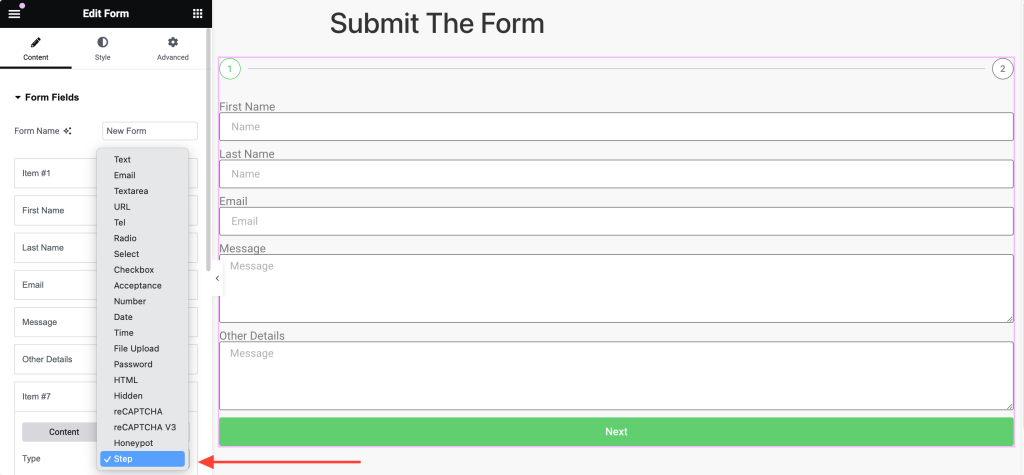
Step 6: Select the Step Field Type
In the Type dropdown menu, select “Step.” This will add a step marker to your form, dividing it into multiple steps.
Step 7: Arrange the Step Field
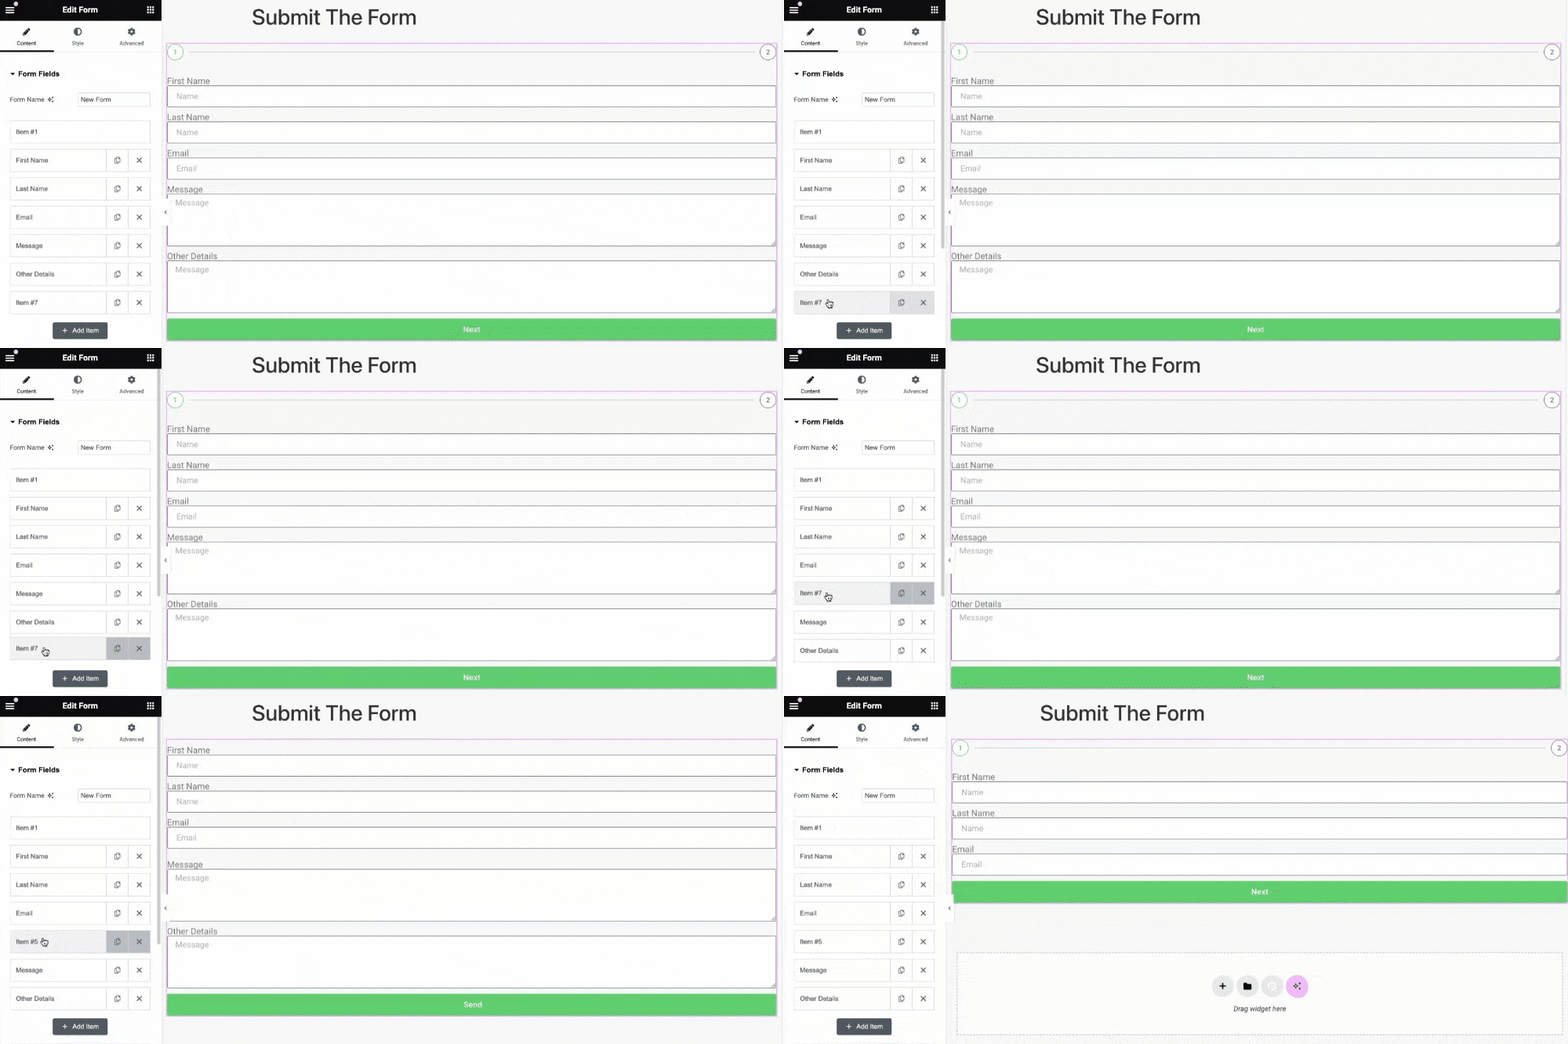
In the panel, drag the newly added Step field so that it’s positioned between the Email and Message fields. This placement will ensure that the form is divided correctly.
Step 8: Configure the Multistep Form
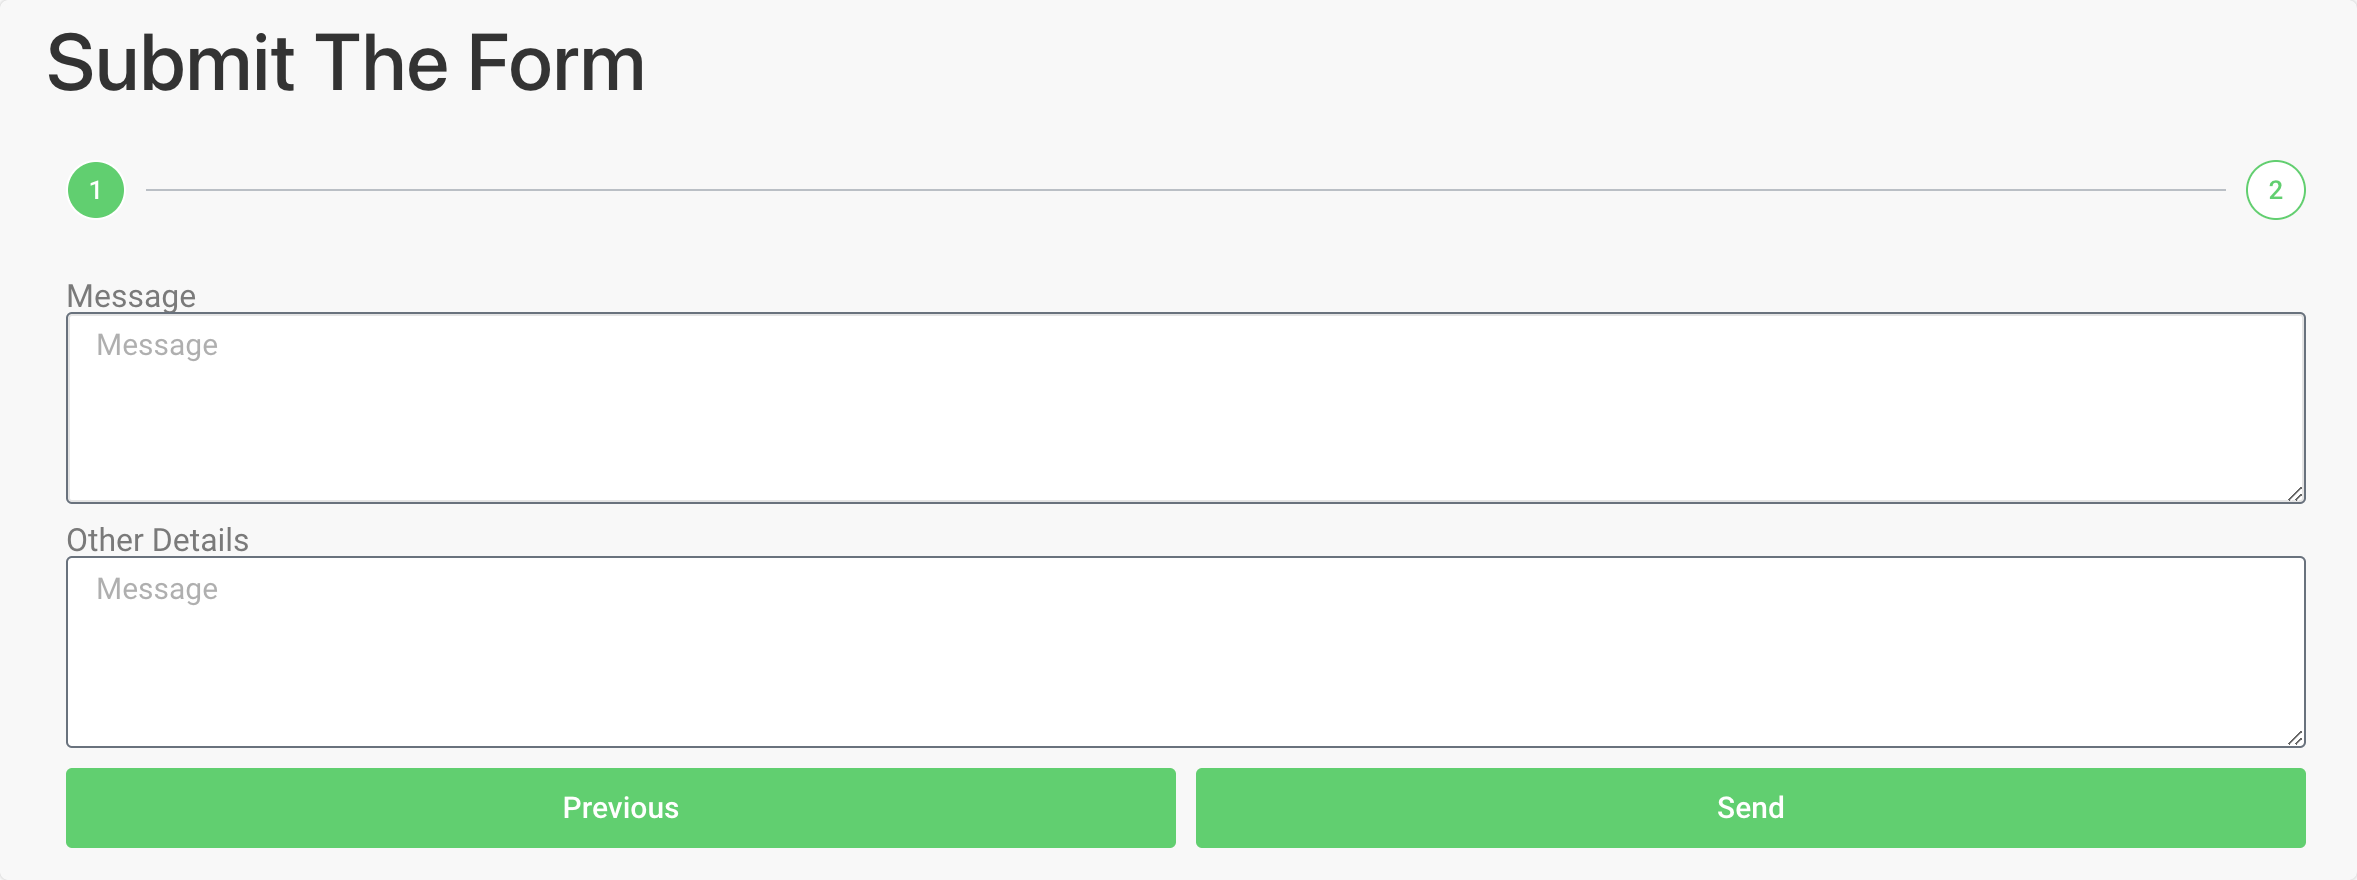
Now, your form consists of two steps:
- First Step: First Name, Last Name, and Email fields with a “Next” button underneath.
- Second Step: Message and Other Details fields with “Previous” and “Submit” buttons underneath.

Final Touches
Customize the labels and placeholders of the form fields to match your needs. Using Elementor’s extensive design options, you can also style the form to fit the design of your website.
Conclusion
Multistep form is a simple yet effective way to enhance your website’s user experience. By following these steps, you can create an easy form for visitors to fill out!
You can create a multistep form in Elementor using its native contact form widget; however, if you’re using other popular WordPress contact form builders such as WPForms, Contact Form 7, or Gravity Forms, you can explore a detailed guide on:
- How to Style Gravity Forms with Elementor
- How to Customize Contact Form 7 with Elementor
- How to Style WPForms with Elementor
If you face any difficulty following the steps mentioned in this article, please get in touch with us or drop your queries in the comment section.
What are your thoughts on this tutorial? Do share if you found this helpful guide! Also, join us on Twitter, Facebook, and YouTube.
