Want to grab your visitors’ attention without overwhelming your page? A marquee effect is a great way to do that.
From highlighting special offers and announcements to showcasing featured content or brand messages, a scrolling marquee can add movement and make important information stand out. The best part? You don’t need to write a single line of code.
With the PowerPack Marquee Widget for Elementor, you can easily create beautiful scrolling text, images, or a combination of both in just a few minutes.
In this guide, we’ll show you how to create a marquee effect with custom text in Elementor step by step.
Create a Marquee Effect With Custom Text in Elementor
Before we get started, let’s understand what the marquee effect is and how it works. Then, I’ll walk you through the process of creating a marquee effect with custom text in Elementor!
What Is a Marquee Effect
A marquee effect is a continuously scrolling section that moves content across your webpage. Traditionally, it was used to display text, but modern marquee sections can include images, icons, links, and even custom separators.
Instead of displaying static content, a marquee keeps moving, making it an excellent way to draw attention to important information.
You can use the marquee effect to display:
- Promotional offers
- New product launches
- Important announcements
- Featured services
- Customer testimonials
- Brand slogans
- Partner logos
- Event updates
Why Use a Marquee Effect
A marquee section isn’t just visually appealing; it can also improve user engagement when used thoughtfully.
Here are a few reasons to add one to your website:
- Highlight announcements without taking up much space.
- Draw attention to limited-time offers.
- Showcase featured products or services.
- Add movement to modern landing pages.
- Display repeated branding messages.
- Make your website feel more interactive.
The key is to use it sparingly. Too many moving elements can distract visitors, while a well-designed marquee helps guide their attention naturally.
Now, without any further delay, let’s see how you can create a marquee effect with custom text in Elementor.
Step 1: Install and Activate PowerPack Addons
Before you can create a marquee effect, you’ll need to install the PowerPack Addons for Elementor plugin on your WordPress website.
PowerPack extends Elementor with a wide collection of creative widgets, including the Marquee Widget that we’ll use in this tutorial. The widget lets you create smooth scrolling content without writing any custom CSS or JavaScript.
Step 2: Open Your Page in Elementor
Now that PowerPack is installed, it’s time to build your marquee section.
Open the page where you’d like the scrolling content to appear. This could be your homepage, landing page, about page, or even a promotional page.
Click Edit with Elementor to launch the visual editor.
If you’re creating a new page, add a new section first. Otherwise, you can insert the marquee into any existing section of your layout.
Think about where the marquee will have the most impact. Many websites place it near the top of the page to highlight announcements, while others use it between sections to showcase offers or featured services.
Step 3: Drag and Drop the Marquee Widget
Once you’re inside the Elementor editor, use the search bar in the widget panel and type Marquee.
When the widget appears, drag and drop it onto your page.
As soon as you add the widget, Elementor will display all of its settings in the left sidebar. This is where you’ll configure the content, animation, separators, and styling.
At this point, you may notice some placeholder content inside the widget. Don’t worry, you’ll replace it with your own custom content in the next steps.
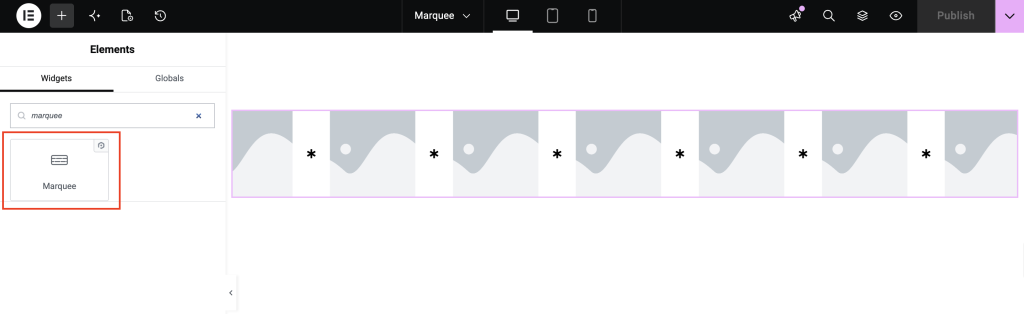
PowerPack Addons Marquee Widget is designed to be beginner-friendly, so you can see every change live as you customize it.
Step 4: Choose the Custom Source
PowerPack Addons Marquee Widget for Elementor offers two different content sources:
- Custom
- Posts
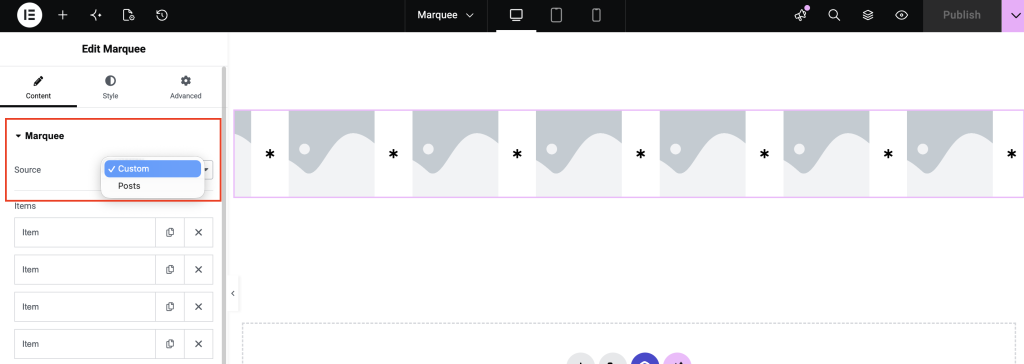
Since this tutorial focuses on creating a marquee with your own text, select Custom as the source.
Choosing the Custom option gives you complete control over every item displayed in the marquee. Instead of automatically pulling content from your website, you can manually create messages that perfectly fit your design.
This is ideal for displaying:
- Promotional offers
- Company announcements
- Brand slogans
- Event information
- Product highlights
- Service features
If you ever want to display your latest blog posts in a scrolling format, you can switch to the Posts source instead.
Step 5: Add Marquee Items
Now it’s time to build your scrolling content.
Every piece of content inside the marquee is called an Item. You can add as many items as you’d like, allowing you to create a continuously scrolling banner filled with announcements, promotions, or other important information.
Click Add Item to create your first marquee entry.
Each item includes several customization options that help you create a more engaging scrolling experience.
Image
Want to make your marquee more visually appealing? You can upload an image for each item. Images help break up long blocks of text and make the marquee more engaging.
For example, you can use:
- Product images
- Brand logos
- Category icons
- Event graphics
- Small illustrations
If you only want text, leave this field empty.
Image Resolution
After selecting an image, choose the appropriate image resolution. Using properly optimized images keeps your marquee looking sharp while helping your page load faster.
There’s no need to use very large images here since marquee items are generally compact.
Text
This is where you’ll enter the message you want visitors to see.
Try to keep your text concise and easy to read. Since the content is constantly moving, shorter messages are usually much more effective than long sentences.
For example:
- New Collection Available
- Free Shipping on Orders Over $50
- Trusted by 10,000+ Customers
- Early Bird Registration Now Open
Notice how each message quickly communicates a key point.
Link
If you’d like your marquee items to be interactive, add a link. Visitors can click the scrolling text or image and be redirected to another page.
This is especially useful for driving traffic to:
- Product pages
- Sale pages
- Registration forms
- Service pages
- Blog posts
Adding links transforms your marquee from a simple visual element into a useful navigation tool.
Add Multiple Items
One of the best things about the Marquee Widget is that you’re not limited to just one message. Repeat the process to create as many items as needed.
You can also:
- Rearrange items by dragging them into a different order.
- Duplicate existing items to save time.
- Remove items that are no longer needed.
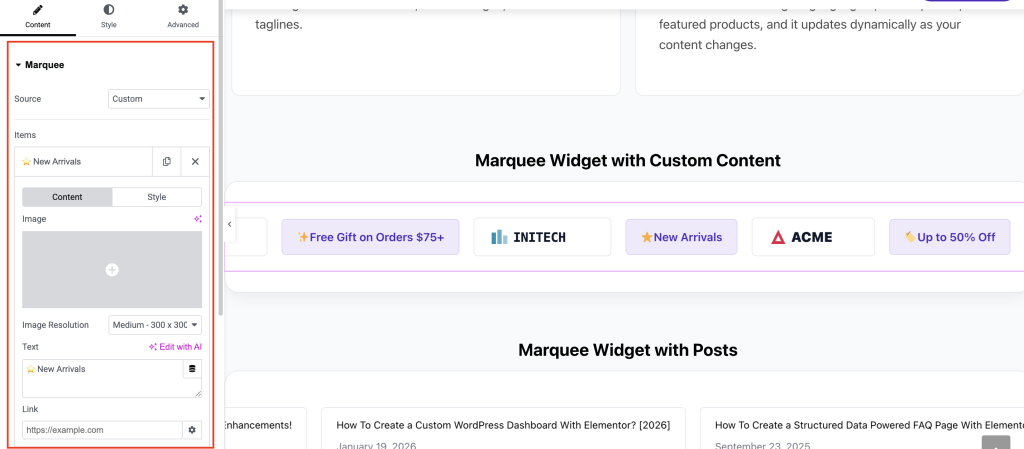
Creating multiple items helps your marquee feel more dynamic while allowing you to highlight several announcements within the same section.
Step 6: Customize the Separator
Without separators, all your marquee items would flow together, making them difficult to distinguish.
Separators create visual breaks between each item, improving readability while giving your marquee a polished appearance.
Enable the Separator option to start customizing how each item is divided.
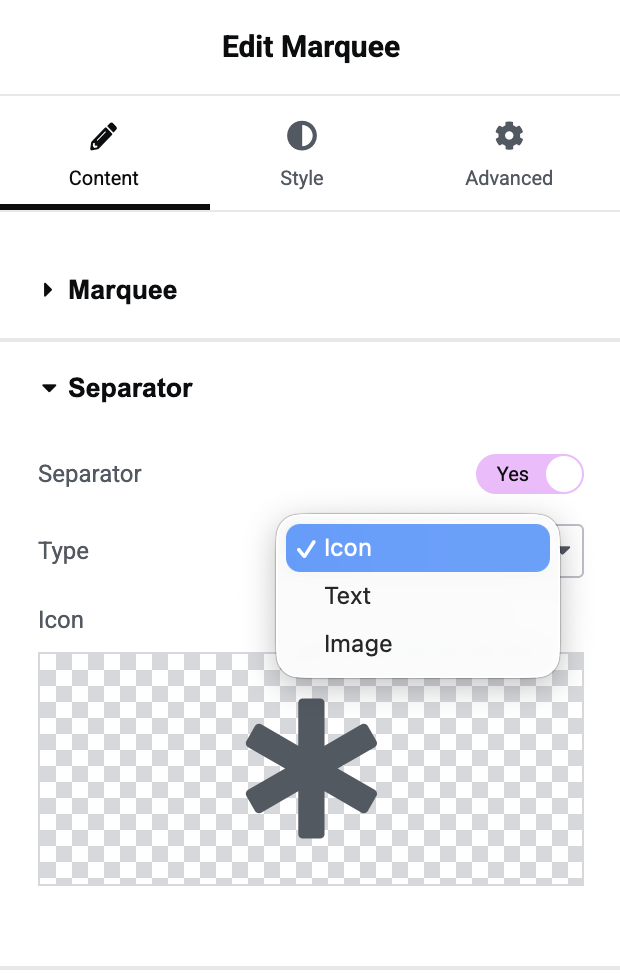
PowerPack gives you three different separator types, allowing you to match your website’s design perfectly.
- Icon Separator: If you’re looking for a modern appearance, choose an icon separator. PowerPack integrates with Elementor’s icon library, giving you access to hundreds of icons. Simple icons like stars, circles, arrows, or diamonds work particularly well because they separate content without distracting from it.
- Text Separator: Sometimes less is more. Instead of using icons, you can display custom text between each item.
- Image Separator: For a more branded look, upload your own separator image. Many businesses use their company logo or a small decorative graphic between each marquee item.
Step 7: Configure Marquee Settings
Now that your content is ready, it’s time to bring it to life.
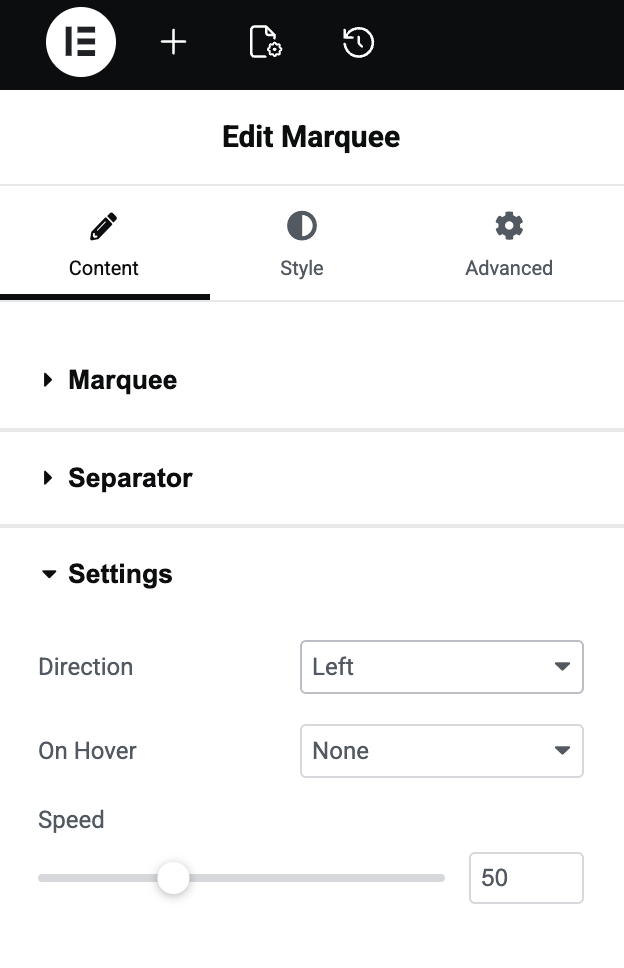
The Marquee Settings let you control how your content moves across the screen. Small adjustments here can dramatically change the overall feel of your design, so don’t hesitate to experiment with different combinations.
- Direction: First, choose the scrolling direction. PowerPack supports four directions: Left, Right, Top and Bottom. Horizontal scrolling is the most popular choice for announcements and promotional banners, while vertical scrolling is great for displaying news updates or featured content in a compact area.
- On Hover: Think about how visitors will interact with your marquee. PowerPack lets you control what happens when someone moves their cursor over the scrolling content. You can choose between three behaviors:
- None — The marquee keeps scrolling continuously.
- Pause — Stops the animation while the cursor is hovering, making it easier to read or click links.
- Slow Down — Reduces the scrolling speed instead of stopping completely, creating a smooth browsing experience.
- Speed: Finally, adjust the scrolling speed. The right speed depends on the type of content you’re displaying. For announcements or promotional offers, a medium speed usually provides the best reading experience. If you’re showcasing logos or decorative content, you can increase the speed slightly for a more energetic feel.
Preview your page and make small adjustments until the scrolling feels natural.
Style Your Marquee
Once your content is ready, switch to the Style tab to personalize its appearance. Depending on your design, you can customize elements such as:
- Typography
- Text color
- Background color
- Item spacing
- Padding
- Margins
- Border
- Border radius
- Alignment
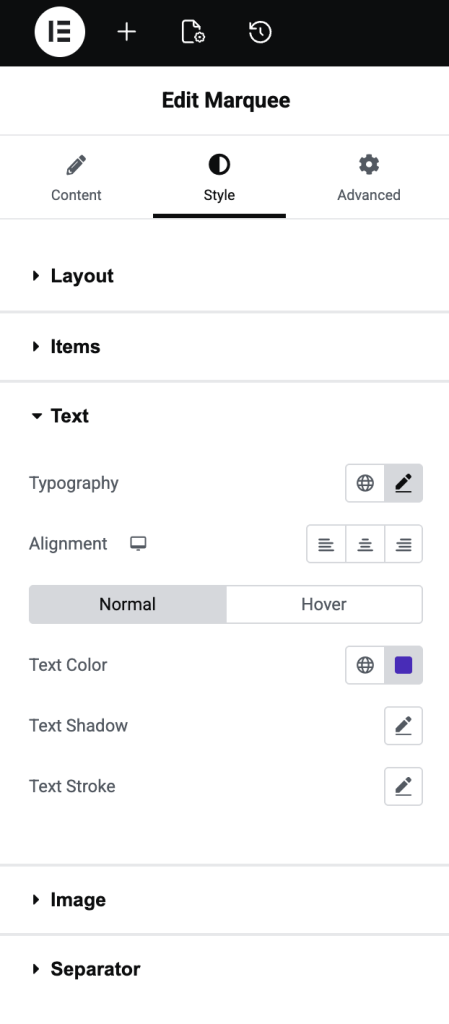
These styling options help you match the marquee with the rest of your website.
Best Practices for Using Marquee Text
Although marquee sections are eye-catching, using them thoughtfully makes all the difference. Here are a few tips to keep in mind.
- Keep the Text Short
- Don’t Scroll Too Fast
- Use Meaningful Links
- Choose Clear Separators
- Match Your Website Design
Frequently Asked Questions
Yes. PowerPack Marquee Widget lets you build fully customizable marquee sections using Elementor’s drag-and-drop editor.
Absolutely. Each marquee item can include an image, text, and an optional link.
Yes. You can choose between None, Pause, or Slow Down under the On Hover settings.
Yes. Besides the traditional left and right scrolling, you can also scroll content from top to bottom or bottom to top.
Yes. Since it’s built for Elementor, your marquee will adapt to different screen sizes, and you can further customize its appearance for desktop, tablet, and mobile devices.
Wrapping Up!
Adding a marquee effect is a simple yet effective way to make important content more noticeable on your website. Whether you’re promoting a sale, sharing announcements, showcasing services, or highlighting your brand message, a scrolling marquee can make your pages feel more engaging without taking up much space.
With PowerPack Marquee Widget, creating a custom marquee in Elementor is quick and completely code-free. Choose the Custom source, add your text, images, or links, customize the separators, adjust the scrolling behavior, and style everything to match your website.
Experiment with different layouts, scrolling directions, and speeds to find the look that best fits your design. In just a few minutes, you can create an eye-catching marquee that keeps your visitors informed while adding a dynamic touch to your Elementor website.
