Searching for a simple way to add Yelp reviews to your WordPress website using Elementor?
Yelp is a platform that provides information related to your business, such as user reviews, ratings, photos, and other relevant details.
In this article, we’ll walk you through a step-by-step process of showcasing Yelp reviews on your Elementor websites to help your businesses build credibility, increase visibility, and allow users to make informed decisions.
How Is Displaying Yelp Reviews on the Website Useful?
Displaying Yelp reviews on a website can be helpful for a few reasons:
- Social Proof: Yelp reviews can prove to potential customers that the business is reputable and trusted by others in the community.
- Improved SEO: Displaying Yelp reviews on a website can help with search engine optimization (SEO) by providing fresh and relevant content to search engines.
- User-generated content: User-generated content, such as Yelp reviews, can increase engagement and build trust with website visitors.
- Valuable insights: Yelp reviews can provide valuable insights for businesses on what customers like and dislike about their products or services, which can help them improve their offerings.
How Can I Add Yelp Reviews to My Elementor Site?
With the PowerPack Business Reviews widget, you can easily add Yelp reviews to your Elementor website.
PowerPack Addon is a creative addon you can consider using with Elementor. PowerPack offers 80+ creative widgets, 300+ page & block templates, and plenty of powerful extensions that empower your Elementor and allow you to build more beautiful websites effortlessly.
With the PowerPack Business widget, you can easily integrate Google and Yelp reviews on your website. In addition, you get easy customization and styling options at your fingertips. Just drag and drop on the widget, make customizations, and you’re done with a beautiful Yelp review section on your Elementor site.
You don’t need to add custom CSS or HTML to alter the styling. With PowerPack, you got it all!
How to Add Yelp Reviews to WordPress Using Elementor?
Let’s see how you can display Yelp reviews on your WordPress website using Elementor and PowerPack Addons for Elementor.
Step 1: Get the Yelp API Key
First, you need to get the Yelp API key to showcase Yelp reviews on a website.
To get the Yelp API key, go to Yelp Developers Website.
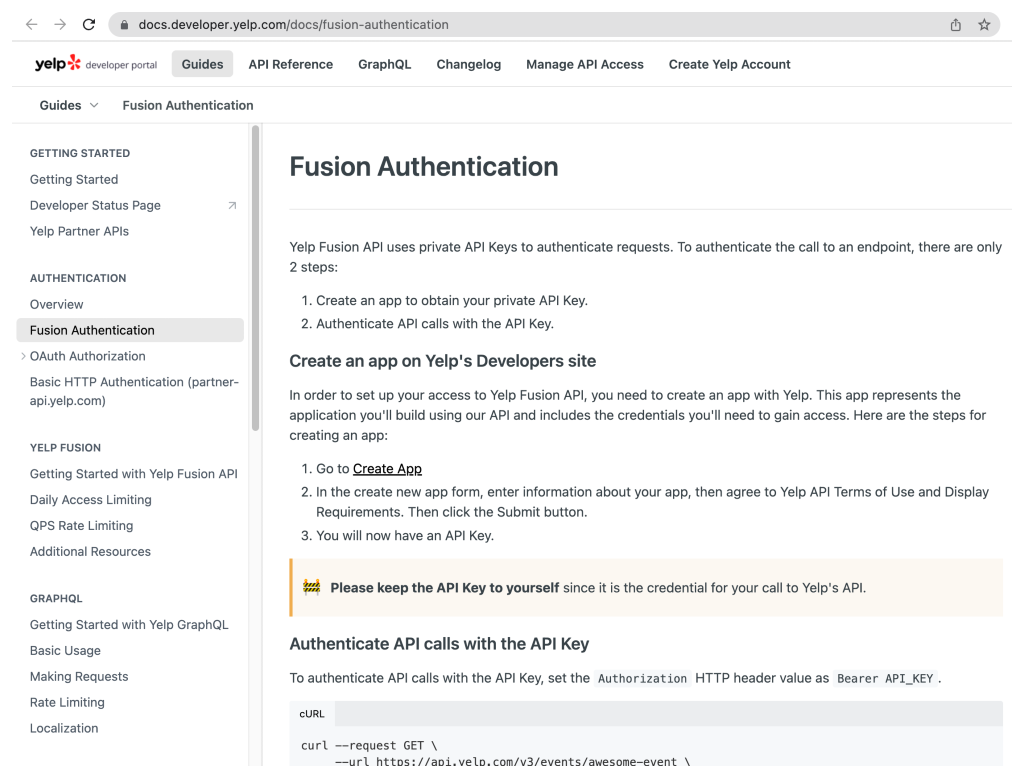
Once you open the website, scroll down and click Create App link.
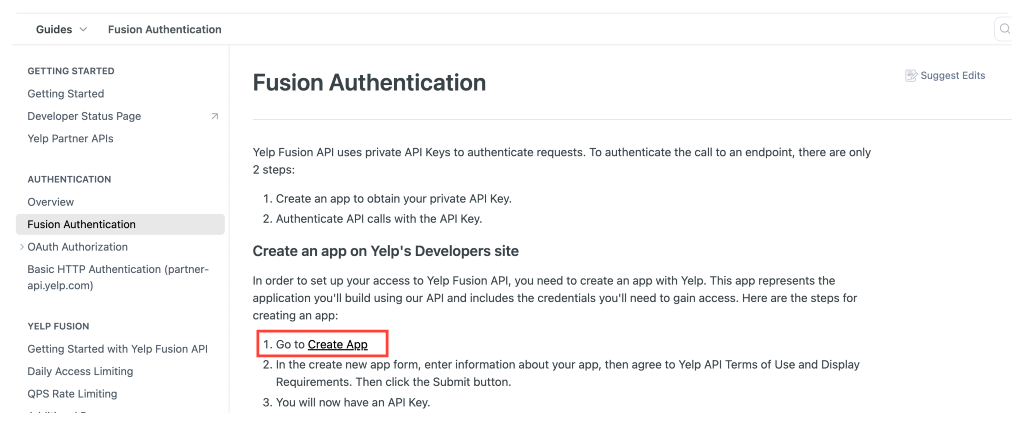
This will open the login screen of Yelp. Add all the required details to create Yelp app.
Once you create the app, you’ll be redirected to the My App page of your Yelp account. On the top of the page, under Client ID, you’ll find your API Key.
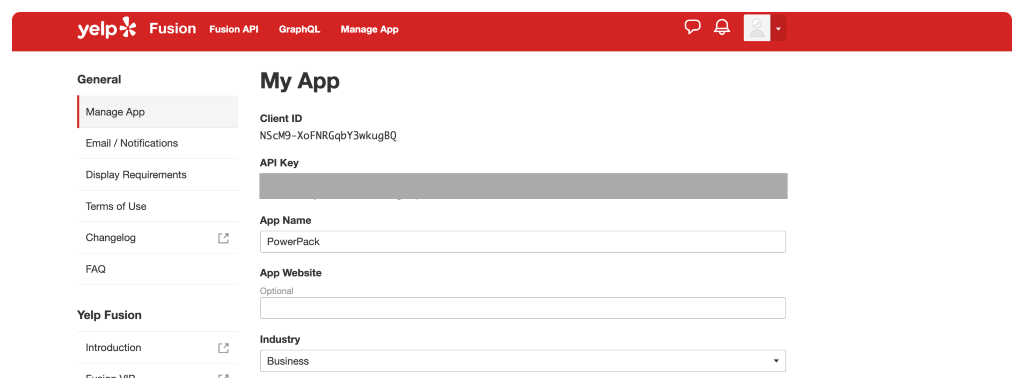
Step 2: Add the Yelp API Key to PowerPack Setting
Once you get your API key, you need to add the key to PowerPack settings to fetch Yelp reviews.
To do that, go to your admin dashboard and click Elementor >> PowerPack.
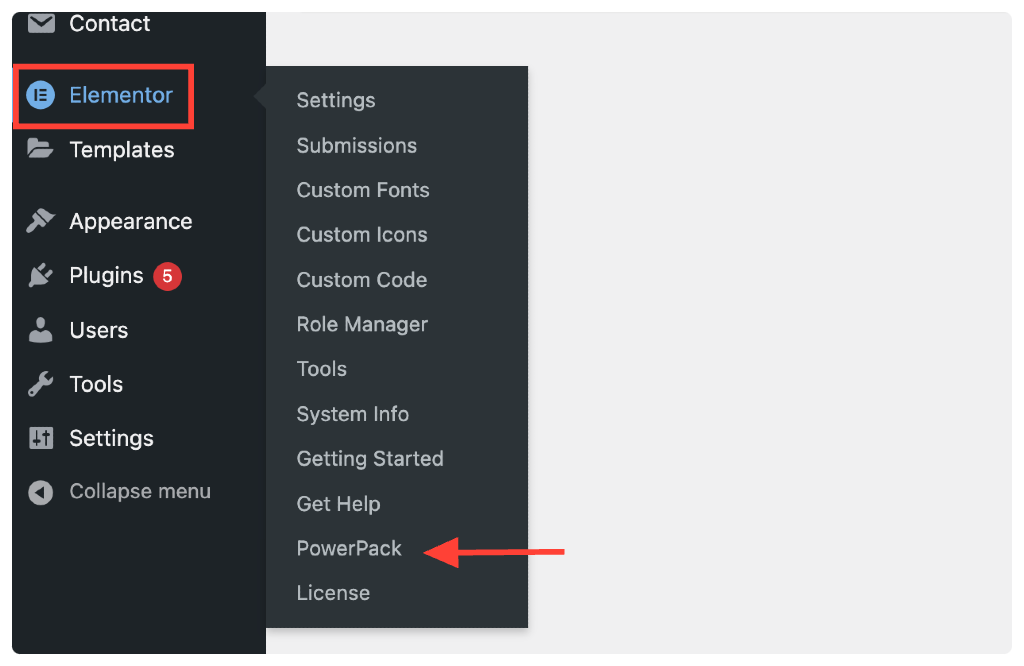
Clicking this will open the PowerPack settings page. Next, go to the Integration Tab, and paste the API key in the Yelp Business API Key field.
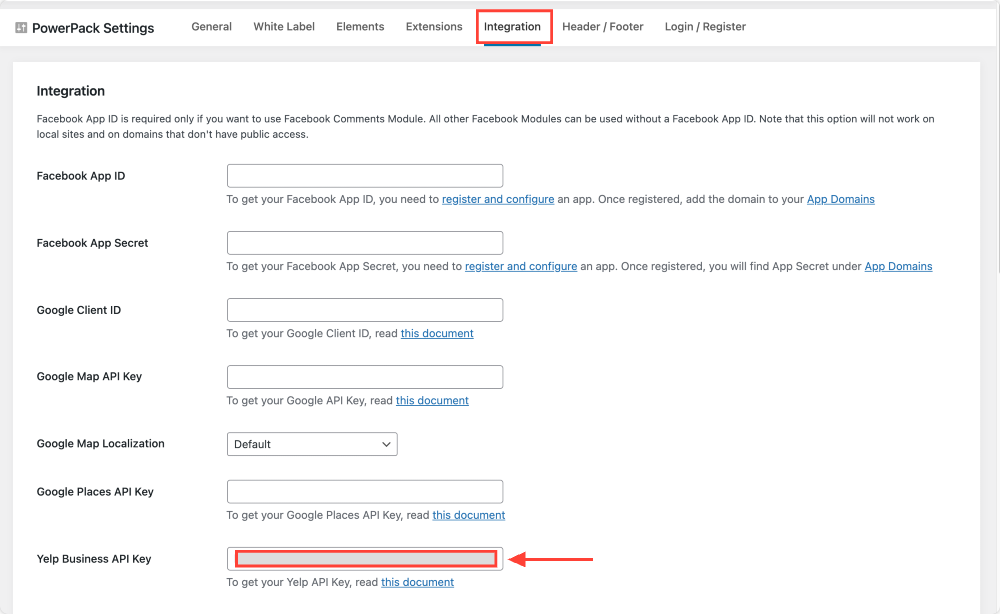
Once done, don’t forget to click on the Save Changes button.
Step 3: Drag and Drop the PowerPack Business Reviews Widget
Now open the page where you want to display your Yelp Reviews.
In the Elementor widget section, search for the business reviews widget and drag and drop the PowerPack Business Reviews widget on the page.
Make sure to check the “PP” icon in the upper right corner of the widget.
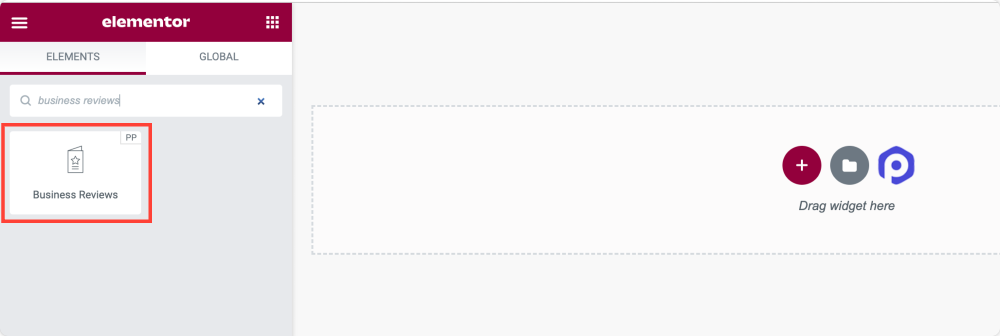
Like every other Elementor widget, the PowerPack Addons Business Reviews widget also includes three main tabs:
- Content Tab
- Style Tab
- Advanced Tab
You can have granular control over your Business Reviews widget using these tabs.
Let’s see what content customization options you get in the Business Reviews widget.
Step 4: Content Tab of the Business Review Widget
In the Content Tab of the Business Reviews widget, you’ll 5 sections:
- Business Reviews
- Layout
- Filters
- Review Details
- Help Docs
Let’s start exploring the options of each section in detail.
Business Reviews
This is the first section of the Business Reviews widget. Here you can:
Choose a Skin Type for your Yelp review display. You can choose the Classic Skin or Card Skin per design preferences.
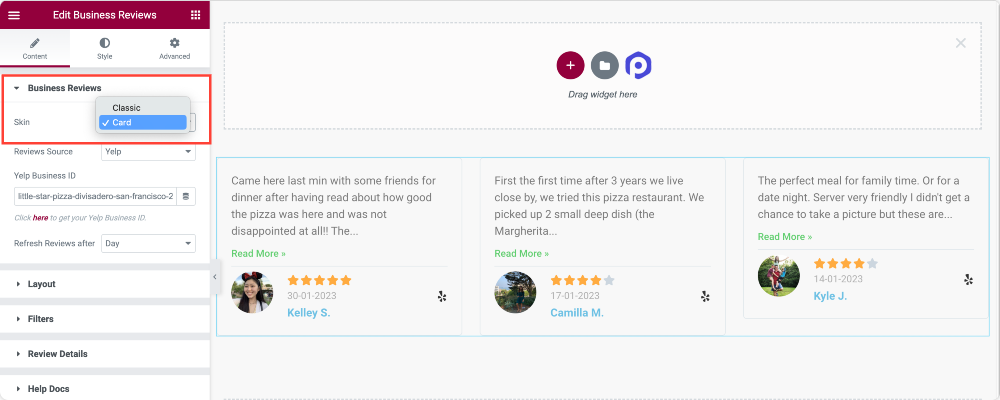
Next, you need to choose your review source. PowerPack Business Reviews widget allows you to display Yelp reviews and Google Reviews.
Since we’re discussing displaying Yelp reviews using Elementor, we’ll choose Yelp as our review source.
If you want, you can display reviews from Google + Yelp at the same time.
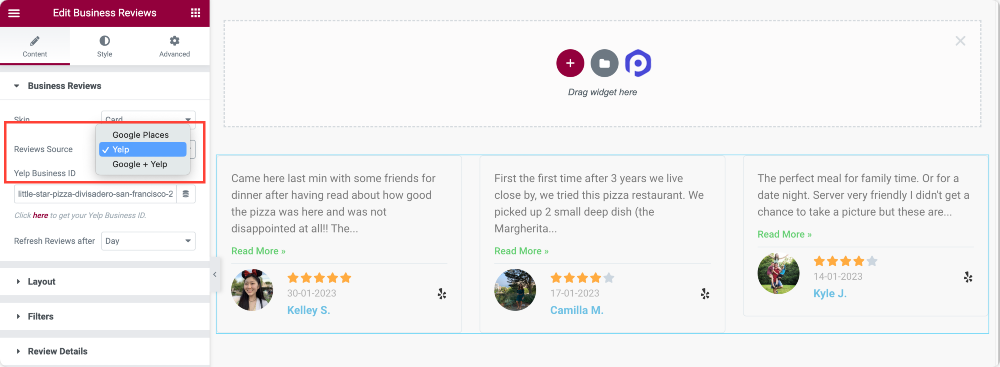
Further, you get a Refresh Reviews after feature that automatically refreshes reviews after the defined time, such as Hour, Day, Week, Month, and Year.
Layout
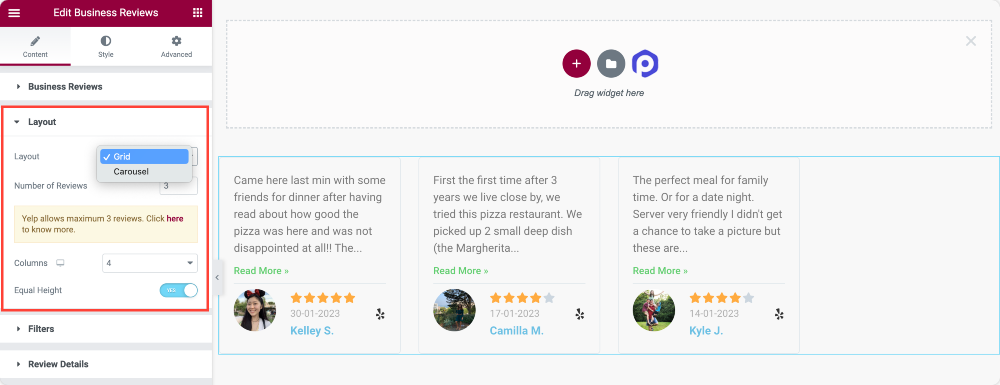
As the name says, from the Layout section, you can define the layout of your Business Reviews widget.
You get options to:
- Display reviews section in Grid or Carousel layout
- Set the number of reviews to be displayed on a screen.
- Set column numbers
- Enable equal height.
Filters
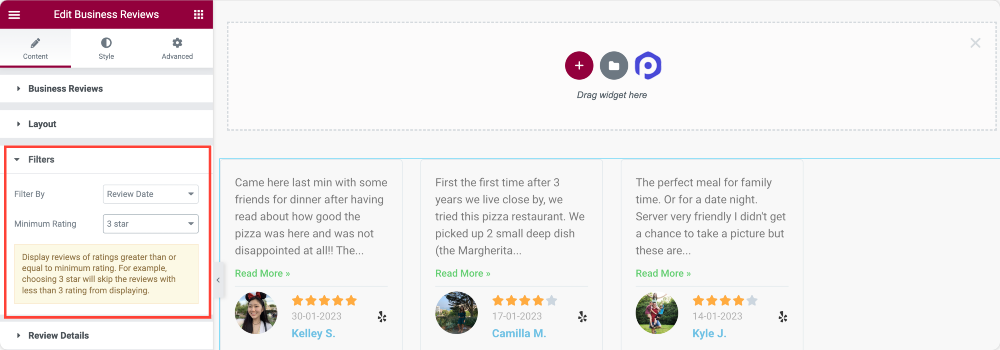
The FIlter section gives you more control over what exact review you want to display. For example, you can choose only to display a 5-star review, 4-star review, or 3-star review.
Also, you can filter and display reviews by Minimum Rating and Review Date.
Review Details
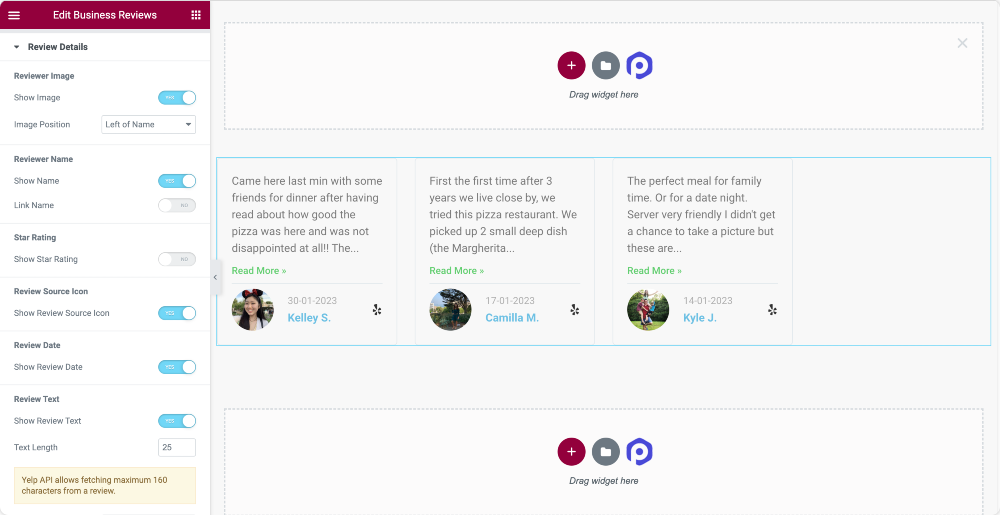
The Review Details section lets you enable/disable the details of the reviews.
For example, you can choose to show or hide:
- reviewer’s image, and set the image position and overall alignment.
- reviewer name and link name to the original review source.
- star rating and review source icon.
- review date and choose relative or numeric date type.
- review text, define review text length, and customize read More button text.
You’ll get these customization options in the Content Tab of the Business Reviews widget. Now let’s move to the Stye Tab to explore the styling options.
Step 5: Style Tab of the Business Reviews Widget
The beauty of PowerPack Business Reviews is that you get styling options to customize every single element of the widget.
Whether you want to change the color, typography, set margin, or padding, you can do it all without hassle!
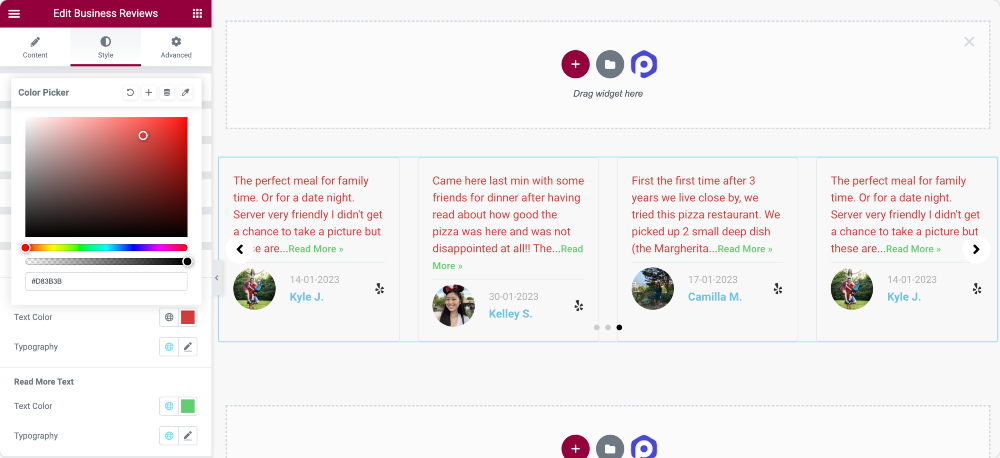
The Style tab of the Business Reviews widget includes 9 sections with various styling options that you can use to give your widget a unique look. LeLet’so through these options in more detail.
- Layout
- Box
- Image
- Name
- Review Date
- Rating
- Review Text
- Arrows
- Pagination: Dots
LeLet’so through these options in more detail.
Layout
With the Columns Gap option, you can adjust the space between the columns.
Box
In this section, you can customize the review box by changing the background color, adding a border, and choosing the border color. You can also add a box shadow and a separator line and customize their colors and sizes.
Image
This option allows you to customize the reviewers’ images by adjusting the size and the gap between the image and the text. You can also add a border to the image.
Name
If you want to style the reviewers’ names, you can change the color, typography, and bottom spacing.
Review Date, Rating, and Review Text
You can also style the review date, rating, and text by changing their colors and typography.
Arrows
In this section, you can choose the arrow icon from the icon library, set its size, and define its alignment. You can also add a background color, customize its color, and choose the border type, border radius, and padding.
Pagination: Dots
This option allows you to customize the pagination dots by choosing their position, size, and color. You can customize the active dot color and add a border, border radius, and margin.
Wrapping Up!
That’s it! We hope this guide helps you understand how to add Yelp reviews to WordPress using Elementot page builder.
You can also check our tutorial on how to create a portfolio website in Elementor with a filterable gallery.
PowerPack Addons for Elementor offer a wide range of creative widgets that can be used to personalize your Elementor pages. With over 80 available widgets, you can enhance your page design and functionality.
Please refer to this resource for further information on the PowerPack Addons for Elementor.
If you got any queries, let us know in the comment section below!
