How you display the information on your website plays a very important role!
In the age of advanced design styling, just a simple line of text to display crucial information on your website will not help you stay ahead of your competition. But if you do not know how to code, this can be a challenge… but not anymore! With the Card Slider Elementor widget, you can display information on your website in an impressive card slider format.
You can even display your blog posts on the Card Slider by simply selecting the source as “Post,” which makes the widget more useful and easy to use.
In this tutorial, we will see how you can display your recent posts on your website with the help of Elementor and PowerPack Addon’s Card Slider widget. If you prefer watching a video instead, check below.
You will require Elementor and the PowerPack Elementor addon installed and activated to create a blog post slider on your website similar to the one we are about to make.
Let’s begin, shall we?
Creating a Blog Post/Information Slider with Elementor
Firstly, open the page to which you want to add the Card Slider in Elementor Editor.
Once you are in the editor, drag and drop the Card Slider widget on the page.
Content Tab of the Slider Widget
Since I want to display the blog posts on the slider, I’ll set the source as “Posts.” Once you do that, you will see your recent posts showing up on the slider.
You can also change the number of tabs you want to display on the slider. You can go with Title, Image, Button, and Box for the link to the respective blog.
You can choose whether to display the date and can even change the date icon. If you do not wish to display the recent posts, you can set a custom query to filter the posts you want to display on your posts slider with the query subsection.
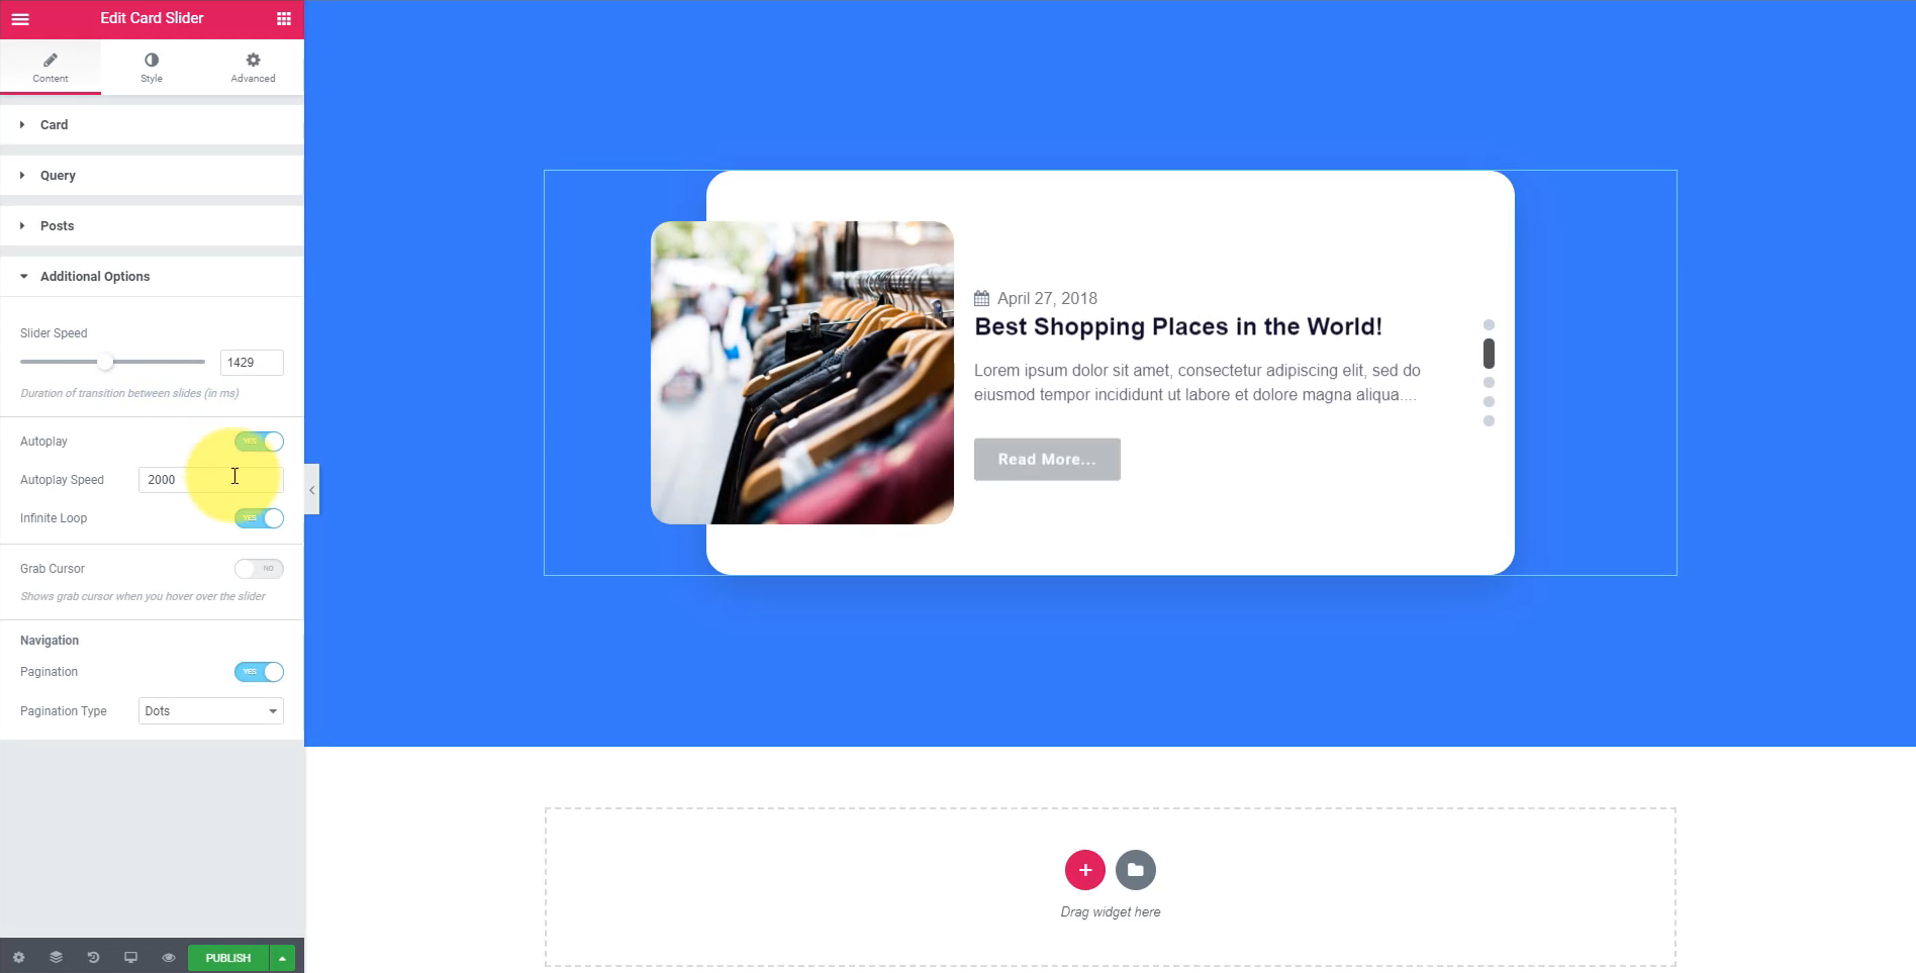
You can even enable/disable the title, featured image, excerpt, post meta, author, and category for your slider. Moreover, you can change the slider’s and auto-play speeds and enable/disable and customize the pagination.
Here are the changes I have made to the Card Slider’s Content Tab:
Style Tab
Now we will look at how our sider looks, and we can adjust this using the Style Tab. You can fully customize the card, image, button, and navigation dots for the slider.
You can customize the height, width, typography, image radius, title, text, dots, etc., the way you want.
Here are the changes I have made to the style tab of the Card Slider widget:
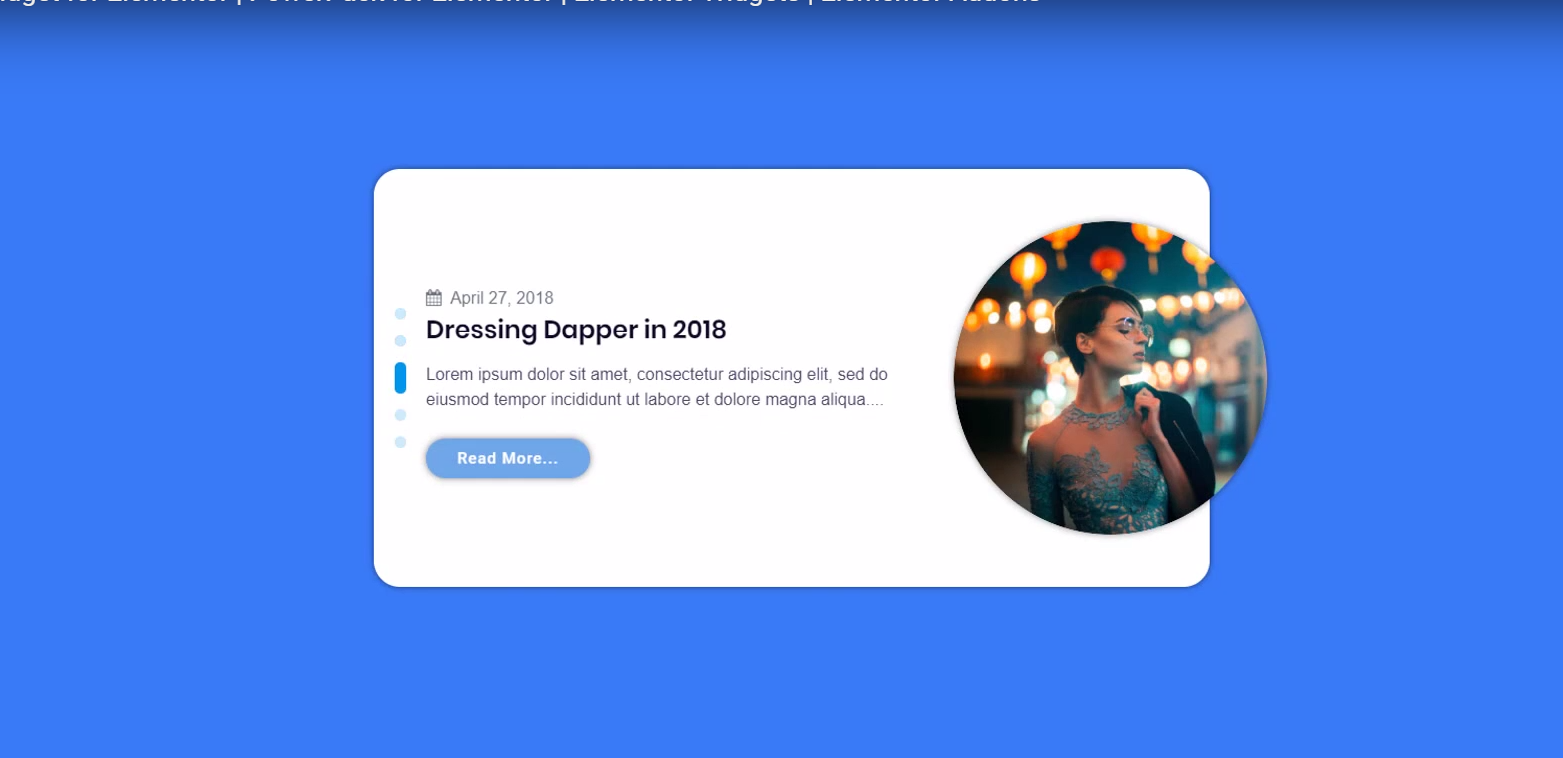
Once you have made all the changes, this is what your card slider widget will look like:
Winding It Up!
This is just one of the designs which you can make with the Card Slider widget. If you wish to have a look at more designs, you can check out the demo page of the Card Slider widget.
With this widget, you can easily display the information or your blog posts on your WordPress website in a slider.
What do you think of this widget? Do share your thoughts by commenting below.
Read Next: How to Create a Stunning Team Section with Elementor Popups?
If you found this article useful, do share the love!

1 thought on “How to Create Featured Blog Post Sliders on your WordPress Site with Elementor?”
It was a great article. Thank you