Looking for an easy to create a full screen overlay menu in Elementor? Great, you’ve landed on the right page!
Many sites these days use an off-canvas menu style or a full-screen overlay menu. You can use these styles to create a unique header layout and jazz up the site a bit with subtle animations.
A full-screen overlay menu can be a good fit for a small website with limited pages or content, or you can use the full-screen overlay menu as an extension to hide/show additional links. The PowerPsck Advanced Menu widget can help you build off-canvas and full-screen overlay menus using Elementor without worrying about code.
In this tutorial, we learn how you can create a full-screen menu using Elementor and PowerPack Elementor addon’s Advanced Menu widget.
Creating a Full-Screen Overlay Menu with Elementor
If you prefer watching a video tutorial, check the video below!
Before we begin, ensure you have Elementor Builder and PowerPack Elementor addon installed and activated.
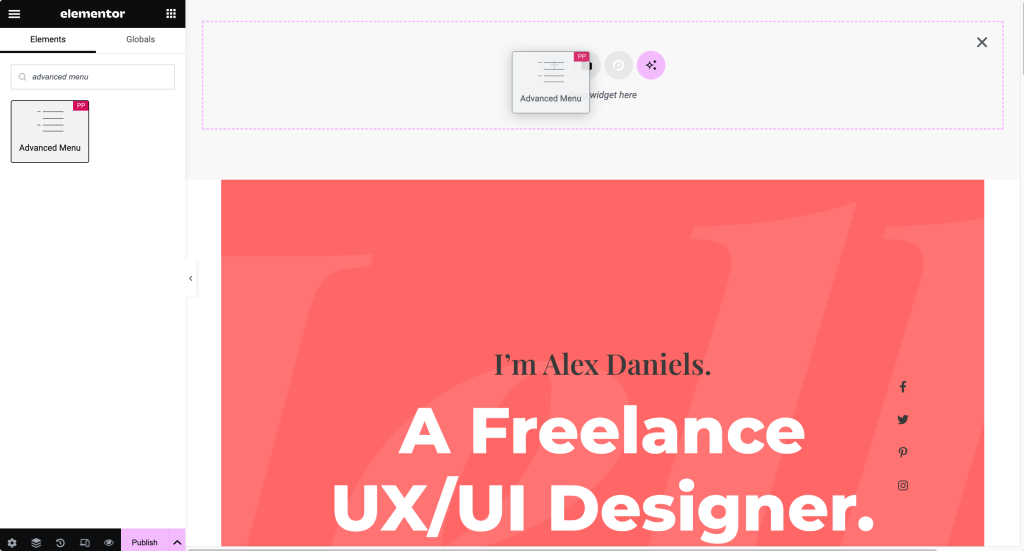
Step 1: Adding the Elementor Advanced Menu widget
Before we add the widget, you need to decide where you want this widget to appear. If you wish your overlay menu to appear on a single page, you can directly add it to the page (ex., landing page), and the menu will appear only on that page.
If you want your overlay menu to appear on the whole website or every page, you can add the widget on the custom header built with elementor, and it will appear wherever the header appears, which is usually sitewide.
Open the page/header in the Elementor editor and add the Advanced menu widget of PowerPack by simply dragging and dropping it in place. Here I will be adding the menu on the landing page as I want this menu to appear on that page only.
Step 2: Setting Up the Full-Screen Overlay Menu
Next, select the menu from the list of WordPress Menus that you would like to display.
Scroll down the options till you find the Responsive Section. Select the Breakpoint as Always and change the menu type to “Full Screen.”
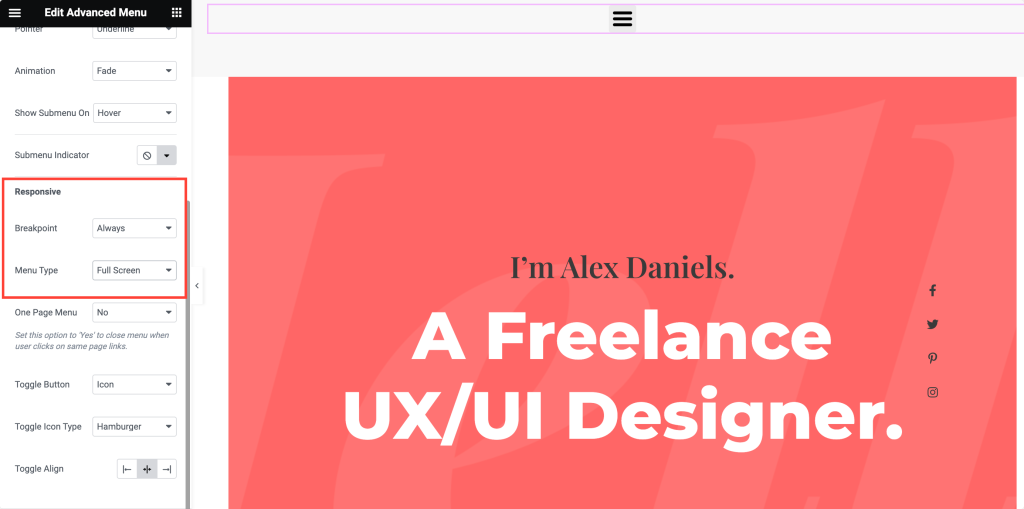
You can also change the alignment, button style, etc., for the button from the given settings.
Once you have made the changes in the content tab, your full-screen menu will look something like this:
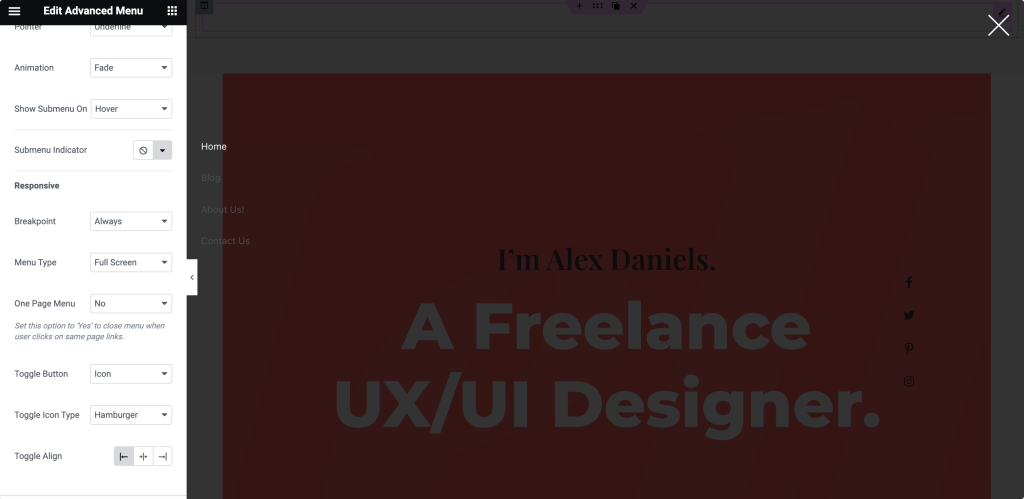
Since this is not the ideal layout style, we will make it look better with the help of the Style tab.
Step 3: Style tab Customizations for Full-Screen Overlay Menu
Main Menu: This section provides styling options for the parent/top-level menu items like text color, typography, padding, etc.
Dropdown: In this section, you can change the typography, text, background colors, add borders, border radius, padding, divider, etc. for the dropdown menu items.
Toggle Button: Since a full-screen overlay button is triggered via a toggle icon/button, you can customize it in this section. Here, you can change the color, background, size, thickness, border, and label (if enabled from the content tab). These settings are only applicable to the toggle button.
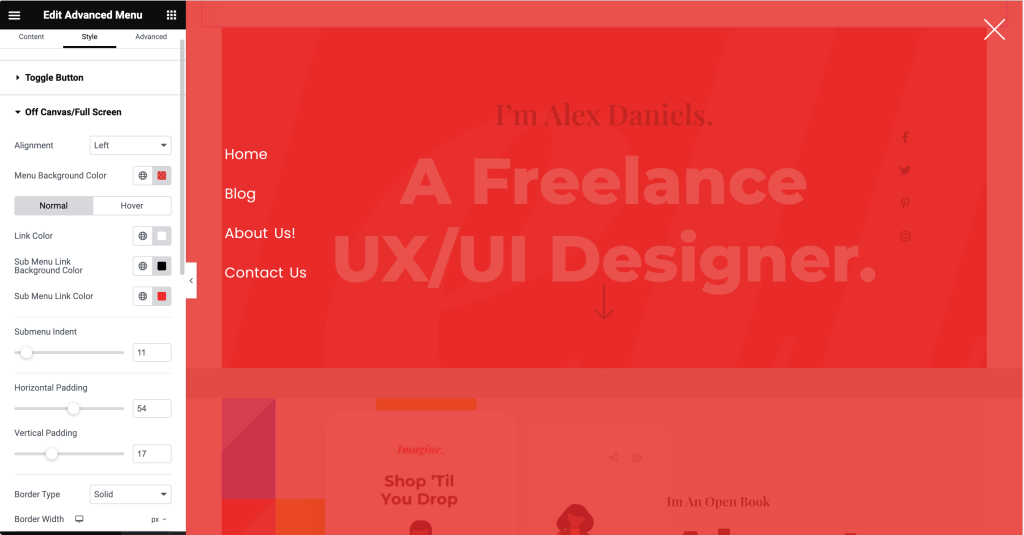
Responsive: Here, we will be making changes to the responsive version of the menu. Before we start making changes, go ahead and click on the toggle button to trigger the menu; this way, you can see the changes you are making to the menu live.
- Starting with the alignment, go ahead and change the alignment to Center.
- Change the menu background color and the link (menu elements) color from the given options.
- You can also change the link hover color, background, and hover color. For the submenu, you can customize the colors, padding, etc.
- You can change the border color, width, etc., easily from the options.
- You can change the close icon color and the size, as well.
Once you are done making changes, you can go ahead and update the page.
Full-Screen Overlay Menu is ready!
After publishing the changes, your full-screen overlay menu for Elementor is ready. Wondering what the full-screen menu in my example looks like? Here’s an example of the full-screen menu. 🙂

Creating advanced menu styles with Elementor is now super easy with PowerPack Elementor addons.
