
Looking for a way to create a sitemap for your website using Elementor?
You might have heard of terms like XML Sitemaps while reading about Search Engine Optimization (SEO). An XML Sitemap, or simply Sitemap, is a file that lists your website’s content in XML format so search engines like Google can easily index it.
Similar to the robots.txt file of your website, a Sitemap also helps Google and other search engines easily crawl your website by giving them a map of your site’s content.
How Does a Website Sitemap Look Like?
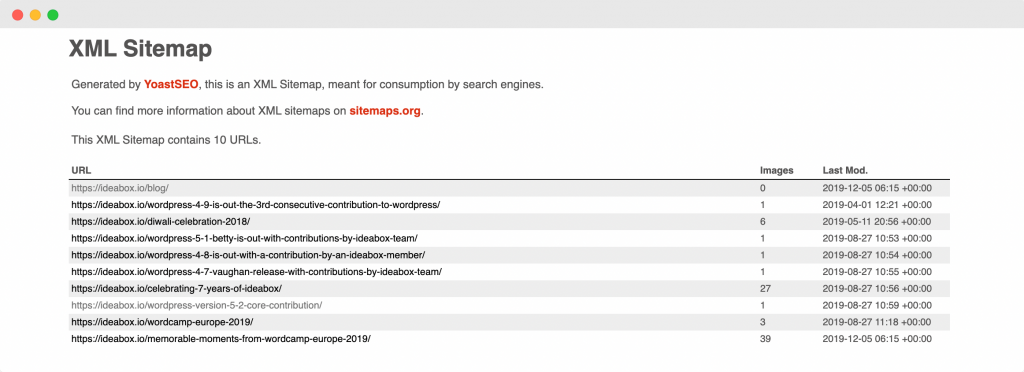
A Sitemap usually contains some helpful metadata like:
- Raw URLs of the pages on your site.
- Information on when a particular page was last modified.
- Images on a particular URL of the site.
Below is a screenshot of what a Sitemap looks like for your reference.
Now that we know what Sitemaps are, let us understand how they benefit our website.
How Does Adding a Sitemap Improve the SEO of Your WordPress Website?
Adding a Sitemap to your WordPress website will help the search engines crawl your website easily. Below mentioned are some of the other ways in which a sitemap improves the SEO of your WordPress website:
- Using Sitemaps, you can ask Google to crawl certain pages on priority by adding respective metadata to those pages.
- Although Google crawls your website, even if you do not have a sitemap, having one helps search engine bots crawl content faster than they would without one. This results in faster indexing of your site’s pages on Google.
- If you add your sitemap to Google Search Console, you can use the console to find out how effective you are at indexing your site’s pages with the help of analytics provided by the search console.
- According to Google Search Central, if your site uses many media files (videos, images), then Google can take additional information from sitemaps into account for search, where appropriate. This may include the image type, subject matter, image licensing details, etc.
These were some benefits of adding a Sitemap to your WordPress site. How can you determine if you need a Sitemap for your website?
Do You Need a Sitemap?
Do I need a Sitemap for my website? – Many people ask this question, so let’s try to answer it as clearly as possible.
Cases in Which Having a Sitemap Helps Your Website
- When you’ve launched a new website with few external links, having a sitemap is really beneficial. As Google Search Central quotes, “Googlebot and other web crawlers crawl the web by following links from one page to another. As a result, Google might not discover your pages if no other sites link to them.”
- Suppose your website has a large amount of media content. In that case, having a sitemap can be really beneficial because if Google or any other search engine needs additional information regarding any media items (images, videos), it can be fetched from the sitemaps.
- If your site has many pages, Google search crawlers may overlook some recently added or updated pages. Having a Sitemap ensures that search engines crawl all the pages.
- If your website has many pages that are not interlinked well, then Google or other search crawlers might overlook them. To avoid such a situation, it is better to use a Sitemap.
Now that we have discussed the cases where having a sitemap helps let’s also discuss the other aspects where having a Sitemap is not that important.
Cases in Which You Might Not Need a Sitemap
- Your site’s pages are interlinked thoroughly so that Google can easily access other pages by following the links on the homepage.
- Your site does not contain any media files you want to be displayed in Google search results. As we know, Sitemaps can fetch information regarding media files in order to display them in search results, so if there are no media files to be displayed in search results, then there’s no need for a sitemap.
Till now, we have covered what an XML Sitemap is, the benefits of having a Sitemap on your website, and cases in which you might need/not need a Sitemap.
Suppose you have already added a Sitemap to your site and then understood that you might not need a Sitemap. So, a natural question that arises here is, does a Sitemap have any negative effect on your site? We’ll try to answer this question in the next section!
Does a Sitemap Have Any Negative Effect on Your Site?
No! Having a Sitemap will never have any negative effect on your site. The worst thing that can happen is that you won’t see any positive results after adding one. As Google quotes, “In most cases, your site will benefit from having a sitemap, and you’ll never be penalized for having one.”
Now that we know about XML Sitemaps in detail let’s see how we can create one for our Elementor site using the PowerPack Elementor Sitemap widget.
Create a Sitemap Using PowerPack Elementor Sitemap Widget
We have also created a short, to-the-point video explaining how to create a Sitemap using PowerPack Elementor’s Sitemap widget.
So, if you like the video explanation, I suggest you look at it.
Now, let’s continue. To create the Sitemap, we will be using these two plugins:
- Elementor Free Version: Get Elementor.
- PowerPack for Elementor: Get PowerPack.
Once you’ve installed and activated these plugins, you must create a new page by heading to your WordPress Dashboard > Pages > Add New. Name the page “Sitemap.”
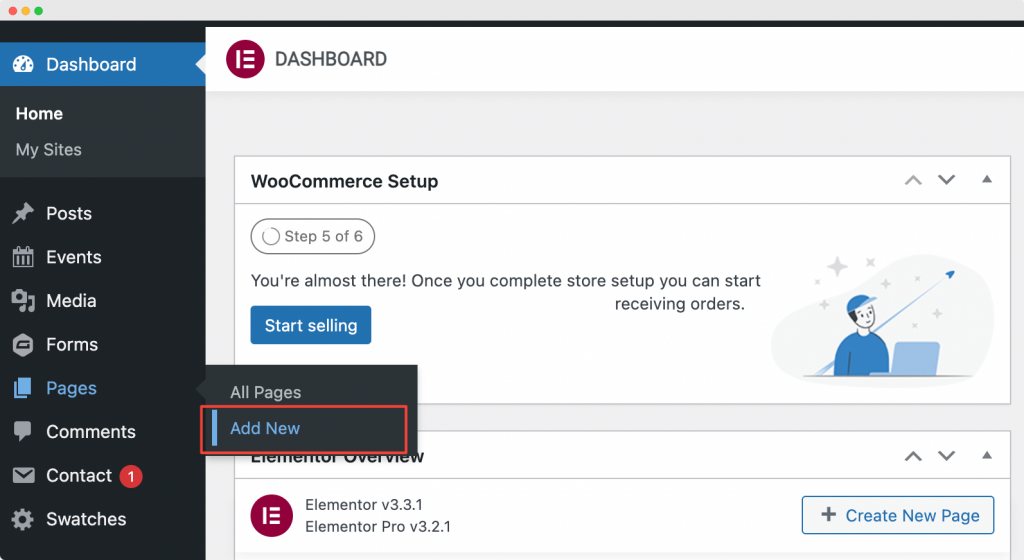
Next, click on “Edit with Elementor” to open the page in Elementor Page Builder.
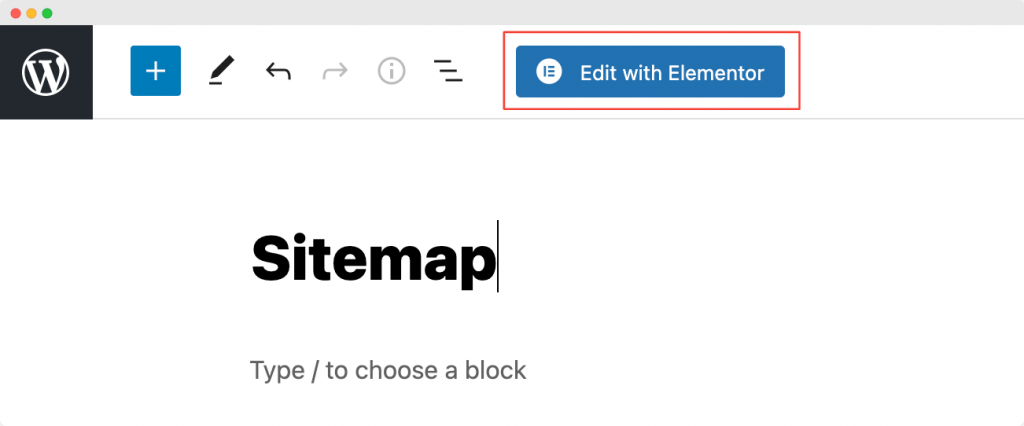
Launch Elementor Editor
As soon as you click on “Edit with Elementor,” the Elementor editor will open. Next, drag and drop the Sitemap widget into the Elementor editor.
As soon as you add the Sitemap widget, you’ll see the list of pages in a column, and the list of categories on your site appears in another column with default settings.
The below screenshot shows how your page would look after adding the Sitemap widget.
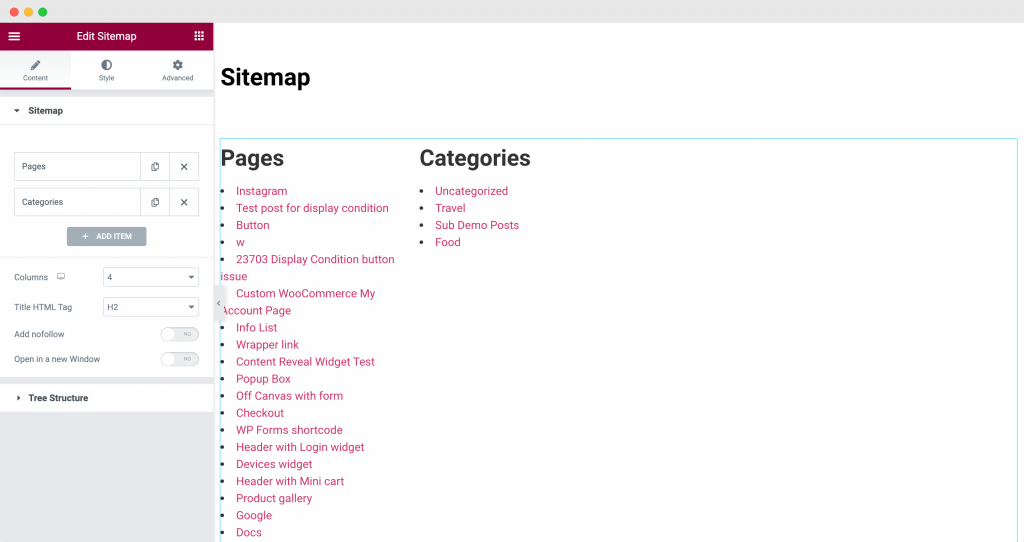
Now that we have added the PowerPack Sitemap widget to the page, we will customize and style the Elementor editor’s content and style tab.
Sitemap Widget Customization in Content Tab

As the screenshot above shows, the Sitemap widget’s content tab allows us to display the links on our site as we require.
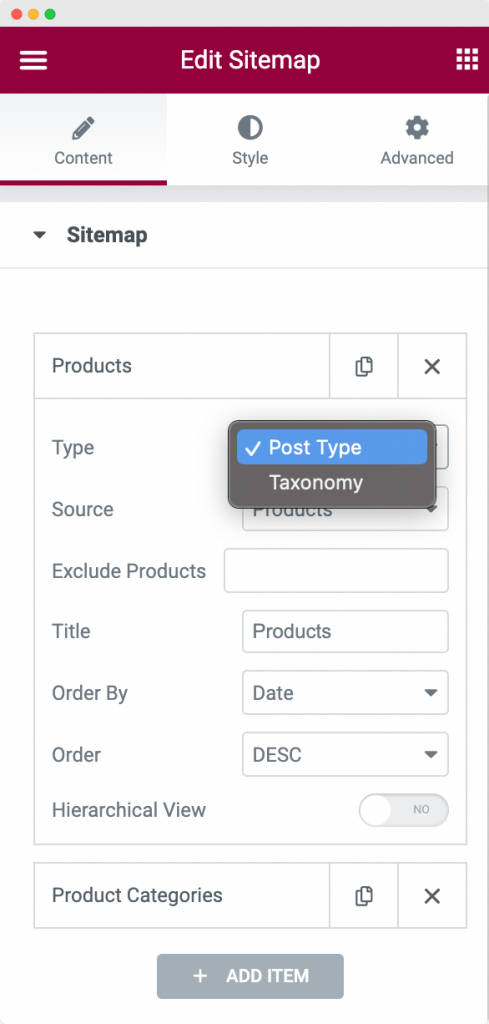
First, we can choose the Type of Sitemap we want to display on our site. We can choose between “Post Type” and “Taxonomy.” For our example, we’ve chosen the “Post Type.”
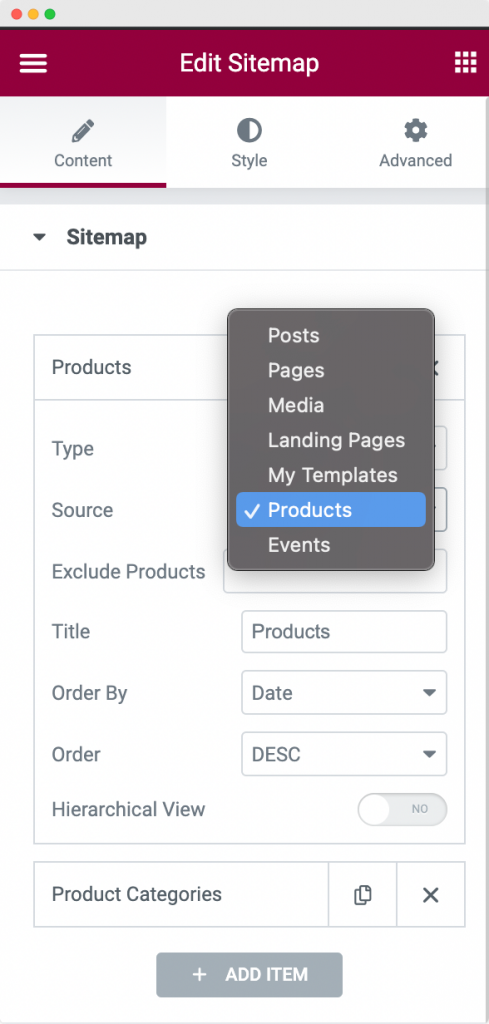
Next, we have to choose the Source of Taxonomy. Since I wanted to show all my products on the Sitemap, I have chosen Source as “Products.” You can choose any source from the list.
The next option is “Exclude Products.” It allows you to exclude any product from the sitemap. You can also change the Title of the taxonomy section. The default title was “Pages.” However, we have changed it to “Products,” as shown in the screenshot above.
Finally, you can order the Taxonomy in Ascending or Descending order. You can order the Taxonomy by Date, Title, Menu Order, or Random by using the “Order By” option of the Sitemap widget.
Another option in the Content tab is “Hierarchical View.” To see how this functions, we’ve added another item in our Sitemap named “Product Categories.”
As you can see in the screenshot below, we’ve chosen “Type” as “Taxonomy” and “Source” as “Product Categories.” We have also enabled the Hierarchical View.
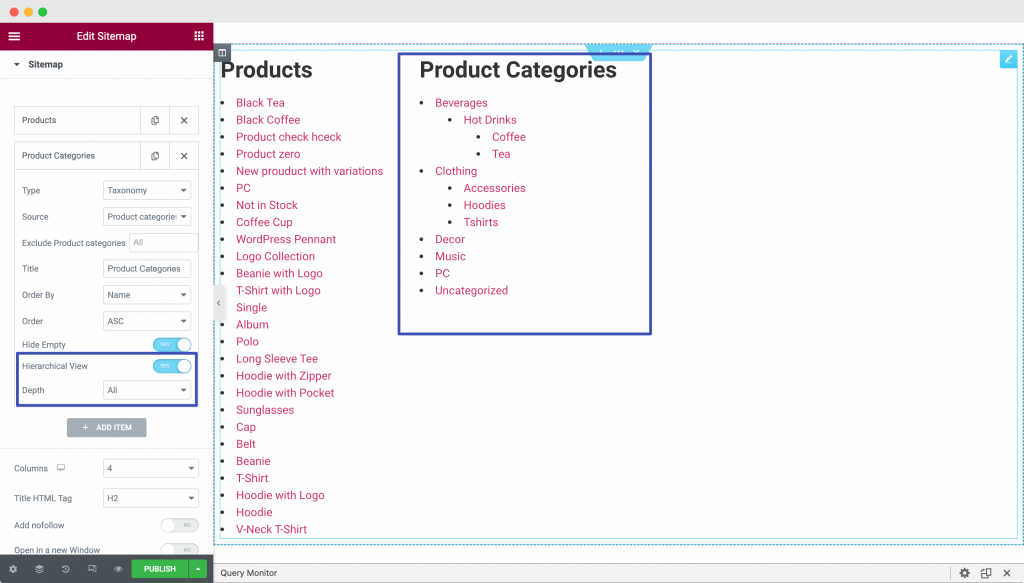
Here, “Product Categories” have a hierarchy of categories and subcategories, so you can use this option to display the categories in Hierarchical order. You can also choose the hierarchy depth you want to display in your Sitemap.
Some other options in the Content tab of the PowerPack Elementor Content tab are:
- Columns: You can display your sitemap in any columns you wish. In our example, we chose column “4” (as shown in the above screenshot). However, we only have two items to display (Products and Product Categories), so our sitemap is spread across two columns.
- Title HTML Tag: Here, you can choose the heading tag for the title of the items in your sitemap. We’ve chosen this as H2.
- Add Nofollow: If you enable this option, the links in your sitemap will have a “nofollow” tag. The “nofollow” tag tells the Search Engines to ignore the links and not let them affect the search engine rankings.
- Open in a New Window: As the name suggests, if you enable this, all the links in your sitemap will open in a new window.
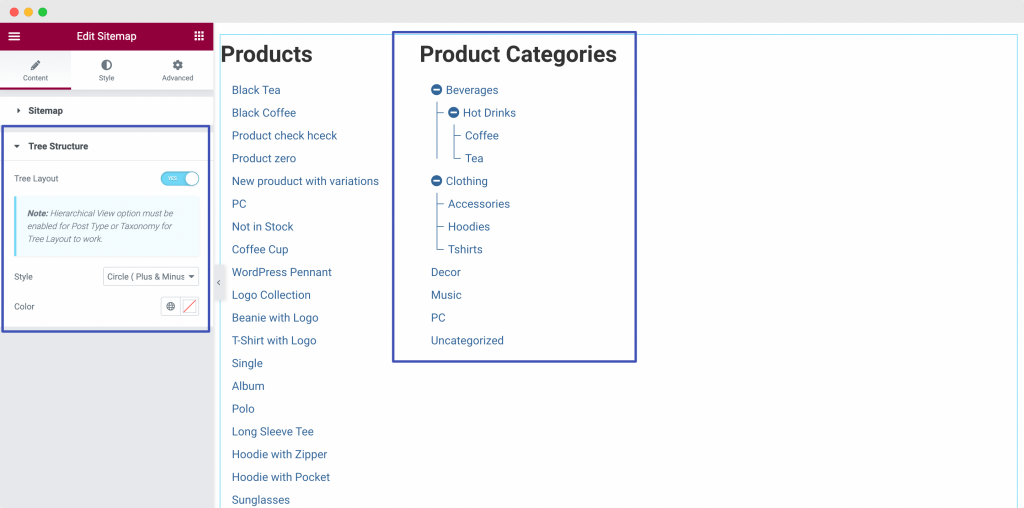
As we go down in the Content tab, another section is “Tree Structure.” Tree Structure can enable or disable the “Tree Layout.”
A thing to note here is Hierarchical View option must be enabled for Post Type or Taxonomy for Tree Layout to work.
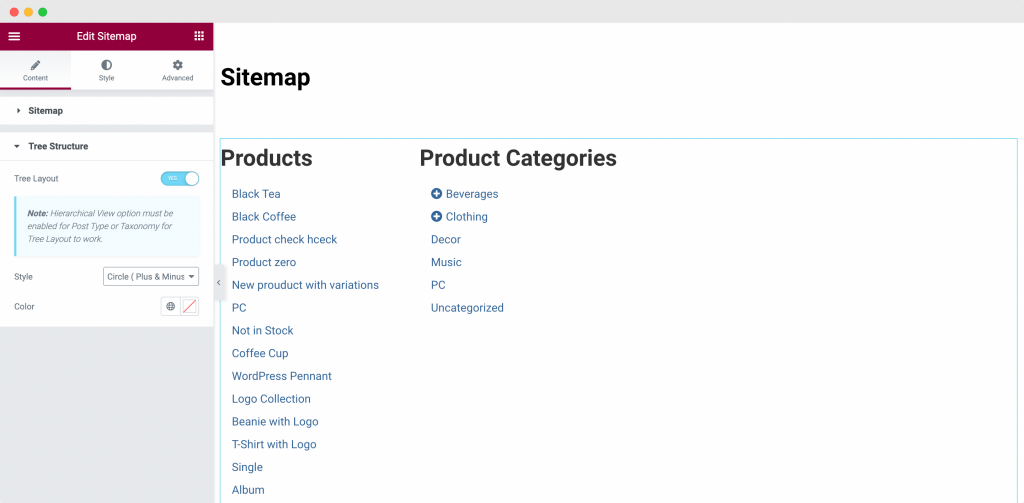
As you can see in the screenshot above, once we enabled the Tree Structure, the “Product Categories” sitemap turned into a tree and branch-like structure.
If we click on the “+” icon in the Product Categories, the subcategories of the parent category will open up. Look at the screenshot below to understand how the branching of subcategories is done once the Tree Structure option is enabled.
This was all about the Content tab of PowerPack Elementor’s Sitemap widget. Now, let’s move on to the Style tab and style our Sitemap widget.
Sitemap Widget Styling in the Style Tab
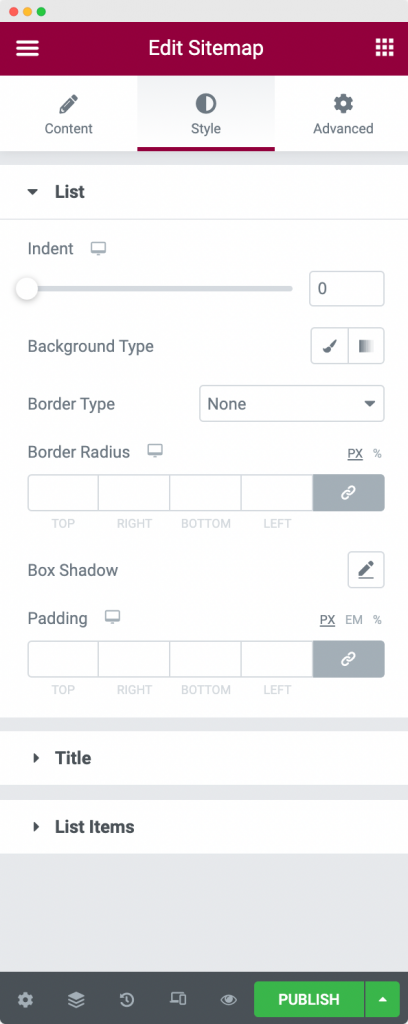
As you can see in the screenshot above, the Sitemap widget consists of 3 sections in the style tab:
- List
- Title
- List Items
Let us go through each of the sections one by one.
List: As the name suggests, this option allows us to style the page’s overall list of Sitemaps. We can change the list’s indent, add a background color, apply border properties, and add padding. As you can see in the screenshot below, we have applied an indent of 10 to our list.

Title: This is the next option in the Style tab. We can use this option to style the title of the Sitemap items. Through this option, we can change the alignment, background color, and text color, apply border properties, add margins and padding to the titles, and change the typography of the Title.
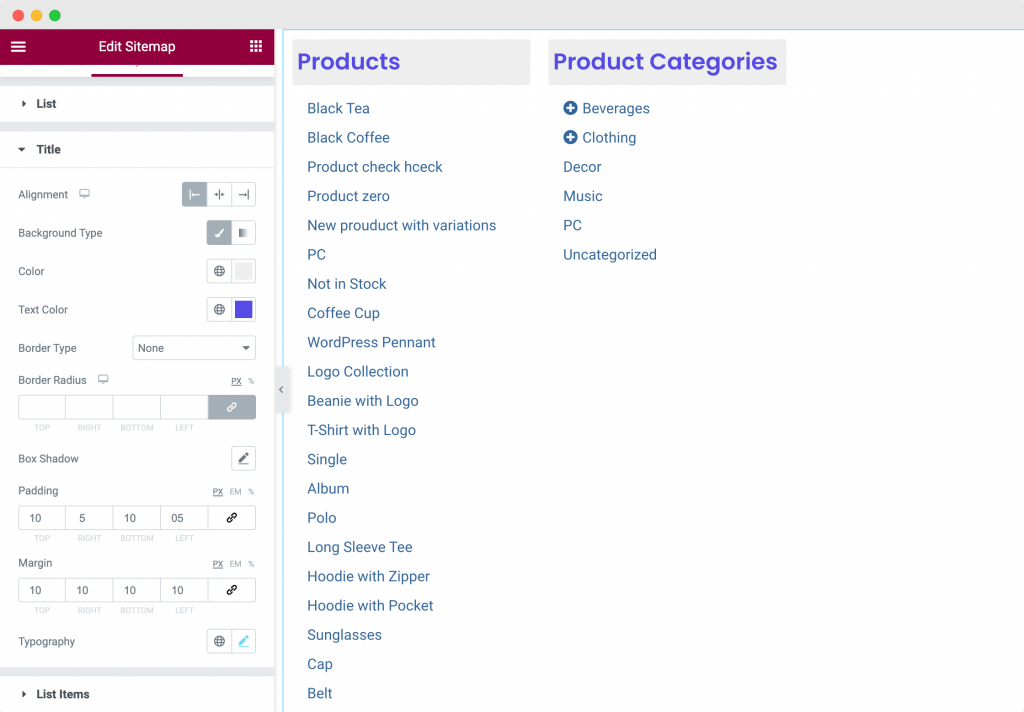
The above screenshot shows the styling we applied to the title. We chose the left alignment and applied a background and text color to the title. We also added margin and padding to the title and changed the default typography.
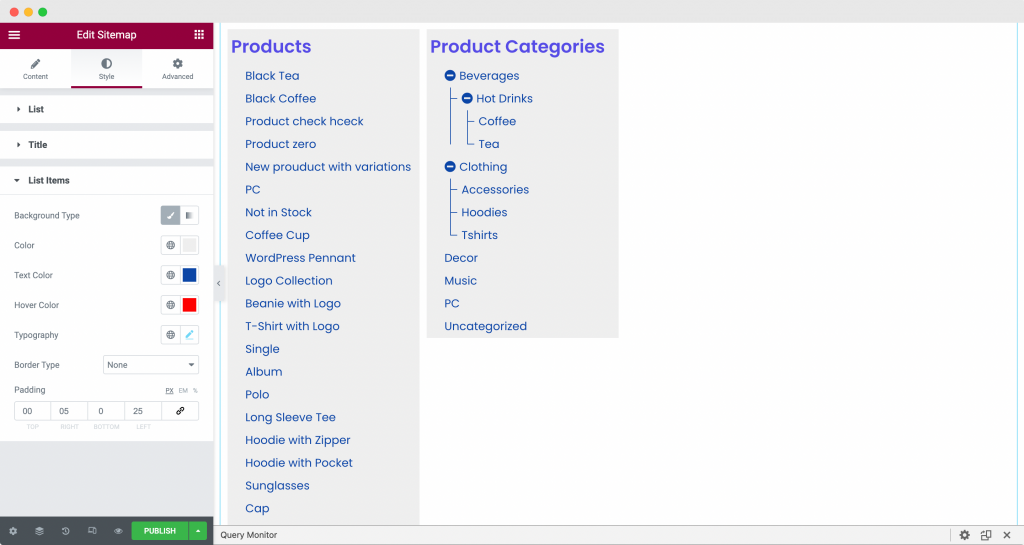
List Items: As the name suggests, this option can be used to style the list items in the sitemap. We can change the items’ background color, text, hover color, and typography and apply padding to the list of items in the sitemap.
Look at the screenshot below for our sitemap after applying the styling changes.
This was about the Style tab of the Elementor Editor for PowerPack Elementor’s Sitemap widget.
Wrapping it Up!
In the above steps, we have customized and styled our Sitemap page for a stylish and elegant feel. To achieve this look, we have used a combination of customizations, such as Hierarchical view and Tree view, and styling options, such as typography, background colors, and hover colors.
You can check the options that we used in the above screenshots.
Check out our Sitemap page build with the PowerPack Elementor Sitemap Widget below!

I am sure that this tutorial helped you set up your website’s sitemap page easily. You can do a lot more with the PowerPack Addons for Elementor. There are more than 70 creative widgets that you can use to customize your Elementor pages. If you wish to learn more about the PowerPack Addons for Elementor, check here.
What are your thoughts on this tutorial? Do share if you found this guide useful! Also, join us on Twitter, Facebook, and YouTube.
Frequently Asked Questions Related to Sitemap and PowerPack Sitemap Widget
A sitemap is a file that lists all the pages of your website to help search engines like Google navigate and understand your site’s structure. It improves the chances of your web pages getting indexed by search engines, leading to better visibility and ranking in search results.
No, you don’t need coding knowledge to use the PowerPack Sitemap Widget. It’s user-friendly and can be easily integrated into your website through a simple drag-and-drop interface.
Yes, you can customize the appearance of the sitemap generated by the PowerPack Sitemap widget to match your website’s design and branding. You can adjust various styling options such as colors, typography, spacing, and layout to create a sitemap that complements your website’s overall look and feel.
Yes, having a sitemap can improve SEO by providing search engines with a comprehensive list of your website’s pages, which helps them crawl and index your site more effectively. This can lead to better visibility and ranking in search engine results pages (SERPs).
It’s recommended to update your website’s sitemap whenever you add new pages or make significant changes to your site’s structure. This ensures that search engines have the most up-to-date information about your website’s content, improving the chances of your pages being indexed and ranked correctly.
There is no specific limit to the number of pages that can be included in a sitemap created using the PowerPack Sitemap widget. However, ensuring that your sitemap remains manageable and doesn’t overwhelm search engines with irrelevant or low-quality content is essential.
