
Countdown timers are a great way to incite urgency on your website. Often website owners and marketers use this technique to create a sense of rush and urgency on websites.
If you, too, want to create urgency on your website and are looking for a way to create a countdown timer using elementor, I will take you through a step-by-step guide on how to create a visually appealing countdown timer on your website using the Elementor website builder.
Tools you will need
To create a countdown timer using Elementor, we will be using the Countdown Timer widget of the PowerPack Addon for Elementor.
Indeed Elementor comes with its own Countdown timer, but it lacks some features or functionalities that we have added to the PowerPack Countdown Timer widget.
What makes the PowerPack Countdown Timer better than Elementor’s Countdown widget?
- You get the option of displaying months and years in PowerPack’s Countdown widget.
- Two timer types: Fixed and Evergreen
- Supports ACF for the fixed countdown timer type
- Extend design and styling options for the Countdown widget.
- Multiple options actions after countdown completion.
- Enable/disable and customize labels for seconds, minutes, hours, etc.
We will need these two plugins installed and activated on the website.
Elementor Plugin
If you have the Elementor Pro version, you can use that. Otherwise, the free version or the base plugin will work as well.
PowerPack Pro Addon for Elementor

Since we will be using the Countdown Timer widget of Powerpack Pro, make sure it is installed and activated on your website. If you do not have PowerPack Pro, you can get it here.
If you would rather watch a video of the tutorial, you can check it out:
Creating a Countdown Timer using Elementor
To create a countdown timer, open the page where you want to add the countdown timer in the Elementor Editor.
Now drag and drop the Countdown Timer widget. You will be displayed with the settings as soon as you drag and drop the widget. Let’s take a look at each one of them.
Content Tab of the Countdown Timer Widget
The Content Tab has three subsections: Countdown, Action, and Structure.
In the Countdown section, you will get these options:
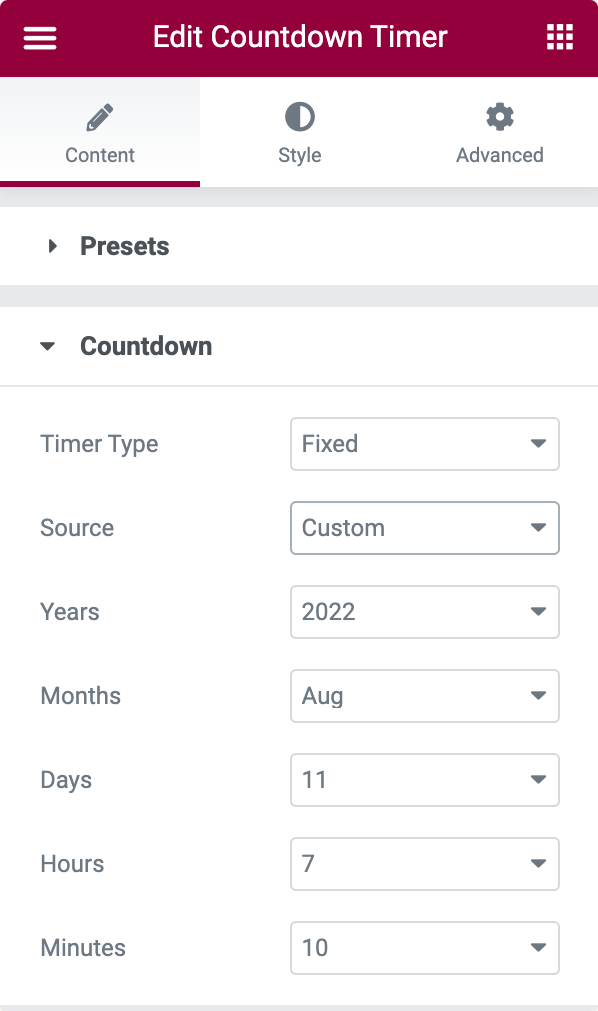
- Timer Type: You go with a fixed timer or Evergreen timer. The fixed timer will count down to a specific time in the future, and the evergreen timer will count a particular period of time. Choose the one you want and the rest of the fields will change accordingly.
- Source: You can choose the ACF source for the fixed countdown timer types from this option. This option saves a lot of time, requiring dynamically setting the due date of the countdown timer with an ACF field.
- Days/Hours/Minutes/Seconds: Choosing the evergreen timer will open these options. You can choose the period of time by selecting the number for each field.
- Year/Months/Days/Hours/Minutes: When the Fixed timer option is selected, you will see these options, and the fields will allow you to choose the future point in time. The countdown will stop at the predefined time when it arrives.
In the Action Subsection, you will see these options:
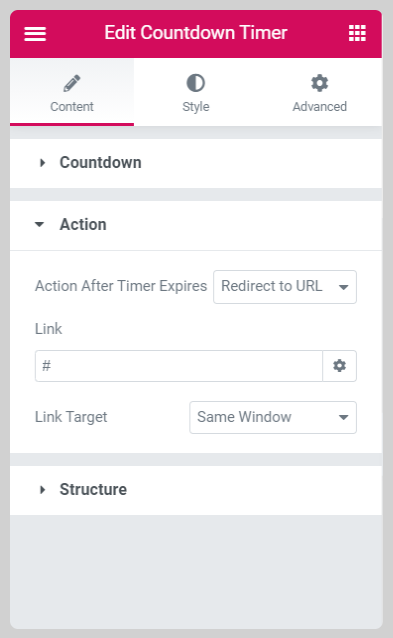
- Action after time expires: This option will allow you to select the action that will get triggered when the countdown timer is completed. You get four options here:
- Hide Timer: Choosing this option will hide the countdown timer upon completion.
- Display Message: Choosing this option will display a custom message, which will be displayed in place of the countdown timer. You can type the message below in the message box.
- Redirect to URL: Choosing this option will redirect the users to a different page upon completion. You can add the URL in the field below.
In the Structure Subsection, you can choose what should be displayed on the timer.
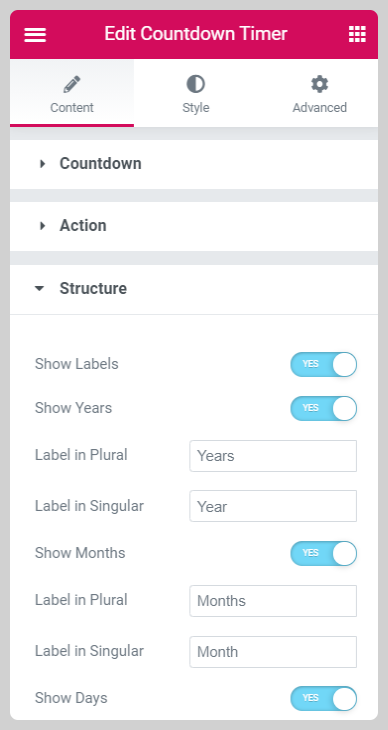
- Show Labels option allows you to display the labels below the counters.
- Further, using a Toggle Button, you can hide individual labels and counters like Years, Months, Days, etc. If you want to customize the label, you can do it by changing the singular/plural text of individual labels.
Style Tab of the Countdown Timer Widget
The Style tab allows you to make visual changes to the countdown timer. You can customize the text, typography, colors, borders, spacing, alignment, and positioning.
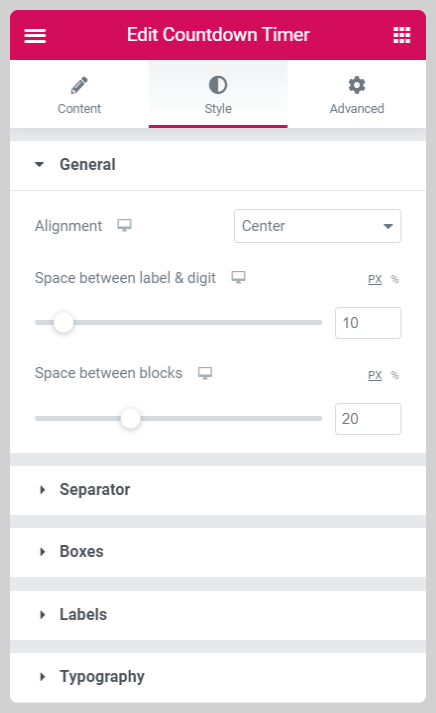
All the options here are self-explanatory, and if you have used Elementor before, you can easily customize the countdown timer widget.
Alright, after making all those changes, here is what the final countdown timer looks like:

Winding It Up!
Countdown timers are perfect for creating urgency on any website. Now you can add them to your website easily using the Elementor builder and PowePack.
If you have any questions regarding this piece, drop a comment below, and I will get back to you asap!
