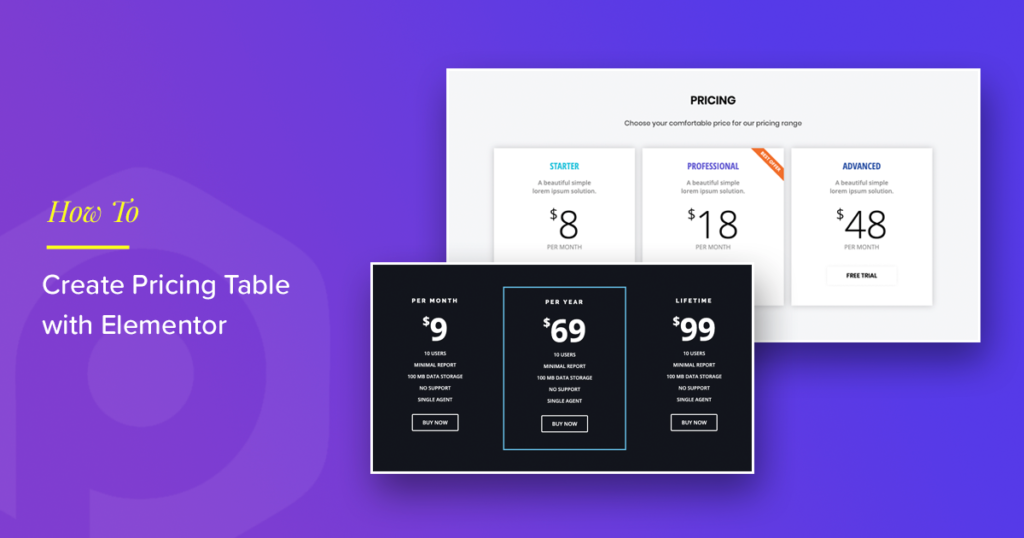
Looking for a super easy way to create a pricing table using Elementor?
Pricing table plays an essential role in the website that sells courses, packages, or any other services. Effective pricing tables help users compare different features to make it easy for them to decide on the purchase.
If people can see value in your offer through a clear pricing table design, then they are more likely to become paying customers. With the Elementor pricing table widget, you can create impressive & useful pricing tables. This widget allows you to add exciting features to your pricing table through which you can portray the right info to your customers.
In the following post, we will see step-by-step instructions for creating a pricing table using Elementor and PowerPack Addons for the Elementor.
Are you looking for more inspiration? Check out the demo setup for the Elementor Pricing Table Widget on our website.
How To Create a Pricing Table With Elementor
Designing an impressive price table requires a subtle mix of creativity and usability. PowerPack Pricing Table Widget helps you to create an impressive price table & too without touching a single line of code.
Also Read: How to Create a Variable Pricing Table with Elementor?
Before you start, make sure you have installed and activated both Elementor and the PowerPack Elementor addon plugins.
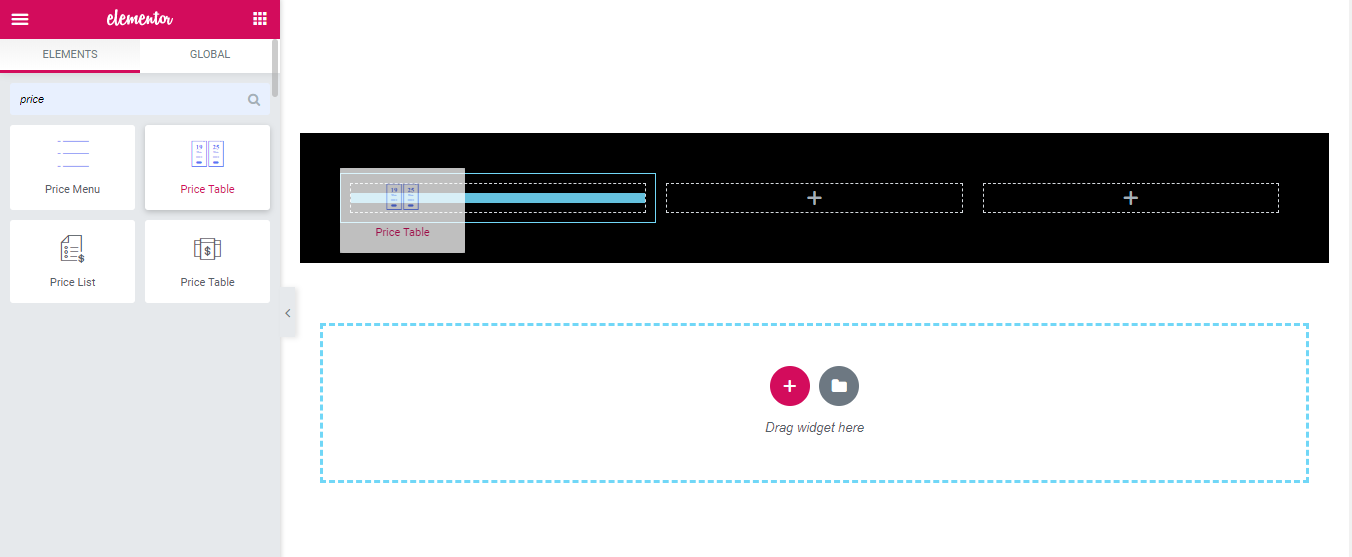
Step 1: Add PowerPack Elementor Pricing Table Widget
To create a price table with Elementor, login to your WordPress dashboard, select the page in which you wish to add the Price Table widget, and click the “Edit with Elementor” option/button.
Now, you can drag and drop the Price table widget in place in the Elementor editor.
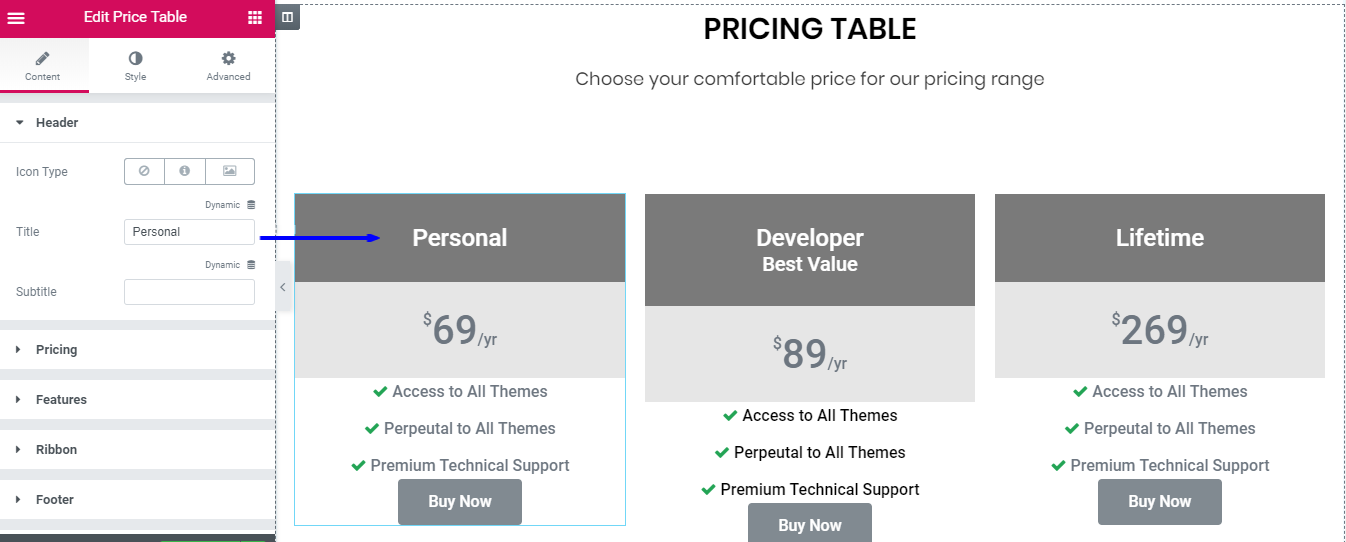
Step 2: Elementor Pricing Table Customizations in the Content Tab
- Header Section: The header section is the first section of the pricing table; here, you can select icon type, title, and subtitle for the pricing table.
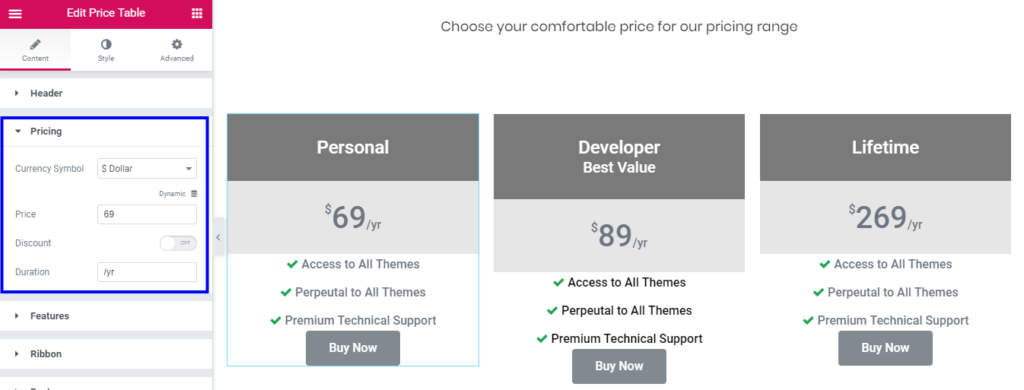
- Pricing Section: Pricing section allows you to display the cost of the packages.
In this section, you can modify the currency symbol and set the price of a pricing package.
You can also use the toggle to enable or disable the discount option. If you enable this option, you can set the discount price according to pricing package.
Features Section: This is the section where you can add different features of the pricing packages you offered.
From this section, you can add and modify the feature list of the pricing table.
You can customize each feature of the table. From the subsections, you can change the list item, list icon & icon color. Also, you can change the text color & background color of the list item.
Apart from this, you can use the toggle to exclude any active feature of the table.

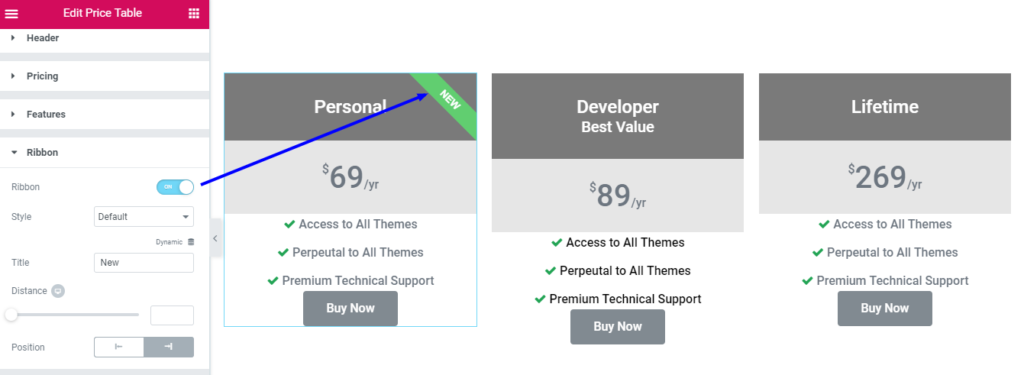
Ribbon Section: Ribbon is a slant highlighted text which makes your card pop up and helps in displaying discounts and offers related to that plan.
Here, you can enable or disable the ribbon button to display/hide the Ribbon. If you enable the button, you will see a drop-down menu to change the ribbon Style and also have the flexibility to change the title of the ribbon.
You can also set the distance and alignment of the ribbon.
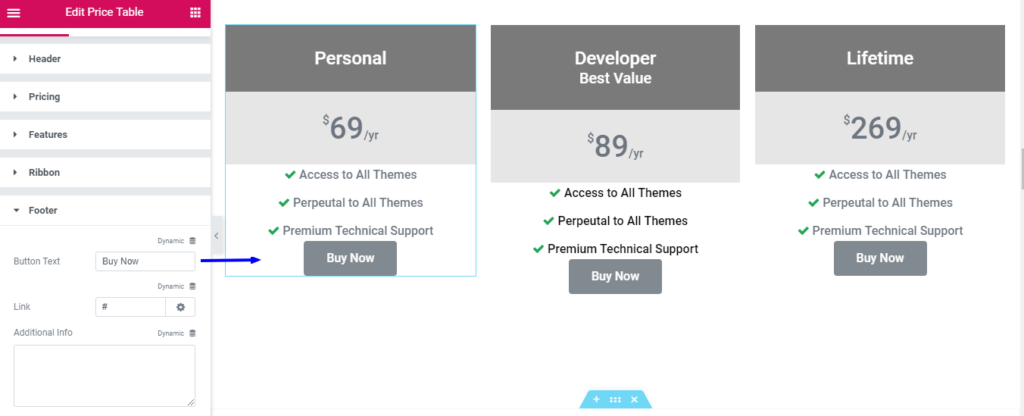
Footer: Footer is the last section of the pricing table, here you can customize the call-to-action button. You can modify button text, button link, and add additional info.
Step 3: Elementor Pricing Table Customizations in Style Tab
After setting up the layout of the pricing table, you can switch to the style tab to unlock all the styling options. Pricing table widget for Elementor comes with many exciting features by which you can style every aspect of the pricing table.
Header Section: From Header section, you can add background color, border type, and many more styling features. In this section, you can style icon, title & subtitle of the pricing table.
Similarly, you can style pricing, features, ribbon & footer section by changing color, typography & other aspects of pricing table as per your needs.
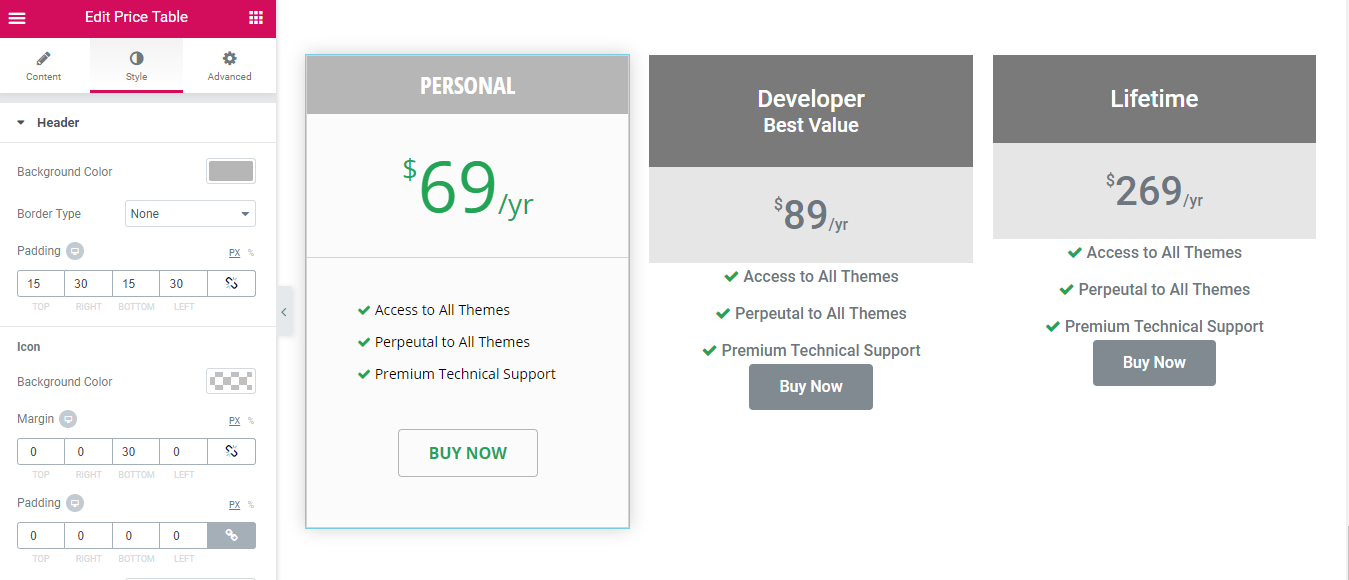
Here, I change the header background color & typography of the pricing table.
Furthermore, I will add a little padding to all the elements of the pricing table with respective settings.
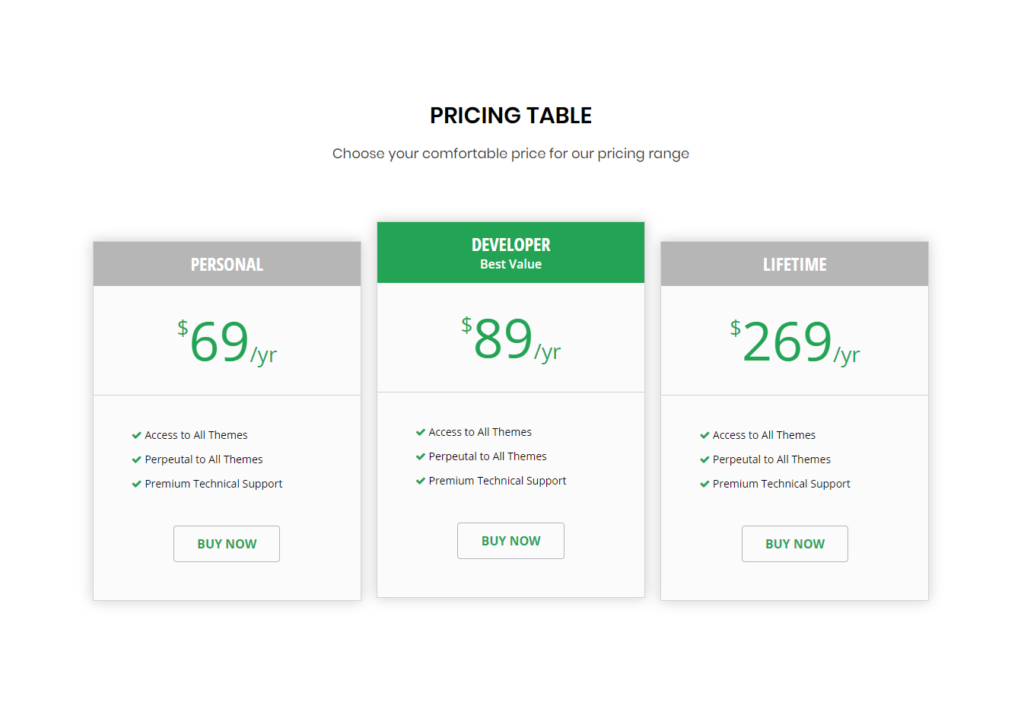
Final outcome:
Once you made all the changes in the style tab, this how your pricing table looks like:
Here are some more examples of the impressive Elementor Pricing Table made with PowerPack Pricing Table Widget!

Wrapping it up!
With all the setting options of the price table widget, you create some fantastic pricing tables & hike up your business. Get the price table widget for Elementor with PowerPack, the best Elementor addon.
PowerPack Addons offers 50+ extremely useful Elementor widgets which you can use to take Elementor to the next level.
