
Looking for a simple (yet creative) way to create a user registration form using Elementor?
Creating a seamless user registration experience is crucial for any website that allows users to sign up, whether it’s a membership site, an online store, or a community platform. A well-designed registration form not only captures essential user information but also sets the tone for the overall user experience.
By default, WordPress offers a basic registration system, but it lacks the flexibility, styling options, and user-friendly features modern websites demand.
That’s where Elementor comes in. As one of the most popular WordPress page builders, Elementor allows you to build custom page layouts using a simple drag-and-drop interface, without writing a single line of code.
To take things a step further, PowerPack Addons for Elementor extends Elementor’s capabilities with a wide range of advanced widgets, including the Registration Form widget, which makes it incredibly easy to create custom user registration forms tailored to your website’s specific needs.
In this tutorial, we’ll walk you through the process of building a fully functional, visually appealing, and secure user registration form using Elementor and the PowerPack Addons plugin.
But first…
Why Use a Custom Registration Form in WordPress?
While WordPress does offer a default registration page, it’s very limited in both design and functionality. Here’s why using a custom registration form is a better option:
Benefits of a Custom Registration Form
- Better Design Control: Customize the look and feel of your form to match your website’s branding by controlling layout, colors, spacing, and typography using Elementor’s styling options.
- Additional Fields for Collecting User Data: Collect more than just a username and email. Add fields like full name, phone number, user preferences, website URL, dropdowns, and checkboxes to gather detailed user information.
- Enhanced User Experience: Improve usability with inline validation, friendly error messages, and conditional logic. You can also redirect users to a welcome page after a successful registration.
- Spam Prevention and Validation Features: Integrate Google reCAPTCHA, add consent checkboxes, and utilize custom validation rules to minimize spam and ensure high-quality signups.
Common Use Cases
Custom registration forms are ideal for a variety of website types:
- Membership Sites: Enable users to sign up for premium content or gain exclusive member-only access.
- Online Communities: Enable user profiles, comments, and group participation.
- Educational Portals: Register students for courses, webinars, or programs.
- Event Signups: Let users register for events, workshops, or newsletters.
Tools You’ll Need
Before you start building your registration form, make sure you have the following tools installed and activated on your WordPress website:
- ✅ Elementor (Free or Pro): Elementor is required to build and design the page where the form will be placed. The free version is sufficient for this tutorial.
- ✅ PowerPack Addons for Elementor (Pro Version): Registration Form widget is part of the Pro version of PowerPack. This widget provides all the necessary tools to build a secure and flexible registration form with custom fields, styling options, and user role assignments.
Note: If you don’t have PowerPack Pro installed, you can get it here.
- ✅ A WordPress Website with Administrator Access: You’ll need admin-level access to install plugins, configure user roles, and access Elementor’s editing tools.
How to Create a User Registration Form Using Elementor and PowerPack Addons
Now, without any further ado, let’s walk through the complete process of creating a custom user registration form in Elementor using the PowerPack Registration Form widget.
This tutorial covers everything from placing the widget to customizing its fields, styling the form, and configuring actions after registration.
Step 1: Install and Activate PowerPack Addons
Before you begin, make sure the PowerPack Addons is installed and activated on your site. This plugin enhances Elementor’s capabilities by offering powerful widgets, one of which is the Registration Form widget, available in the Pro version.
Once installed, you can verify the plugin is active by navigating to your WordPress dashboard. Go to PowerPack >> Elements and confirm that the “Registration Form” widget is enabled. If it’s not, toggle it on so you can access it within the Elementor editor.
Step 2: Open the Page in Elementor
Now, choose the page where you’d like to display your registration form. You can either create a new page from Pages, add a new one, or edit an existing one. Once the page is ready, click the “Edit with Elementor” button to launch the Elementor visual editor.

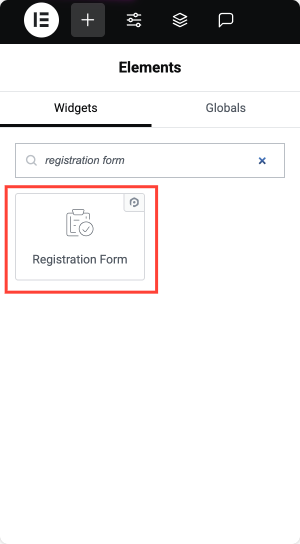
Step 3: Insert the Registration Form Widget
In the Elementor editor:
- Use the search bar in the Widgets Panel and type “Registration Form”.
- Once you see the widget under the PowerPack category, drag and drop it onto your page canvas.
You’ll now see a basic registration form structure on your page. Like any Elementor widget, this one is divided into three tabs: Content, Style, and Advanced.
Let’s go through the configuration options under each.
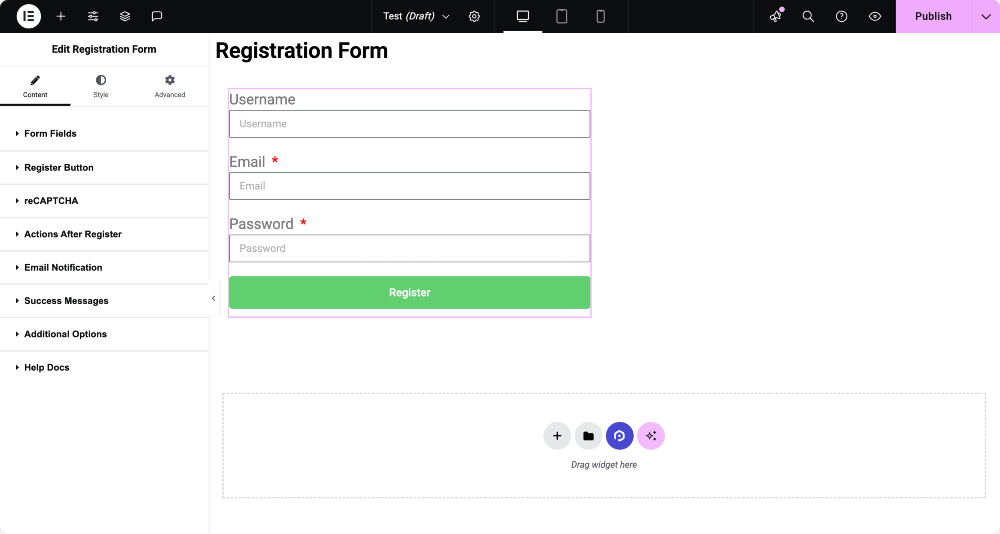
Configuring the Registration Form
Customizing Form Fields
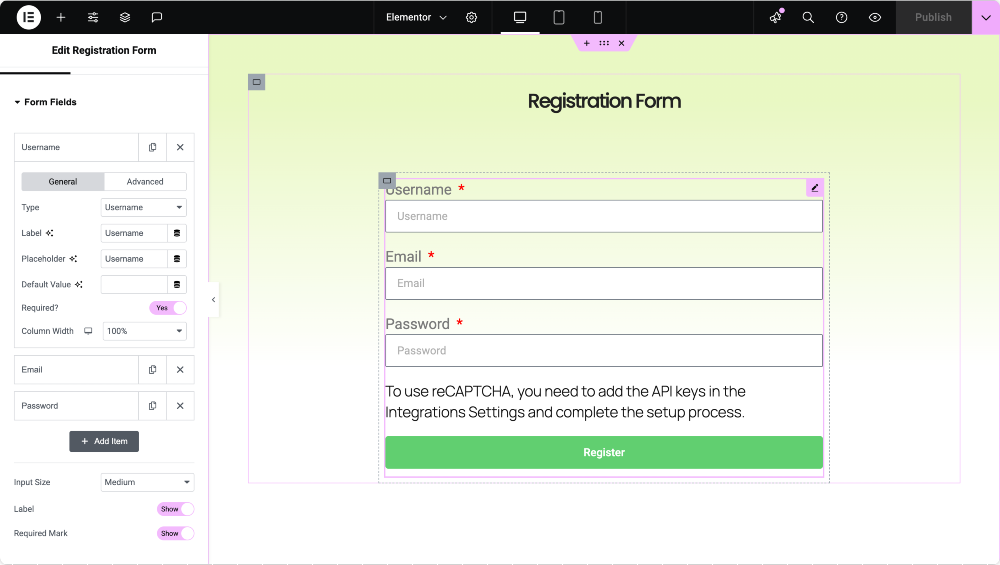
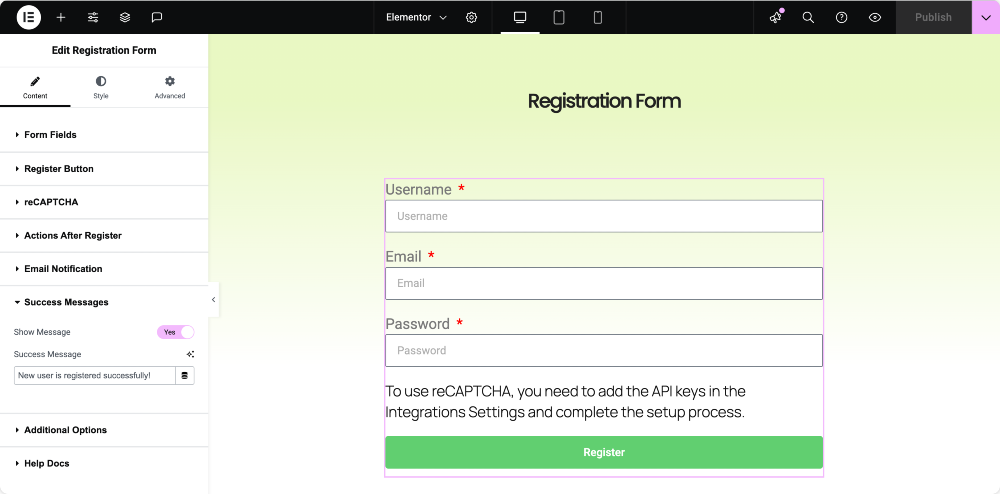
In the Content tab, the first section you’ll configure is Form Fields. This is where you build the structure of your form by adding input fields, such as name, email, or phone number. You can click the “Add Item” button to add new fields and customize each field by clicking to expand its settings.
For each field, you can define its types, such as Username, Email, Password, Confirm Password, First Name, Last Name, Website, or even Static Text for notes or disclaimers.
Each field allows you to set a label, placeholder text, and default value, as well as specify whether it is required. You can also adjust the column width, which is useful if you want to place multiple fields on the same row.
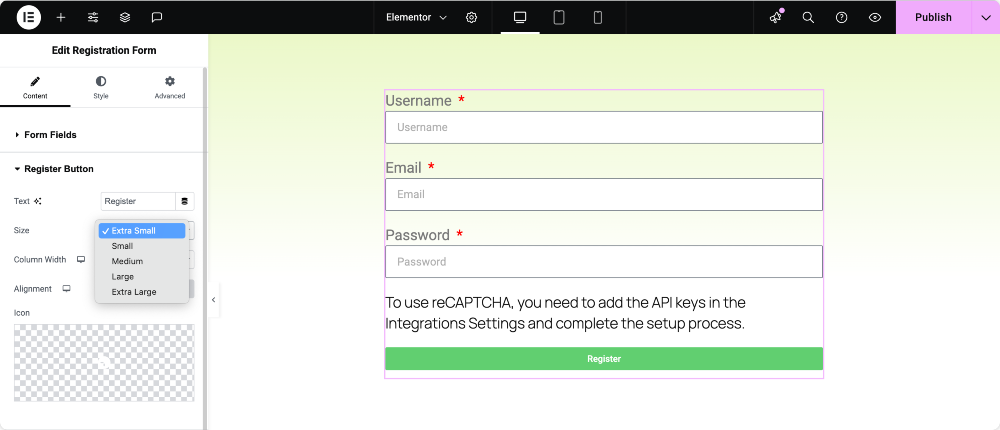
Register Button Settings
Next, you can customize the Register Button, which controls how the form’s submit button appears. Here, you can set the button’s label (such as “Register” or “Sign Up”), its size, alignment, and even add an icon to give it a more modern look.
You can also adjust its width to ensure it fits well within your layout.
reCAPTCHA
To prevent spam or bot registrations, you can integrate Google reCAPTCHA.
- Enable reCAPTCHA: Activate this toggle to enhance form security.
- Validation Type: Choose between:
- “I’m not a robot” checkbox (reCAPTCHA V2)
- Invisible reCAPTCHA (V2)
- Invisible reCAPTCHA (V3)
- Theme: Select either ‘Light’ or ‘Dark’ based on your site’s look and feel.
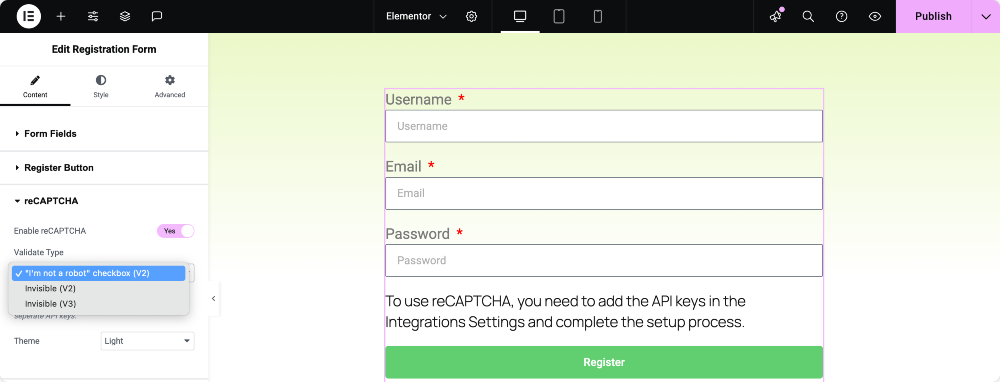
Make sure you’ve registered your site with Google reCAPTCHA to get the required keys.
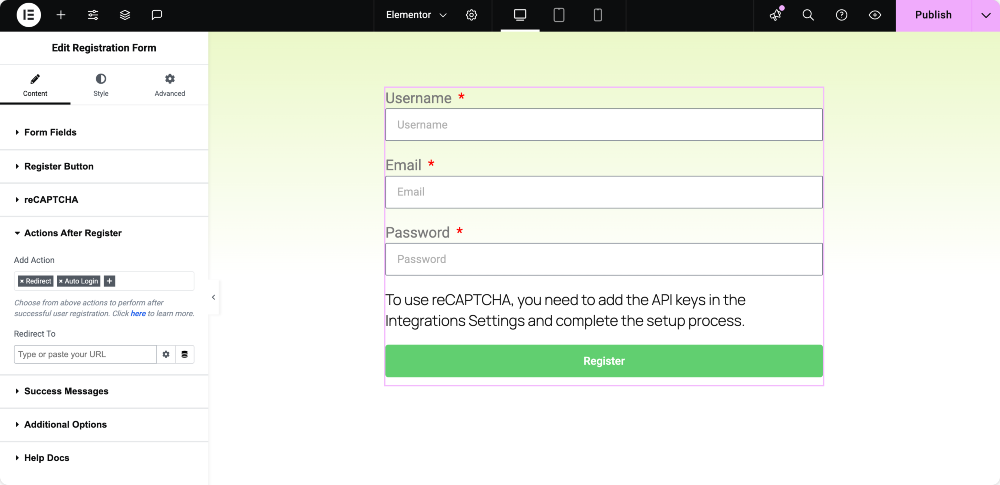
Set Actions After Successful Registration
After a user registers, you can define what happens next using the Actions After Register section. You might want to redirect the user to a welcome page, send them a confirmation email, or log them in automatically.
These actions can be added individually, each with its own settings, such as defining the destination URL for a redirect or crafting the content of an email message.
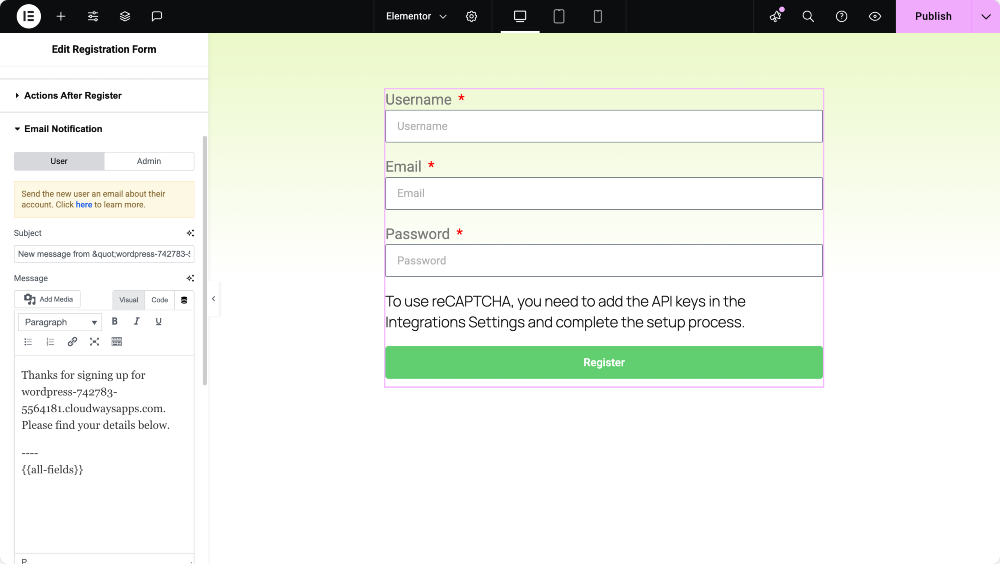
Email Notifications for Users and Admins
This section enables you to manage who is notified when someone completes the form. You can enable email notifications for the user, which include a welcome message or login instructions.’
Similarly, admin notifications can be enabled to keep site managers informed of new signups. You can customize the subject lines and content for both types of emails and send admin alerts to multiple recipients if needed.
Customize Success Messages
If you’re not using a redirect, you can instead show a success message directly on the page. This is useful for keeping the user on the same page while still confirming that their registration was successful. You can type in any custom message like “New user is registered successfully!”
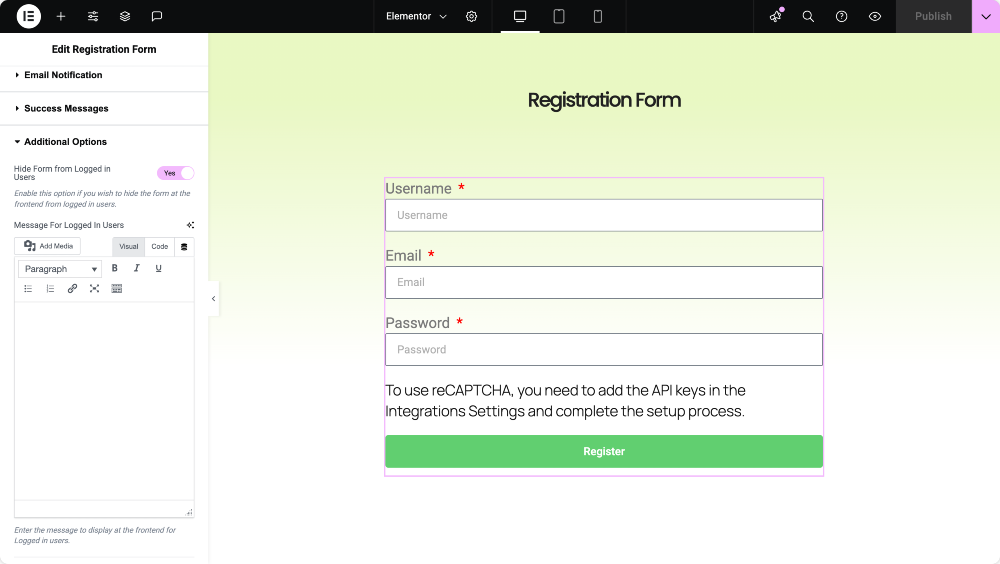
Control Form Visibility for Logged-in Users
To enhance the user experience, you can choose to hide the registration form from logged-in users. This ensures that registered members don’t see a form they no longer need. Instead of the form, you can display a custom message, such as “You’re already logged in.” This is a great way to keep your frontend clean and relevant for each visitor.
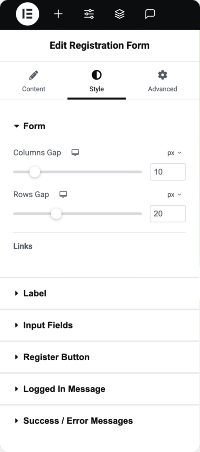
Styling the Registration Form
Once the form is functional, you’ll want to match its appearance to your website’s design. The Style tab in the widget gives you full control over the look and feel of each element in the form- No CSS Needed.
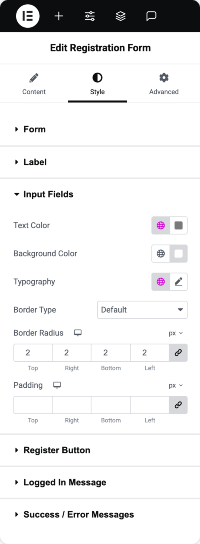
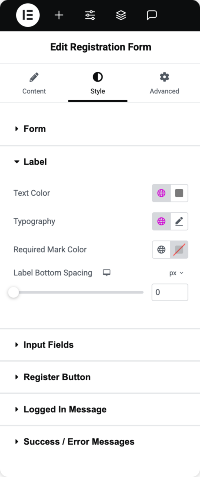
You can adjust the spacing between columns and rows, customize the labels’ typography and color, and even style the required asterisk for mandatory fields. Input fields can be styled with background colors, borders, padding, and more to ensure they visually align with your brand.
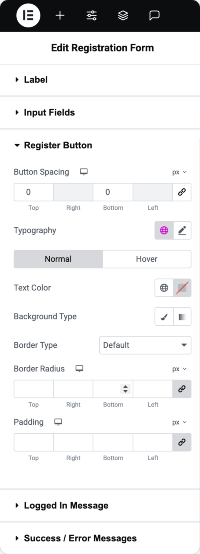
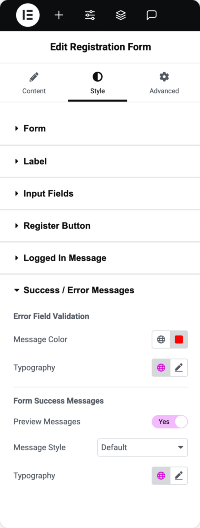
The register button comes with its own styling options for typography, color, spacing, and hover effects. You can also separately style the success and error messages to ensure they’re easy to read and fit within your site’s tone.
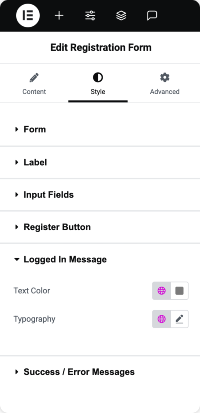
Even the message shown to logged-in users is fully customizable, which means your design will remain polished regardless of who is viewing the page.
Conclusion
Using Elementor with PowerPack Addons makes it incredibly easy to build a fully customized user registration form that looks professional and functions smoothly. You get complete control over the form structure, validation, post-registration actions, email notifications, and styling, all without touching a line of code.
It doesn’t matter whether you’re running a membership site, an e-learning portal, or an online store; a tailored registration form improves the user experience and helps you collect exactly the information you need.
Ready to build your registration form?
Install PowerPack Addons for Elementor and unlock the powerful Registration Form widget. Have any questions or need help customizing your form? Drop a comment below or reach out!
