
Wanted to add a business hours section on your WordPress website using Elementor? Great, you’ve landed on the right page!
In today’s time, having an online presence is crucial for businesses of all sizes. Whether a small local shop or a multinational corporation, your website serves as a virtual storefront, welcoming potential customers and clients at any hour of the day. One key element that can significantly improve user experience and help drive conversions is the clear display of your business hours.
In this guide, we’ll walk you through the process of adding a professional and customizable business hours section to your website using two powerful tools: Elementor and the PowerPack Business Hours widget. Elementor, a leading page builder for WordPress, empowers users to create beautiful websites with its intuitive drag-and-drop interface. PowerPack, an addon for Elementor, extends its functionality with advanced widgets and features.
By the end of this guide, you’ll have a polished business hours section that looks great and helps potential customers find the information they need to engage with your business.
Let’s get started!
Add a Business Hours Section Using Elementor and PowerPack Addons
Whether you’re building a new website from scratch or looking to enhance your existing site, adding a business hours section is a simple yet impactful way to provide valuable information to your visitors. With Elementor and PowerPack, you can create a visually appealing and SEO-friendly business hours section that seamlessly integrates with your website’s design.
Install and Activate Elementor and PowerPack Addons
To begin, ensure you have both the Elementor plugin and PowerPack Addon installed and activated on your WordPress website. PowerPack extends the functionality of Elementor with a range of powerful widgets, including the Business Hours widget, which we’ll be using to add and customize your business hours section.
Create a New Page or Edit an Existing One
Navigate to the page where you’d like to display your business hours. If you’re creating a new page, simply click “Add New” under “Pages” in your WordPress dashboard. If you’re editing an existing page, select it from the list of pages.
Once you’re in the page editor, click on “Edit with Elementor” to launch the Elementor editor, where you can easily customize your page’s design.
Drag and Drop the Business Hours Widget
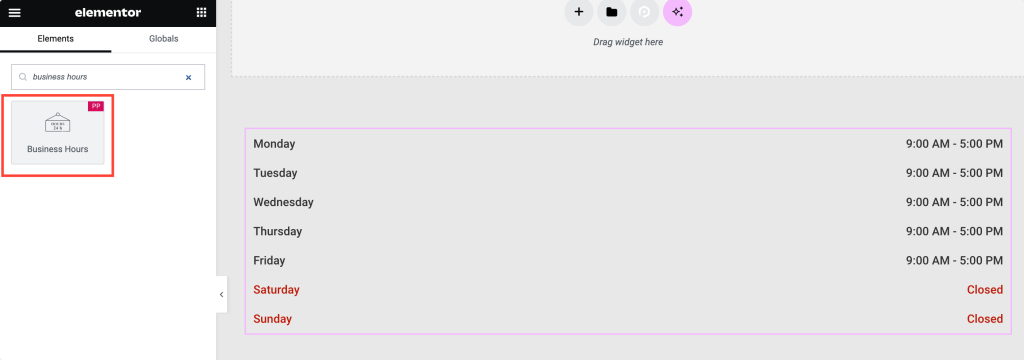
In the Elementor editor, locate the widget panel on the left-hand side. Here, you’ll find a wide range of widgets available for use.
Search for the “business hours” widget and drag it onto the section of your page where you want to display your business hours. Don’t forget to check the “PP” icon on top-right corner of the widget.
Content Tab of the Business Hours Widget
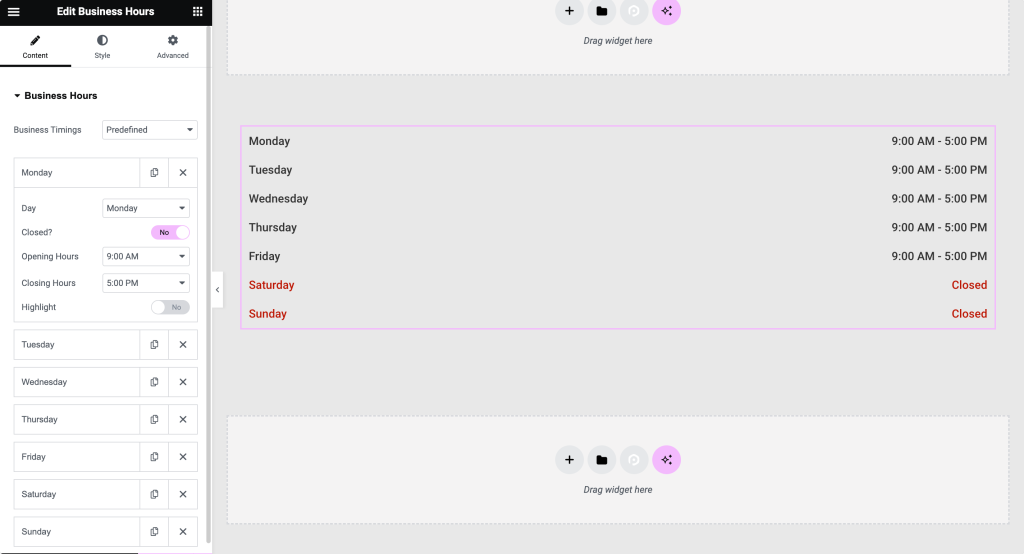
Once you’ve added the Business Hours widget to your page, you’ll see a range of options available in the Content tab.
- Choose between “Predefined Timings” or “Custom Timings” based on your business schedule. With PowerPack, you have the flexibility to set your business hours exactly as you need them.
- Customize each day of the week by selecting the day from Monday to Sunday. Whether your business operates seven days a week or has specific opening hours for weekdays and weekends, the PowerPack Business Hours widget can accommodate your needs.
- Toggle the “Close” option if your business is closed on a particular day. This feature allows you to provide clear information to your visitors about when your business is open for business.
- Set the opening and closing hours for each day with ease. With PowerPack’s intuitive interface, you can input your business hours quickly and accurately.
- Optionally, use the “Highlight” toggle to draw attention to specific days, such as special hours or holidays. Highlighted days can be customized with unique background and text colors, ensuring they stand out on your page.
- Enable the “24-Hours Format” toggle if your business operates on a 24-hour schedule, providing clarity to visitors worldwide.
- Choose between “Short” or “Long” format for days, allowing you to display abbreviated or full names of the days of the week according to your preference.
Style Tab of the Business Hours Widget
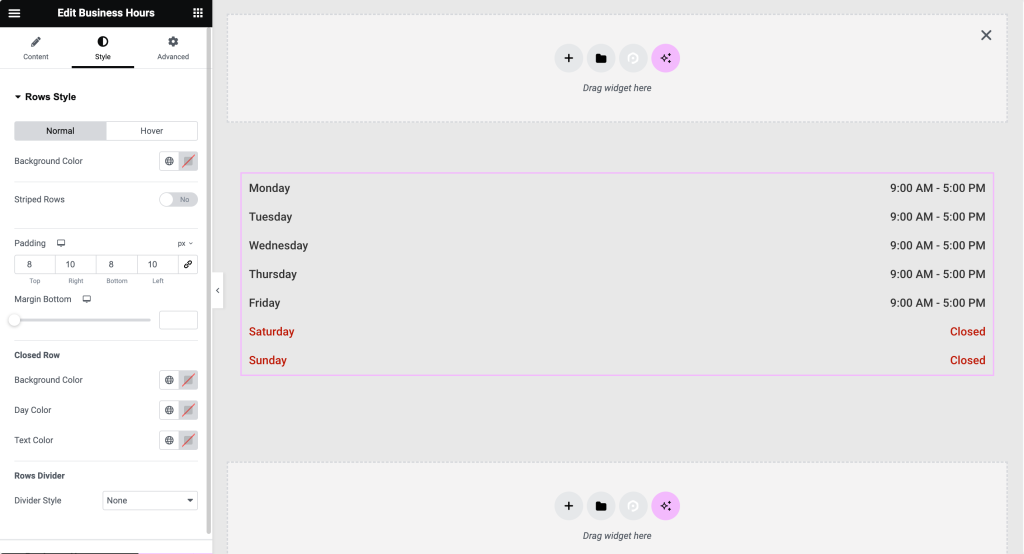
Once you’ve configured the content of your business hours section, switch to the Style tab to customize its visual appearance.
- Under the “Rows Style” section, adjust settings such as background color, striped rows, and padding, and customize the Closed Row and Rows divider. PowerPack gives you full control over the design of your business hours section, ensuring it matches your website’s branding and style.
- Customize the alignment, color, and typography options for Days and Hours in both Normal and Hover mode under the “Business Hours” section. With PowerPack, you can ensure that your business hours section looks professional and is easy to read on any device.
Preview and Publish
Before publishing your changes, take advantage of the Elementor live preview feature to see how your business hours section will look on your website.
Once you’re satisfied with the design and functionality of your business hours section, click on the “Publish” button to make changes live on your website.

Wrapping Up!
With the PowerPack Business Hours widget, you can create a professional and customizable business hours section that not only enhances the user experience and but also provides valuable information to your visitors. Upgrade your website with PowerPack today and take your Elementor design capabilities to the next level!
PowerPack Addons for Elementor allow you to do a lot more. There are more than 70 creative widgets that you can use to customize your Elementor pages. If you face any difficulty following the steps mentioned in this article, please feel free to connect with us or drop your queries in the comment section.
What are your thoughts on this tutorial? Do share if you found this helpful guide! Also, join us on Twitter, Facebook, and YouTube.
