
Looking for a simple way to create a custom footer using Elementor?
Creating a custom footer for your WordPress website can enhance its look and functionality. With the PowerPack Header Footer builder for Elementor, you can easily design a footer that matches your site’s branding and layout, even if you’re using the free version of Elementor.
Here’s a step-by-step guide to help you create a custom footer using Elementor and PowerPack Addons.
You might be wondering why you need to create a custom footer. Well, it’s a great way to add some personality and useful links to every page of your site.
Let’s get started!
Create a Custom Footer Using Elementor and PowerPack
We have also created a detailed video tutorial. If you prefer to watch a video, check the below link:
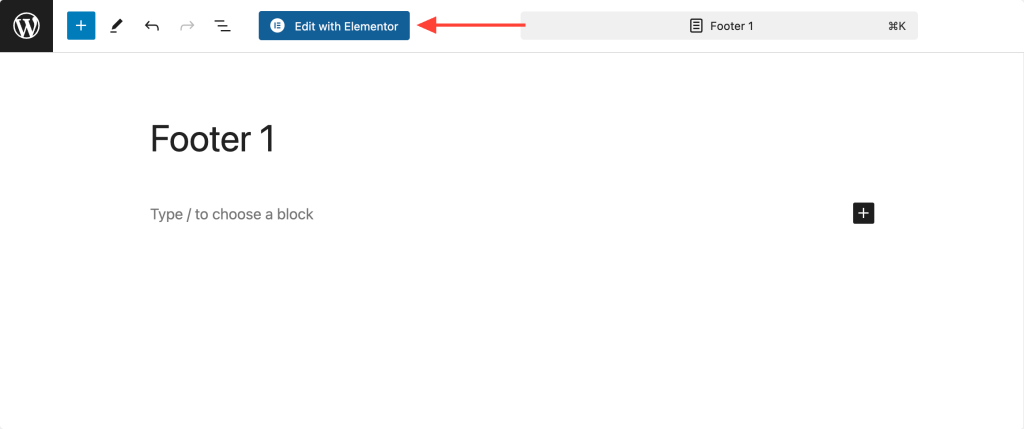
1: Add a New Page
Okay, let’s create a new page where we’ll design our footer. Go to your WordPress dashboard and navigate to Pages >> Add New. Here, you’ll want to name your page something like “Footer 1” to keep things organized.

2: Edit with Elementor
Once you’ve named it, hit the ‘Edit with Elementor’ and edit your new page in the Elementor editor.
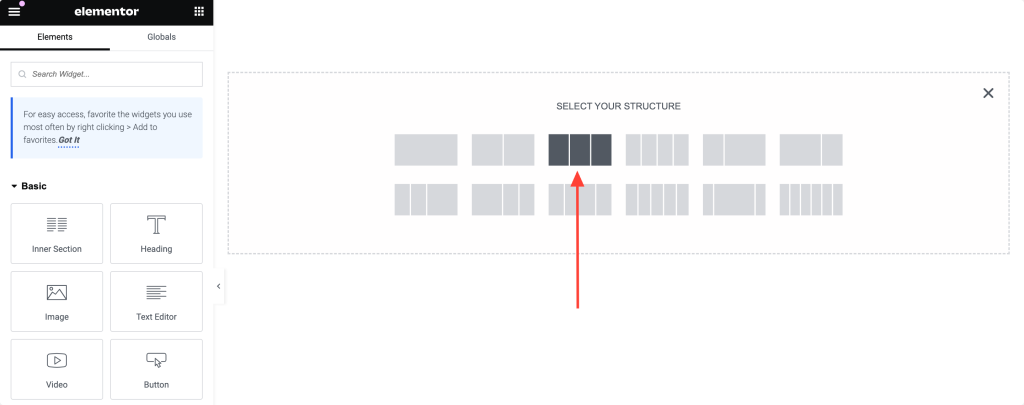
3: Create a Custom Footer Template
Start by clicking on the ‘+’ icon to add a new section. Here, I am selecting the 3-column layout. This layout will provide a balanced structure for your footer, giving you space to add different types of content.
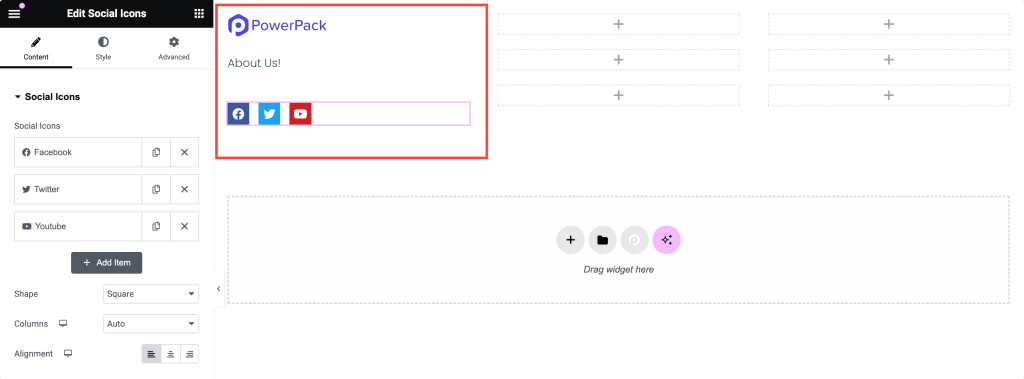
4: Customize the First Column
In the first column, we’ll add an image, some text, and social icons. Drag and drop the Image widget into the first column and upload your logo or any image you want to use.
Below the image, add a Text Editor widget and type in your text—maybe a short tagline or some company info.
Finally, drag the Social Icons widget to the bottom of the first column and add your social media links. Customize the icons to match your site’s style.
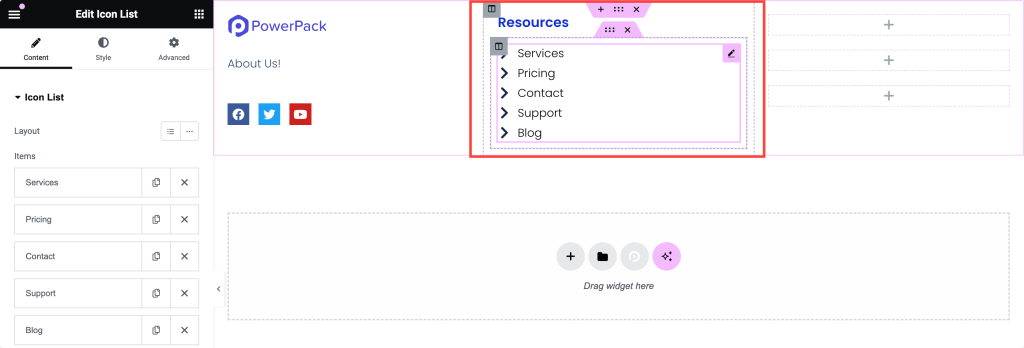
5: Customize the Second Column
Next up, let’s work on the second column. Here, we’ll add a heading and an icon list with links. Drag and drop the Heading widget into the second column and type in something like Quick Links or Resources.
Below the heading, add an Icon List widget. Enter the items and links for your icon list—these could be links to important pages like Contact, Pricing, or Services.
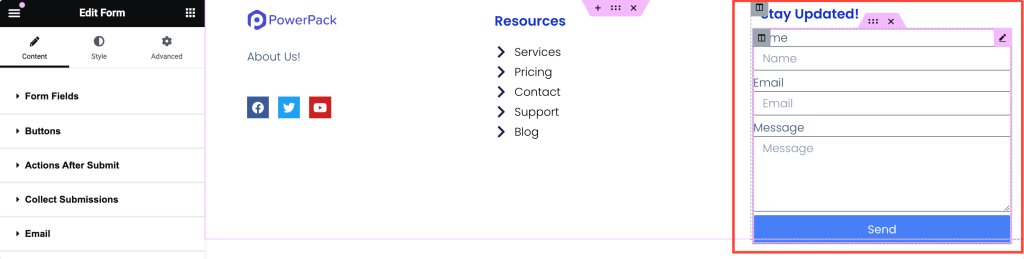
6: Customize the Third Column
Finally, let’s move on to the third column. We’ll add a heading and a newsletter form. Drag and drop the Heading widget into the third column and maybe title it Stay Updated.
Below the heading, add a Form widget. Set up your form with fields like email address and a subscribe button. This is a great way to encourage visitors to stay connected and receive updates from your site. Feel free to get creative and add more widgets if you like!
7: Publish Your Page
Once you’re happy with your footer design, it’s time to publish. Click the Publish button in the Elementor editor. Your custom footer is now live on the page you created. Woohoo! This means your design is saved and ready to be assigned as the footer for your entire site.
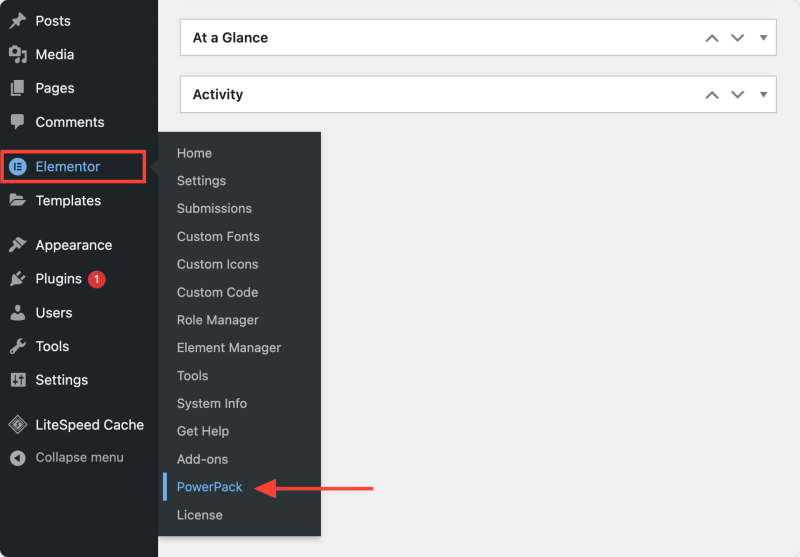
8: Assign the Footer to Your Website
Now, let’s make sure your footer shows up across your site. Go to Elementor > PowerPack in your WordPress dashboard.
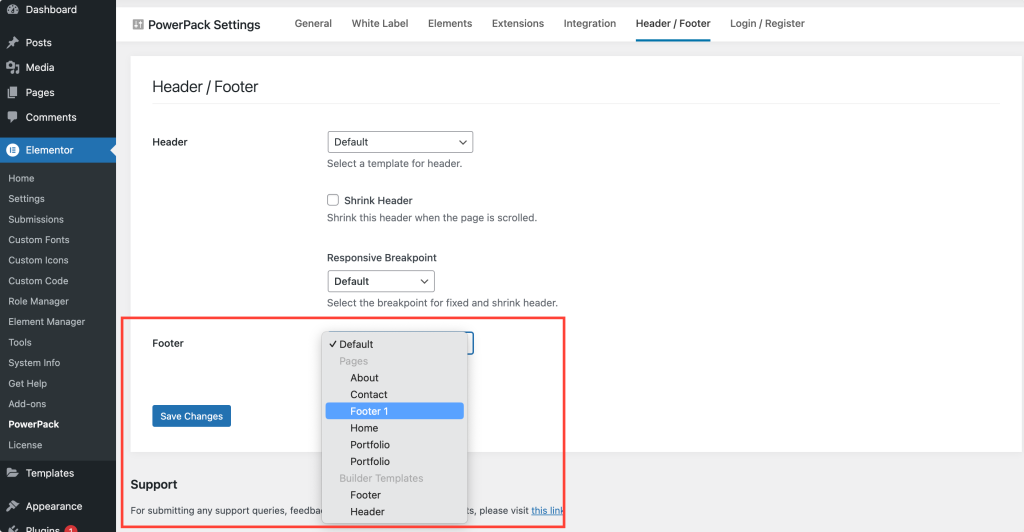
When the PowerPack settings page opens, head over to the Header/Footer tab. In the footer options, select the page on which you’ve designed your footer from the dropdown menu.
Click on the Save Changes button. And that’s it!
Wrapping Up!
Creating a custom footer using Elementor and PowerPack is not only easy but also fun. You get to add a personal touch to your website, making it more engaging for your visitors. This is how your footer will look on the live website:

If you face any difficulty following the steps mentioned in this article, please get in touch with us or drop your queries in the comment section.
What are your thoughts on this tutorial? Do share if you found this helpful guide! Also, join us on Twitter, Facebook, and YouTube.
Including the footers, headers also play a crucial role in any website’s design. So, if you’re looking for a simple and hassle-free way to create a header using Elementor, check out the detailed post on how to create a header with Elementor.
