
Looking for a simple yet creative way to create a login page with Elementor?
If you are a WordPress website owner, I am sure you have seen the good old login page that allows you to access the back-end dashboard of the website.
The login page functions perfectly, but in terms of design, it is pretty straightforward. Being straightforward is not bad, but if you are a developer creating client websites, I am sure you would like to custom-brand the login page with your brand’s identity. After all, that will help you build more authority and deliver good websites to your clients. In this guide, we will show you how to create a custom WordPress Login Page using Elementor and use it for a website.
Let’s dive in!
Creating a Custom WordPress Login page Using Elementor
To create a custom WordPress login page, we will be using these two plugins:
Since we will be using the PowerPack Login Form widget, make sure you have the PowerPack addon installed and activated on your website
Since we are creating a new login page, we need to create a new one.
Creating a new page
Step 1: Log in to your WordPress website and go to Pages > Add New.
Next, give your page a proper name, like My New Login Page, and Click on the Edit with Elementor button.

We will be creating a custom design. You don’t necessarily have to follow the steps in this section step-by-step. You can create your own unique login page design.
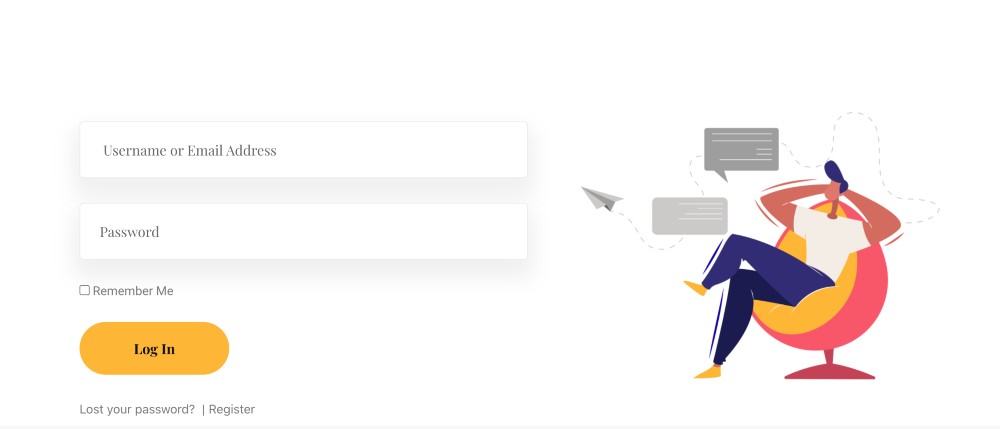
For this tutorial, I am creating a login page that will look like this:
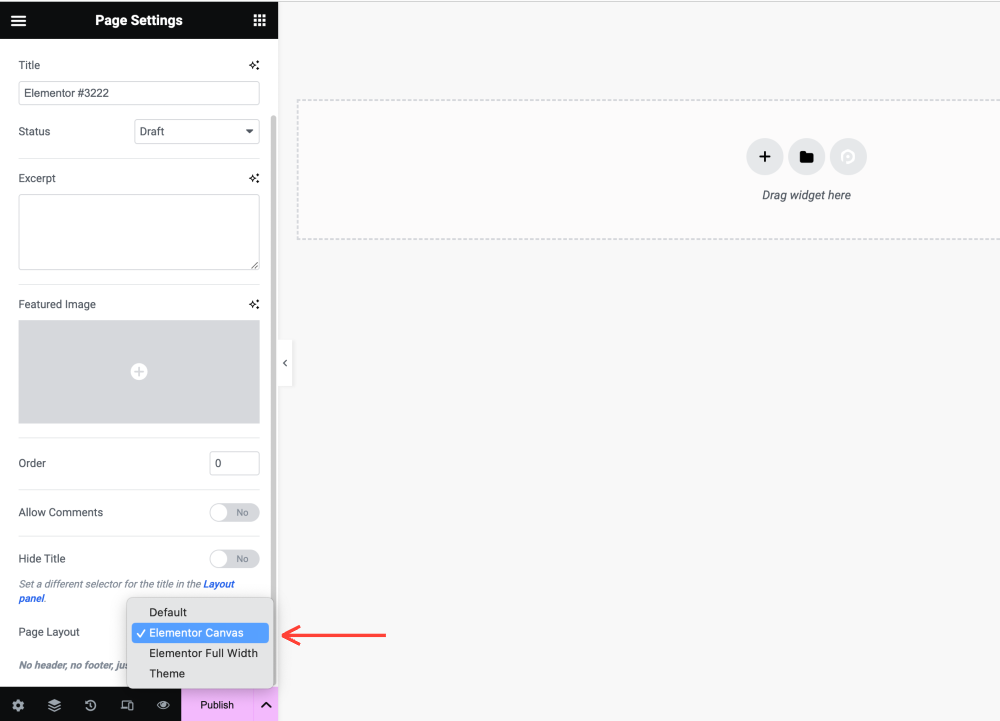
We are creating a 2-column layout login page without any headers or footers, so first, we need let’s disable the headers.
Step 2: Go to Elementor settings (by clicking on the settings icon) and set the page layout as Elementor Canvas.
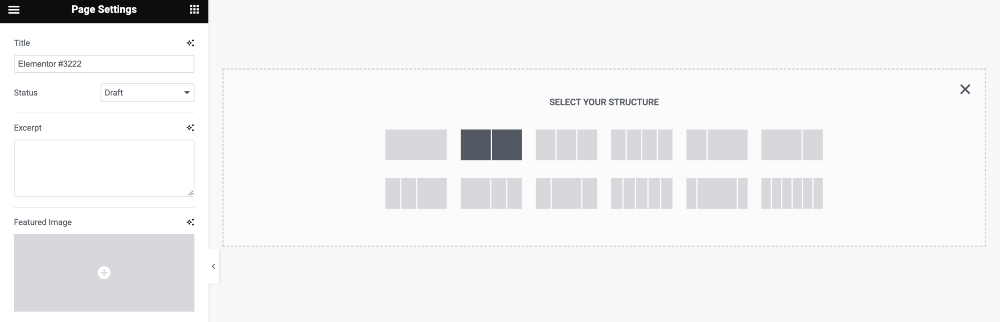
Step 3: Add 2 column layout on the page. Click on the + icon and then SELECT YOUR STRUCTURE.
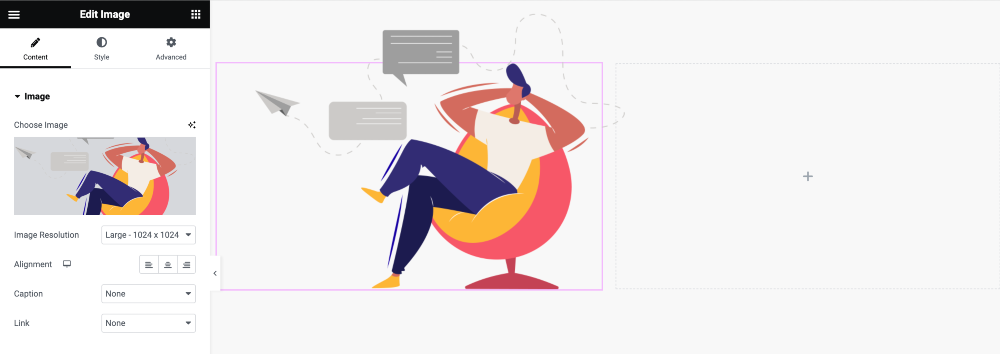
Step 4: Now add the Image widget on the left column and select the image you want to add there.
Let’s move on to the right column.
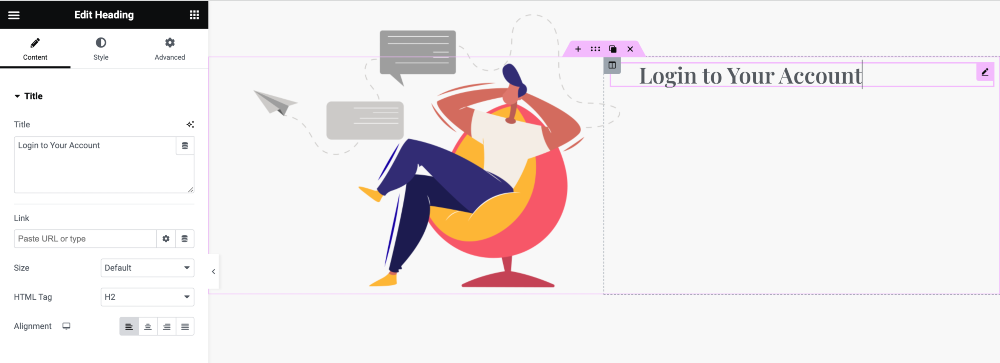
The right column will have a heading and the login form fields.
Step 5: So go ahead and add the heading widget to the right column. Give it the styling changes to match your website’s overall design.
Now, look for the Login form widget. You will see the PowerPack Login form widget in the widget editor. Ensure you see the PP icon at the top right corner of the widget.
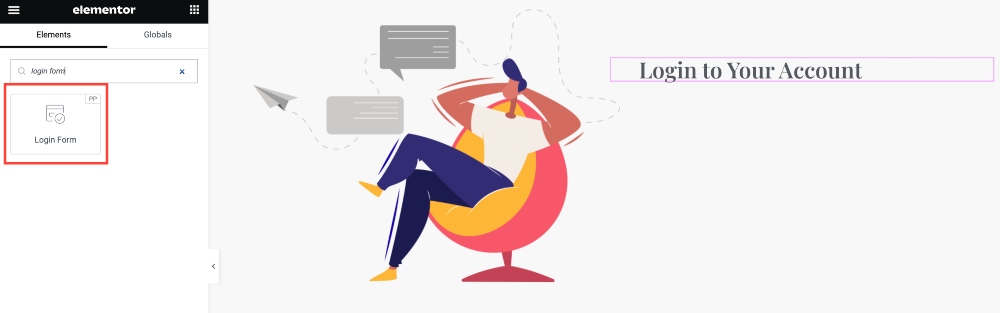
Step 6: Drag and drop the login form widget on the page. The login form will start showing right away.
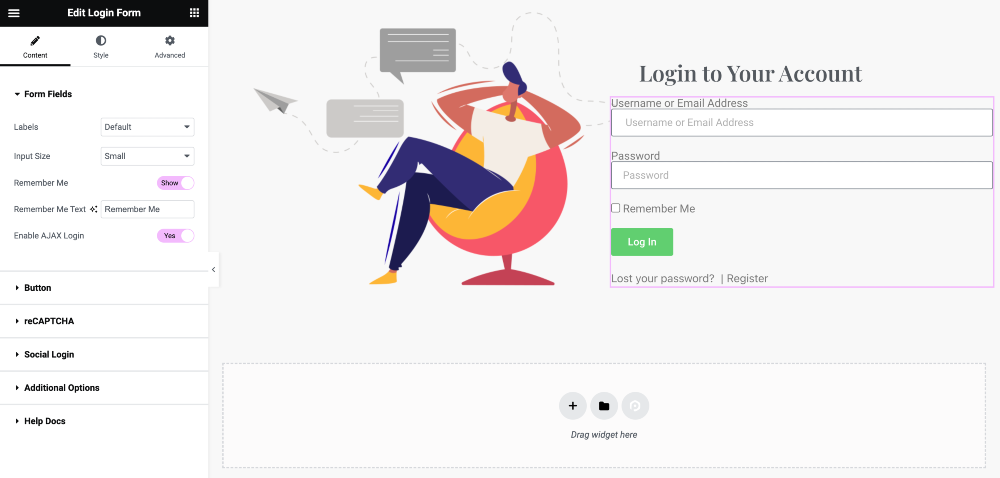
Let’s take a look at the customization options you get with the Login Form widget.
Content Tab
Let’s start with the form fields. You can enable or disable the labels and choose a custom label. Further, you can enable the ‘Remember Me’ checkbox using the toggle button.
For the Button, you can change the text size, text, and alignment. Further changes to the button can be made from the style tab.
You can also enable the reCAPTCHA authentication on the form. For this, you need to add the API keys in the integration settings of PowerPack.
With PowerPack’s login form widget, you can enable social login on websites like Google and Facebook. Enabling them is easy as well, using the toggle button. Ensure you have the App ID and Secret key set up in the integration settings.
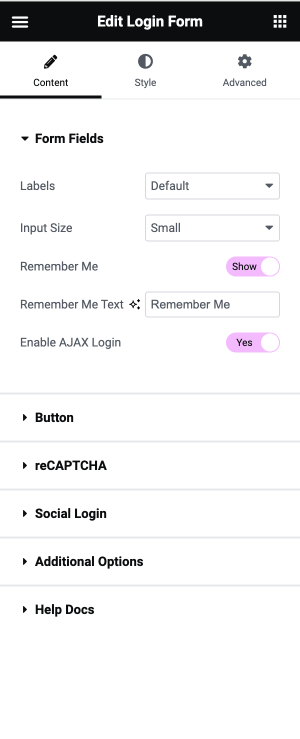
The last subsection in the content tab is Additional Options. Here, you can make the following changes:
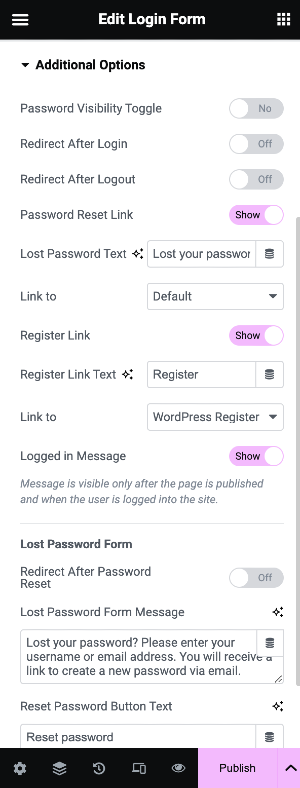
Redirect After Login: This option lets you set up redirects upon successful login.
Redirect after Logout: this redirects the user when they log out of the website.
Password Reset Link: This option shows the password reset link so users who have lost or forgotten the password can reset it themselves. You can also change the text of this link.
Register Link: If you want new registrations on your website, you can enable them using this option.
Logged-in Message: If you want to show a custom message for when a user successfully login, you can do it using this option.
Now we have seen all the options available in the content section of the login form widget. You can make the changes you like using the options I explained above.
Style Tab
Now, let’s take a look at the styling options you get with the style tab.
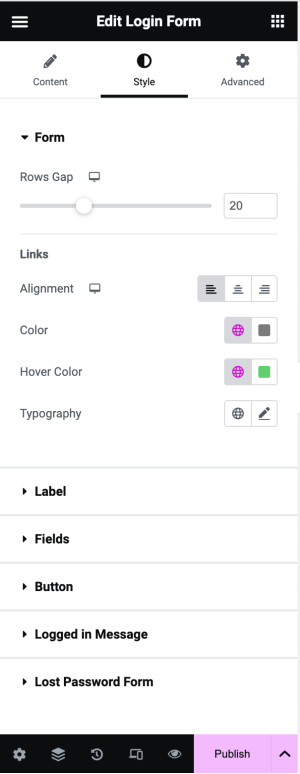
When it comes to styling, you get different styling options for the Form, Fields, Button, and the Logged in Message.
For all the options, you can make numerous styling changes like font, spacing, alignment, hover color, typography, borders, padding, etc.
For example, even for the Logged in message option, you can change the font color and the typography.
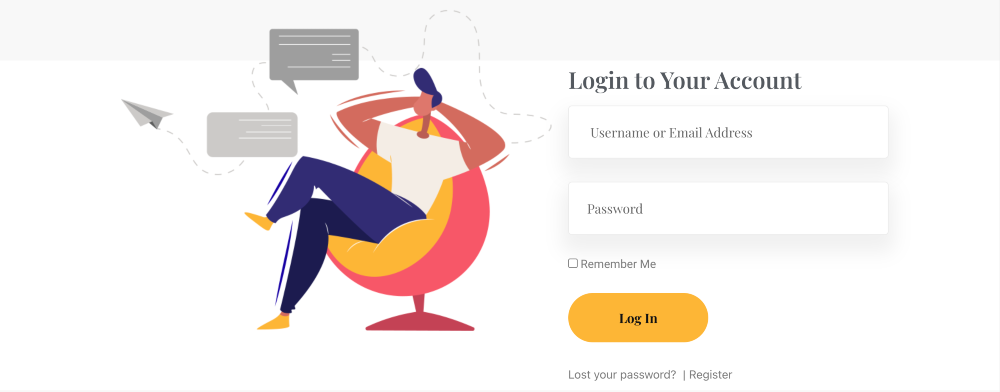
I went ahead and made a couple of tweaks here and there, such as margins, padding, spacing, font, etc., and after making all those changes, here is what my login form looks like.
Our login form is ready; we just need to add it to our current login page for the website.
Step 7: For this, go to the WordPress admin Dashboard > Elementor > PowerPack > Login/Register.
Step 8: Select the page from the list of pages and click on the Save Changes button.
Now you are all set!
Go ahead and log out of the website and try logging back into your website by going to the /wp-admin URL. You will see the newly designed page on the login page.
What’s Next?
Do share the designs you made using PowerPack’s user login page, and do drop a comment in the comments section below if you have any questions.
If you do not have PowerPack, you can get it here.
Read Next: How to create a Custom User Registration Page with Elementor

1 thought on “How to Create a Custom WordPress Login Page with Elementor”
Can we add more fields to our login form? Such as security questions?