
Some agency sites consist of only One Page. Even when you click on the navigation icon, you will be taken to another section on the same page instead of another page.
The purpose of this is to take the visitors to the required section of the page with just a single click without scrolling down. If you are wondering about how to create a one-page site with Elementor, you no longer have to worry. PowerPack Elementor’s One Page Navigation widget does this job.
The One Page Navigation widget includes a navigation control that allows you to switch between sections easily. These navigation controls allow your visitors to navigate through the content of the One Page agency site easily.
The One Page Navigation widget lets you display tooltips on mouse hover, customize the navigation icons, change the border and background colors, navigate from one section to another using the scroll wheel, scroll up and down using scroll keys, and adjust the scroll speed on the page.
Now, let’s go ahead and see how we can use PowerPack’s One Page Navigation widget.
We have also created a short, to-the-point video explaining how you can create a One Page Agency site. So, if you like the video explanation, I suggest you look at it.
Create a One Page Agency Site with Elementor
The One Page Navigation widget comes with the PowerPack’s Pro version. To use the One Page Navigation widget, install and activate Elementor first, then the PowerPack Pro. You can get both plugins from the links below:
- Elementor: Get Elementor
- PowerPack Addons for Elementor: Get PowerPack
Add the One Page Navigation Widget
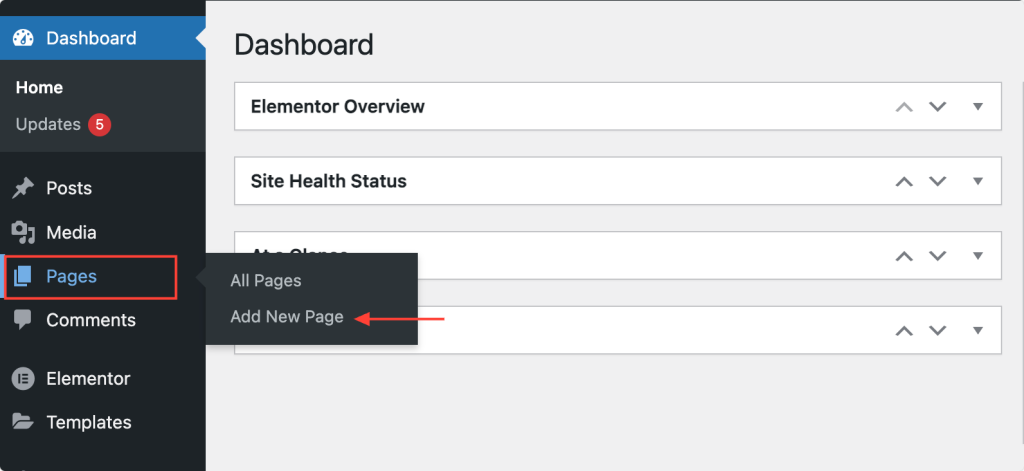
Go to WordPress Dashboard and click on Pages >> Add New.
If you have already created a page, click on Pages >> All Pages and select the page you want to add to the One Page Navigation widget.
Search for the One Page Navigation widget in the search bar. Make sure that the widget is with the “PP” icon at the corner. This icon indicates that the widget belongs to PowerPack.
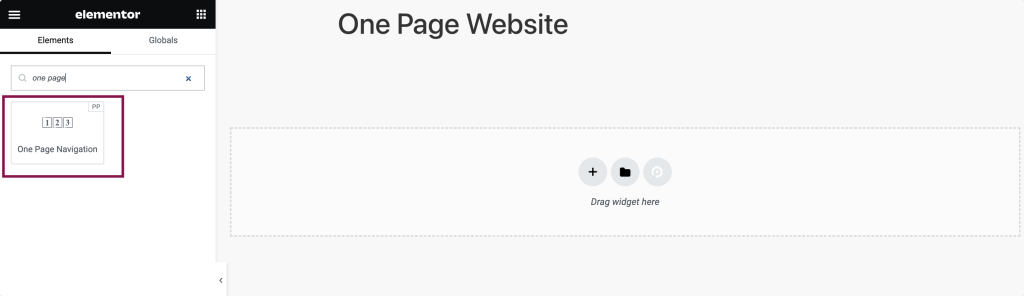
Simply drag & drop the One Page Navigation widget into the ‘Drag widget here’ section. Initially, this is how One Page Navigation would look:
Now, let’s see how to customize and style the content and style tab of Elementor.
Customizing the Content Tab
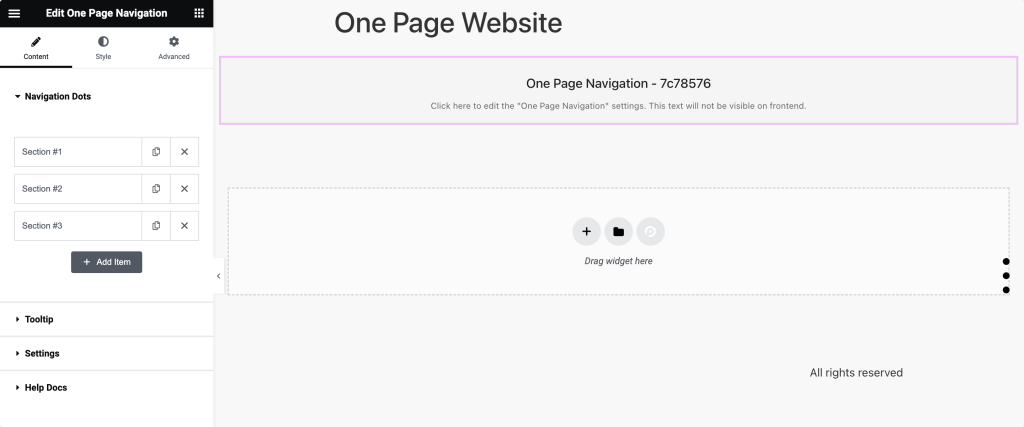
Under the ‘Content’ tab, you will find 3 sections, which are listed below:
- Navigation Dots
- Tooltip
- Settings
Let’s have a look at each section briefly.
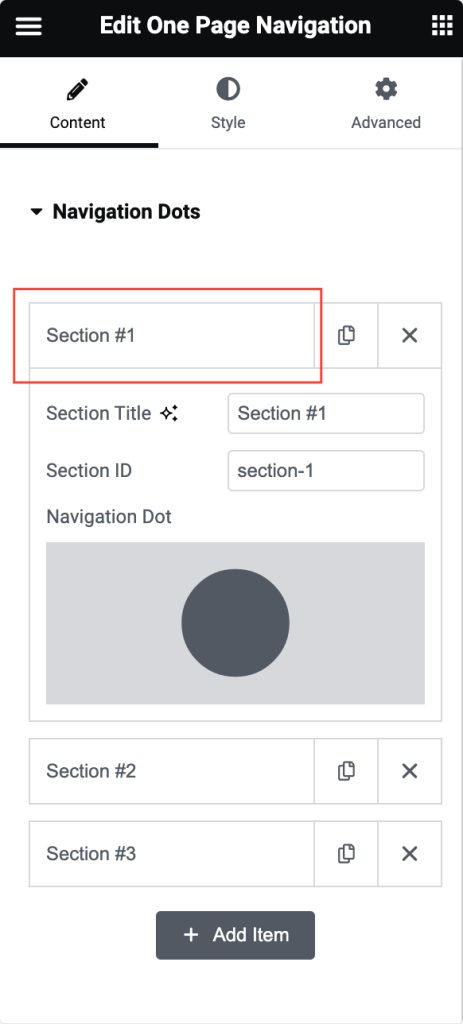
Navigation Dots
This section allows you to add a Section Title, Section ID, and a dropdown menu to select a navigation dot.
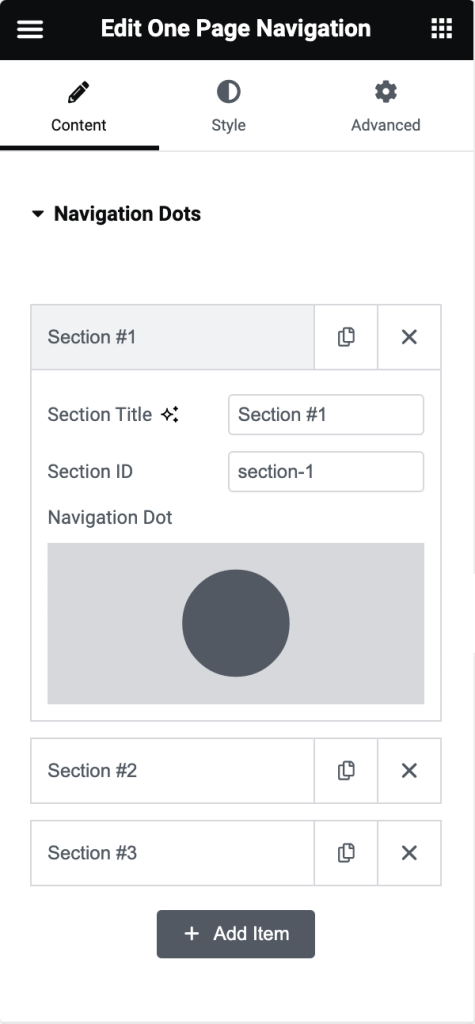
- Click on the “Add item” button to add the dots. You can also remove them by clicking on the “X” icon.
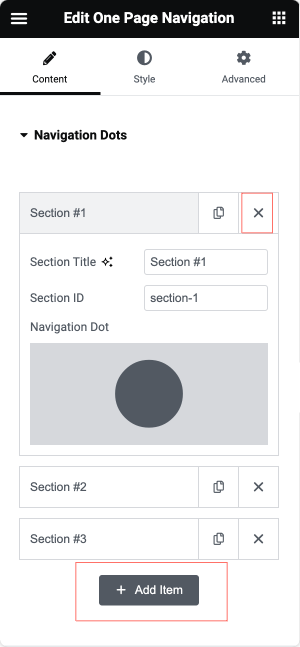
- Choose “Section 1” and give it a proper title.
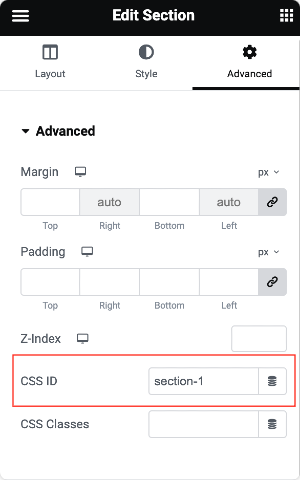
- The next option is the Section ID. This is a CSS ID that is set for a specific section. Click on the edit section and select Advanced at the top of the section settings. Copy the CSS ID and paste it to the Section ID in the Layout.
- Now, you can choose the custom navigation dot for the section. You can make the same changes to the remaining dots. Adding an icon from the list can give each navigation dot a unique look.
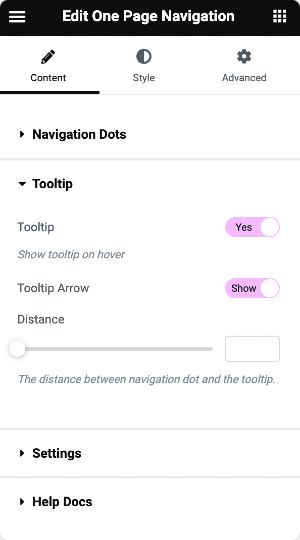
Tooltip
A tooltip appears on the page when the mouse hovers over the Navigation icons. You must enable the Tooltip and the Tooltip Arrow in order to use it. You can also adjust the distance between the Tooltips.
Settings
There are 3 sub-sections in the Settings tab.
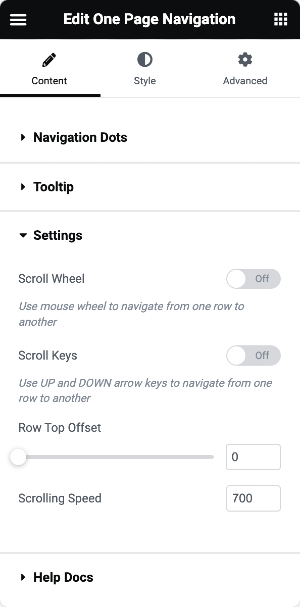
- Scroll Wheel: This allows you to use the mouse wheel to navigate from one row to another.
- Scroll Keys: Allows you to use UP and DOWN arrow keys to navigate from one row to another.
- Scrolling Speed: Gives you full control over the speed of the scroll of the elements.
Once you have made changes in the Content Tab, you can proceed to the Style Tab to style the PowerPack Elementor’s One Page Navigation widget as required.
How to Style One Page Navigation Widget?
One Page Navigation widget comes with multiple styling options.
From the ‘Style’ tab, you can modify Alignment, Color, Size, Spacing, Tooltip, and many other options of the Page Navigation.
There are 3 sections available in the style tab that are listed below:
- Navigation Box
- Navigation Dots
- Tooltip
Let’s have a look at each section in detail.
Navigation Box
In the Navigation Box section, you can choose the alignment, border, and background type from the pop-up list. It is even possible to add styling to the border.

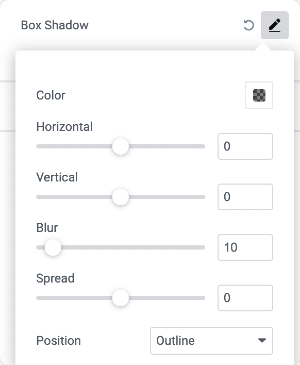
You can also adjust the color of the box shadow horizontally or vertically.
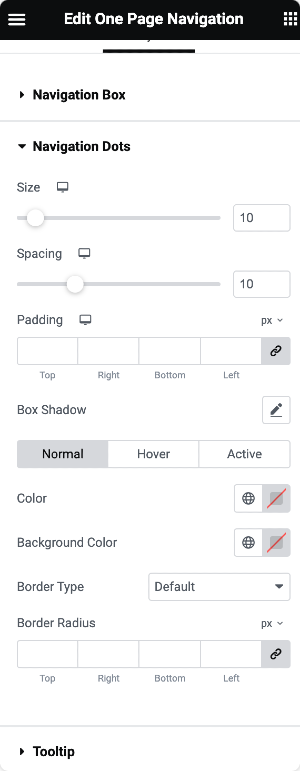
Navigation Dots
From this section, you can change the size and spacing of the Navigation Dots. If you want, you can even add ‘Box Shadow’ as well. Moreover, you can separately control the styling for ‘Navigation Dots’ when it’s in normal, hover, or active view.
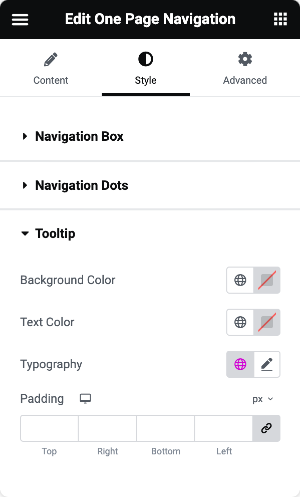
Tooltip
Tooltips can be customized by changing their backgrounds and text colors. This section also allows you to edit the ‘Typography’ of your Tooltip content.
Wrapping Up!
The user experience gets better with easier navigation settings. Thus, the PowerPack Elementor’s One Page Navigation widget makes it easy for your visitors to navigate through the content of the agency site.
The PowerPack Addons for Elementor give you many more options. You can customize your Elementor pages with more than 70 creative widgets. Check here to learn more about the PowerPack Addons for Elementor.
