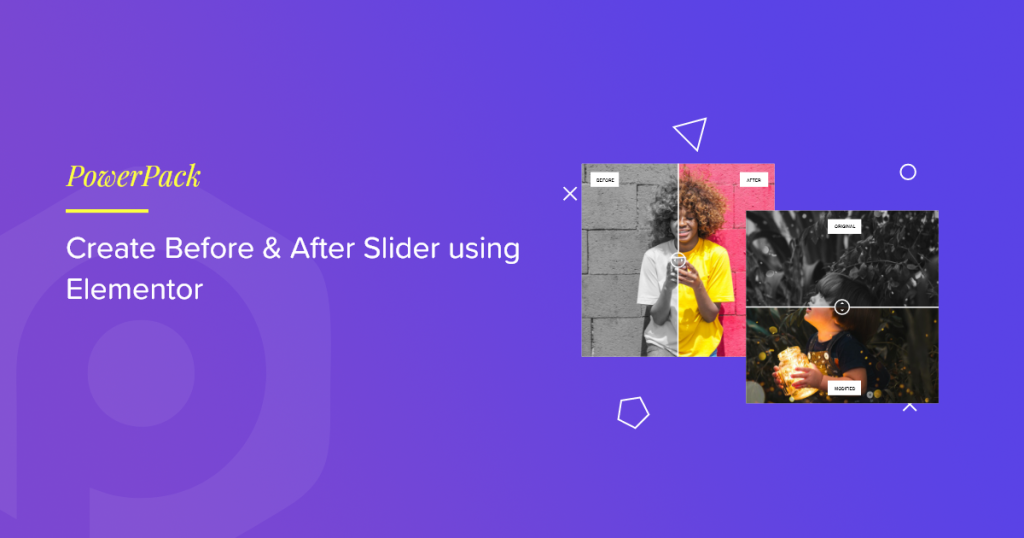
Engaging visuals are crucial for any website, and a before-and-after slider is a great way to showcase transformations effectively.
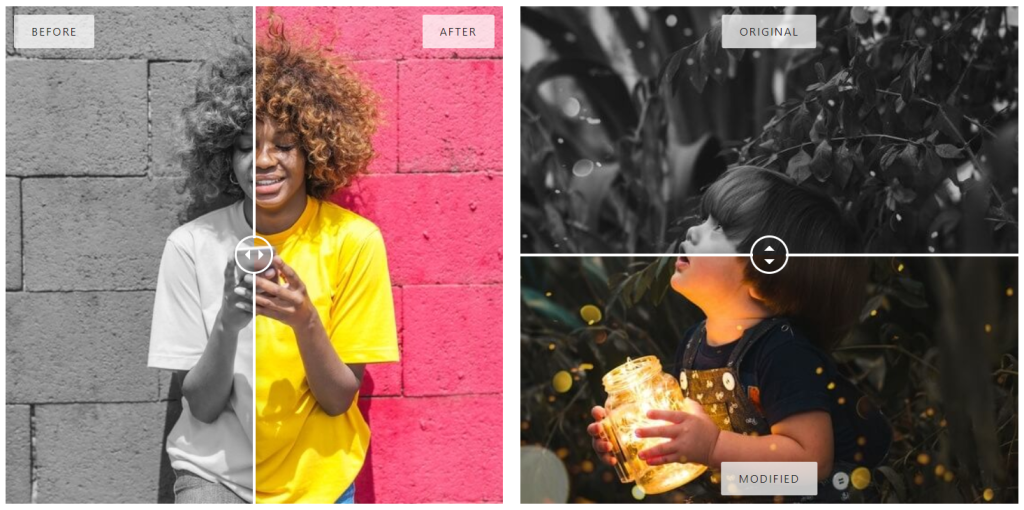
Image comparison sliders include touch-friendly before and after versions of an image with a separator in the middle that you can drag horizontally or vertically to see the difference between those two.
In this tutorial, we’ll show you how to create a before-and-after slider using the Image Comparison Widget from PowerPack Addons for Elementor.
Why Use a Before-and-After Slider?
Before-and-after sliders are perfect for industries that rely on visual storytelling, such as:
- Web Design: Showcase website redesigns.
- E-commerce: Display product transformations.
- Photography: Compare original vs. edited images.
- Home Improvement: Highlight renovations or interior design changes.
- Health & Fitness: Show fitness transformations.
Create Before/After Slider Using PowerPack Image Comparison Widget
PowerPack Elementor Addons is a complete toolkit that helps you design professional WordPress websites. It includes 100+ creative Elementor widgets, including the Image Comparison widget!
If you prefer watching a video, check the link below to learn how to create a before/after image comparison using Elementor.
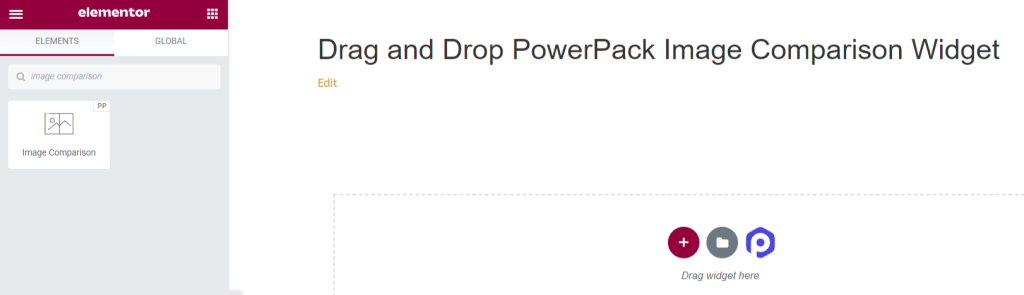
Drag and Drop the PowerPack Image Comparison Widget
First, launch the Elementor editor page, then type image comparison in the search bar and drag & drop the widget on the page.
Make sure to check for the PowerPack “PP” sign on the top right corner of the widget.
Content Tab of the PowerPack Image Comparison Widget
Navigate to the content tab of the PowerPack Image Comparison widget. There you’ll find three sections:
- Before Image
- After Image
- Settings
Before Image
You can add and customize your Before Image in this section.
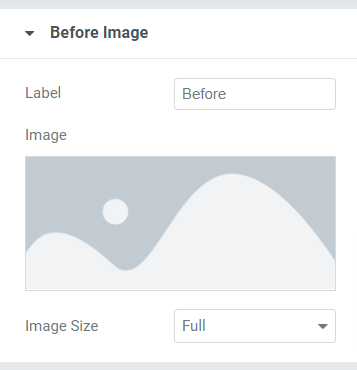
Here, you get options to customize the Before Image’s title and add an image by inserting media from the media library.
Also, you can select the image size from the comprehensive image size options available here. We recommend you keep the image size full.
After Image
You can add and customize your After Image in this section.
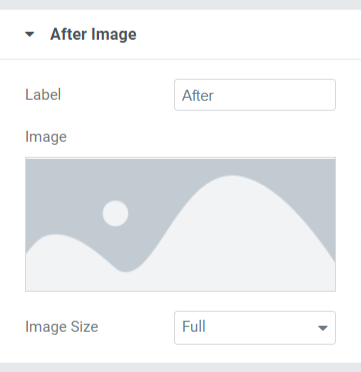
In this section, you get similar options to those in the previous image section. Here also, you can customize the After Image’s title and add an image by inserting media from the media library.
Also, you can select the “image size” from the comprehensive image size options available here.
Settings
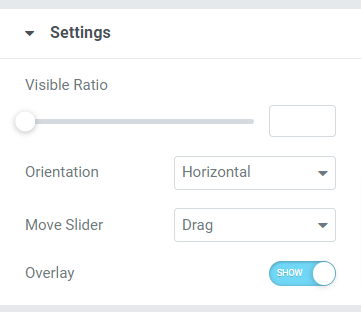
This section includes additional settings that help you to customize the Before After Slider better.
This section consists of four subsections:
- Visible Ratio: With the help of this feature, you can adjust the visibility of your images.
- Orientation: Here, you can choose the orientation of your image comparison slider, either Horizontal or Vertical.
- Move slider: With this option, you can select the action for the image slider from the options such as Drag, Mouse Move, or Mouse Click.
- Overlay: If you want to apply an overlay for the images, you can use this option.
Style Tab of the Image Comparison Widget
Style tab contains all the styling parts of the Image Comparison widget.
This Tab includes four sections:
- Overlay
- Handle
- Divider
- Label
Overlay
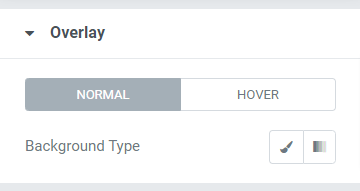
If you’ve applied the overlay option for the images in the content tab, you can customize this background type feature for the before and after slider sections.
In addition, you can separately customize the background type for normal and hover effects.
Handle
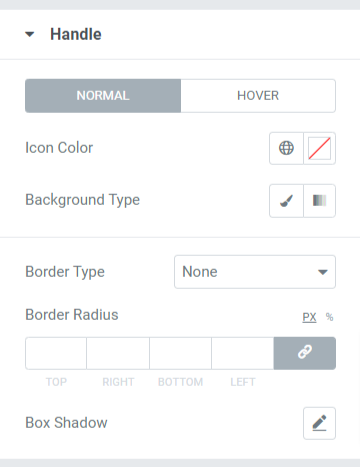
All the styling options for the handle placed in the separator are available in this section.
Let’s see the options available in this section in detail:
- Icon color: With this option, you can change the color of the handle icon placed in the middle of the separator.
- Background Color: Customize the background color for the handle using this option.
- Border Type: You can choose the border type for the handle from the options available here, such as solid, dotted, dashed, doubled, and groove. You can select “none” if you don’t want to display any border.
- Border Radius: If you’ve applied a border, you can use this border-radius option to give a smooth edge to the border applied.
- Box Shadow: Customize the box shadow for the handle using this option.
Divider
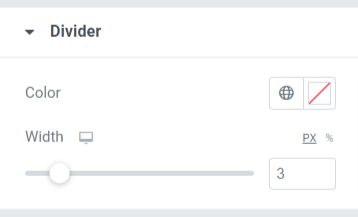
In this section, you’ll get options to customize the separator or divider. You can change its “color” and adjust its “width” by using the options available here.
Label
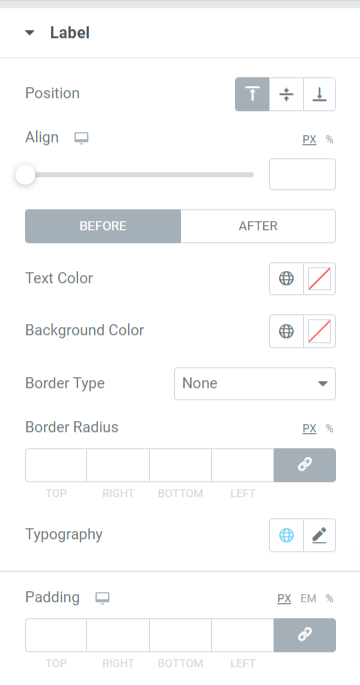
In this section, you’ll get a wide range of options to customize the label displayed in the before & after slider.
Let’s see all the options available in this section:
- Position: Set the label box position to the top, middle, or bottom.
- Align: Set the alignment of the before/after label displayed on both images to the left, right, or center.
- Text Color: Select the label text color using this option.
- Background Color: If you want to add a background color to the label text, you can add it here.
- Border Type: If you want to apply a border, you can select any border type from the options available, such as solid, double, dotted, dashed, or groove.
- Border Radius: You can adjust the border radius for the label text, and using a border radius will give soft edges to the label text.
- Typography: Customize the typography for the label text using this option.
- Padding: This allows space between the box and the content. Adjust this option to display smoothly organized content in the label box.
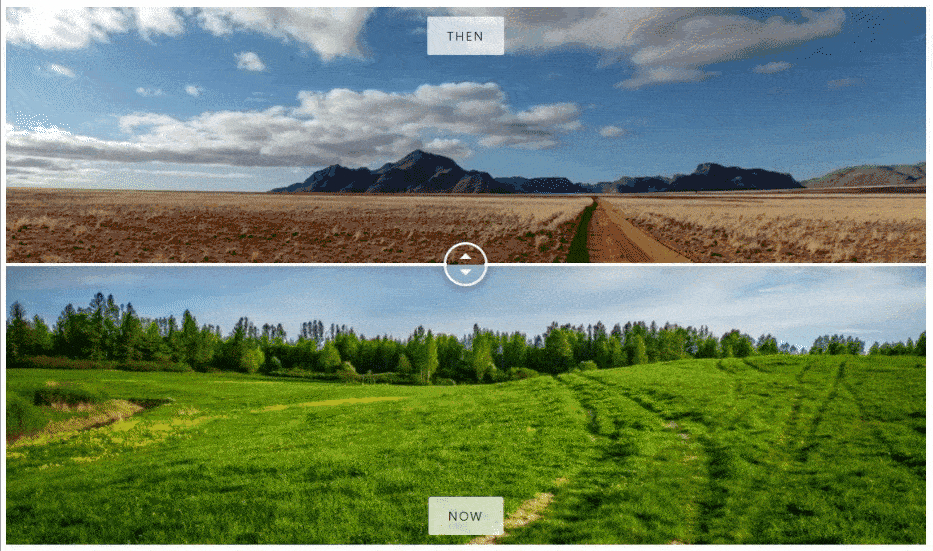
So, this was the complete tutorial; by following this, you can easily create a before-and-after slider using Elementor page builder and PowerPack Elementor Addons.
After applying all these changes, you’ll get something like this:
Get the PowerPack Image Comparison Widget for Elementor
We hope this tutorial will help you create an appealing before-and-after slider using Elementor for your website. If you’ve enjoyed reading this article, we’re sure you’d also love experiencing our other PowerPack Elements.
Click here to get the PowerPack Image Comparison widget for Elementor.
Also, if you’re searching for another way to flaunt your product images interactively, you can check our post to learn how to create card sliders using Elementor.
Please feel free to drop your comments here; we’d love to receive feedback from you.
