If you’re running a WooCommerce store, you probably know how important it is to have a well-designed product page. A great product page not only makes your store look professional but also helps convert visitors into customers. That’s where PowerPack WooBuilder comes in. With its easy drag-and-drop interface and a wide range of WooCommerce widgets, you can design stunning product pages without writing code.
In this guide, we’ll take a deep dive into how to create a Single Product Page and a Product Archive Page using PowerPack WooBuilder, WooCommerce, and Elementor.
Why Choose PowerPack WooCommerce Builder?
Before we jump into the actual process, let’s talk about why PowerPack WooBuilder is a game-changer for WooCommerce stores.
- Super Easy to Use: No coding required—just drag, drop, and customize!
- Wide Range of Widgets: Get access to WooCommerce-specific widgets like product images, pricing, add-to-cart buttons, reviews, and more.
- Custom Layouts: Full control over the look and feel of your product pages.
- Seamless Integration with Elementor: Works like a charm with Elementor, so you can build your pages visually.
- Better Shopping Experience: A well-designed product page makes it easier for customers to find information and make a purchase.
Now that you know why PowerPack WooCommerce Builder is worth your attention, let’s get started with creating a Single Product Page.
Part 1: Creating a Single Product Page With PowerPack WooCommerce Builder
Step 1: Install Required Plugins
Before you begin, make sure you have the following plugins installed and activated on your WordPress site:
Step 2: Create a New Single Product Template
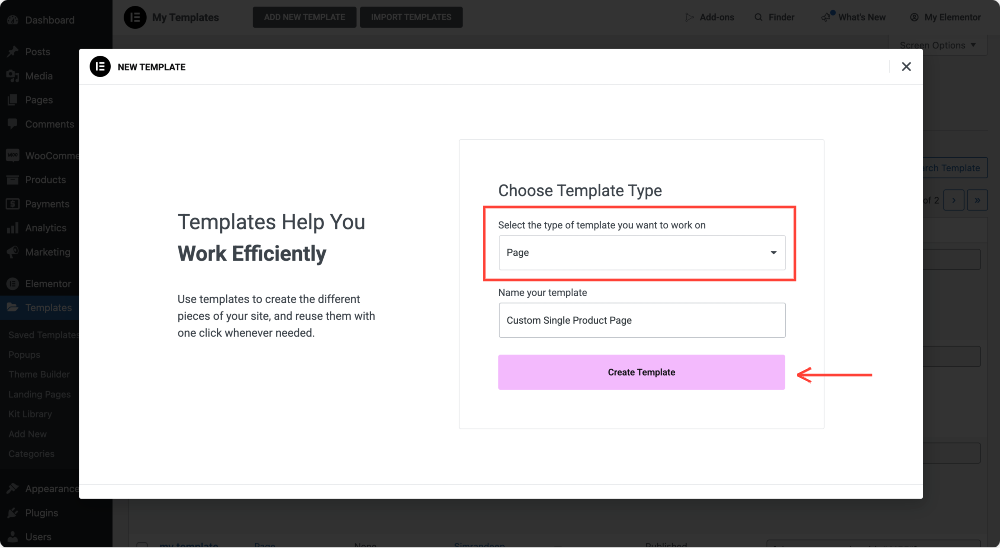
- Go to Dashboard >> Templates, and click on Add New.
- Select “Page” as the template type.
- Give your template a name (something like “Custom Single Product Page”).
- Click Create Template.
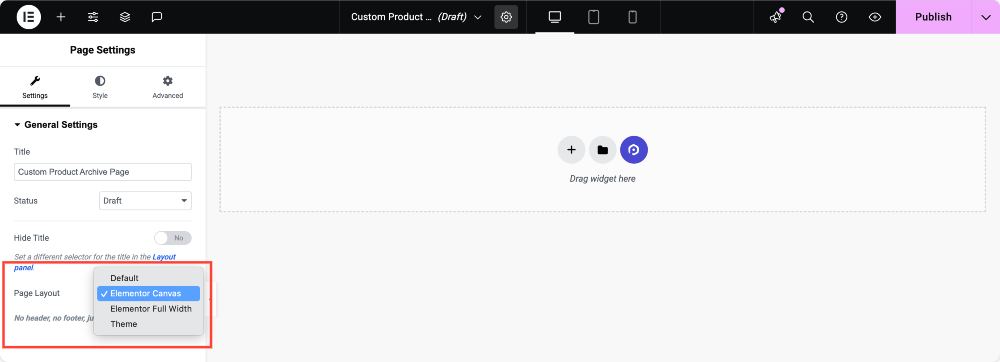
Step 3: Customize the Layout
Once the template is created:
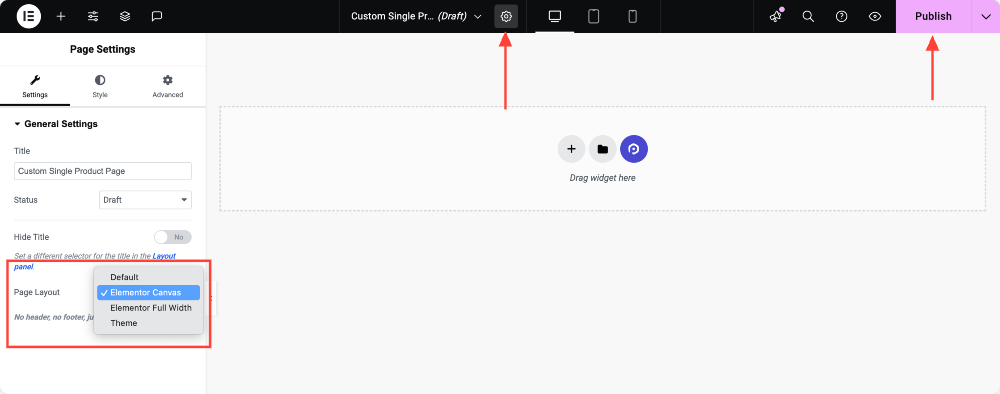
- Choose the Canvas layout for a full-width design, or stick with the Default layout if you prefer a standard look. To change the page layout, click on the settings icon at the top of the panel. From there, you can choose a canvas the layout that suits your design needs.
- Click Publish to save changes.
Step 4: Enable WooBuilder
Now, let’s turn on WooBuilder so we can start designing.
- Return to your WordPress dashboard.
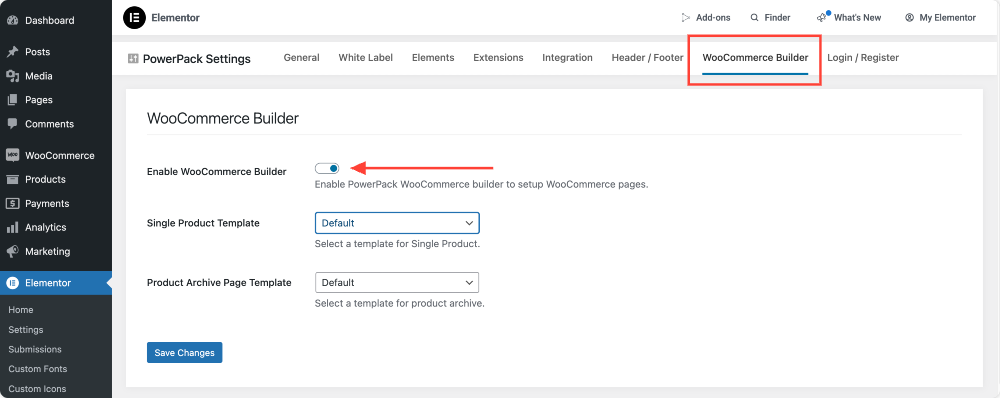
- Navigate to Elementor >> PowerPack.
- Click on WooCommerce Builder tab and toggle ON the Enable WooCommerce Builder.
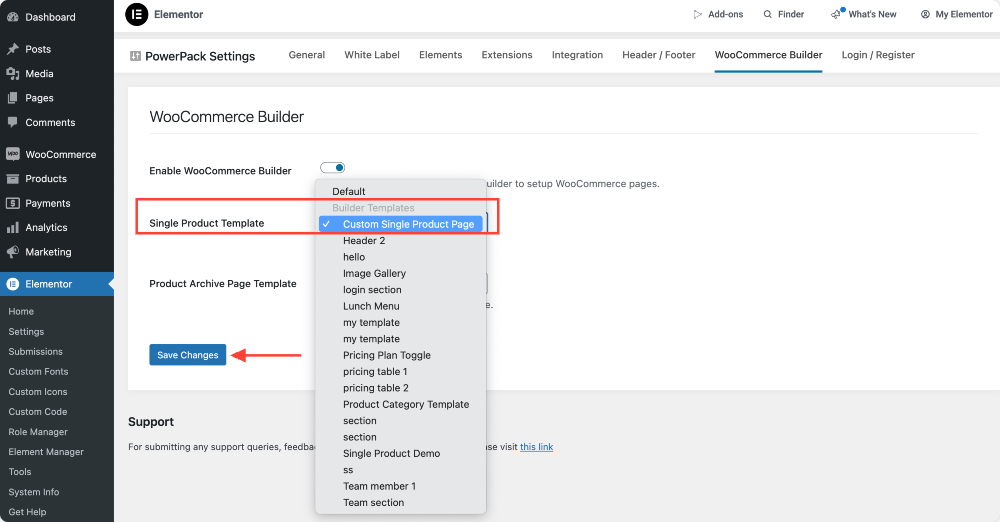
Step 5: Assign the Single Product Template
After enabling the WooCommerce Builder toggle, two new options will appear: Single Product Template and Product Archive Page Template.
In this section, we are creating a single product page, so select the template you just created from the dropdown menu under the Single Page Template option.
Don’t forget to click the Save Changes button.
Step 6: Design the Single Product Page Using WooCommerce Widgets
- Click Edit under the Single Product Template.
- Clicking the option will take you back to the Elementor editor, where you can begin customizing your single product template.
- You can drag and drop widgets such as:
- Product Title
- Product Image
- Product Price
- Add to Cart Button
- Product Description
- Product Reviews
- Related Products
- Customize each widget’s design to match your brand.

Tip: Can’t see the Woo Widgets? Head over to Elementor >> PowerPack >> Elements and ensure they are enabled.
To learn in detail about how to each PowerPack Woo – Elements in order to create a Single Product Template, checkout our step-by-step guide on how to create WooCommerce Single Product Page with Elementor.
Step 7: Publish and Apply Changes
Once you’re happy with your design, click Publish and voilà! Your Custom Single Product Page is live and ready to impress your customers.
Part 2: Creating a Product Archive Page With PowerPack WooCommerce Builder
A Product Archive Page is where all your products are displayed in an organized and clean layout. Let’s build one!
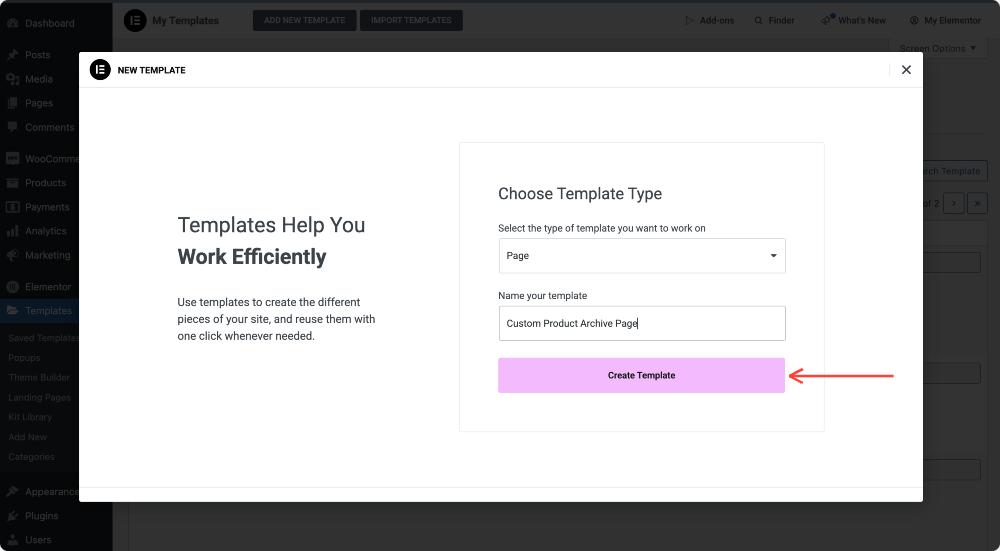
Step 1: Create a New Product Archive Page Template
- Go to Dashboard >> Templates.
- Click Add New.
- Select Page as the template type.
- Name it (e.g., “Custom Product Archive Page“).
- Click Create Template.
Step 2: Customize the Layout
- Choose Canvas for a full-width display or Default for a standard look.
- Click Publish to save changes.
Step 3: Enable WooBuilder
Just like before:
- Go to Elementor >> PowerPack.
- Click on WooCommerce Builder.
- Toggle it ON.
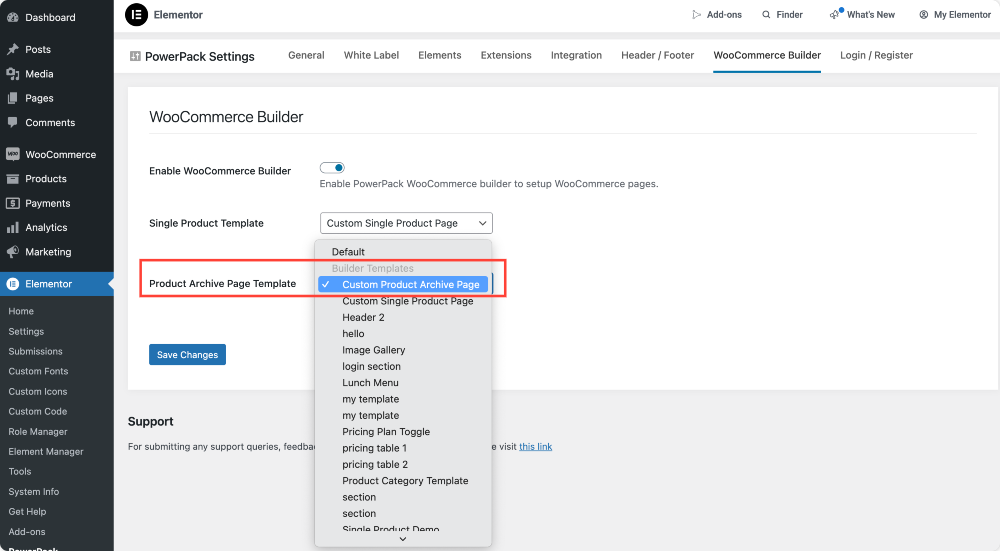
Step 4: Assign the Product Archive Page Template
- After enabling the WooCommerce Builder toggle, you need to assign the product archive page.
- And in this section, we are creating a product archive page, so select the template you just created from the dropdown menu under the Product Archive Page Template option.
- Click Save Changes.
Step 5: Design the Product Archive Page Using WooCommerce Widgets
- Click Edit under the Product Archive Page template.
- Drag and drop PowerPack – WooCommerce Widgets such as:
- Product Grid
- Product Categories
- Product Carousel
- Search and Filter Widgets
- Add to Cart Buttons
- Customize everything to match your brand.
Step 6: Publish and Apply Changes
When you’re satisfied with how everything looks, click Publish, and your Product Archive Page will go live!
Wrapping Up!
With PowerPack WooBuilder and Elementor, you have full control over your WooCommerce store’s design. A well-crafted Single Product Page and Product Archive Page not only make your store visually appealing but also improve user experience and increase conversions.
By following this guide, you can create a stunning WooCommerce store that stands out from the competition. Now, go ahead and start designing!
Do share if you found this helpful guide! Also, join us on Twitter, Facebook, and YouTube.
Got questions or need help? Drop a comment below!
