Looking to make your links stand out in Elementor? With the Link Effects Widget from PowerPack for Elementor, you can add eye-catching hover animations to your links! No coding required!
PowerPack Link Effects widget is a great way to enhance the appearance of links on your website, making them more engaging and visually appealing. With this widget, you no longer need to write custom CSS to add animated effects—saving you time and effort during the design process.
By using the Link Effects widget, you can create eye-catching link animations that capture your visitors’ attention and encourage them to interact with your content. This helps increase engagement and motivates users to explore more of your site.
In this tutorial, we’ll walk you through the steps to use the Link Effects widget effectively.
Introducing the Link Effects Widget by PowerPack
Link Effects Widget is a part of the PowerPack for Elementor addon. It provides 20+ hover animations that you can apply to any text link or anchor. Perfect for:
- Navigation menus
- Call-to-action links
- Blog post excerpts
- Footer links
- Inline text links
No CSS or JavaScript needed, just drag, drop, and style!
How to Use the Link Effects Widget in Elementor
In order to use the Link Effects widget, we will have to add it to any page on the site. Before moving further, please make sure you have installed and activated these two plugins:
1. Create a New Page in Elementor
To create a new page, please head over to WordPress Dashboard >> Pages >> Add New.
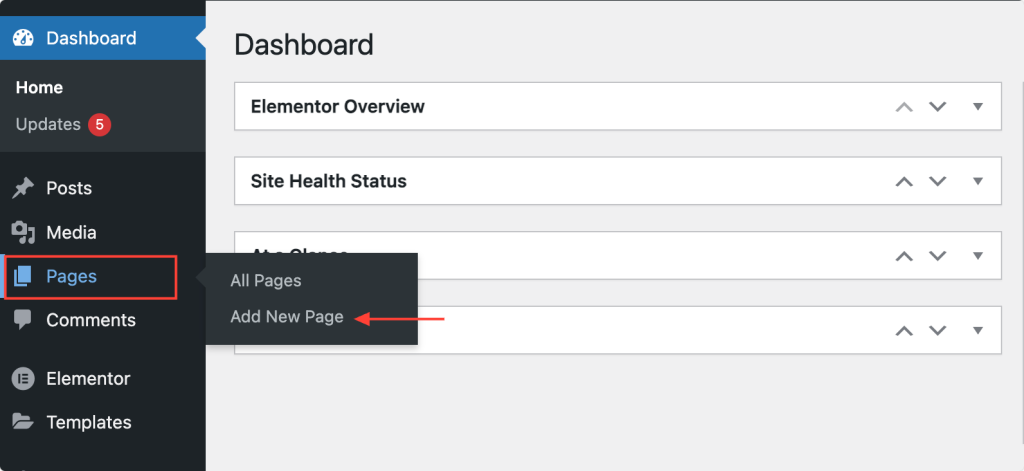
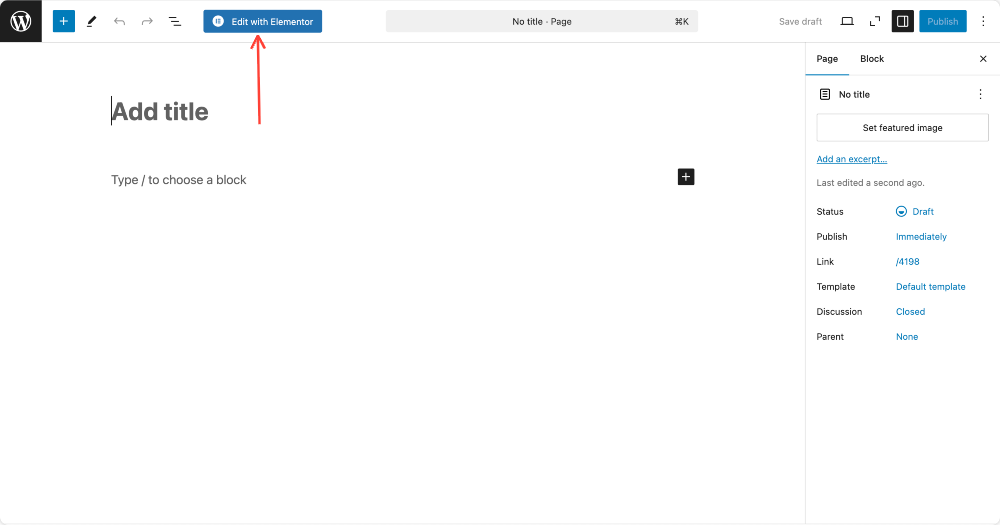
Name the page as Link Effects or any. Next, click on “Edit with Elementor” to open the page in Elementor Page Builder.
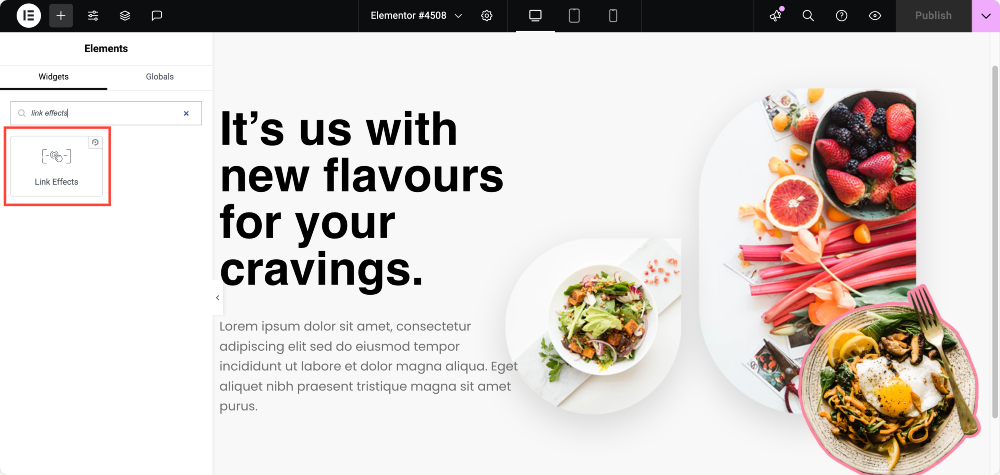
Search for the Link Effects widget in the search bar. Once the widget appears, drag and drop it into the page.
Make sure that the widget is with the PP icon at the corner. This icon indicates that the widget belongs to PowerPack.
Now that we have added PowerPack’s Link Effects widget to the page, we will make some customizations and styling in the Elementor editor’s content and style tab.
2. Choose a Link Effect
The Content Tab of the Link Effects widget consists of 2 sections:
- Link Effects
- Help Docs.
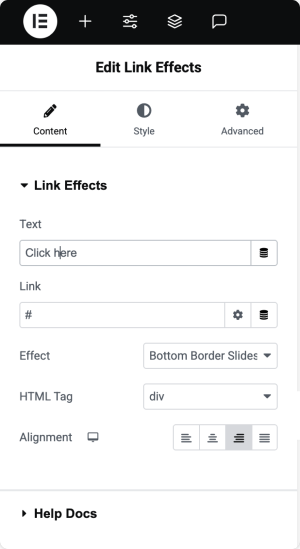
First, let us have a look at the Link Effects section.
- Text: Here you need to enter the text on which the link will be embedded.
- Link: You can then add the link to the text here.
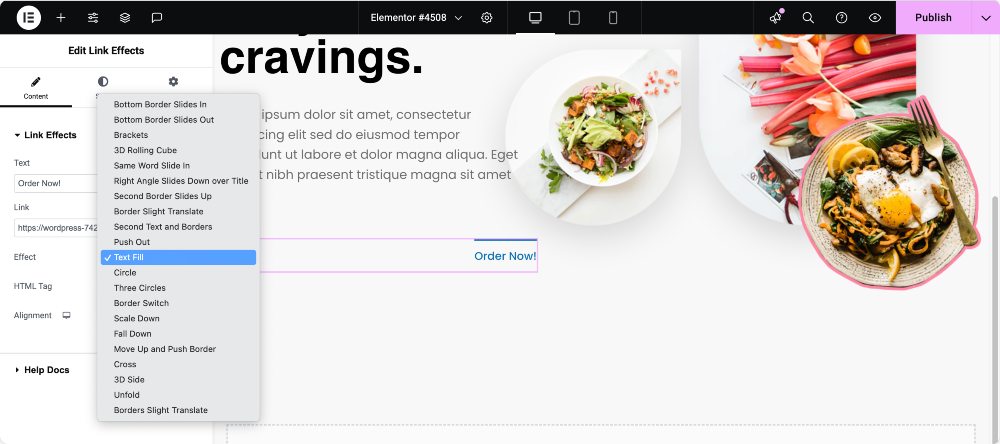
- Effect: Here, you’ll find the list of all the effects that could be applied to your links. You can choose any of the effects from the dropdown.
- Alignment: You can use this option to align the link text to the right, center, or left of the page.
The next section is Help Docs from where you can find the documentation for the widget.
That’s all about the Link Effect widget’s Content tab. Now let’s move on to the Style Tab and explore the various styling options.
3. Customize the Style
When it comes to styling the links, you have various Link Effects options. Let’s look into it one by one.

- Typography: You can change the text’s font size, font family, line height, line spacing, and font weight using this option.
- Link Color: This allows you to change the color of the text in both Normal and Hover modes. You can experience the hover effects when you place the cursor on the text.
- Background Color: As the name suggests, using this option you can change the background color of the link.
- Border Color: Similar to the background color, you can change the Border color of the text using this option.
This was all about the Style tab for PowerPack Elementor’s Link Effects widget.
Check out the Live Demo here →
Wrapping it Up!

We hope that PowerPack Link Effects widget helped you make your link texts look stylish using various customization and styling options. The Link Effects widget is designed for use by both beginners and advanced users.
How easy did you find the Link Effects widget to use? What do you use Link Effects on your website for? Just comment below!
You can do a lot more with the PowerPack Addons for Elementor. There are more than 70 creative widgets that you can use to customize your Elementor pages. If you wish to learn more about the PowerPack Addons for Elementor, check here.
