Do you want to display Breadcrumbs on your Elementor website? You’ve come to the right place. Here, in this tutorial, we will guide you on how to add Breadcrumbs to your Elementor website using the Breadcrumbs widget.
Using PowerPack’s Breadcrumbs Widget, you can display a hierarchical representation of navigation links on the pages built with Elementor. Adding breadcrumbs provides an easy way for your visitors to navigate the site and help them easily understand the site structure.
Before we go through PowerPack’s Breadcrumbs Elementor widget, let us first understand breadcrumbs and why they are useful.
What are Breadcrumbs?
A Breadcrumb is a small text path usually located at the top of the page. It indicates where a user is on the site along with the higher-level categories that led them to the page/post they are currently viewing. A breadcrumb also enables easy navigation to the previously visited pages.
Let us understand breadcrumbs with the help of an example:
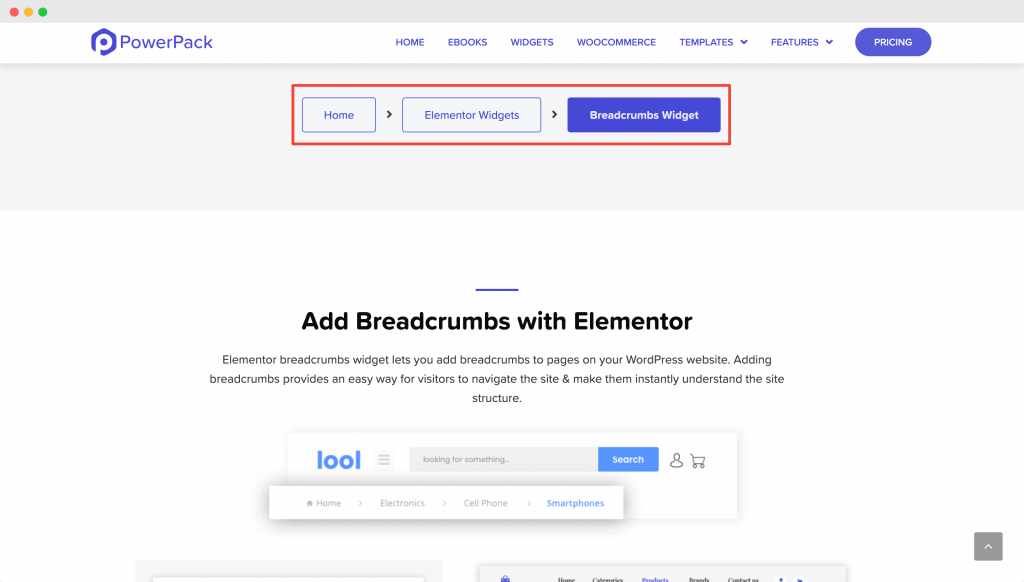
This is the PowerPack’s Breadcrumbs Elementor widget page. The part marked in red (Home > Elementor Widgets > Breadcrumbs Widget) is known as Breadcrumb. The Breadcrumb highlights the current page that we are viewing. It also links back to the pages (Home > Elementor Widgets) through which we have landed on our current page (Breadcrumbs Widget).
This helps users easily go back to the page they came from in a structured manner instead of pressing the back button, and going back via the home or search page. Breadcrumbs are mostly useful in navigating between pages on eCommerce websites with a lot of product or archive pages or in a blog containing various categories and post content.
Types of Breadcrumbs
There are usually 3 types of breadcrumbs:
- Hierarchy-based Breadcrumbs: These are the most common type of breadcrumbs. This is what we are using on our site too. Hierarchy-based breadcrumbs highlight the page that the user is currently on while also linking back to the page through which the user has landed on the current page.
- History-based Breadcrumbs: As the name suggests, history-based breadcrumbs are generated according to the pages visited by the user.
- Attribute-based Breadcrumbs: Attribute-based breadcrumbs are most commonly visible on eCommerce sites. These breadcrumbs are generated based on the attributes that a user has searched for which has finally led to a particular product page.
Why are Breadcrumbs useful?
Breadcrumbs are useful for your site in many different ways. However, we will discuss the three most important ways in which Breadcrumbs helps improve the usability of your site:
- Improves the SEO of the site: Google loves Breadcrumbs! Breadcrumbs give navigation links to your site’s content, thus helping Google bots/crawlers understand how your overall site is structured. Further, Google also displays the Breadcrumbs on the search results page, thus helping the user with additional information that is available on your site.
- Improves the UX: Breadcrumbs help in improving the UX of your site. Users usually look for a way to understand where they are on the site and how to go back or move forward. Breadcrumb navigation links element serves this purpose by making users aware of exactly where they are and what they’re looking at. This drastically improves the UX of the site.
- Reduce Bounce Rate: Most users come to your site via organic searches. This usually means that users directly hop onto a page containing the information that they are looking for. Now, they might want to browse more of your website either because a particular page didn’t fit their needs or because they liked the page and would want to know more. But how can they get an idea about what’s on your website? Enter Breadcrumbs! The breadcrumbs navigation links help users to go to different pages of your site.
If the breadcrumbs are missing, then the user might get lost and go back to google search results. This will increase the bounce rate of the page, however, if there are breadcrumbs, then chances are users will browse through your website, thus reducing the bounce rates.
Now that we have a fair understanding of breadcrumbs, I will explain how you can add Breadcrumbs to your Elementor website using PowerPack’s Breadcrumb Elementor Widget.
Add Breadcrumbs to your Elementor Website using the Breadcrumbs Widget
In order to add breadcrumbs, we will have to add the Breadcrumbs widget to any page on the site. You will also need to install and activate both Elementor and the PowerPack Elementor Pro plugin on the site.
Launch Elementor Editor
Once you have installed and activated both Elementor and PowerPack Addons on the site, please head over to your WordPress Dashboard > Pages. Now select the page on which you wish to add the Breadcrumbs widget and click on the “Edit with Elementor” button.
Next, drag and drop the Breadcrumbs widget in the Elementor editor. As soon as you add the Breadcrumbs widget, you’ll see the breadcrumbs appear with default settings.
The below screenshot shows how your page would look like after adding the Breadcrumbs widget.
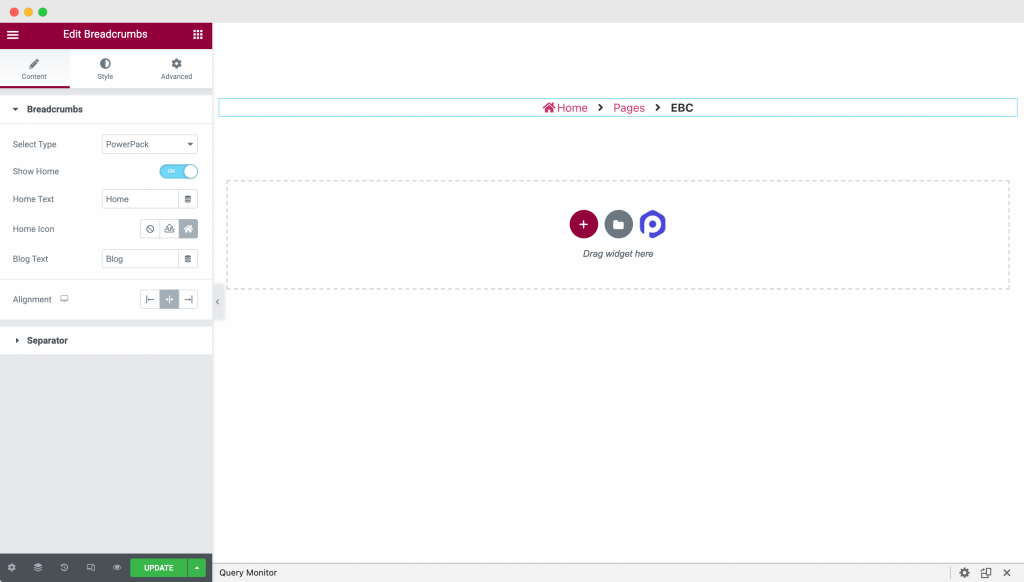
PowerPack’s Breadcrumbs Widget Customization in Content Tab
Breadcrumbs: This is the first section of the Breadcrumbs widget. Here, you’ll get options to choose the type of Breadcrumbs, Show/Hide home link, and home icon in the breadcrumbs navigation. Further, you can align the breadcrumbs to the left/right/center of the page.
The first step is to select the type of breadcrumbs that you want to display on your site. As you can see in the image below, PowerPack’s Breadcrumb widget helps you generate and customize breadcrumbs for your site. Besides that, you can choose to display breadcrumbs generated by other plugins like Yoast, Rank Math, Breadcrumb NavXT, and SEOPress.
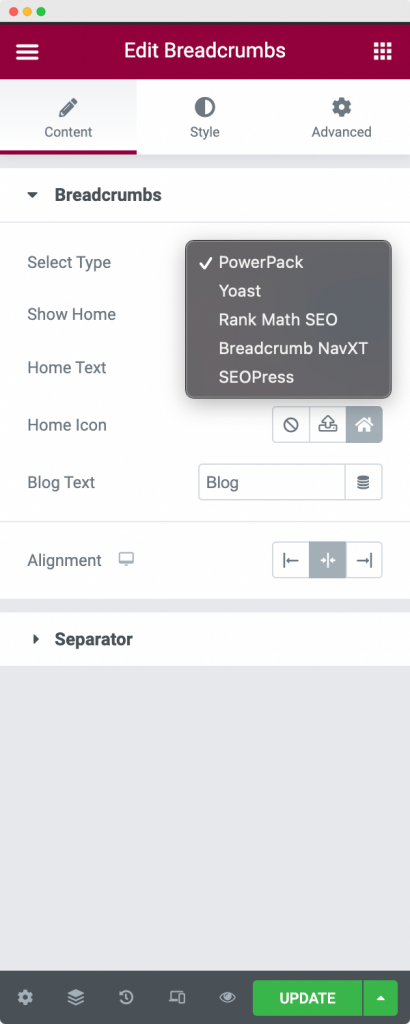
In case you choose to display breadcrumbs using any other plugin, then PowerPack’s Breadcrumb widget offers you the option to style these navigational links. We will further discuss the styling options in the next section.
However, if you choose PowerPack in the “Select Type” tab, then you can customize the structure of your breadcrumbs.
You’ll be presented with options like Show Home, Home Text, Home Icon, and Blog Text that you can use to customize your breadcrumbs. We will now explain these options below:
- Show Home: By default, this option is enabled. If you enable the “Show Home” option, it will display the Home Link in your breadcrumb navigation links. Similarly, if you’ll disable it, the Home link won’t be shown in your breadcrumb navigation links.
- Home Text: You can further change the text of the Home Link that you enabled in the previous tab using this option.
- Home Icon: If you want, you can display an icon along with the Home Link in the breadcrumb navigational links.
- Blog Text: PowerPack’s Breadcrumb widget gives you the option to change the text of the “Blog” page navigation link that displays on the blog page of your site.
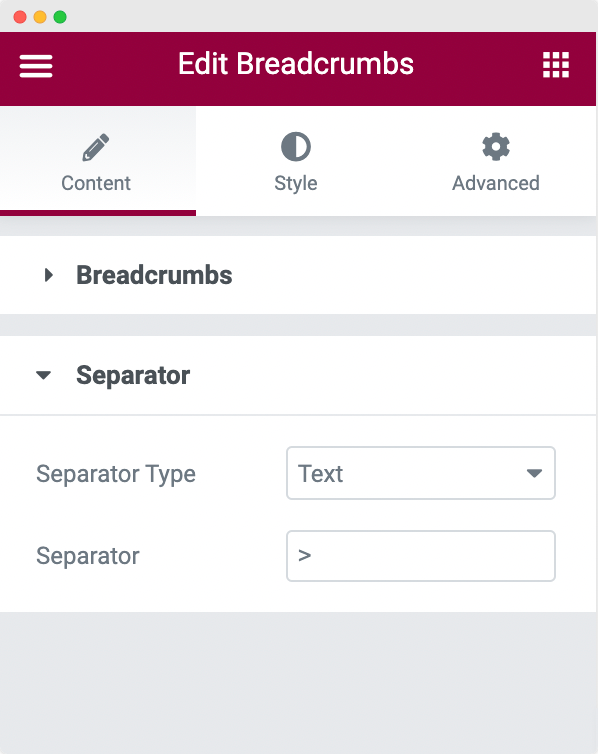
Separator: This is the next section of the Breadcrumbs widget. Here, you’ll get the option to choose the type of the “Separator.” There are two types of Separators that you can choose from Text and Icon.
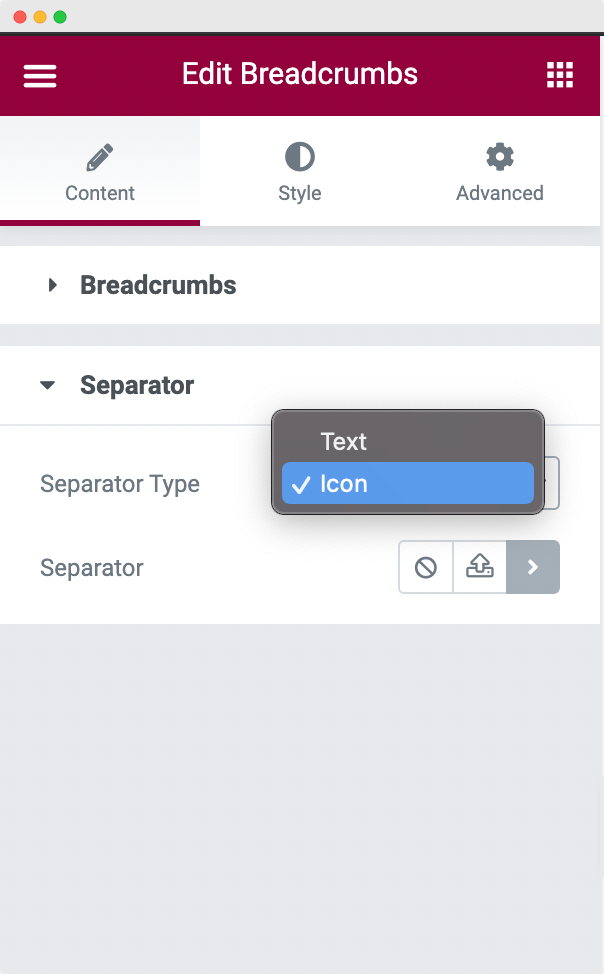
If you choose the Separator type as “Icon,” then you will further have the option to either upload an icon as an SVG file or use the predefined icon, or simply don’t use any icon in the breadcrumbs navigational links.
However, if you choose the Separator type as “Text,” you can describe the separator that you want in between the navigation links.
This was all about the PowerPack’s Breadcrumbs Widget Customization in Content Tab. Now, let’s see how we can style the PowerPack’s Breadcrumbs Widget.
PowerPack’s Breadcrumbs Widget Styling in Style Tab
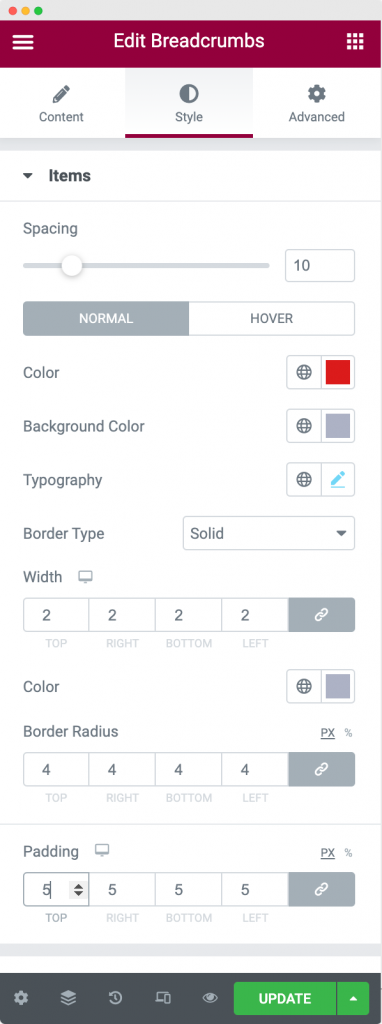
Items: This is the first section of the PowerPack’s Breadcrumbs Widget Style Tab. Here, you can adjust the spacing between 2 items in navigational links along with the colors, typography, borders, and padding for the items in navigational links.
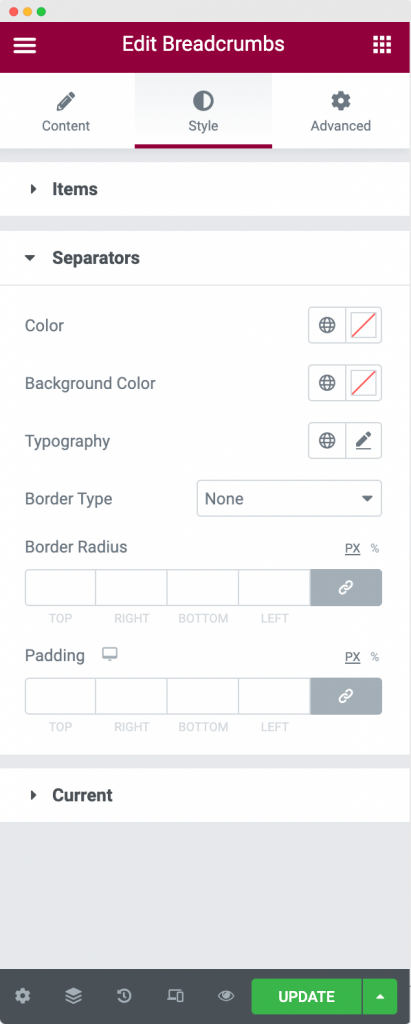
Separators: This is the next section of the PowerPack’s Breadcrumbs Widget Style Tab. Here, you can set up the colors, typography, borders, and paddings for the separators between the navigational links.
Current: This is the final section of the PowerPack’s Breadcrumbs Widget Style Tab. Here, you can set up the colors, typography, and borders for the current page that you’re viewing. If you want, you can set the breadcrumbs styling of the current page to be totally different from the other navigational links.
Wrapping it Up!
I hope you found this article useful. As we saw, the process of adding Breadcrumbs to your site using the Breadcrumbs Widget was fairly easy. We also understood the importance and types of breadcrumbs that we can use on our site.
I would suggest you check out the demo of the PowerPack’s Breadcrumbs Elementor Widget once to get an idea of how the Breadcrumbs would look on your site.
If you liked this article, then share your thoughts in the comments section below. For more PowerPack tutorials, please subscribe to our YouTube Channel.

4 thoughts on “How to Add Breadcrumbs to your Elementor Website using the Breadcrumbs Widget”
How to add history based breadcrumb in powerpack elementor
How to customize the breadcrumb title in specific pages
Hi @Jelina
History based breadcrumbs are not support by PowerPack breadcrumbs 🙂
How can I add my Blog page in the breadcrumbs on my single post template?