
 [Extended] BFCM Sale! Get up to
Do you want to create a YouTube video gallery on your WordPress websites using Elementor? If yes, you’ve landed on the right page.
In this blog post, we’ll show you how to embed videos from YouTube on WordPress – without messing with any code!
So, let’s dive in!
Benefits of Displaying Twitter Feed on Your WordPress Website
- Enhanced Visual Appeal: Adding a YouTube gallery can make your website visually engaging and dynamic, capturing visitors’ attention right away.
- Improved User Experience: With a gallery, visitors can easily browse through your videos without leaving your site, leading to a smoother and more enjoyable experience.
- Increased Engagement: Videos are inherently more engaging than text or images alone. You encourage visitors to spend more time on your website by showcasing your YouTube videos in a gallery.
- Showcase Your Content: A YouTube gallery allows you to showcase all your videos in one place, making it easy for visitors to discover your content and explore different topics or themes.
- Boost SEO: Including videos on your website can improve your search engine optimization (SEO). YouTube is owned by Google, so embedding YouTube videos can enhance your site’s visibility in search results.
- Cross-Platform Promotion: By embedding your YouTube videos on your WordPress site, you can promote your YouTube channel to your website visitors, encouraging them to subscribe and engage with your content on multiple platforms.
- Mobile-Friendly: YouTube videos are inherently mobile-friendly, and by embedding them on your WordPress site, you ensure that your content looks great and functions smoothly on all devices, including smartphones and tablets.
- Social Sharing: Visitors can easily share your videos from your website, which will help increase your content’s reach and attract new audiences to your website and YouTube channel.
Why Use PowerPack To Create a YouTube Video Gallery Using Elementor?
Generally, showcasing videos from YouTube on live websites requires custom coding or changes to the webpage’s source. However, PowerPack Elementor Addons make the process super fun and easy.
You just need to drag and drop the Video Gallery widget, paste your YouTube link, and you are done. Seems pretty simple? It is because PowerPack Addons come with dedicated widgets that allow you to fetch videos from YouTube.
In addition, you have plenty of options to customize the video gallery to match your existing site design and layout.
Additionally, you can add a custom video title and description, enable filters, and many more nifty options. So, without any further delay, let’s start creating a YouTube video gallery on your WordPress website using Elmeentor and the PowerPack Video gallery widget.
Create a YouTube Video Gallery in WordPress Using Elementor and PowerPack Addons
Step 1: Get Started
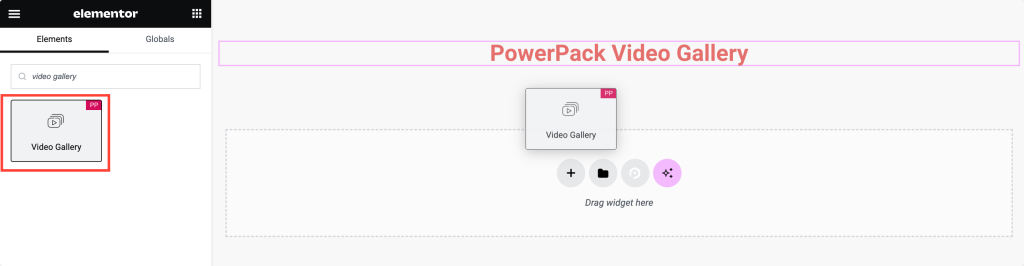
So, first things first, make sure you’ve installed Elementor and PowerPack Addons on your WordPress website.
Next, open your site’s dashboard and head to the page where you want to add your awesome video gallery.
Once you’re there, look for the “video gallery” widget in the Elementor panel. Grab that widget and drop it into the section of your page Don’t forget to check the “PP” icon on the top-left corner of the widget.
Step 2: Set Up Your Gallery
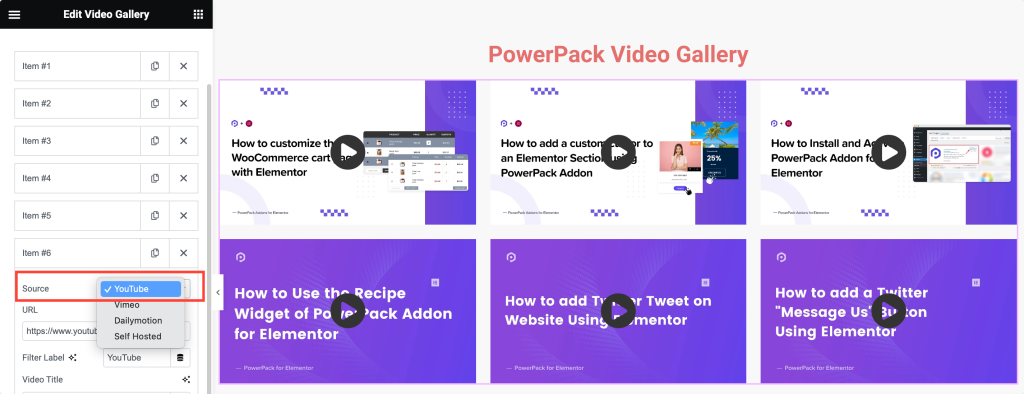
Now that you’ve added the widget, you’ll see a bunch of options pop up.
Don’t worry; it’s all pretty straightforward. Start by choosing the source of your videos. Click on “Source” and select “YouTube”. Now, paste in the URLs of the YouTube videos you want to feature in your gallery.
Step 3: Customize Your Gallery
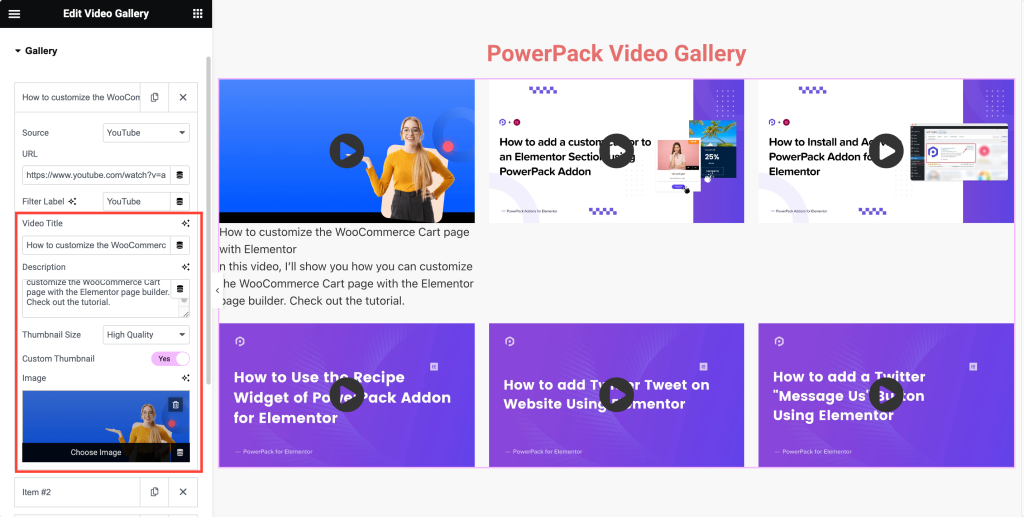
Alright, let’s make your gallery look snazzy. You can add titles and descriptions to your videos if you want to give your visitors a bit more context.
Want to make those thumbnails bigger or smaller? No problem! Just adjust the thumbnail size to your liking. And if you’ve got some custom thumbnails for your videos, you can upload those, too.
Step 4: Enable Filters
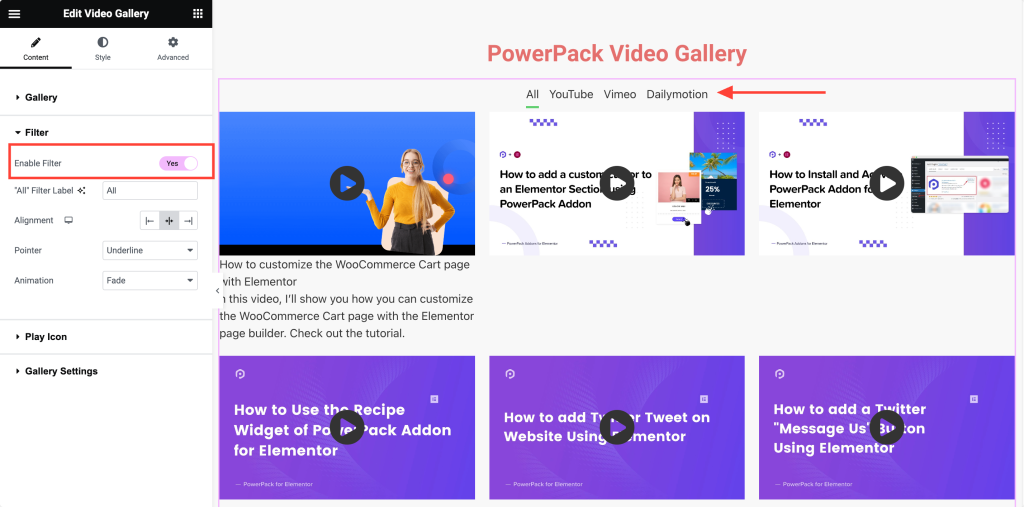
It’s time to make life easier for your visitors. Turn on the filtering options so they can sort through your videos like a pro. This way, they can find exactly what they’re looking for without sweat.
Once you enable the Filters, you get options to fine-tune filter settings. Give the “All” filter a label so folks know it’ll show them everything. And where do you want those filter options to show up? Left, Centre or Right? Decide on the alignment options.
Next, you can customize the look of the filter pointer to match your website’s vibe. You’ve got options like underline, double line, or even framed.
Step 5: Personalize the Play Icon
You know those little play buttons on the video thumbnails? In the PowerPack Video gallery widget, you get options to style those, too. Make ’em unique! You can use a predefined icon or upload your own image.
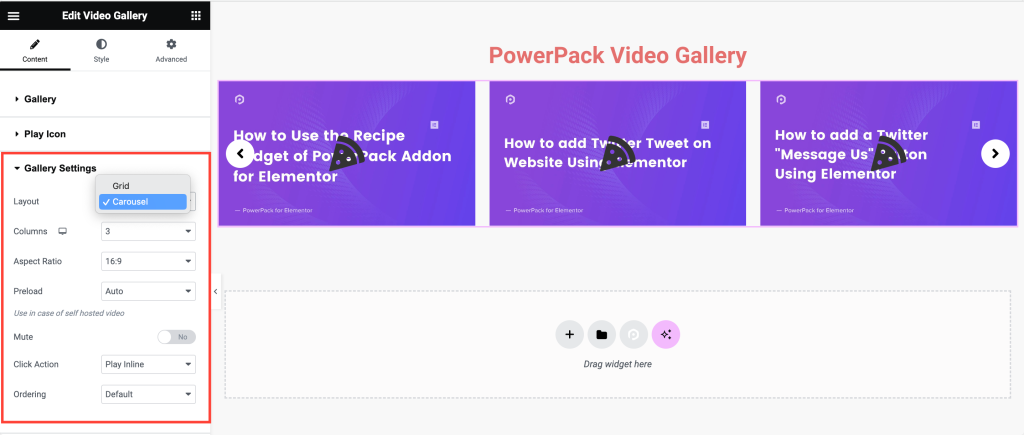
Step 6: Explore Advanced Settings
Alright, let’s explore some more advanced options. You can display your videos in a grid or a carousel. And how many columns do you want in your grid? That’s up to you!
You can also set the aspect ratio for your video thumbnails to ensure they look right. If you want your videos to start playing with the sound muted? You can do that too! And when someone clicks on a video thumbnail, do you want it to play inline or in a fancy lightbox popup? You decide!
Wrapping Up!
And there you have it! In just a few simple steps, you’ve created a beautiful YouTube video gallery using Elementor’s PowerPack Video Gallery widget. Now, sit back and enjoy showcasing your favorite videos to your website visitors!
PowerPack Addons for Elementor allow you to do a lot more. There are more than 70 creative widgets that you can use to customize your Elementor pages. If you face any difficulty following the steps mentioned in this article, please feel free to connect with us or drop your queries in the comment section.
What are your thoughts on this tutorial? Do share if you found this helpful guide! Also, join us on Twitter, Facebook, and YouTube.
