Are you looking for a way to display your web page content in a tabular format? You have landed on the right spot. In this post, we’ll show you how to create beautiful sections on your web pages using the PowerPack Advanced Tab Widget.
Using PowerPack Tab Widget, you can create impressive tabbed navigation and display your page content most spectacularly. The widget allows you to create fully customized tabs that you can use to display any content on your website.
Why use tabs to display webpage content?
If you like minimal and simple page designs, using tabs can really be helpful for you. Tabs allows you to display content in the most simple way possible. You don’t need to create long pages to display your content, just add your content in the tabs, and you are done! You can display large forms of content in one place only. Tabbed navigation allows you to sort your web page content and helps you to show multiple pieces of information in one place, resulting in a better user navigation experience.
PowerPack Advanced Tab Widget gives you the flexibility to create tabbed navigation on your elementor websites. It offers multiple advanced features that allow you to customize tabs as per your needs. Let’s check out some unique features of Tab Widget that make it different from other tab widgets.
Key Features of Tab Widget
- Supports Multiple Content Types: Text, Image, Link, Saved Section, Saved Widget, Saved Template
- Horizontal and Vertical Layout
- Responsive Support for Small Screen Devices
- Multiple Style Types for Tabs
- Alignment and Spacing Options
- Styling Options to Customize Every Aspect of the Tab
Let’s See how you can create tabbed content using PowerPack Advanced Tab Widget.
Before we proceed, make sure you have Elementor and PowerPack Elementor Addon installed and activated on your website.
Let’s Start!
Create Tabbed Content Using Advanced Tabs Widget
Using tabs could be very handy if you have limited space and want to display more content. You can display multiple content types on a single section. PowerPack Advanced Tabs Widget is completely user-friendly. You can easily create advanced tabbed content without writing a single line of code.
Add Advanced Tabs Widget
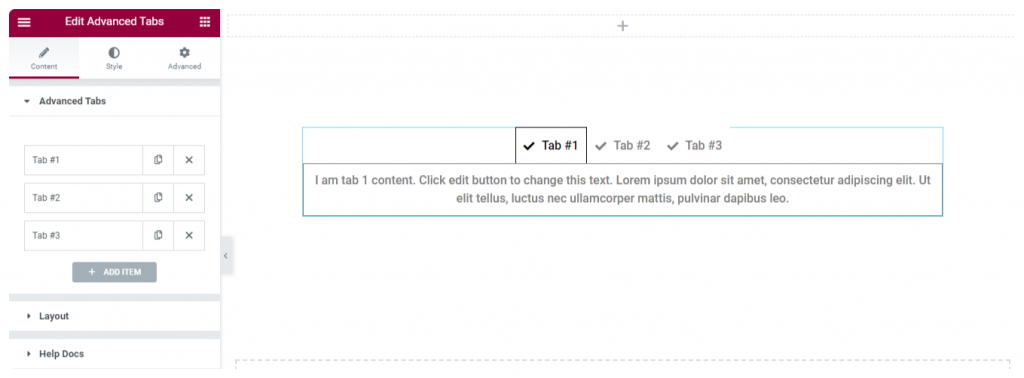
You can add a tab widget on any page or post of your website. To create tabbed content, open the page in the elementor editor and look for the Advanced Tabs Widget in the elementor widget area. Drag and drop the Tabs Widget on the page.
Make sure to check the PP icon on the upper right corner of the tabs widget.
This is the default layout of Advanced Tabs Widget.
Define Tab Content and Choose Layout
Advanced Tabs Widget is completely flexible. You can add any content type, be it a Text, Image, Link, or any Saved Section, Widget, Template, in order to create tabbed content.
Choose Layout
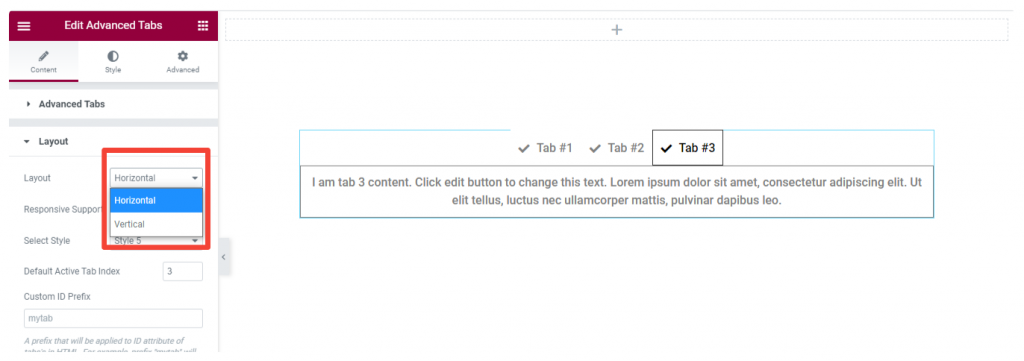
You get two layout options: Horizontal and Vertical to display tabbed content and add Responsive Support from small screen size devices.
Apart from this, you also get multiple style types for your tabbed content. Also, you get the option to choose the active tab; you can select which tab should be by default open while visitors navigate your web page.
Add Styling to Tabbed Content
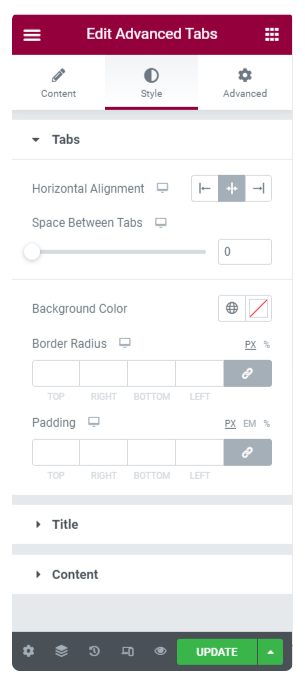
From Style Tab, you get control over the styling property of each tabbed content.
You get options to define alignment and spacing between the elements. You can change the background color and add a border-radius to create clean designs.
For Icon Styling, you can set the icon color, position, size, and width.
Lastly, you get a styling option to customize the text content of your tabbed content. Here you can alter typography, change font size and color.
In addition to these options, you also add border color, padding, and border radius.
Here I am sharing an example of Tabbed Content designed with the PowerPack Advanced Tabs Widget.
Get Advanced Tabs Widget for Elementor!
I hope you find this article helpful. Using the PowerPack Tabs widget you can create beautiful sections in less space and minimum time.
PowerPack offers more than 60 creatively designed widgets and powerful extensions that you can use to create beautiful websites. Click here to get the Tabs Widget for Elementor with PowerPack!
If you liked this article, then share your thoughts in the comments section below. For more PowerPack tutorials, please subscribe to our YouTube Channel.
You can also join us on Twitter and Facebook.
