Getting bored with a basic layout for your blog archive page display? Wanted to go creative? Try Tiled Layout!
A tiled layout is an exciting way to showcase your blog posts. It enables you to present multiple posts in a grid-like structure. This layout is visually appealing and highly functional, especially for blogs with a lot of content.
To achieve this design, we’ll use the PowerPack Tiled widget for Elementor. PowerPack is a powerful addon for Elementor that extends its functionality with a wide range of widgets and features. The Tiled widget, in particular, is designed to help you create beautiful, customizable tiled layouts for your blog posts.
In this comprehensive guide, we’ll walk you through the steps to display your blog posts in a tiled layout using Elementor and the PowerPack Tiled widget. Let’s dive in!
Display Blog Posts in a Tiled Layout Using Elementor and PowerPack
Creating a visually appealing blog layout is crucial for enhancing reader engagement. Elementor, combined with the PowerPack Addons’Addons’ Tiled Posts widget, provides a powerful solution for displaying your blog posts stylishly and organized.
1. Install and Activate PowerPack Addons
To start, you first need to make sure you’ve installed and activated PowerPack Addons for Elementor. This addon extends Elementor’s capabilities with numerous widgets, including the Tiled Posts widget, which offers unmatched customization and design options.
2. Create a New Page (Blog Archive)
Next, create a new page to serve as your blog archive. This is where you’ll showcase your blog posts in a beautiful tiled layout.
- Step 1: Go to Pages >> Add New in your WordPress Dashboard.
- Step 2: Title your page (e.g., Blog Archive).
- Step 3: Click Edit with Elementor to open the Elementor editor.
3. Drag and Drop the Tiled Posts Widget
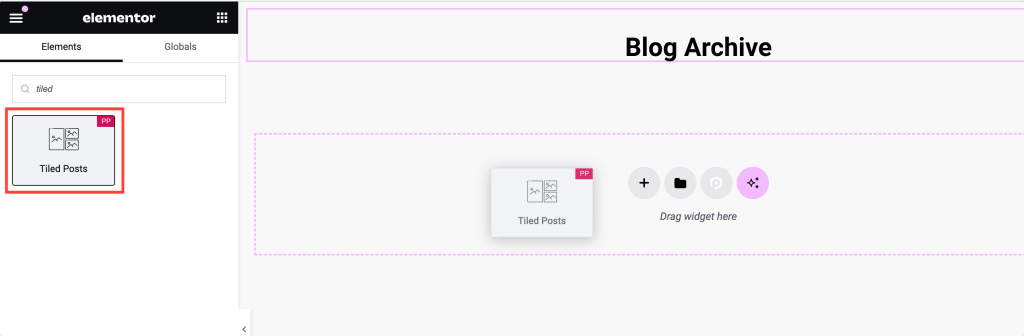
Now, it’s time to use the Tiled Posts widget.
- Step 1: In the Elementor panel, use the search bar to find the Tiled Posts widget.
- Step 2: Drag and drop the Tiled Posts widget onto your page where you want your blog posts to appear.
4. Choose a Layout
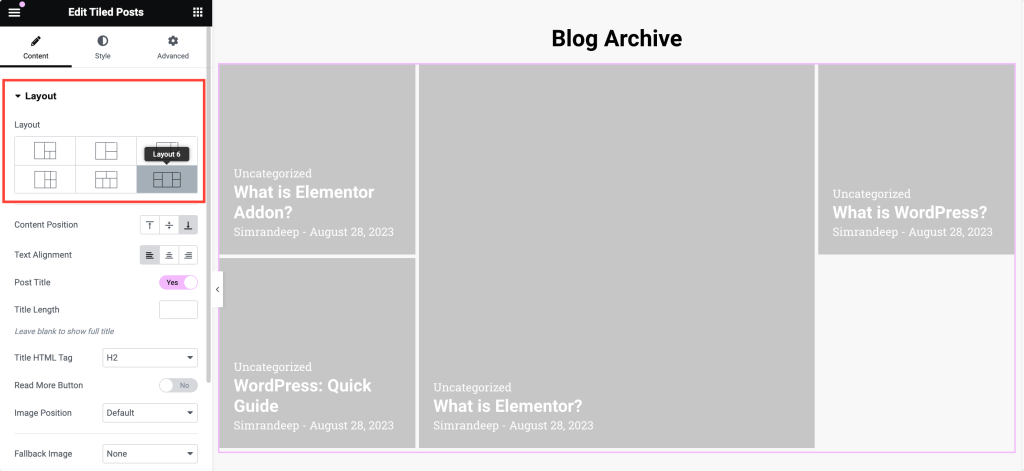
The Tiled Posts widget offers six unique layouts. Choose one that best suits your design preference.
In the Content tab of the widget settings, select from the six available layouts. These layouts control the arrangement and style of your blog post tiles.
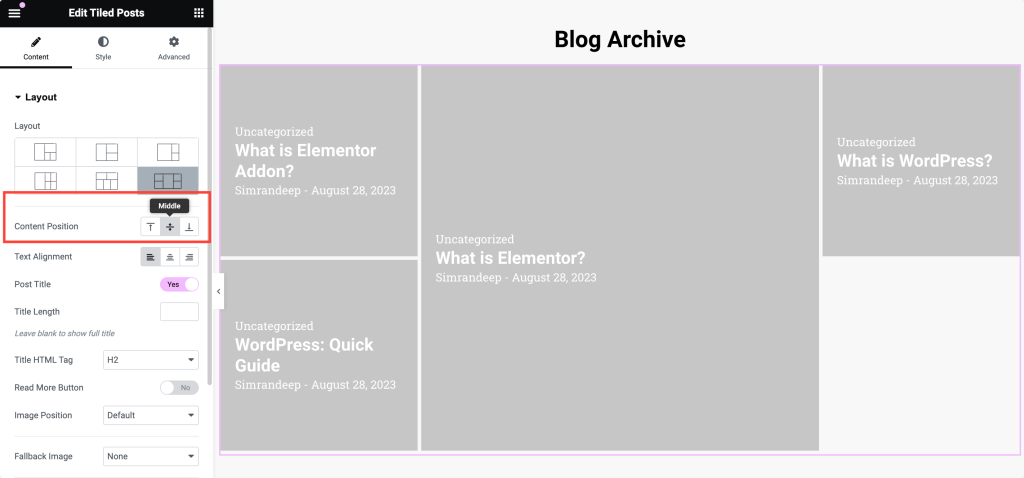
5. Select Content Position
Determine where the content (title and excerpt) appears within each tile. Choose the Content Position: Top, Middle, or Bottom.
6. Choose Text Alignment
Align the text within the tiles to fit your design. Select Text Alignment: left, center, or right. This aligns your post title and excerpt text according to your choice.
7. Enable or Disable Post Title
Toggle the Post Title option to enable or disable the titles
- Enabled: Displays the post titles on the tiles.
- Disabled: Hides the post titles, focusing on elements like images or excerpts.
8. Options for Large Tile
Customize the larger tiles to make them stand out. You can choose the Image Resolution for large tiles and also Enable or disable the Post Excerpt.
Similarly, you get customization options for adjusting the smaller tiles to fit your design needs.
9. Query Options
Define which posts are displayed in the tiled layout. Select the Query Type: Main Query or Custom Query.
- Main Query: Uses the default WordPress query to display posts.
- Custom Query: Allows you to filter and display specific posts based on criteria you set.
10. Post Meta Options
Choose what additional information about your posts to display. You can Enable or disable various Post Meta options such as:
- Date
- Author
- Categories
- Tags
These options provide readers with more context about each post.
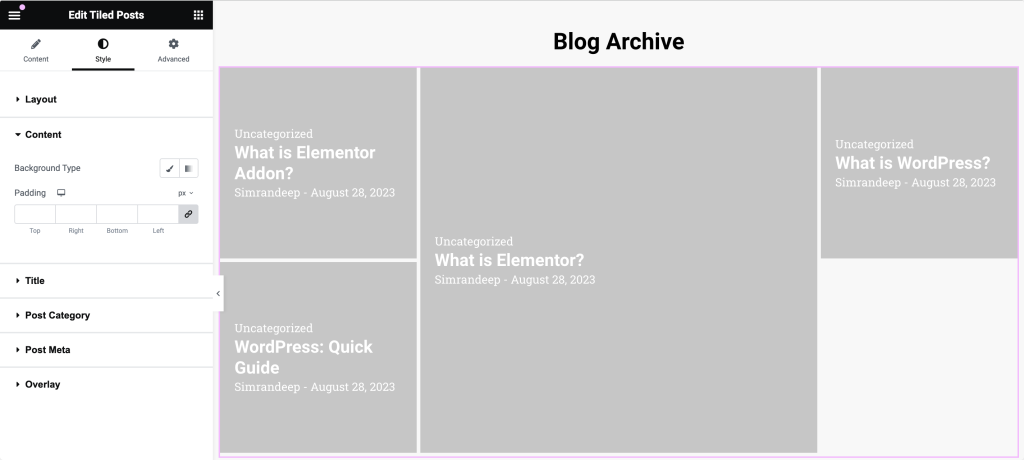
11. Styling Options
PowerPack Tiled Posts widget provides various styling options to enhance your blog archive’s visual appearance.
- Step 1: Go to the Style tab.
- Step 2: Customize different elements:
- Layout: Adjust margins, padding, and spacing to ensure your tiles are perfectly arranged.
- Content: Set background colors, text colors, and typography to match your brand’sbrand’s style.
- Title: Modify the font, size, color, and hover effects of post titles to improve their readability.
Final Touches
Preview your page to ensure everything looks perfect. If your page looks good, click the Publish button to make your new blog archive live.
Wrapping Up!
PowerPack Tiled Posts widget is an advanced tool that lets you create stunning blog layouts easily. Its extensive customization options ensure your blog archive is beautiful and functional.
PowerPack Addons for Elementor allow you to do a lot more. There are more than 70 creative widgets that you can use to customize your Elementor pages.
If you face any difficulty following the steps mentioned in this article, please get in touch with us or drop your queries in the comment section.
What are your thoughts on this tutorial? Do share if you found this helpful guide! Also, join us on Twitter, Facebook, and YouTube.
